
GDS37XX is an audio/video door access system, an innovative IP based powerful door system. The GDS3705 was built for users looking for a strong audio/video facility access and security monitoring solution that can be deployed in environments of all sizes.
Hostage code on the GDS37XX is a security feature that can be used in a critical situation, for instance a kidnaping or an emergency. In such situation the user can open the door by dialing the hostage code instead of the local PIN to open door, this way the door is opened, and the configured silent alarm is triggered warning someone.
The GDS37xx provide a variety of alarms: Audio alarm, Alarm output, Audio alarm to SIP phone, Send email, Upload to alarm center, or Upload snapshot. Once the hostage code sequence is entered the GDS37XX triggers the actions for the hostage mode.
FUNCTIONALITY
In an emergency or when someone is being taken hostage, the user can generate a distress alarm without being noticed while opening the door from the GDSD37xx.
The GDS37XX alarms that can be triggered are:
- Upload to Alarm Center: If selected, the GDS Manager will popup alarm window and sound alarm in the computer speaker.
- Audio Alarm to SIP Phone: If selected, GDS3710 will call pre-configured (video or audio) phone and will play sound alarm.
- Send Email: If selected, an email with snapshot will be sent to the pre-configured email destination.
- Audio Alarm: If selected, GDS3710 will play alarm audio using built-in speaker.
- Alarm Output: If selected, the alarm will be sent to the equipment (for example: Siren) connected to Alarm Output interface.
- Upload Snapshot: If selected, snapshots at the moment where the event is triggered will be sent to preconfigured destination (e.g.: FTP or email).
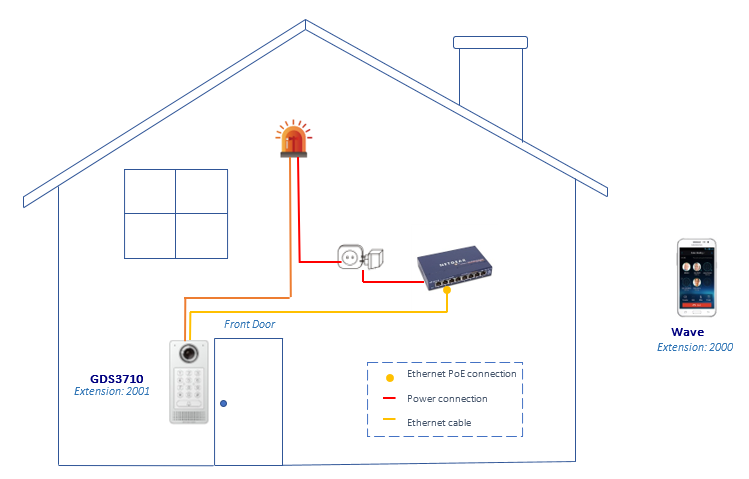
WIRING DIAGRAM
In this scenario, we assume that the GDS3710 is installed on a small warehouse at the front door and the hostage code is configured with Alarm Output and Audio Alarm to SIP Phone calling a remote extension on the GS Wave.
The user needs to enter the hostage code on the GDS3710 to open the door and trigger the alarms.
GDS37XX WEB CONFIGURATION
To configure the hostage code feature on the GDS37XX please do the following:
- Register a SIP account (alarm to SIP phone),
- Set an alarm action,
- Add the remote phone to the Alarm phone list,
- Enable the two-way SIP call,
- Enable the hostage code,
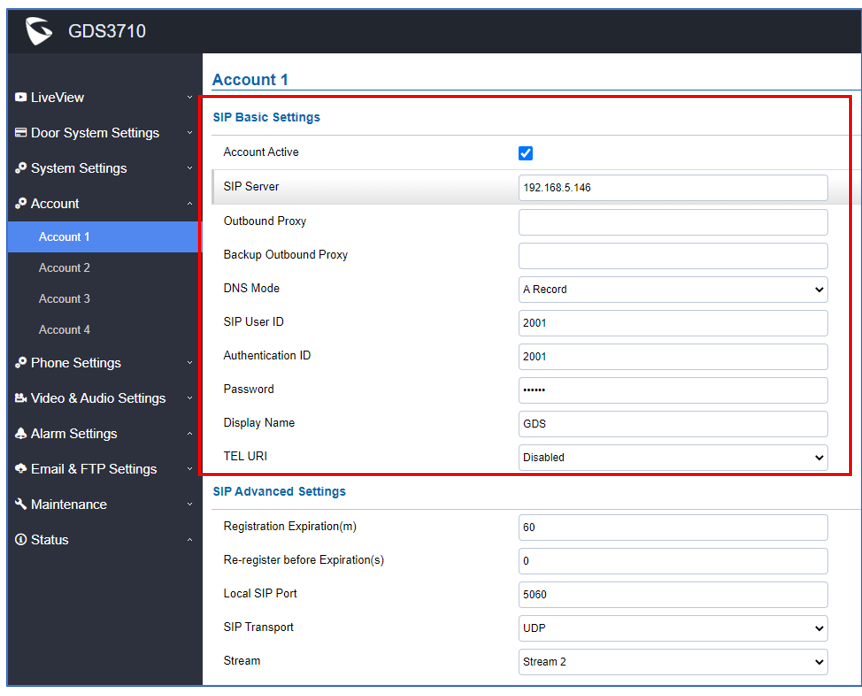
Register a SIP Account
This page allows the administrator to configure the SIP account basic and advanced settings for each SIP account:
- Go to Account 🡪 Account 1 .
- Click on Account Active.
- Enter the SIP Server: configures the FQDN or IP of the SIP server from VoIP service provider or local IPPBX.
- Enter the SIP extension in the SIP user ID field.
- Enter the SIP extension authentication ID in the authentication ID field.
- Enter the SIP extension password in the password field.
- Save the settings.
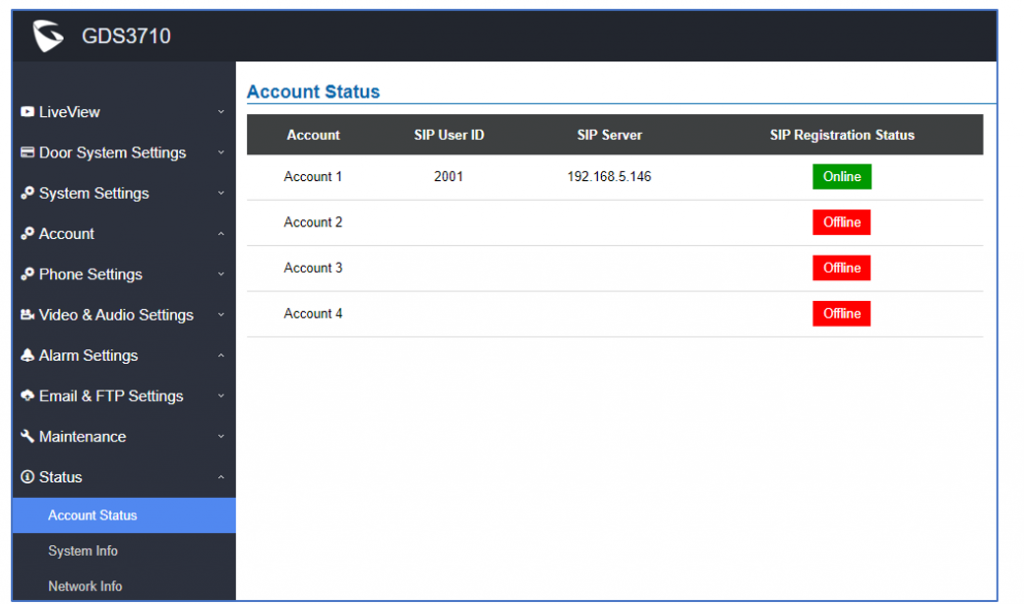
When the SIP account is registered, the SIP Registration status display will be Status 🡪 Account Status.
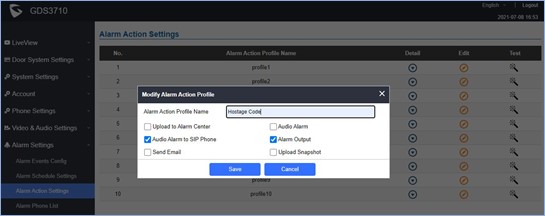
Set an Alarm Action
This page specifies the configuration of Profile used by the Alarm Actions. A Profile is required before the Alarm Action can take effect.
To set an alarm action profile go to Alarm Settings 🡪 Alarm Action Settings:
- Select a profile and click on Edit,
- Name the Alarm action profile,
- Select the Action to trigger when the hostage code is entered and save.
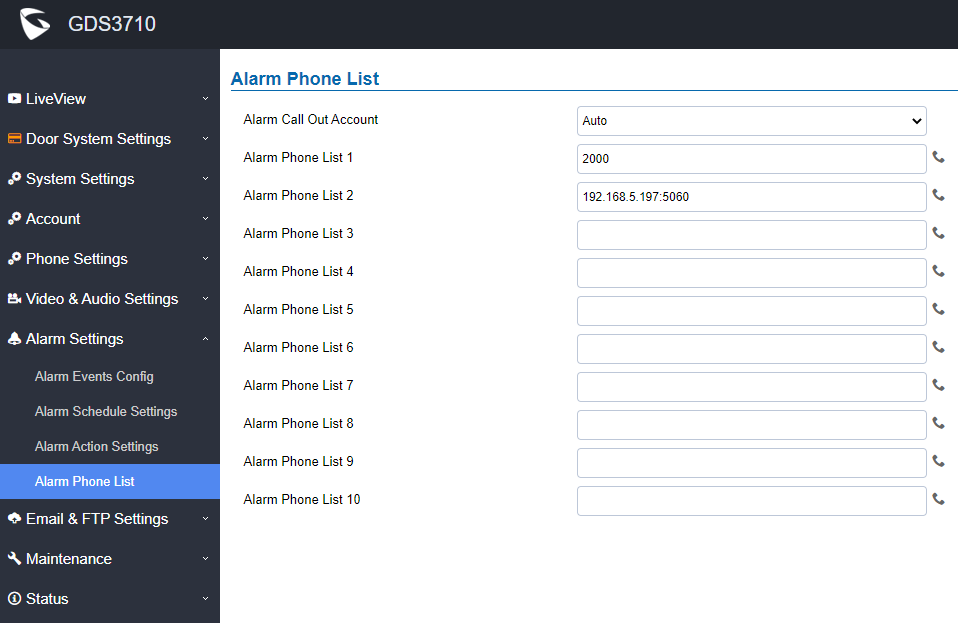
Add the Remote Phone to the Alarm Phone List
The remote SIP phone or mobile phone needs to be added into the alarm phone list. The GDS37XX support up to 10 alarm phones.
To add a phone, go to Alarm Settings 🡪 Alarm Phone List
- Alarm Call Out Account: select the SIP account to be used by the GDS37XX when alarm out is triggered
- Alarm Phone List x: add or delete number from the phone alarm list. (When IP address is used then the port needs to be appended, example: 192.168.5.197:5060)
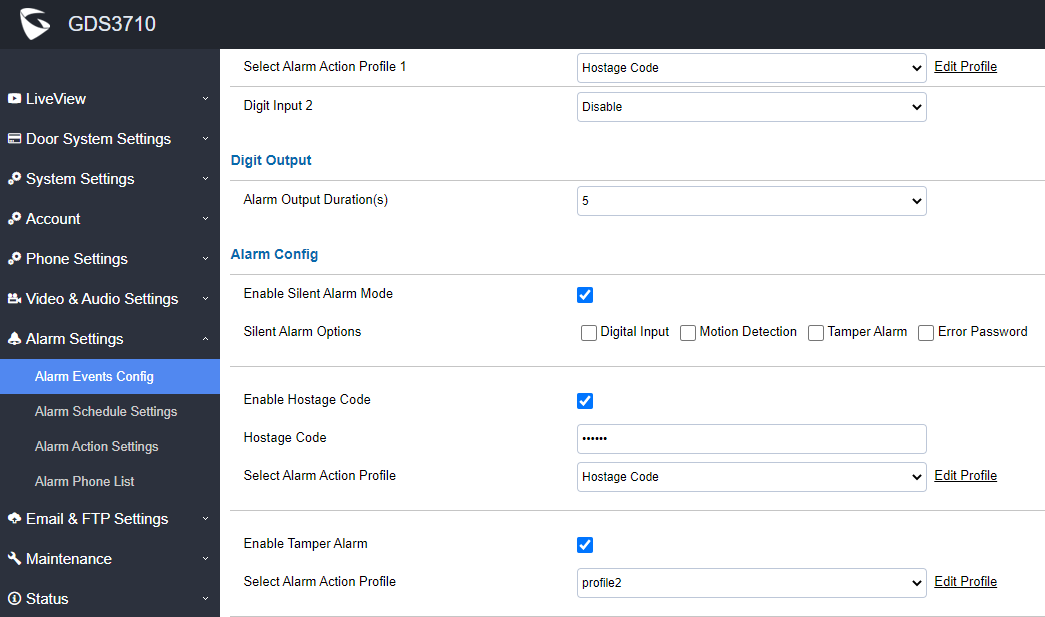
Enable the Hostage Code
Hostage code is the PIN that will be dialed on the GDS keypad when an emergency, users need to enter the following sequence to trigger the actions set for the Hostage Mode: * Hostage Password #
To enable the hostage code go to Alarm Settings 🡪 Alarm Event Config:
- Click to enable hostage code
- Enter a specific hostage code that well need to be entered (for example: 111)
- Select the Alarm action to be taken when the hostage password is typed on the GDS37XX keypad.
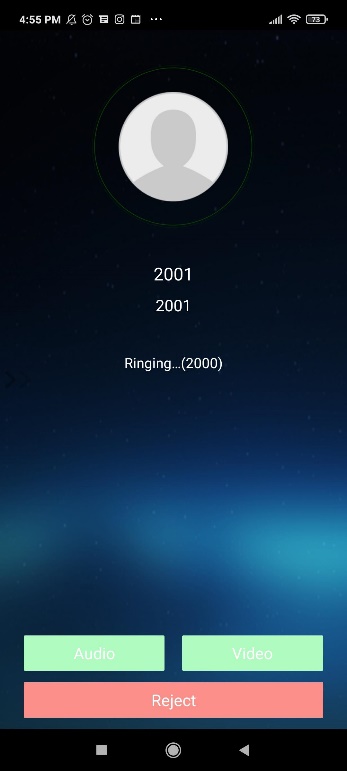
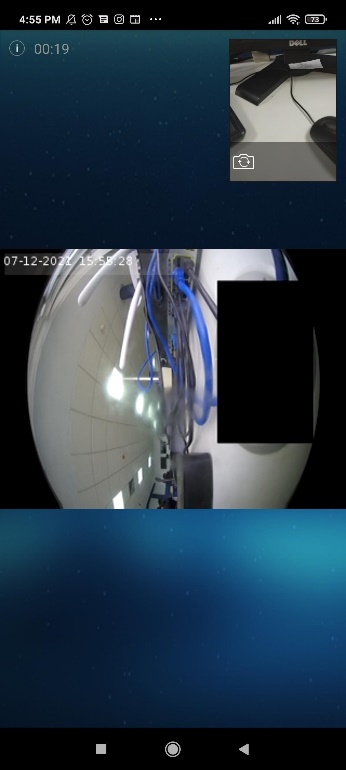
Hostage code test
When the user dials *111# on the GDS37XX keypad the door is open and the discreet alarm that was configured is triggered.
 |  |
SUPPPORTED DEVICES
Following table shows the supported products and the minimum firmware to use:
| Product | Firmware |
|---|---|
GDS3705 | 1.0.1.16 |
GDS3710 | 1.0.7.23 |