
INTRODUCTION
This guide shows the steps required to create an API integration between Google Calendar and supported Grandstream devices. To set up this integration successfully, the user needs to have a Google Account with Workspace enabled to access Google Workspace API, and a Grandstream device that supports Google Calendar API integration.
GOOGLE API CONFIGURATION
Create Google Cloud Project
To use Google Workspace API, the user should access Google Cloud Console and create a project, to do that, please follow the steps below:
- Please access Google Cloud Console using the following link: https://console.cloud.google.com/
- Log in using your Google account if you have not done that already.
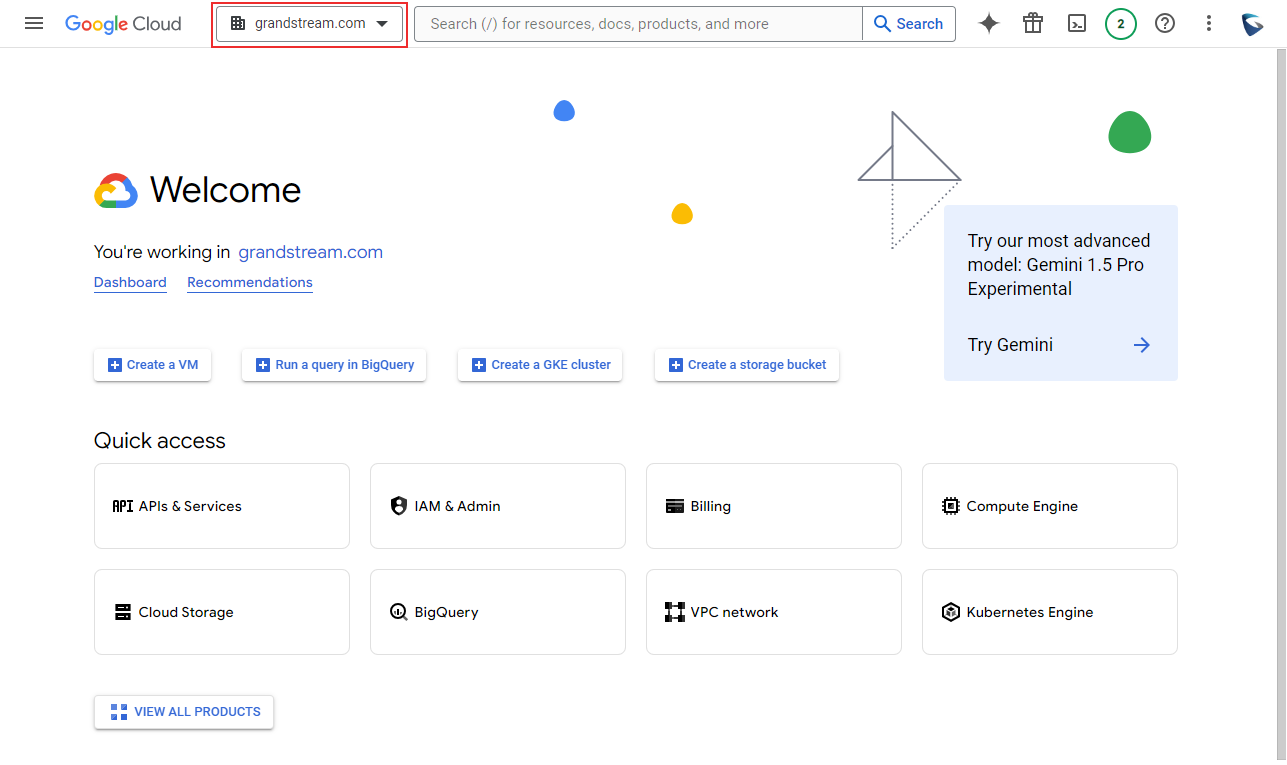
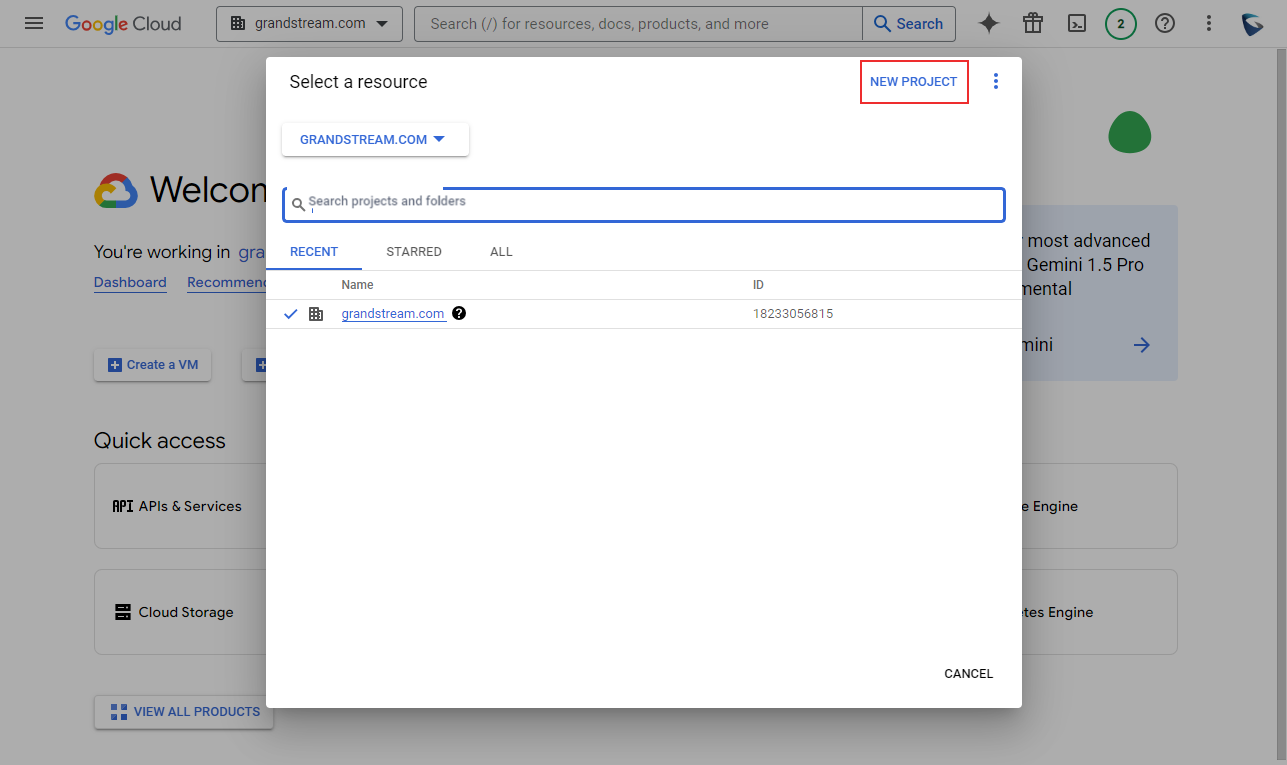
- Once logged in, click on the name of your organization to open the list of projects, as shown in the screenshot below
- Click on “New Project” to create a new project
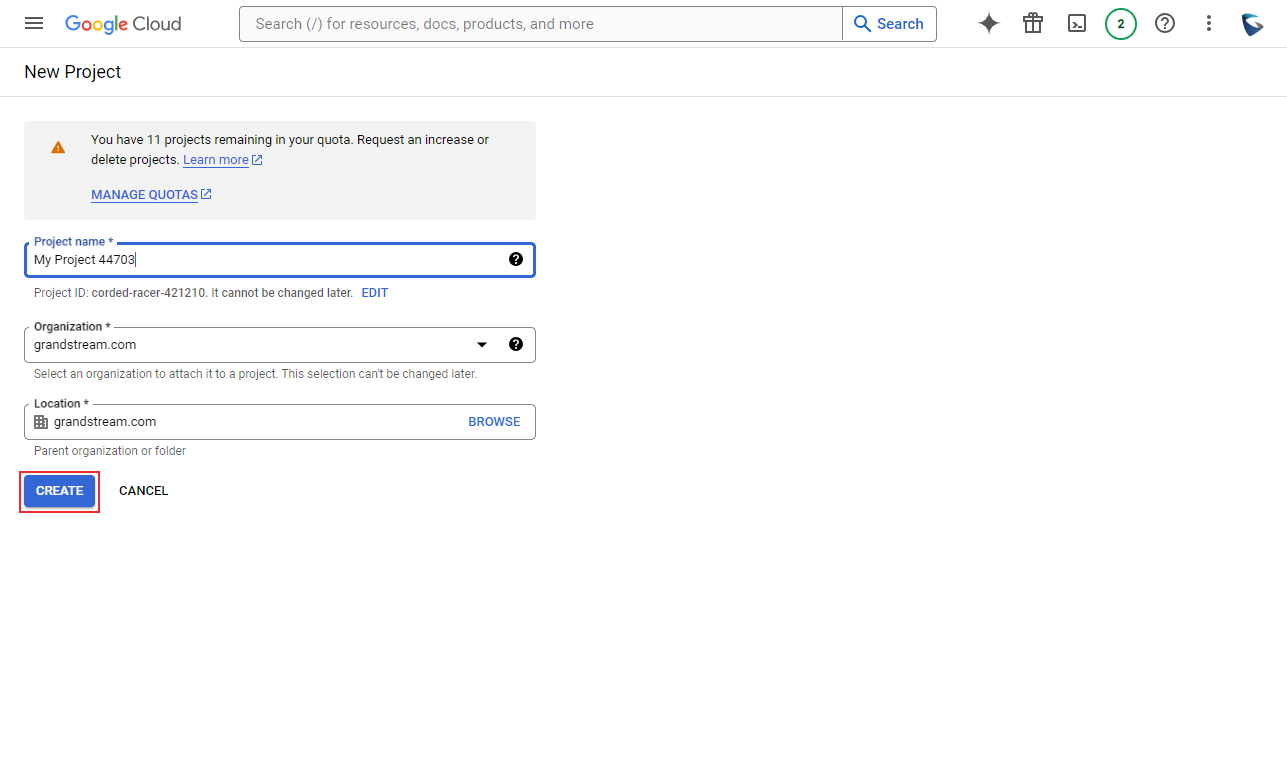
- Enter the project name and click “Create”
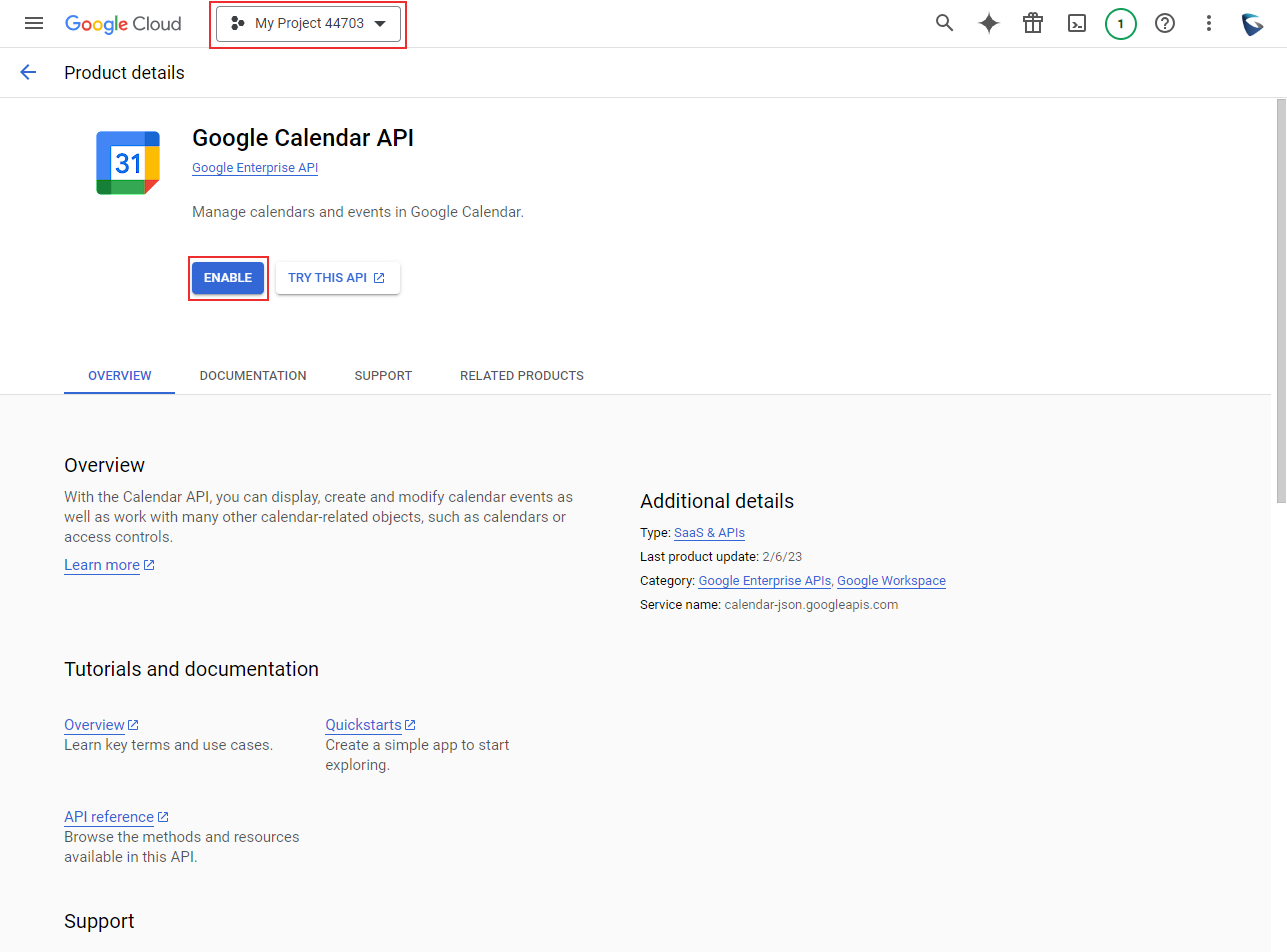
Enable Google Calendar API
- Using the following link https://console.cloud.google.com/marketplace access the marketplace of Google Cloud and search for “Calendar”
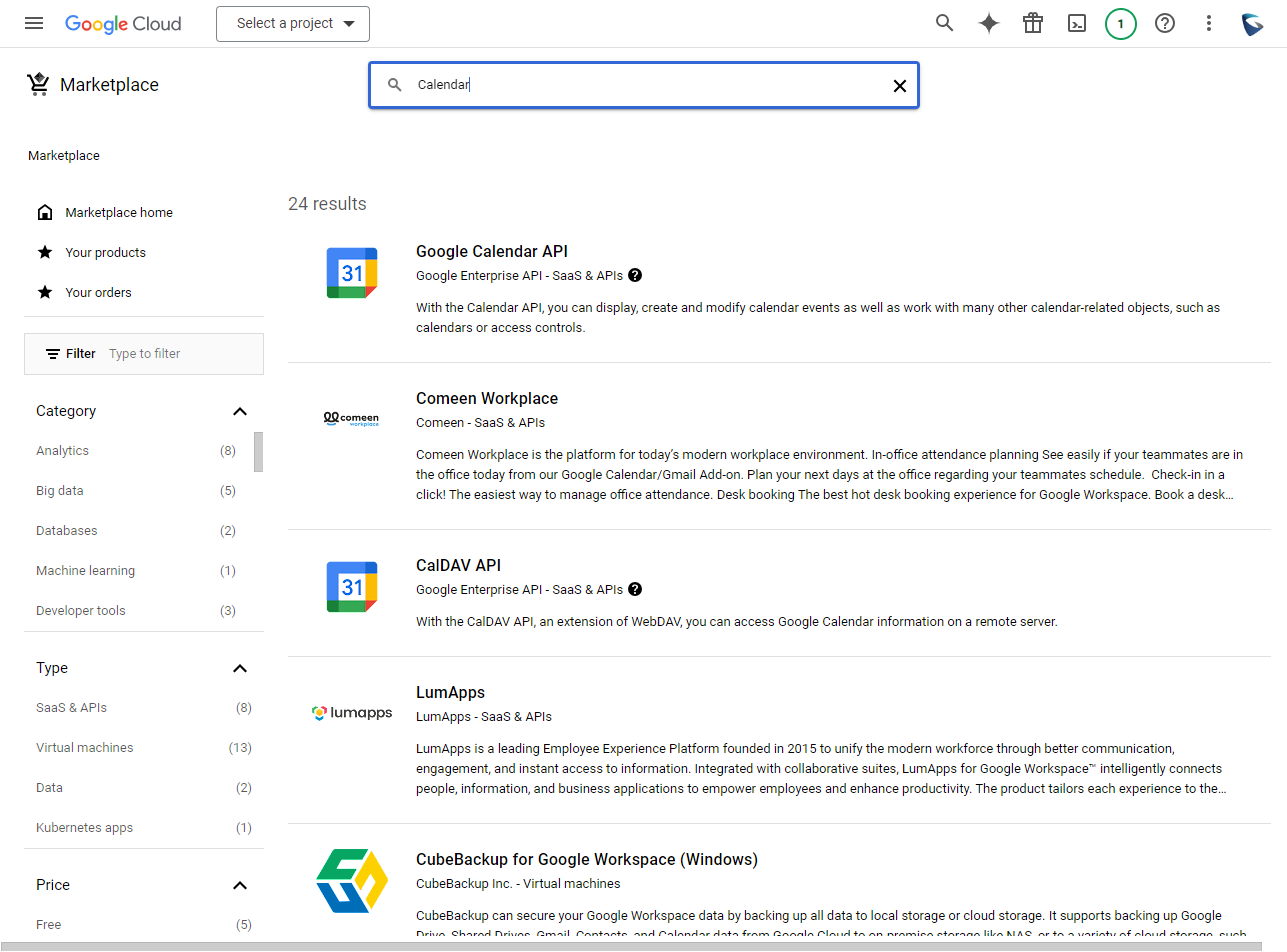
- Click “Google Calendar API”, then make sure that your project is select, as highlighted on the top of the screenshot, then click on “Enable” to enable Google Calendar API.
OAuth Consent Configuration
In this section we will configure the types of users which can use the API integration
- On the console of Google Cloud, on the side bar, click on “OAuth consent screen” as shown in the screenshot below, then select “Internal User” as the User Type. Please note that selecting this option means that only the users in the organization associated with the project will be able to user the API integration.
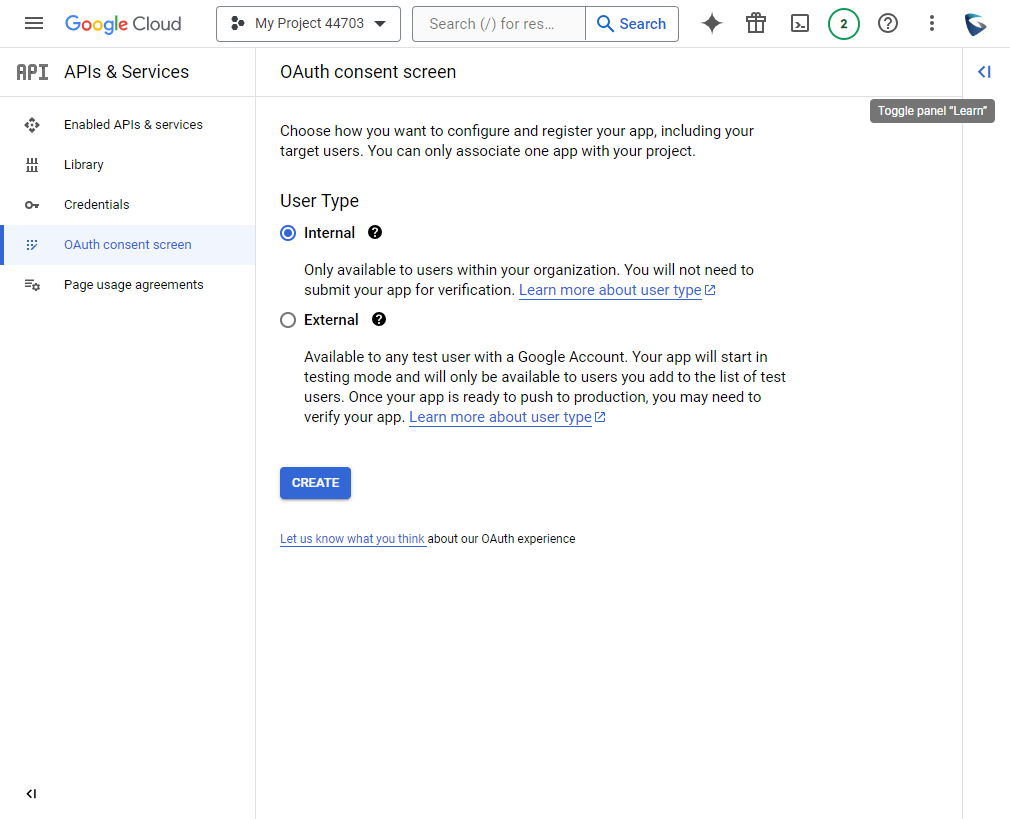
- Click on “Create” after selecting the user type.
- Once that is done, now fill in the required fields.
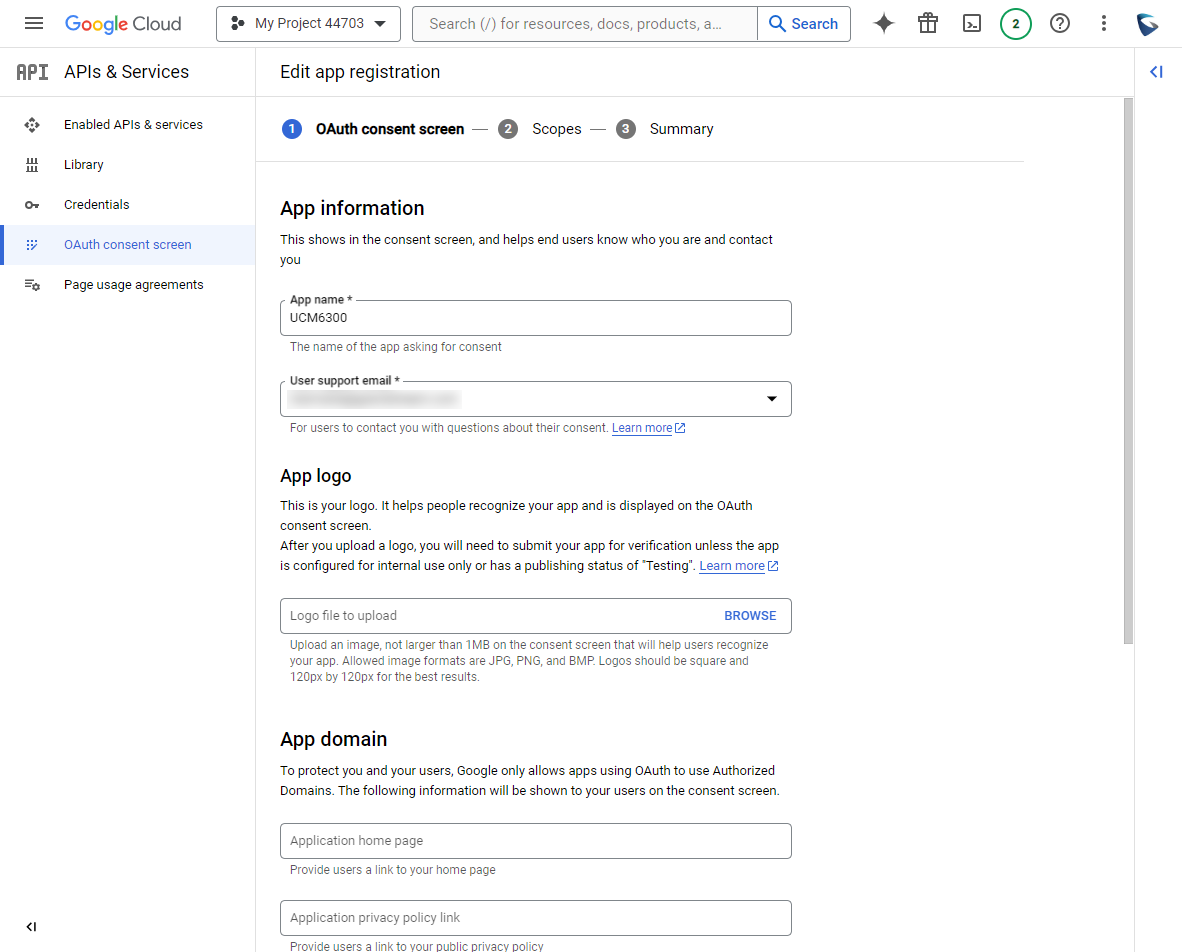
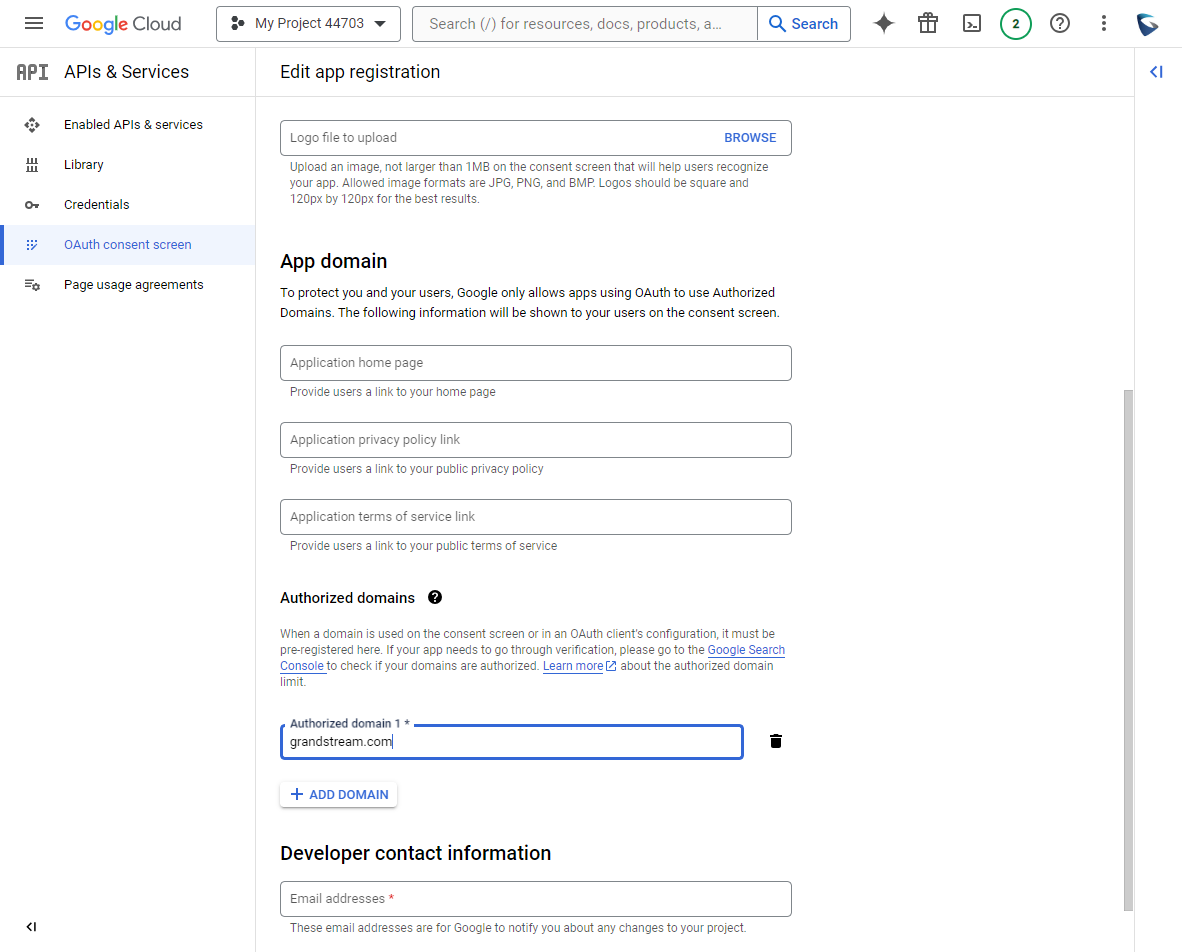
- Enter the authorized domain(s). Further in this guide, we will have to use a Redirect URI for OAuth authentication. The user should include the URI domain in the “Authorized Domain”. In the example below, we have set to authorize “grandstream.com” as the authorized domain.
- Enter the developer contact email under “Developer contact information” then click on “Save and Continue”.
- Then, click on “Add or Remove Scoopes” to add the scopes related to Google Calendar API.
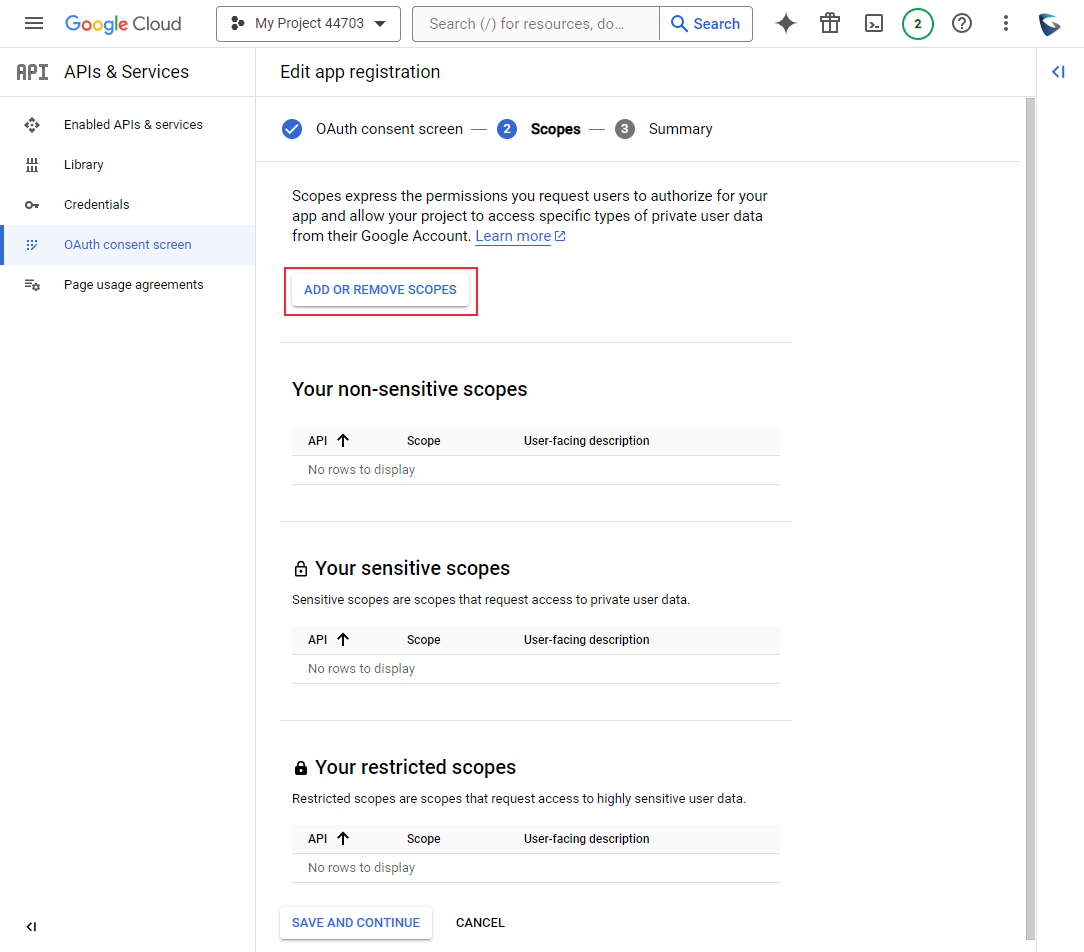
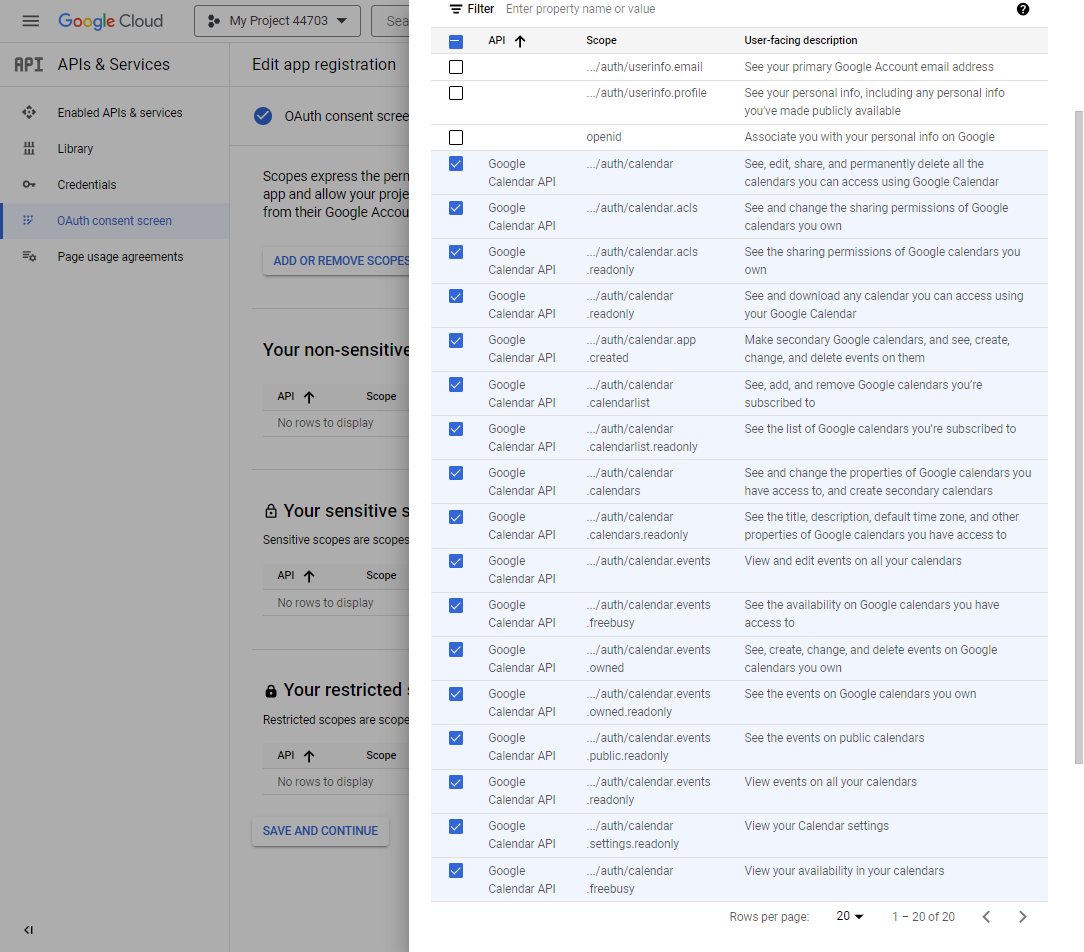
- Select the scopes which are related to Google Calendar API as shown in the screenshot below. Once selected, click on “Update”
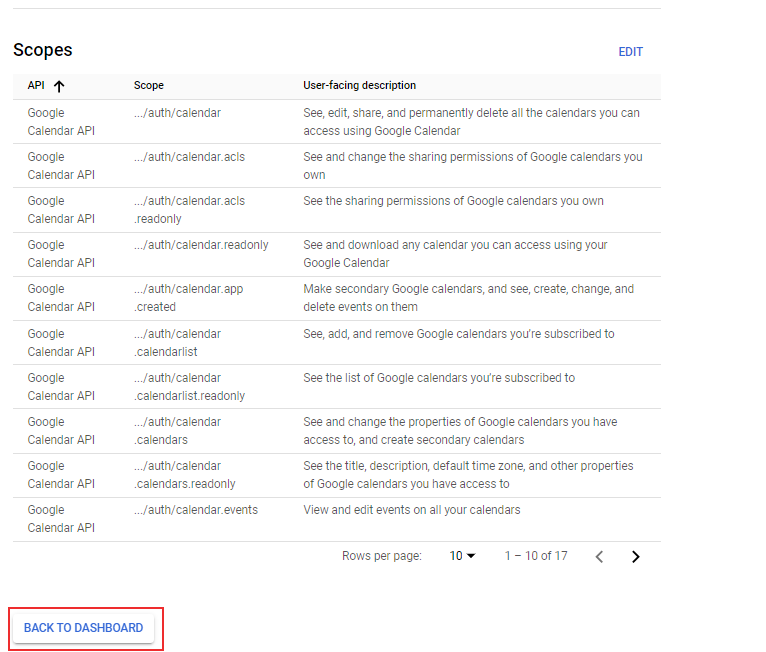
- Click on “Save and Continue”, then the summary screen will appear where you review the settings you have set. Once reviewed, click on “Back to Dashboard”.
Create API Credentials
The next step includes creating the credentials for the authentication. There are 3 types of credentials which can be created, but for this integration we will need to create OAuth credentials. Please follow the steps below to learn how to create them.
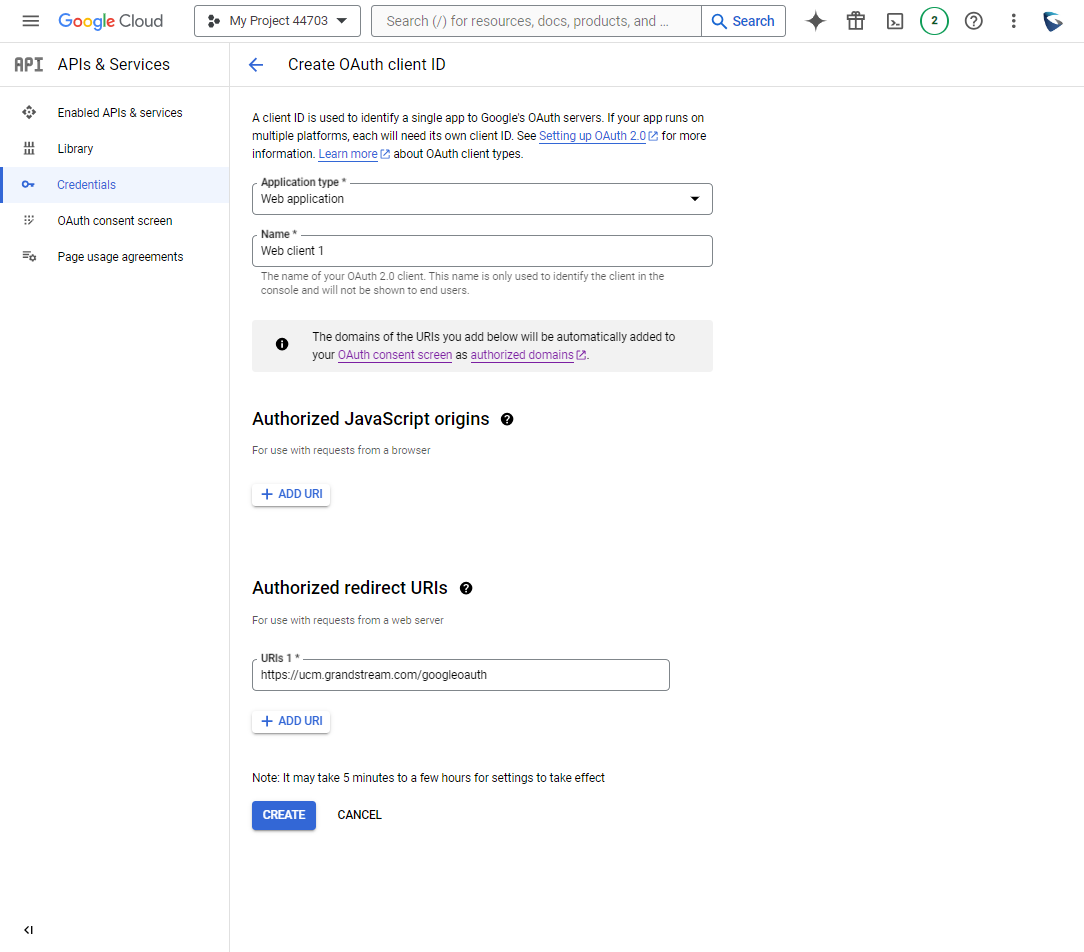
- From the dashboard of Google Cloud Console, please click on “Credentials” on the left sidebar of the dashboard, click on “Create Credentials”, then click on “OAuth client ID”.
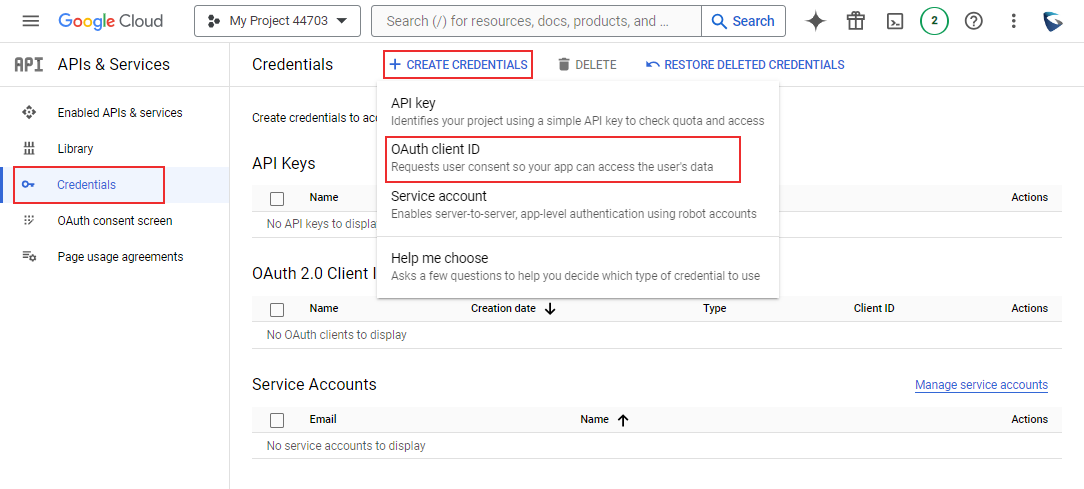
- Select “Web application” as the Application Type, then enter the name of the application in the corresponding field. Enter the URI which will be used for the redirection in Authorized redirect URIs. Once that is configured, please click on “Create”.
Note: This may take from 5 minutes to a few hours to be set.
- The Client ID and Client secret will appear, we will need to keep this window for the next step.

API CLIENT CONFIGURATION
This section shows how to configure the API client using the Client ID and the Client secret that we have generated from the previous section. In this example, we are using a UCM6300 Audio Series unit to integrate with Google Calendar API. Please follow the steps below to connect the client to the API successfully.
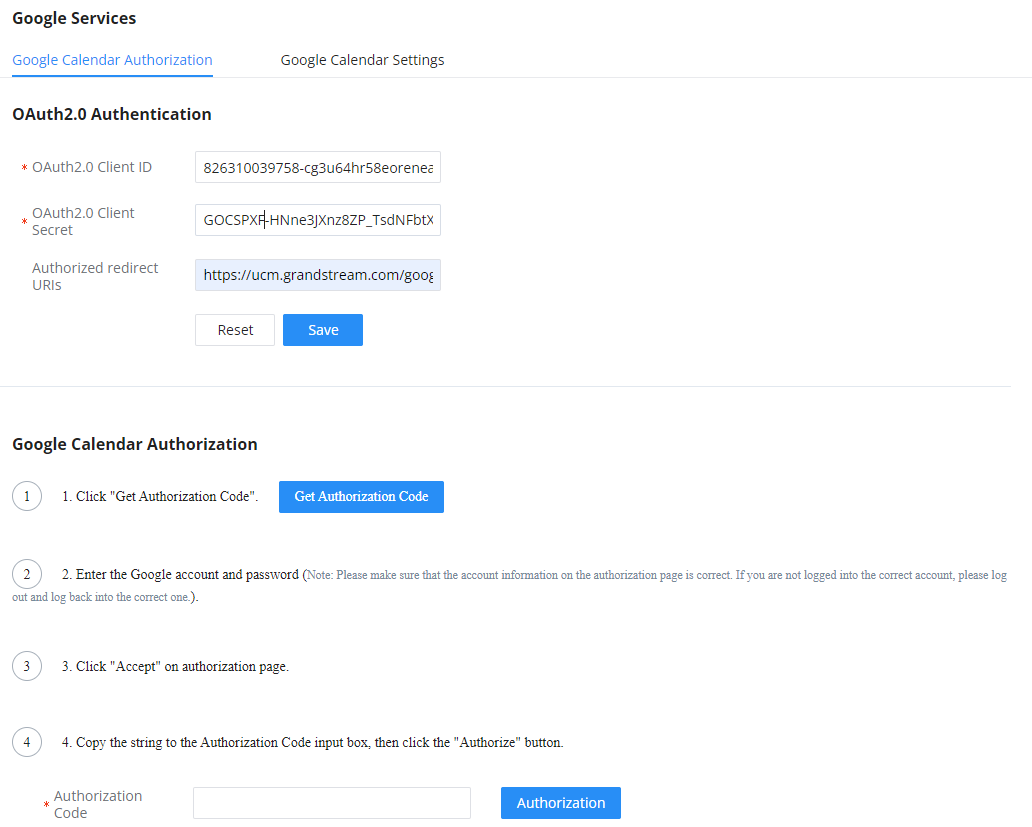
- Log into the UCM device using the super administrator account, then navigate to Integrations > Google Services, then copy and paste the Client ID and the Client secret in their respective fields. Enter the redirection URI in the Authorized redirect URIs, if you have set only one redirection URI on Google API, you can leave this field empty. Then click “Save”
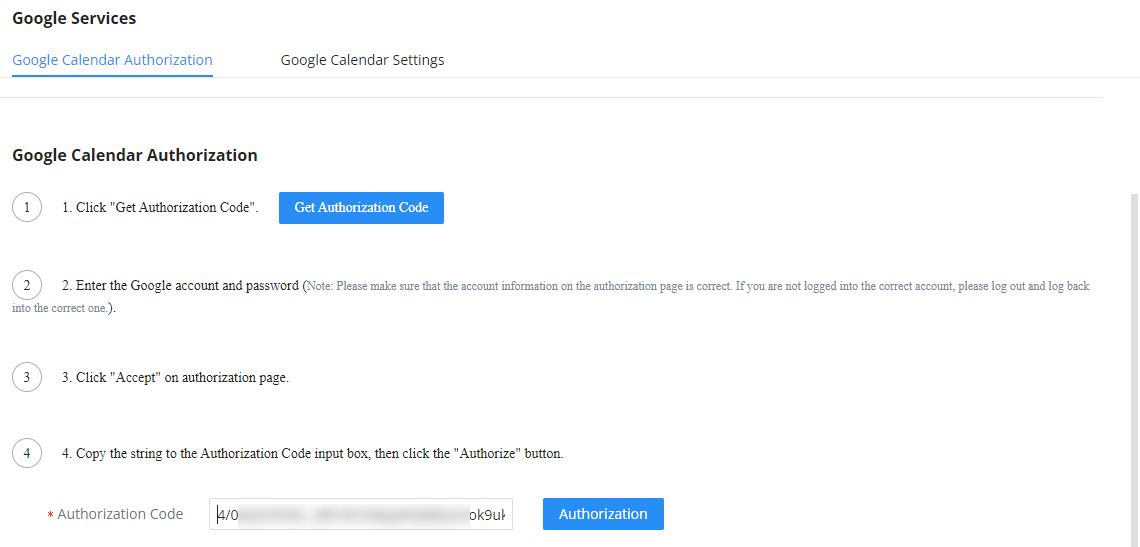
- Click on
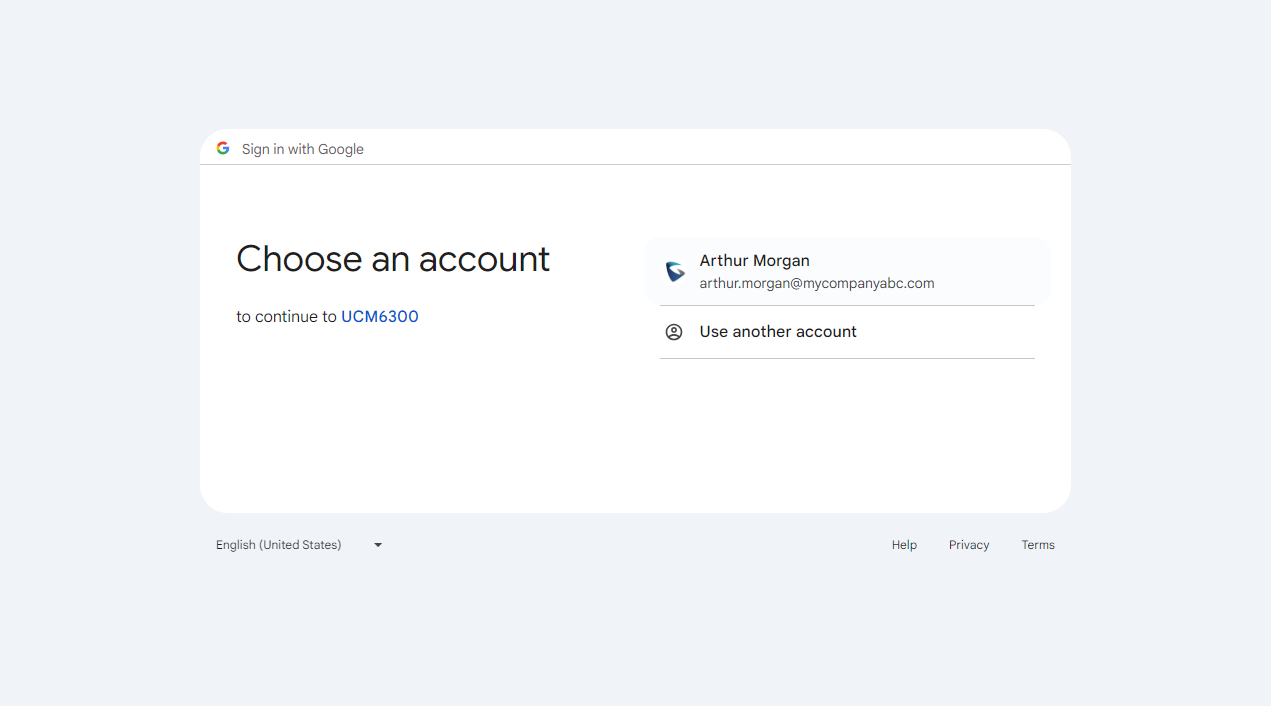
 to request access and provide consent to the integration.
 - Choose the account or log in using your Google account.
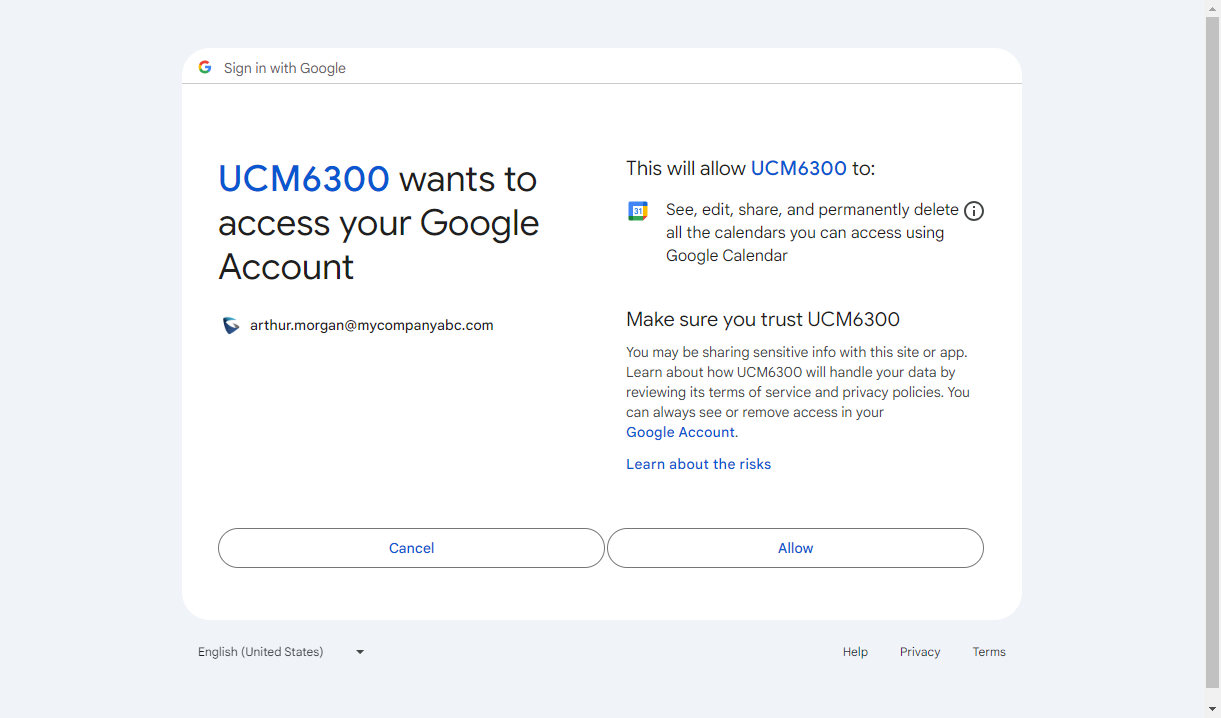
- Understand the requirements and permissions which will be granted then click “Allow”
- A token will be generated after that which can be copied as shown below.
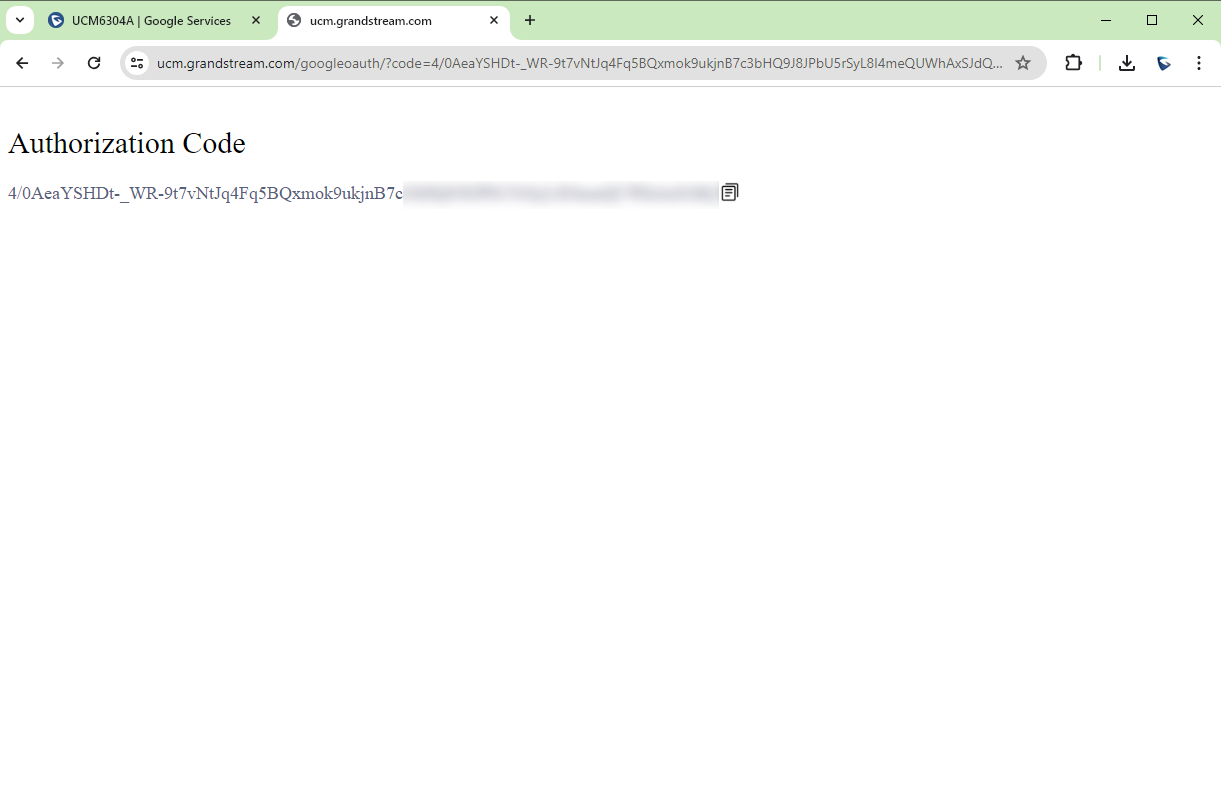
You can also copy it directly from the address bar, as shown in green highlight below

- Paste the authorization token in Authorization Code field, then click

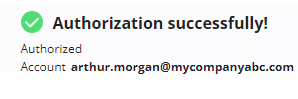
You will get to following message to indicate that the integrations has been done successfully.
EXAMPLE SCENARIO
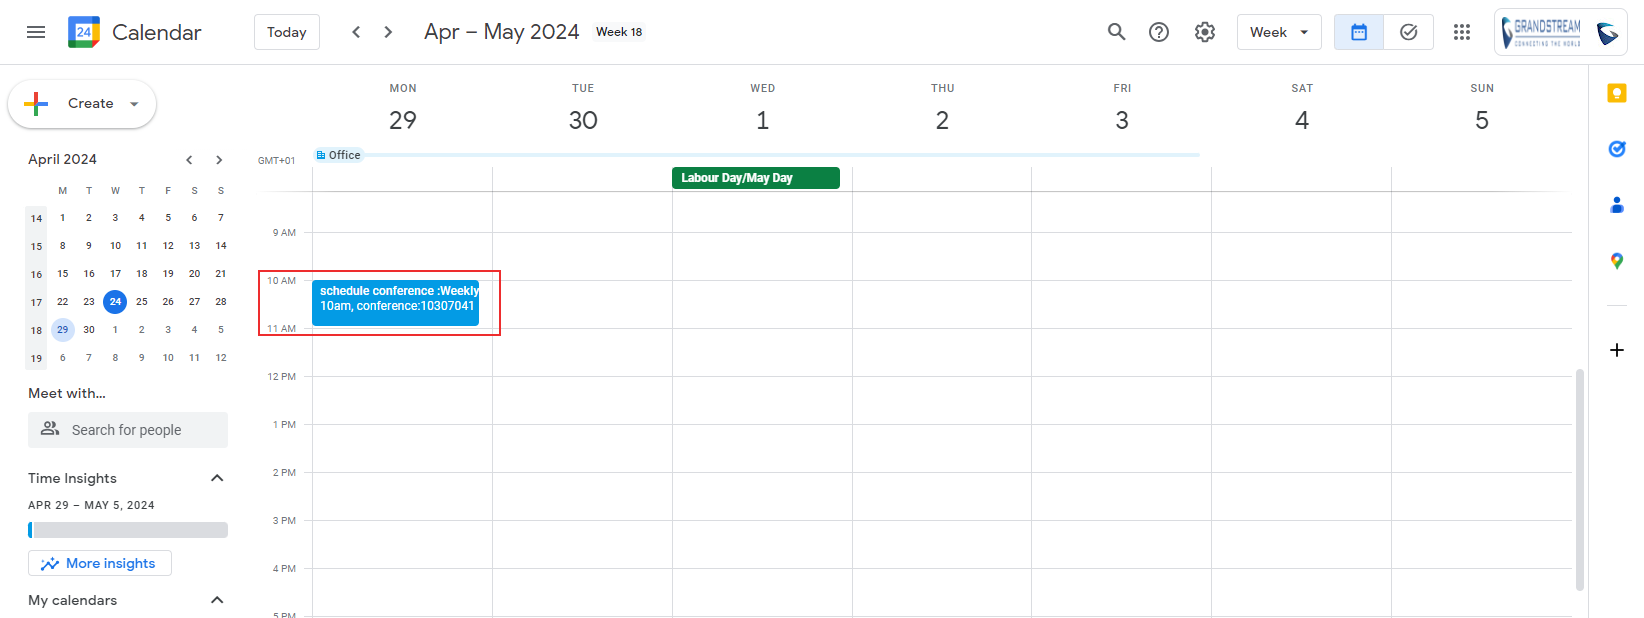
To demonstrate how this option works, we will schedule meeting on the UCM. To do that, please navigate to Call Features > Multimedia Meeting (Meeting for UCM6300 Audio Series) > Meeting, then click on “Schedule Meeting“. Make sure to enable “Sync to Google Calendar” as shown in the screenshot below. Then click “Save”.
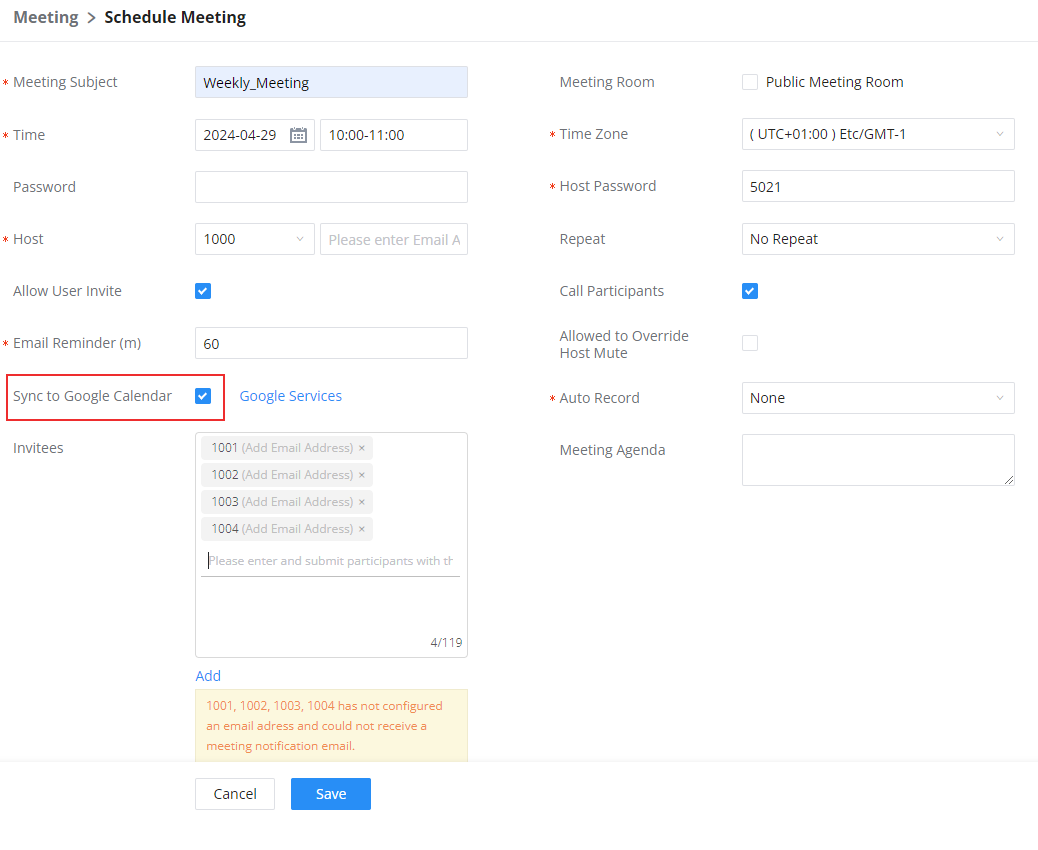
The meeting will marked automatically on the calendar.
SUPPORTED DEVICES
Device Model | Firmware Version |
GCC6000 Series | PBX 1.0.25.11 or higher |
UCM6300 Series | 1.0.25.7 or higher |
UCM6300 Audio Series | |
CloudUCM | 1.0.25.13 or higher |