Overview
The UCM6300 series can work alongside Grandstream’s softphone application Wave to provide device interoperability features, which would allow UCM extensions to interact and manage with IP cameras (IPC) and door systems. This guide will introduce this functionality and how to configure the UCM and Wave settings to receive the full experience.
Connecting to IP Cameras
By configuring IP cameras such as surveillance cameras on the UCM, endpoints registered to the same UCM can quickly access and view the live footage from these devices, providing a convenient and efficient way for several users to view and manage live video feeds.
- Supports access from different endpoints such as IP phones, softphone apps, etc.
- Supports setting permissions for access.
- Supports connections with any IP camera device that complies with RTSP protocol specifications.
Configuring IP Camera Devices on UCM6300
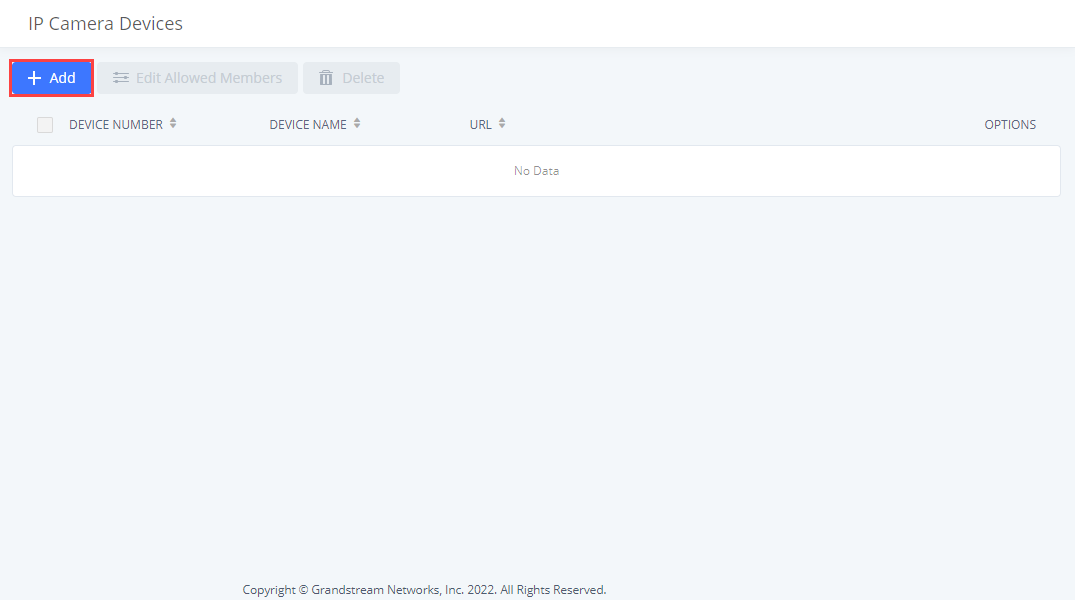
First, we need to navigate on the UCM63xx/A web user interface Device Management → IP Camera Devices then click on ![]()
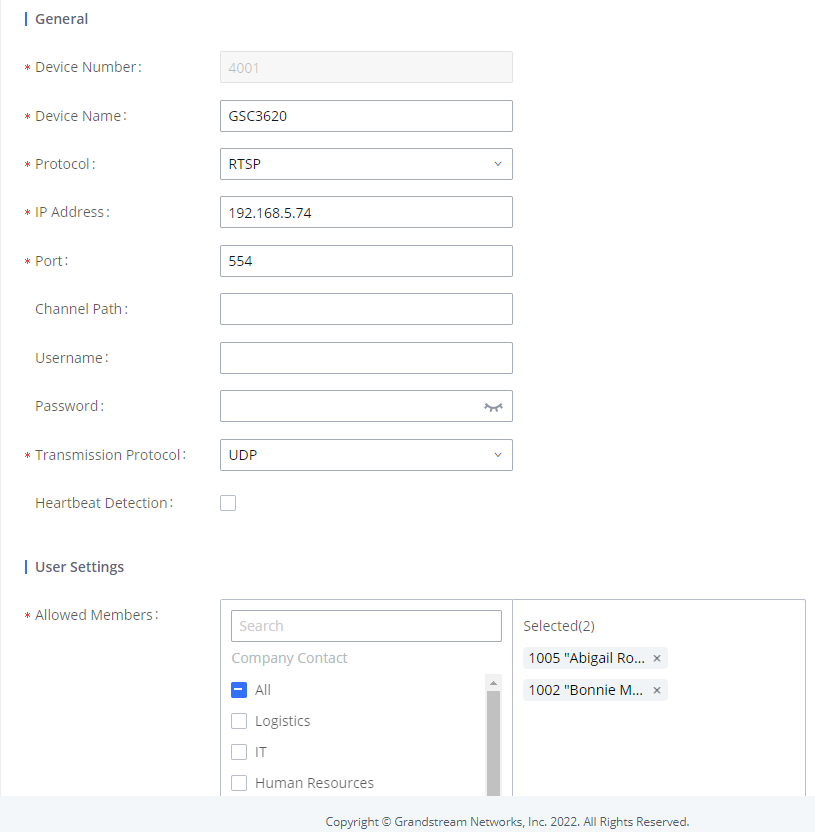
Enter the configuration following the instructions below:
Device Number | The IPC device number. Users in the Allowed Members list can dial this number to access the IP camera. After creating the IPC and saving changes, this number will be automatically created as an extension on the UCM and cannot be modified afterwards. |
Device Name | IPC device name. |
Protocol | IPC device protocol. Currently, only RTSP is supported. |
IP address | IPC device IP address. |
Port | IPC device RTSP port. Default is 554 |
Username | IPC username. If the IPC has a username configured, the UCM will require it to access the IPC. |
Password | IPC RTSP password. If the IPC has a RTSP password configure, the UCM will require it to access the IPC. |
Transmission Protocol | The transmission protocol to use for communicating with the IPC. UDP and TCP are the available options. The default is UDP. |
Heartbeat Detection | If enabled, the PBX will regularly send RTSP OPTIONs messages to check device online status. |
Allowed Members | The extensions, extension groups, and departments that are allowed to access the IP camera by dialing the Device Number. |
After configuring the needed settings, please click on ![]() and
and ![]()
IP Camera Configuration
First, we’re going to do is discover the IP address of the surveillance camera using the Grandstream IP Discovery Tool
After finding the IP address, please enter it in your web browser and you’ll be greeted by this screen.
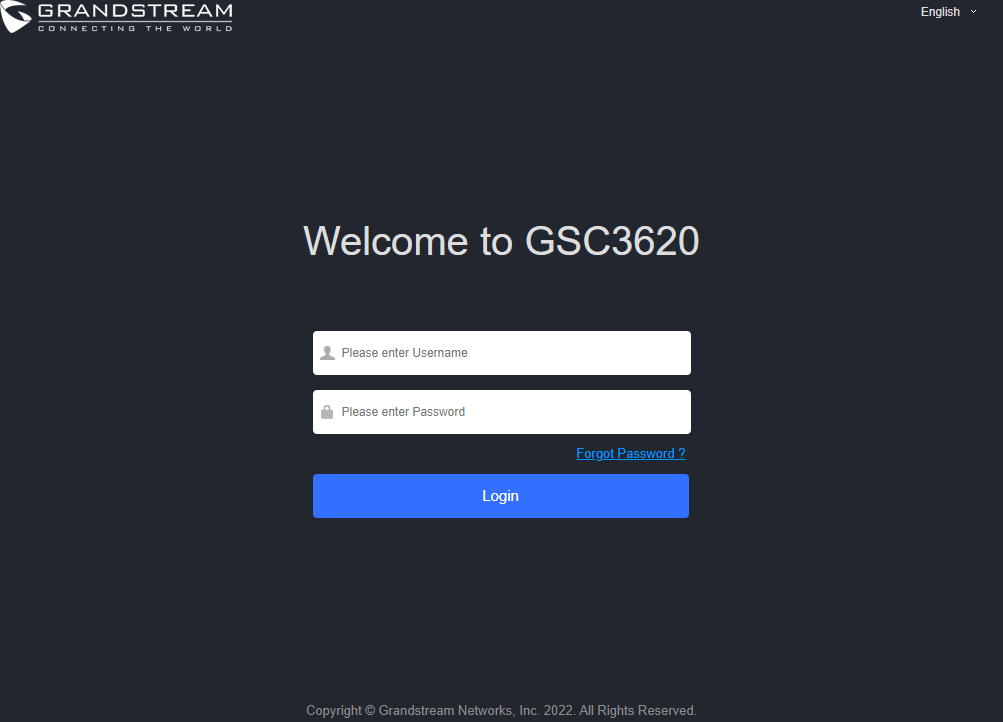
The default username is “admin” and the default password is printed on a sticker on the bottom of the surveillance camera.
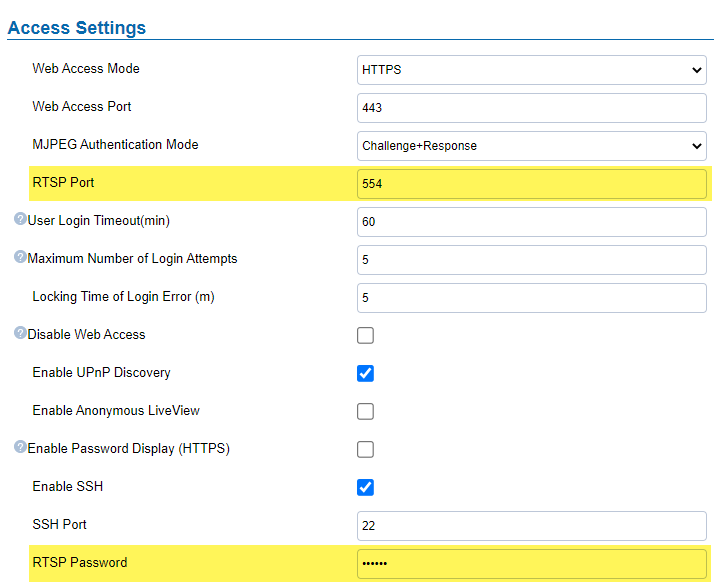
Once you are logged in, please navigate to System Settings → Access Settings
Accessing The IP Camera Device From Wave
Accessing The Camera Feed Using an IP Phone
First, make sure that the extension you are initiating the call from is added to the “Allowed Members” list then
Accessing The Camera Feed Using Wave
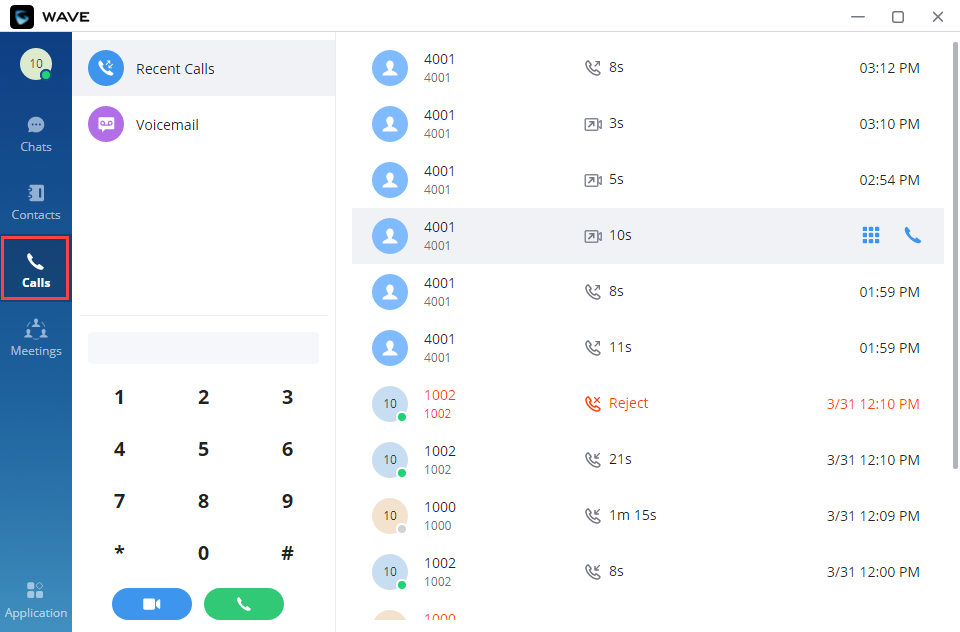
Method 1: Using The Dial Pad
Make sure that the extension that the call is initiated from is selected as an “Allowed Member” in the UCM’s IPC Camera Configuration.
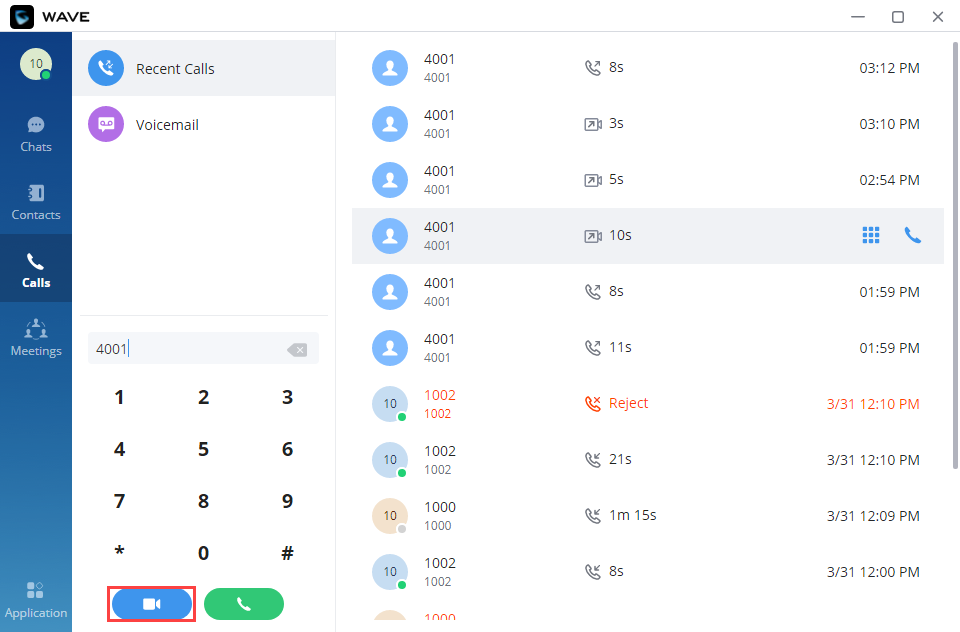
First, navigate to the “Calls” tab on the Wave Desktop/Web application then enter the device number and initiate a video call.
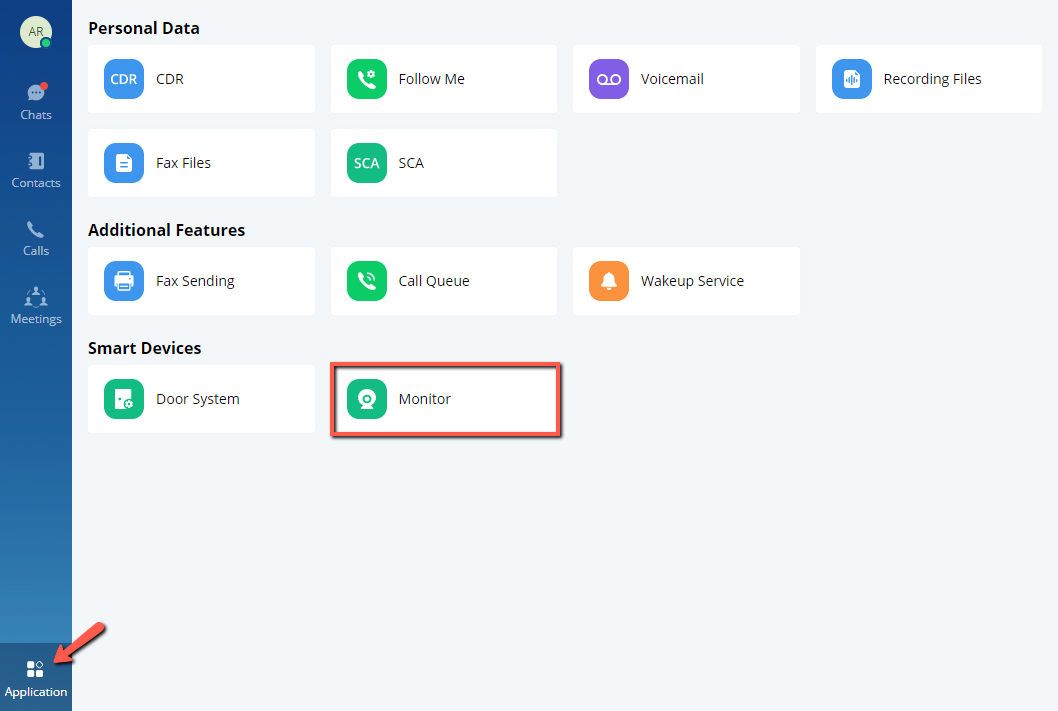
Method 2: Using “Monitor” Panel
Then the list of cameras will appear.
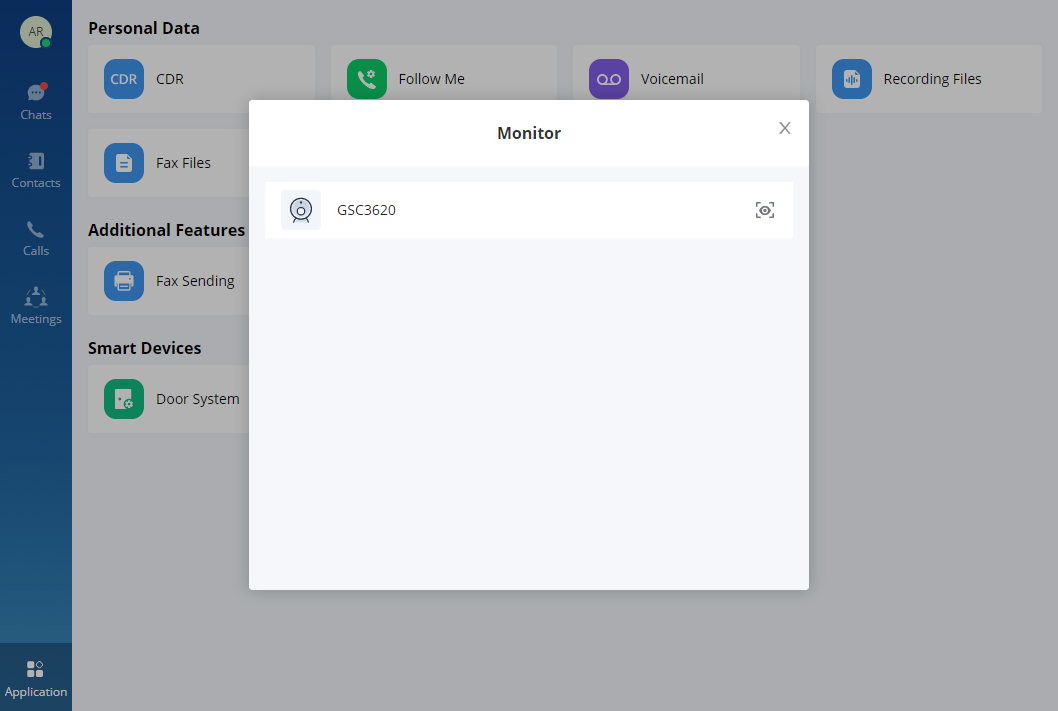
If the extension has been added to the “Allowed Members” list, then the user will be able to see the camera on the list.
Click on ![]() to view the video feed.
to view the video feed.
Inviting an IP Camera to a Meeting
IP cameras can be invited to scheduled/ongoing meetings to allow all participants to view their live feeds.
- When scheduling a meeting, IP cameras can be added to the invite list. When the meeting starts, the camera will be called.
Note: The meeting host must be allowed to access the IP camera in order for it to be added to the meeting. - Any meeting participant that is in the IP camera’s Allowed Members list will be able to directly call the device during a meeting.
- The IP camera’s live feed will be viewable by all meeting participants. Multiple IP cameras can be invited to a meeting.
- When the maximum allowed number of video feeds for a meeting has been reached, invitations to IP cameras will not be allowed.
- Meeting hosts can mute and remove IP cameras from meetings.
Connecting to Door Systems
UCM allows different endpoints (e.g., video phones, Wave, etc.) to access door systems to view their live video feeds, initiate video intercom, and unlock doors to provide simple and flexible door system control. The following features are available:
- Access and connection from different endpoint types such as IP phones, softphone apps, etc.
- Configuration of access permissions.
- Support for SIP door systems
- Support for Unlock PINs
- Visitor Ringing: If the doorbell is rung, permitted devices are able to view the door system live feed, initiate a video intercom with the visitor, and unlock the door via PIN.
- Peephole: Extensions whitelisted by the door system can directly call it to view its live feed via video calls.
- Wave Access: Wave users can quickly and conveniently set up access to door systems.
- Access Records: Direct calling will generate CDR entries will be generated on the UCM, and meeting history will show the door system in its participant and attendee lists.
Requirements
Connecting Wave to a door system requires both of them to be registered to the same UCM.
The following steps will use GDS3710 as an example:
- Create an extension for the door system on the UCM. 1001 will be used in this example.
- Access the GDS 3710 web portal and log in.
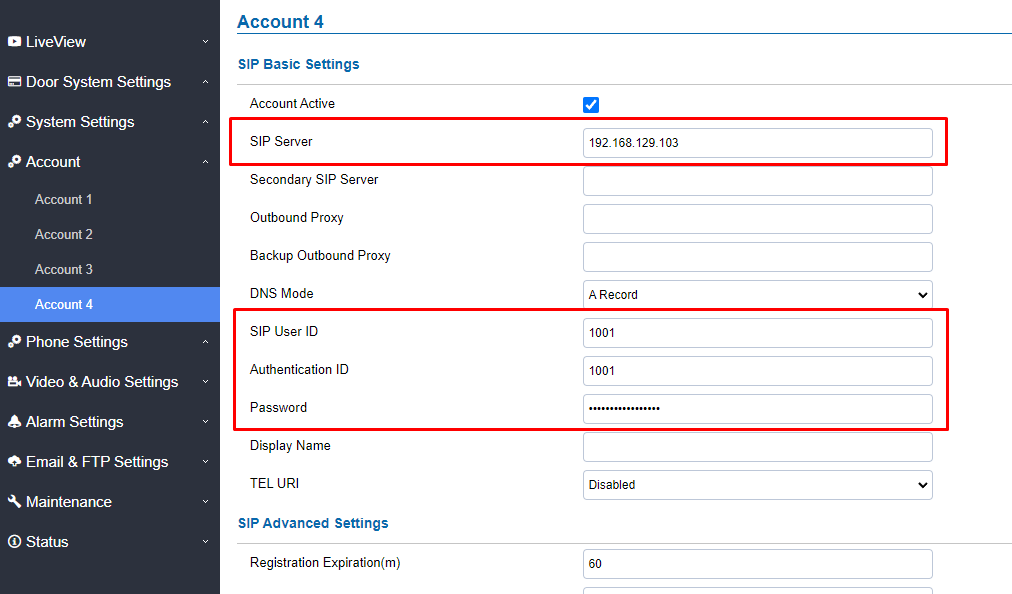
- Go to Account ➔ Account#, configure the IPC with the extension 1001 just like configuring an IP phone.
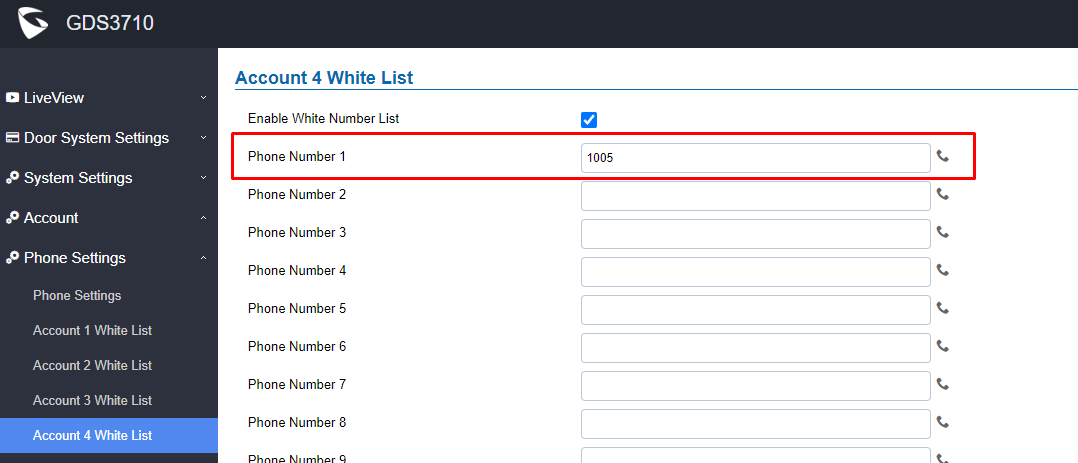
4. (Optional) Configure the whitelist for the account. If the numbers in the list are extensions under the same UCM, they will be able to access the door system. If the whitelist is not enabled, any extension will be able to access it.
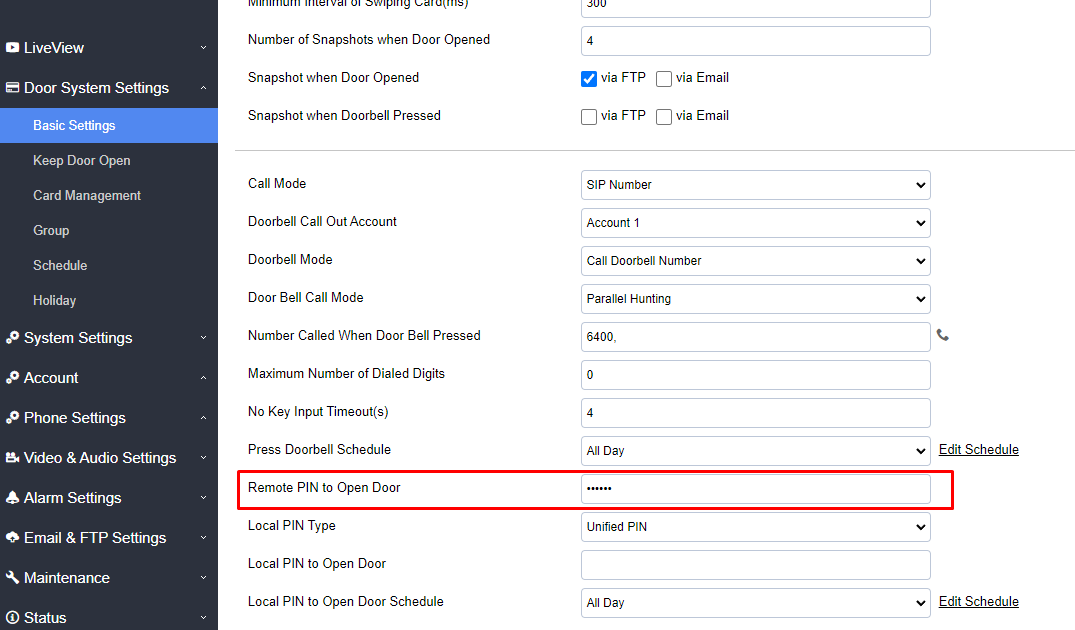
5. Assuming the IP camera is a door system, under the Door System Settings à Basic Settings page, configure Remote PIN to Open Door. This PIN is used to unlock the door. Wave can configure this PIN on its Door System configuration page. However, devices such as IP video phones will need to support door system-related configurations such as PIN entry for quickly and conveniently unlocking the door.
- The GDS will be able to call an existing extension from the UCM after the configuration is done. The extension called can enter the password to open the door remotely. If the extension called has configured the password on the Wave app, the Open Door button will be available.
- Additionally, users can configure the Number Called When Door Bell Pressed field so that the GDS calls the configured extension automatically when the doorbell is pressed.
Accessing Door System
Allows permitted extensions of different types (e.g., video phones, Wave, etc.) to access door systems.
- Visitor Ringing – If the doorbell is rung, permitted devices are able to view the door system live feed, initiate a video intercom with the visitor, and unlock the door via PIN.
- Peephole – Supports whitelisted extensions to dial the door system extension and access it via video intercom. Calls from whitelisted extensions will be picked up automatically.
- Pre-configuration – Wave can be easily configured to access door systems.
- Access Records – Direct calling will generate CDR entries will be generated on the UCM, and meeting history will show the door system in its participant and attendee lists.
Accessing Door System with Wave
Configuring Door Systems from Wave Web/Desktop
Requirements
The following requirements must be met before configuring Wave:
- The door system is registered to a SIP extension on the same UCM as the Wave account.
- The Wave’s extension is whitelisted on the door system for calling and access.
Configuration
Log into Wave Web/Desktop and navigate to the Sidebar ➔ Application ➔ Smart Devices ➔ Door System.

Users can add, edit, and delete door systems that this Wave account can interact with.
Clicking on the “Add” button will bring up the following window:
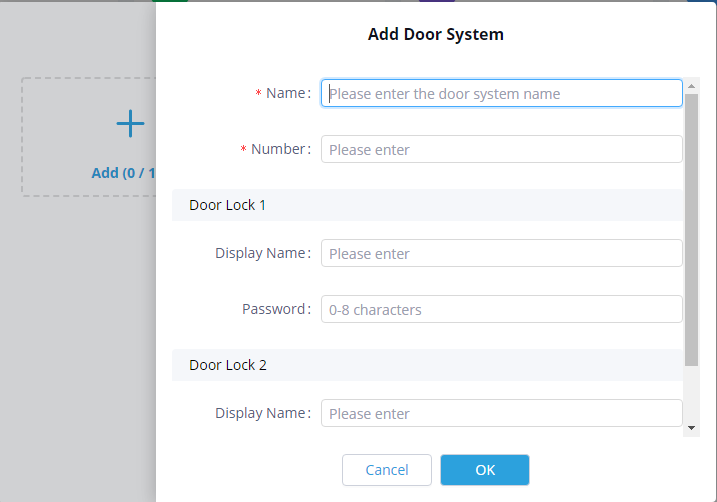
Configuration Options
Name | Name of the door system. This name will be displayed on Wave for management purposes. It is suggested to use a name that is easily recognizable and uniquely identifies the door system. |
Number | Number of the door system. This would be the UCM account that GDS was configured with (e.g., 1001). |
Display Name | (Optional) The name that is displayed on the extension called when GDS rings. |
Password | (Optional) The password to unlock the door system. If using GDS3710, this would be the PIN configured for Remote PIN to Open Door in the Connecting to the Door System section. |
Using the Door System
- Visitor Ringing – Receiving Calls
- Peephole – Calling the Door System
Receiving Calls:
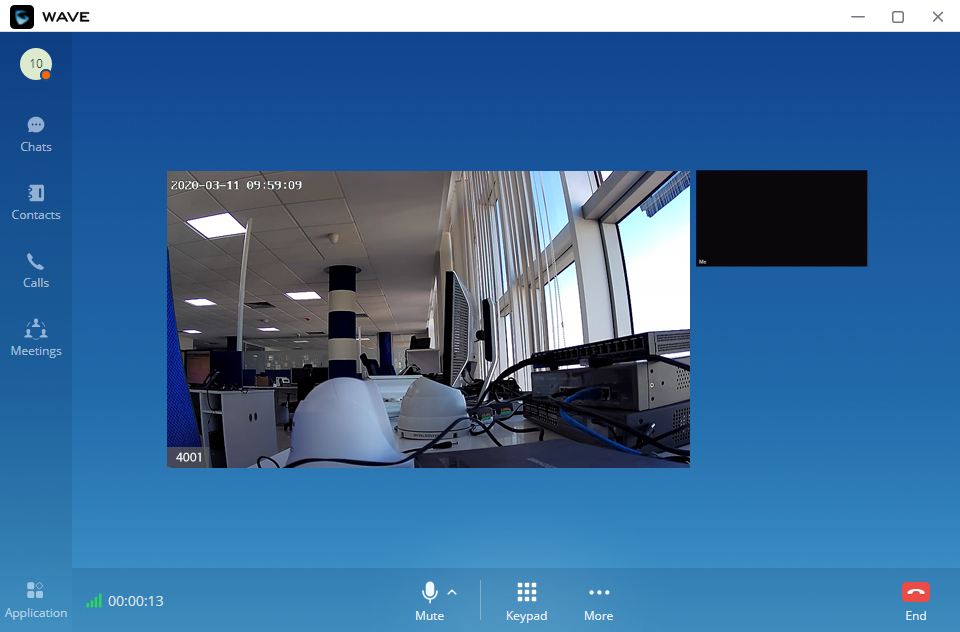
- If both the door system and Wave are configured correctly when someone rings the doorbell, the following call notification will be displayed to Wave Users:
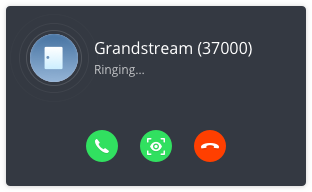
2. Click the ![]() button to answer the call and start the video feed of the door system. Parties on both ends will be able to hear each other.
button to answer the call and start the video feed of the door system. Parties on both ends will be able to hear each other.
3. Click the ![]() button to just view the door system video feed. No audio will be heard on either end.
button to just view the door system video feed. No audio will be heard on either end.
4. Click the ![]() button to end the call.
button to end the call.
5. If the password configured in Wave matches the door system unlock PIN, clicking the  button will unlock the door.
Calling the Door System:
Extensions can dial the door system’s number to directly view the door system’s video feed and unlock the door. If a whitelist is configured, only the whitelisted extensions will be able to call it.
Configuring Door Systems from Wave Mobile (Android™/iOS™)
Configuring door systems on Wave Mobile is largely similar to configuring on Wave Web/Desktop. There is currently no dedicated option to configure monitoring devices. Please refer to the Configuring Door Systems from Wave Web/Wave Desktop section for more details if necessary. To configure door systems on Wave Mobile please follow the steps below:
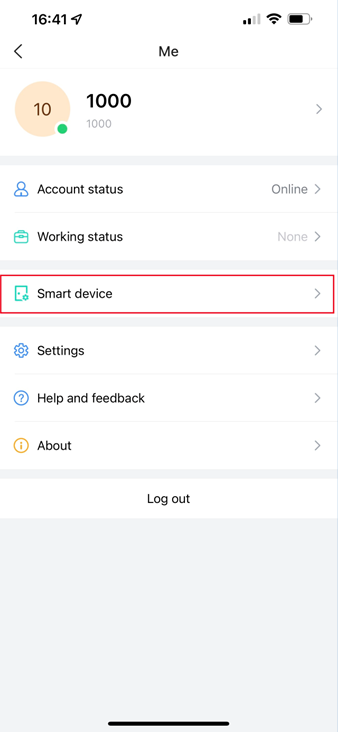
- Tap the personal information icon on the Wave app.
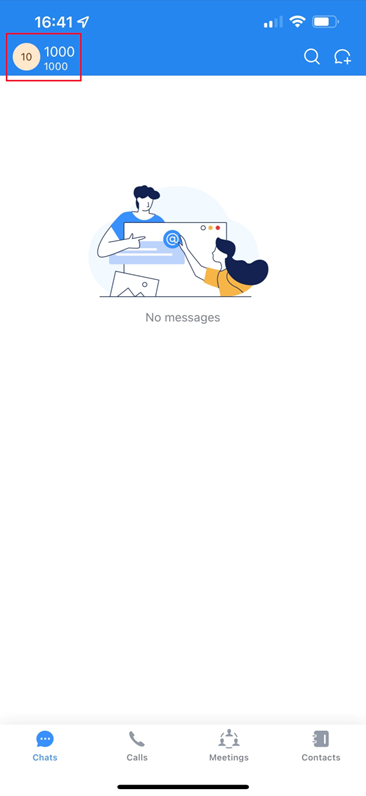
2. The following page will appear:
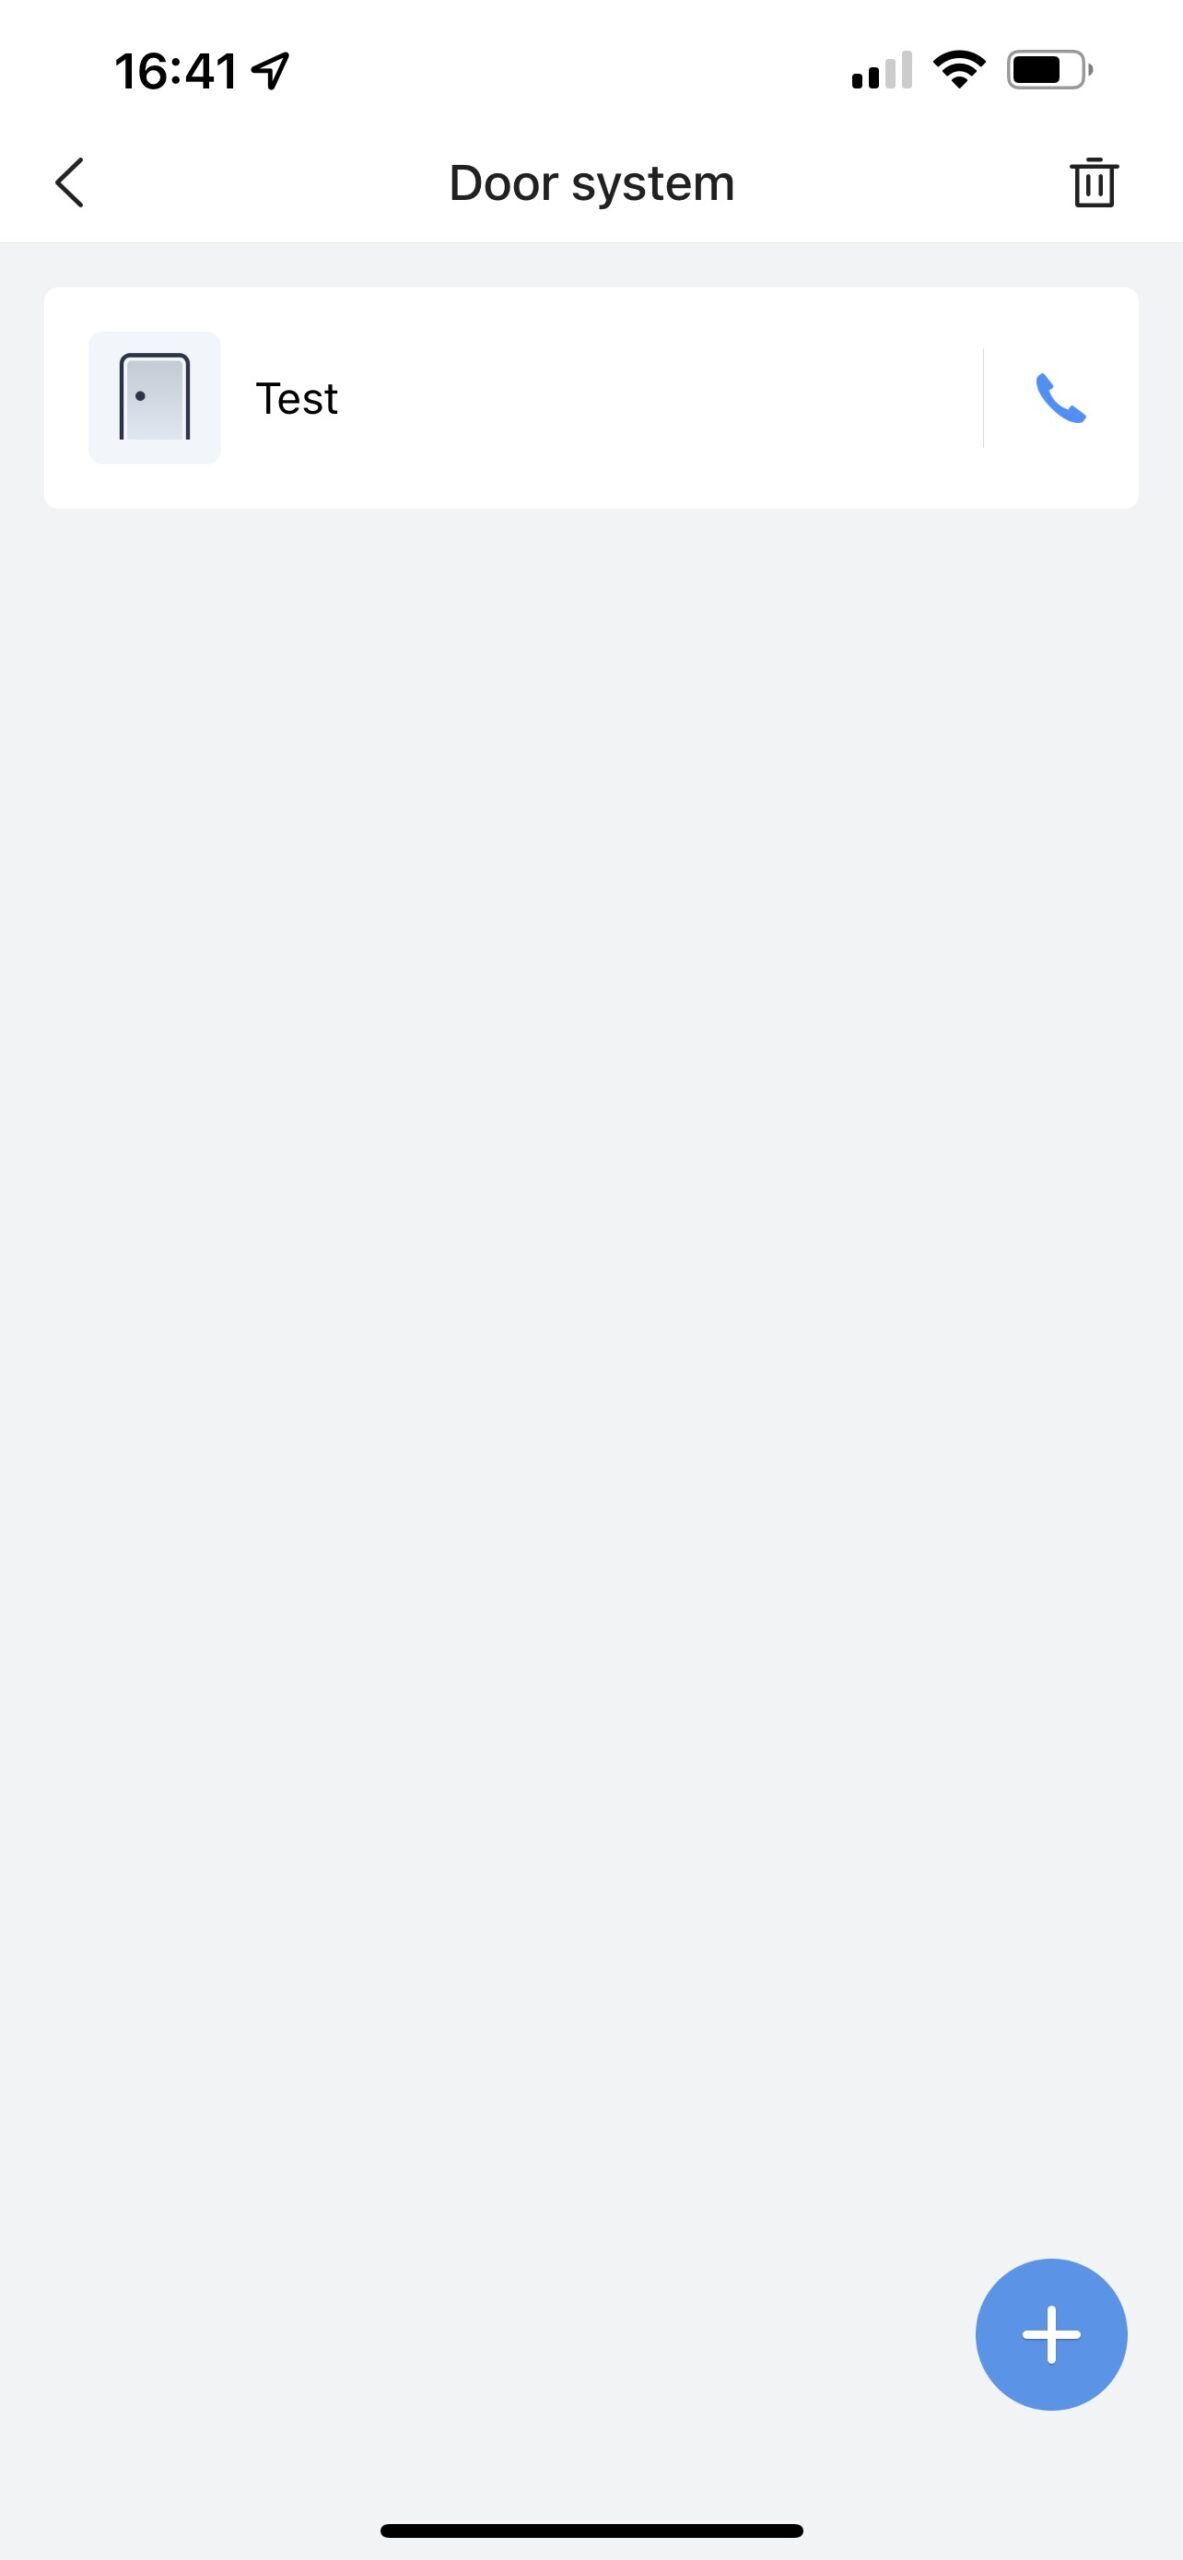
3. Tapping on the smart device option will bring up the Door System overview page
From here the user can add, edit, and delete door systems that this Wave account can interact with.
4. Tapping on the ![]() button will bring up the following page:
button will bring up the following page:
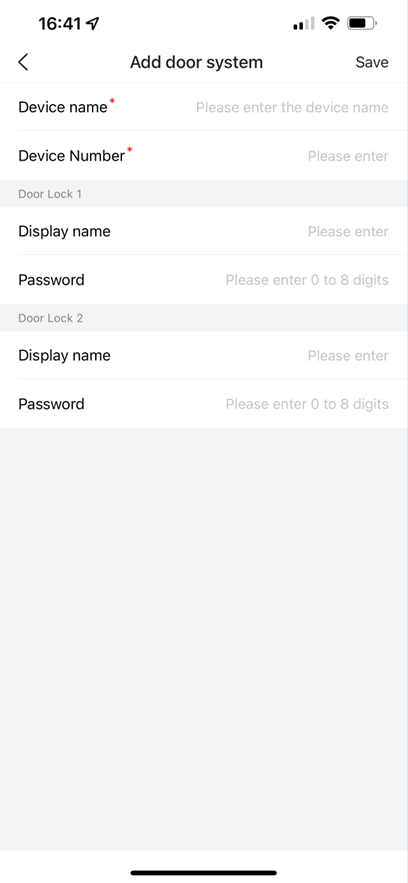
Configuration Options:
Name | Name of the door system. This name will be displayed on Wave for management purposes. It is suggested to use a name that is easily recognizable and uniquely identifies the door system. |
Number | Number of the door system. This would be the UCM account that GDS was configured with (e.g., 1001). |
Display Name | (Optional) The name that is displayed on the extension called when GDS rings. |
Password | (Optional) The password to unlock the door system. If using GDS3710, this would be the PIN configured for Remote PIN to Open Door in the Configuring the IP Camera section. |
Interacting with the Door System
Receiving Calls:
If both the door system and Wave are configured correctly, when someone rings the door system, the following Wave incoming call screen will appear
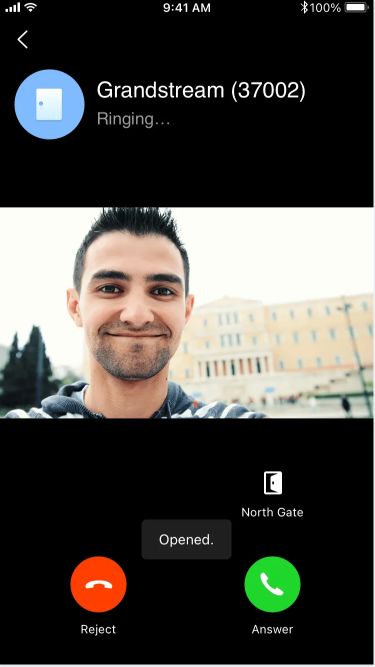
- The live video feed from the door system will be displayed on Wave.
- Tapping in
 icon will answer the call. Both parties will be able to hear and talk to each other.
 - Tapping the button
 will unlock with the PIN configured on the door system.
 - Tapping the
 will end the call. If the call is directed to ring multiple numbers, tapping this button will only end the call for this current extension. The other numbers will continue ringing until it is answered or the call times out.
 icon will answer the call. Both parties will be able to hear and talk to each other.
 will unlock with the PIN configured on the door system.
If the call is answered, the interface will change the following:
- Tapping the
 mute button will cause the door system party not to hear the Wave user.
 - Tapping the
 button will disable the video feed from the door system.
 - Tapping the
 button will unlock the door if the password configured on Wave matches the unlock PIN configured on the door system.
 - Tapping the
 button will end the call.
 mute button will cause the door system party not to hear the Wave user.
 button will disable the video feed from the door system.
 button will unlock the door if the password configured on Wave matches the unlock PIN configured on the door system.
 button will end the call.
Accessing the Door Systems with IP Phones
- Visitor Ringing – Receiving Calls
- Peephole – Calling the Door System
IP video phones can view door system video feeds either by directly calling it or receiving calls from it. The IP phone’s extension would need to be whitelisted on the door system. Whitelisted extensions can unlock the door via DTMF by dialing the PIN code followed by the # key.
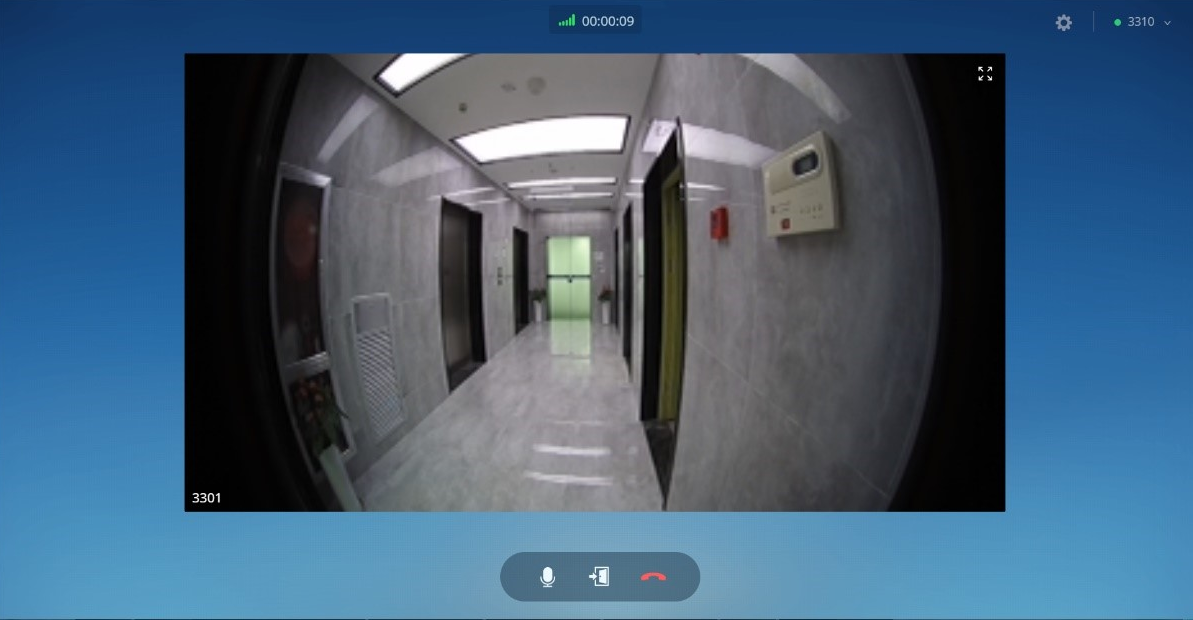
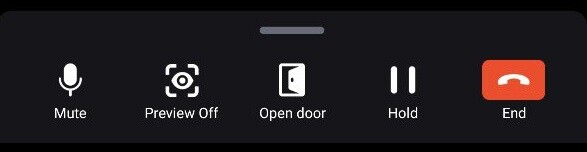
After successfully establishing a call with the door system, the following interface will appear:
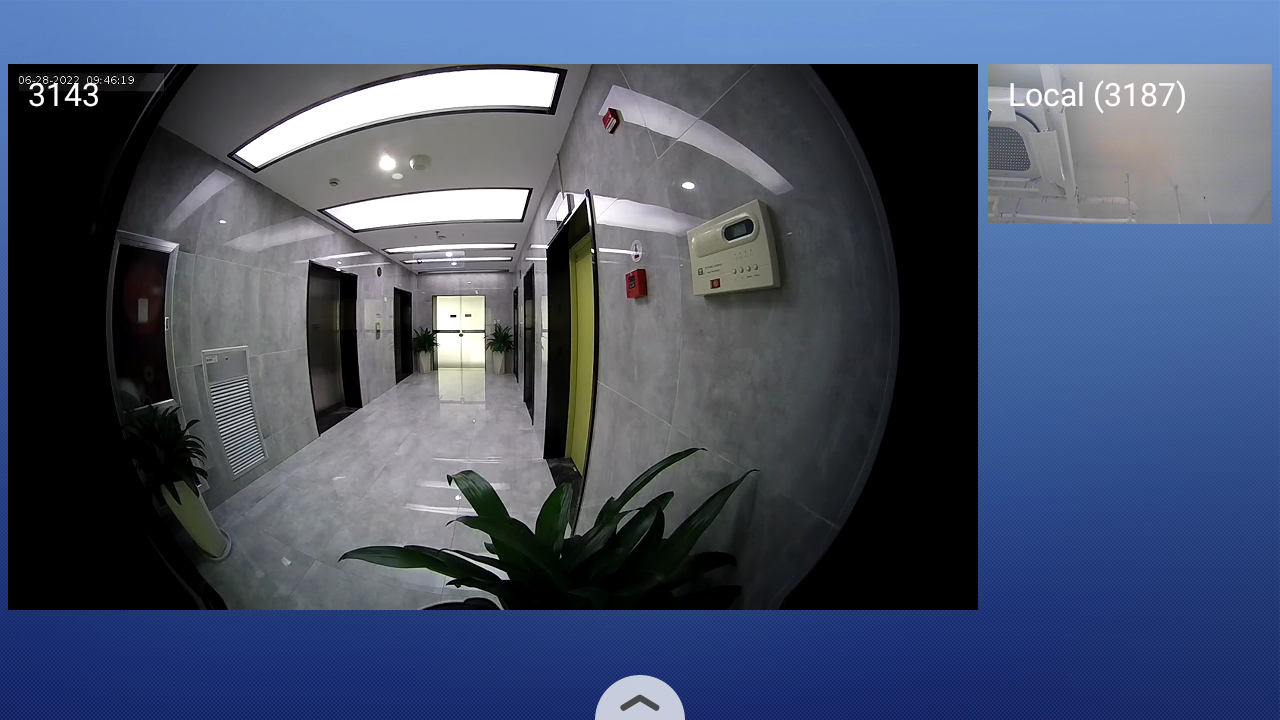
From here, users can toggle the video feed on or off, put the call on hold, mute, enter the PIN to unlock the door, and more.