


Introduction
This guide is designed to help administrators configure and deploy the Account Trunk feature available on the Grandstream UCM6300/A series, CloudUCM, GCC IPPBX, and SoftwareUCM. This feature allows remote devices such as ATA units (HT8xx), gateway devices (HT841/HT881 series), or third-party SIP devices to register to the IP PBX as a trunk using SIP credentials, including a username and password, instead of relying exclusively on traditional IP-based peer trunking.
Account Trunk Use Case
In traditional deployments, SIP trunking is primarily implemented through peer-to-peer (IP-based) trunks, which require static IP addresses, VPN tunnels, or NAT configurations. Alternatively, remote gateway devices could register as SIP extensions, which eliminates the ability to manage call routing as a trunk and limits the flexibility of dial plan control.
The key benefits of this implementation are:
- Remote ATA/gateway registration without static IPs.
- Centralized call routing for inbound and outbound calls.
- Improved NAT traversal and simplified firewall configuration.

Account Trunk Configuration
IP PBX Configuration
This section provides a step-by-step walkthrough to configure Account Trunking on the Grandstream UCM6300/A series, CloudUCM, GCC IPPBX, and SoftwareUCM.
Creating an Account Trunk
In order to create an account trunk, please refer to the steps below:
- Navigate to the IP PBX Web UI.
- Go to Extension/Trunk → VoIP Trunks, and click Add SIP Trunk.

- In the Type drop-down, select Account SIP Trunk.
- Fill in the the required fields:
- Provider Name: Enter a label for the trunk (e.g., ATA1)
- Username: The SIP account username the remote device will use to register
- Password: The SIP password for authentication

- Click Save, then Apply Changes.

Configuring an Outbound Route
This step defines how PBX extensions can place outbound calls via the Account Trunk by specifying the dial patterns to be routed through the trunk and determining which extensions are permitted to use it.
- Go to Extension/Trunk → Outbound Routes, then click Add.

- Set a Route Name (e.g., To_ATA).
- Define a Dial Pattern (e.g., 9XXXXXXXXX to match 10-digit numbers).
- Under Privilege Level, choose an appropriate level (e.g., Internal, Local, National, or International) based on which extensions should be allowed to use the route.
- Under Use Trunk, select the Account Trunk you created earlier.

- Click Save, then Apply Changes.
Creating an Inbound Route
This section allows users to configure how the PBX handles incoming calls from the connected device (e.g., ATA, gateway, or third-party device), such as directing them to an extension, IVR, or ring group.
- Go to Extension/Trunk → Inbound Routes, then click Add.

- Under Trunk, select the Account Trunk created earlier, and choose a name for this route.
- Enter a DID Pattern (e.g., _x. to match all numbers).

- Set a Default Destination (e.g., an Extension, IVR, or Ring Group).
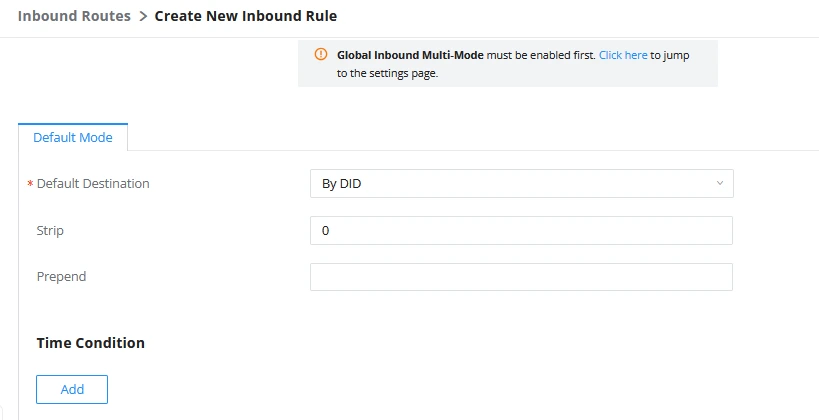
- Click Save, then Apply Changes.
Configuring the Gateway/ATA Device
To establish a connection between the Grandstream IP PBX system and an analog gateway or ATA using the Account Trunk feature, you will need to configure the gateway/ATA to register as a SIP trunk using the credentials generated on the IP PBX.
This configuration applies to any SIP-compatible analog gateway or ATA device that supports SIP account registration, including FXO/FXS gateways. In this guide, we will be using the Grandstream HT818 ATA as an example device.
Example: Configuring the Grandstream HT818 ATA
In this example, we’ll walk through how to configure the Grandstream HT818 ATA to register FXS ports to the Grandstream IP PBX using the Account Trunk method. This allows analog phones or analog line interfaces connected to the HT818 to be treated as trunk endpoints or routed extensions via SIP registration.
Configuring SIP Server under Profile Settings
Go to HT818 Web UI → Profile 1 (or Profile 2), and configure the following:
- Primary SIP Server: Enter the IP address or domain name of the IP PBX
- SIP Transport: Match the SIP transport settings of the IP PBX
- NAT Traversal: Configure based on network requirements
- SIP Registration: Set to “Yes”
- Register Expiration: 60 minutes is typical

Configuring FXS Port Registration
Navigate to HT818 Web UI → FXS Ports, choose the port to use, and fill in the information below:
- SIP User ID: Enter the username from the IP PBX Account Trunk
- Authenticate ID: (if applicable) Enter the AuthID from the IP PBX Account Trunk
- Name: (Optional display name)
- Profile: Select the profile configured in the first section (e.g., Profile 1)
- Enable Port: Set to “Yes”

Verifying Registration and Testing
- Verify Account Trunk Registration
Log in to the IP PBX web UI and navigate to the Dashboard view to confirm the Account Trunk status shows as “Registered“.

- Verify Internal Extension Registration
Ensure your internal SIP extensions (e.g., desk phones or softphones) are registered and ready to make calls.
- Test Calling from Analog to SIP Extension
- Pick up the analog phone connected to the HT818’s FXS port.
- Dial the number of a SIP extension registered to the IP PBX (e.g., 1001).
- Verify that the SIP extension rings, and you can establish two-way audio.

- Test Calling from SIP Extension to Analog Phone
- On the IP PBX, navigate to Extension/Trunk → Outbound Routes, and locate the outbound rule associated with the Account Trunk.
- Add a dial pattern for reaching the analog phone (e.g., 123456).
- From a SIP extension, dial 123456.
- The IP PBX will route the call through the Account Trunk to the HT818, and the analog phone should ring.
- Answer the call and verify two-way audio.


Supported Devices
Model | Firmware Support |
UCM6300/A Series | 1.0.27.10+ |
CloudUCM | 1.0.25.18+ |
GCC IPPBX | 1.0.27.14+ |
SoftwareUCM | 1.0.27.18+ |