This user guide serves to explain how to manage SoftwareUCM instance(s). SoftwareUCM is deployed in a Linux environment using Alma Linux distribution. This type of deployment allows the creation of multiple instances, which are completely separate entities, to easily address scalability and multi-tenancy.
The console offers a script-based menu where the user can view and change configurations related to the operations of the SoftwareUCM instances using only direct responses to the prompts displayed on the console screen. The user can navigate through the menu by entering the number that corresponds to the menu they want to access.
LOGIN
Log in with the user “support”. You need to set a password for the first login. This password will be required to enter to log in after the first login.
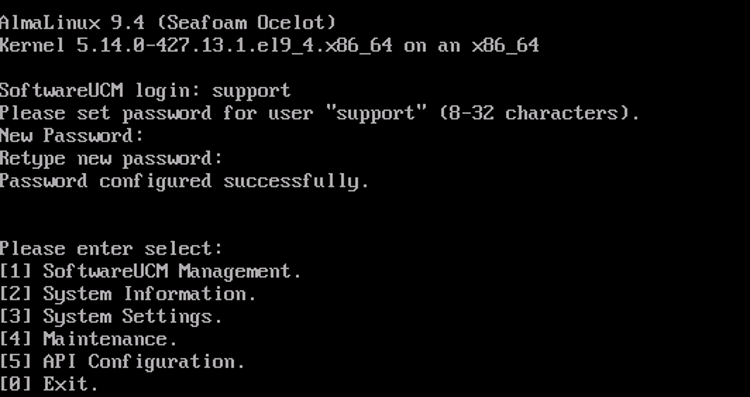
Once logged in, the user will be greeted with a list of parameters that can be used to manage the running instance(s) of SoftwareUCM.
SOFTWAREUCM MANAGEMENT
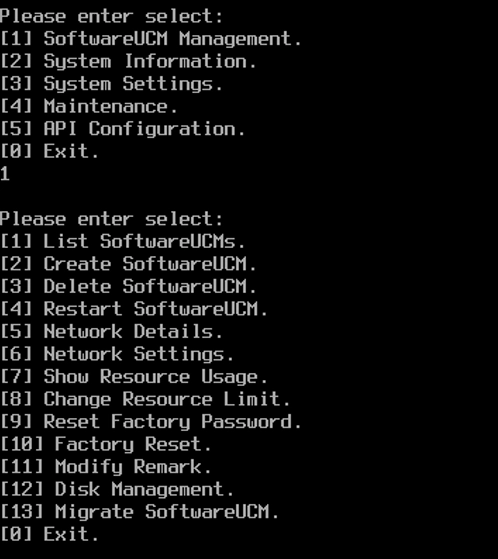
Enter SoftwareUCM Management
In this menu, the user can view, create, delete, and restart the instances of SoftwareUCM. The user can also change the networking settings of each instance and view information related to the resources allocated for all the instances.
View The Current SoftwareUCM Instances
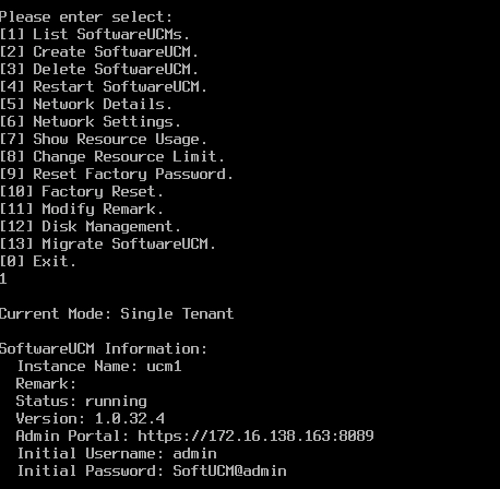
To view the SoftwareUCM instances created, enter “1”. The console will display a list of the instances including the name of each instance, the operational status of the instance, the version installed, the admin portal web access address with the port, the initial username, and the initial password.
Switch From Single-tenant Mode to Multi-tenant Mode
To run multiple instances of SoftwareUCM, the user must switch from single-tenant mode to multi-tenant mode. When multiple instances are created, they run as independent entities from each other and don’t share the same processes.
When creating a new SoftwareUCM, the system will prompt the user to switch to multi-tenant mode before creating the instance.
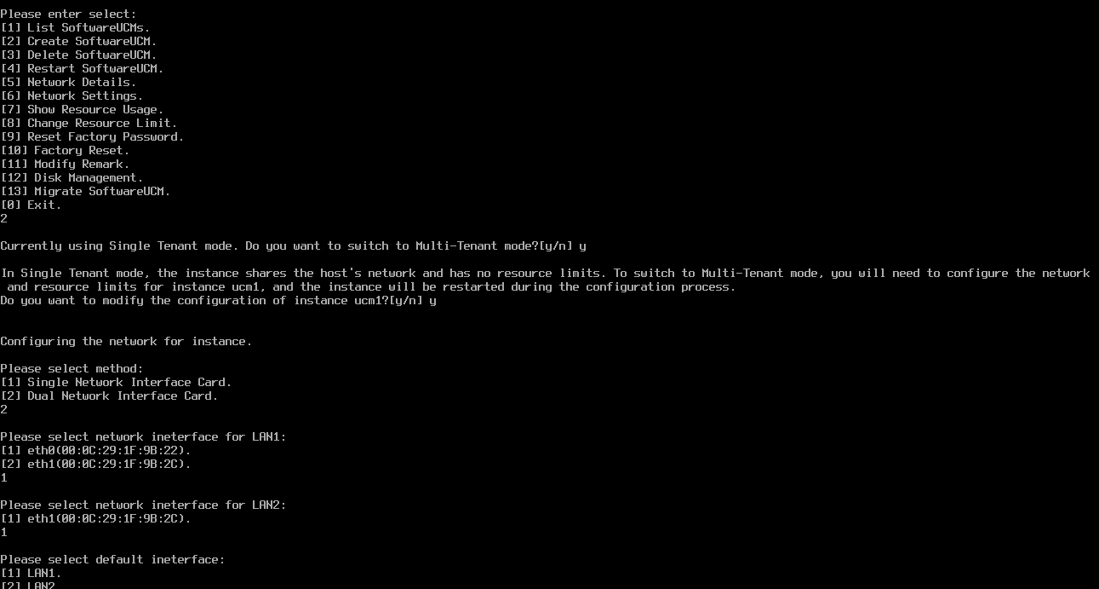
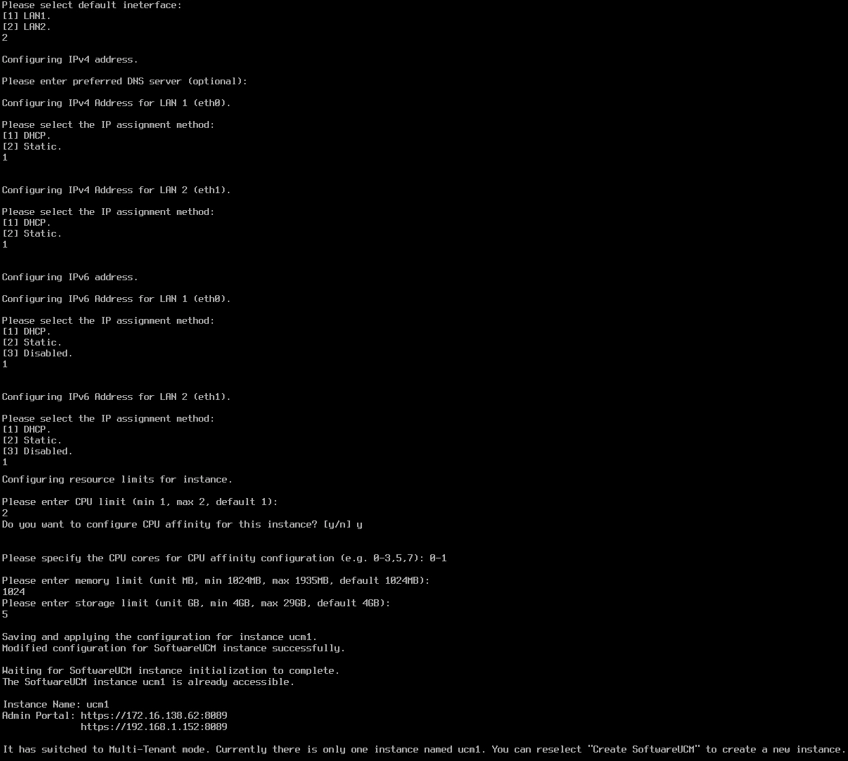
- Select network
- Select single or dual network interface
- Select the physical host NICs corresponding to LAN1 or LAN2
- Select default network interface
- Configure IPv4 and IPv6 addresses for LAN1 and LAN2
- Configure resource limit
- Configure CPU core limits
- Configure CPU affinity
- Configure memory limits
- Configure storage limits
Create a New Instance
Using the menu, the user can create multiple instances of SoftwareUCM to run separate telephony services that are independent of each other. Each instance runs in its own containerized environment which makes the system more flexible, more confidential, and more secure. The user can allocate the resources individually depending on the need of each instance. Refer to [View The Resource Allocation of the Current Instance] and [Change Instance Resource Limits] for more information regarding the resource management of each instance.
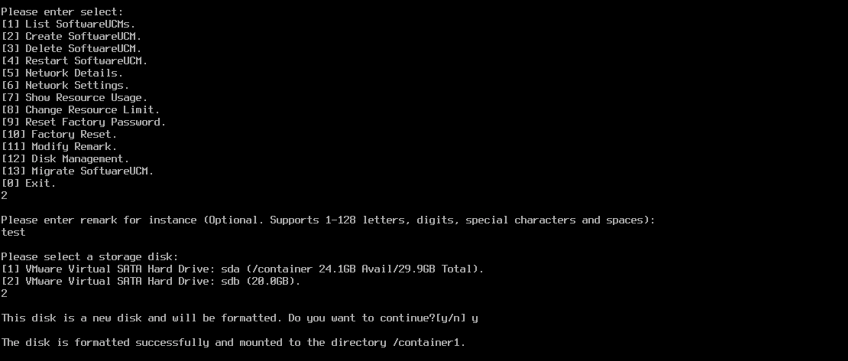
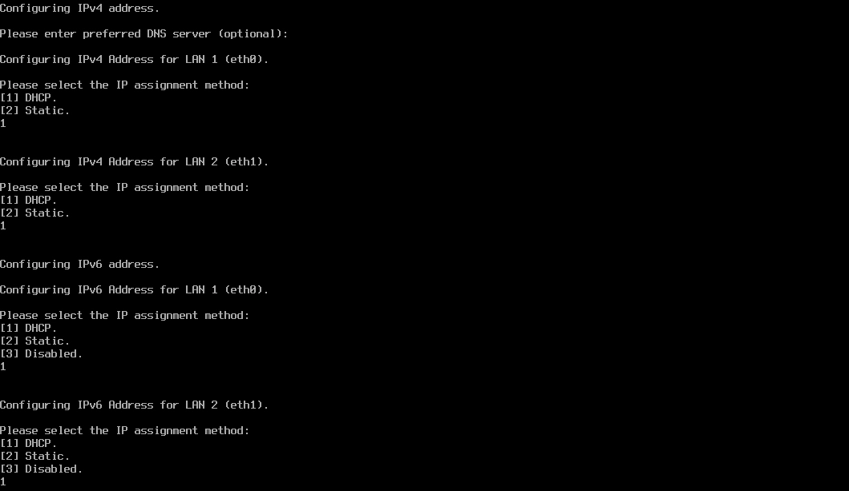
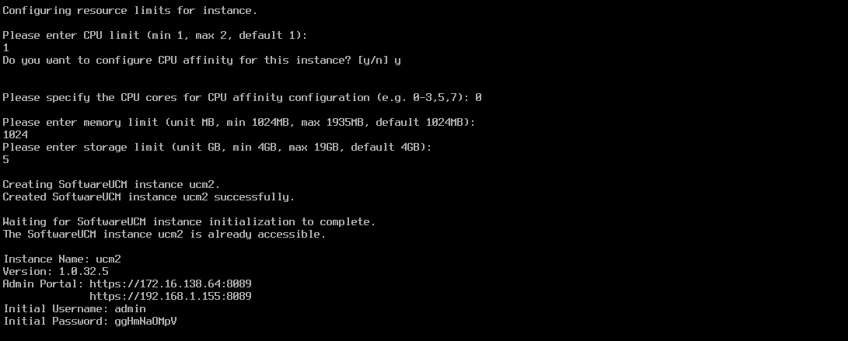
- Select Create SoftwareUCM
- Optional: Enter a remark for easier instance identification.
- Select the disk for instance installation. The disk will be formatted on first use.
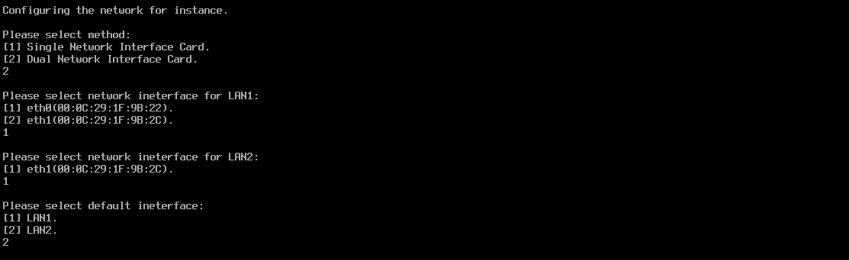
- Configure network
- Configure resource limit
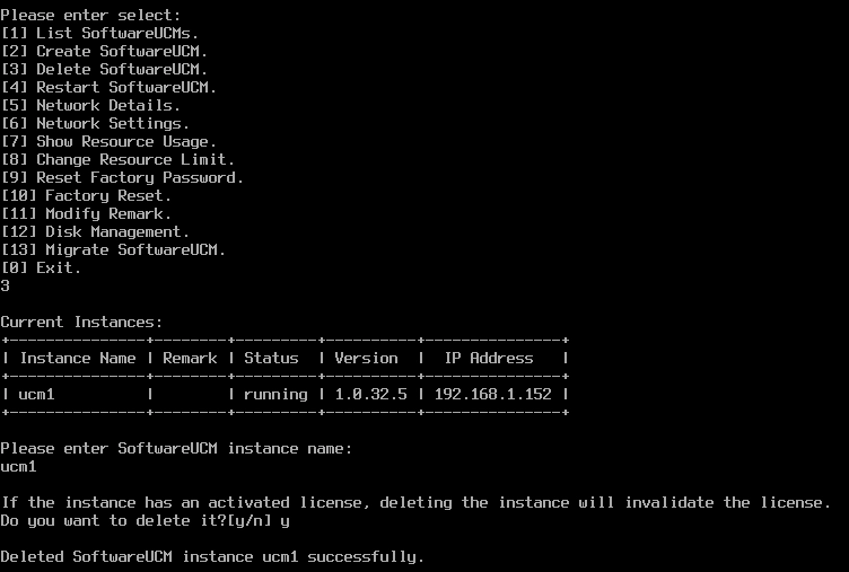
Delete Instance
Restart Instance
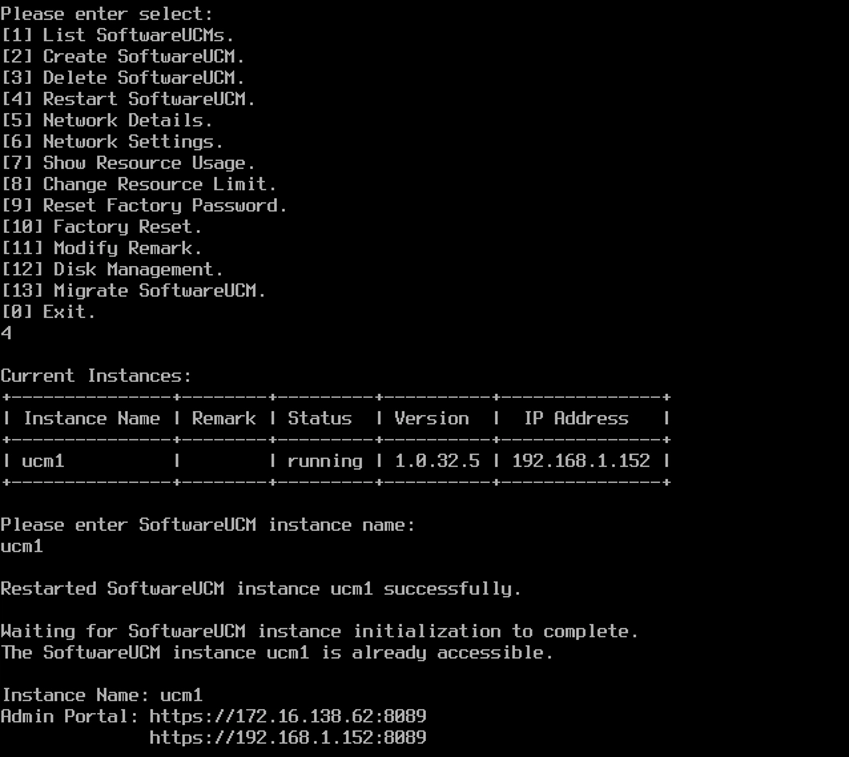
The user can restart individual instances without having to restart the entire system. Ensure that no calls are ongoing before restarting, otherwise, the ongoing calls will be interrupted. The other instances will not be affected by restarting one instance.
View The Network Details of The Instance
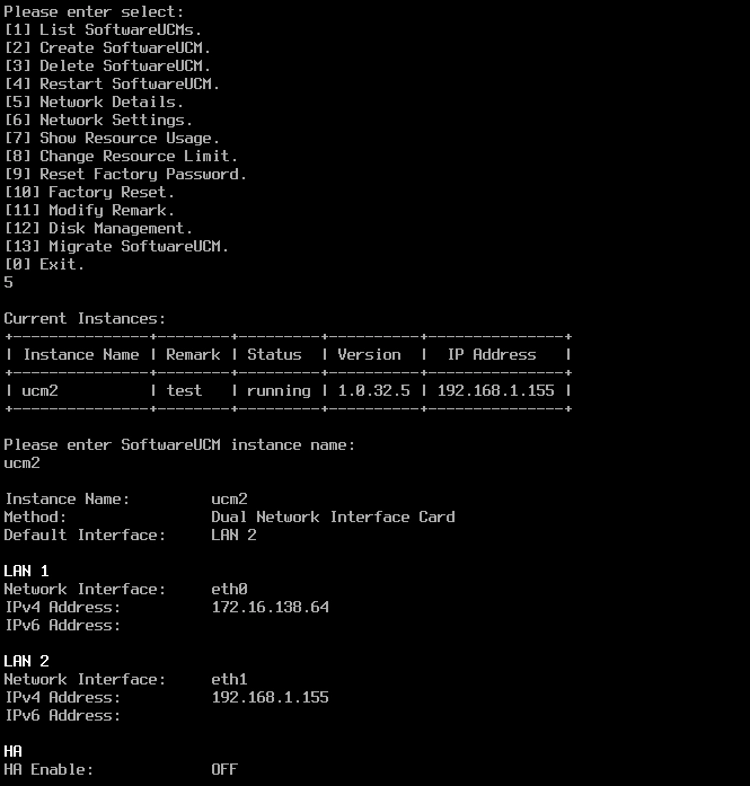
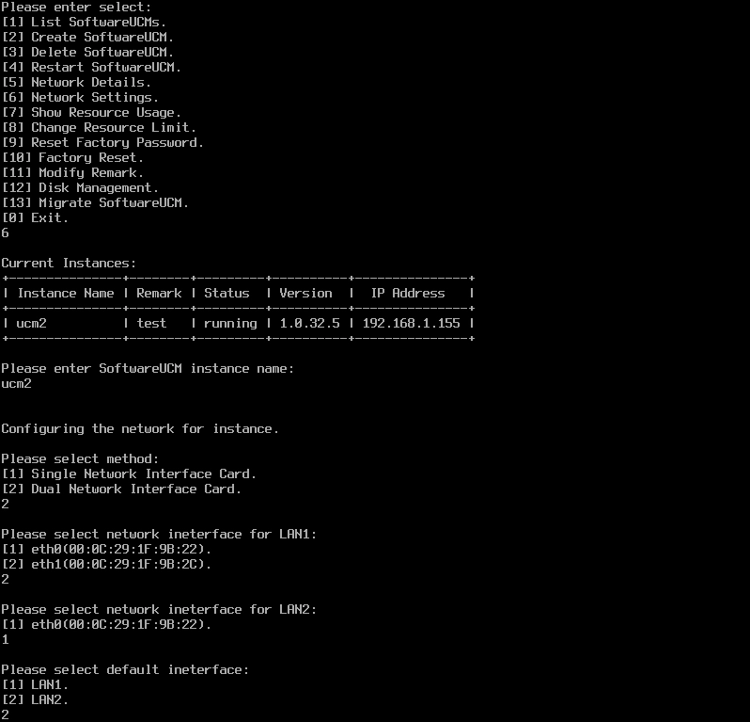
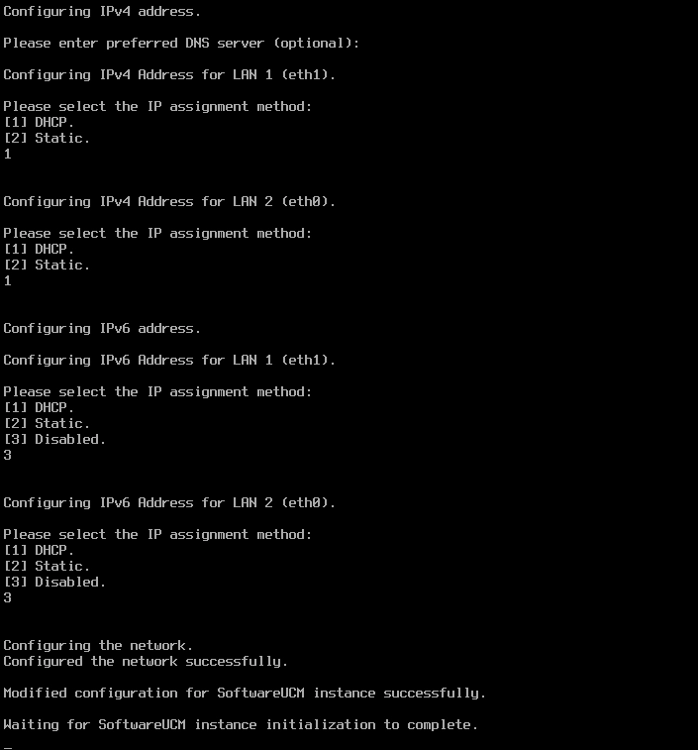
Modify The Network Configuration of an Instance
The user can modify the network setting of the instance.
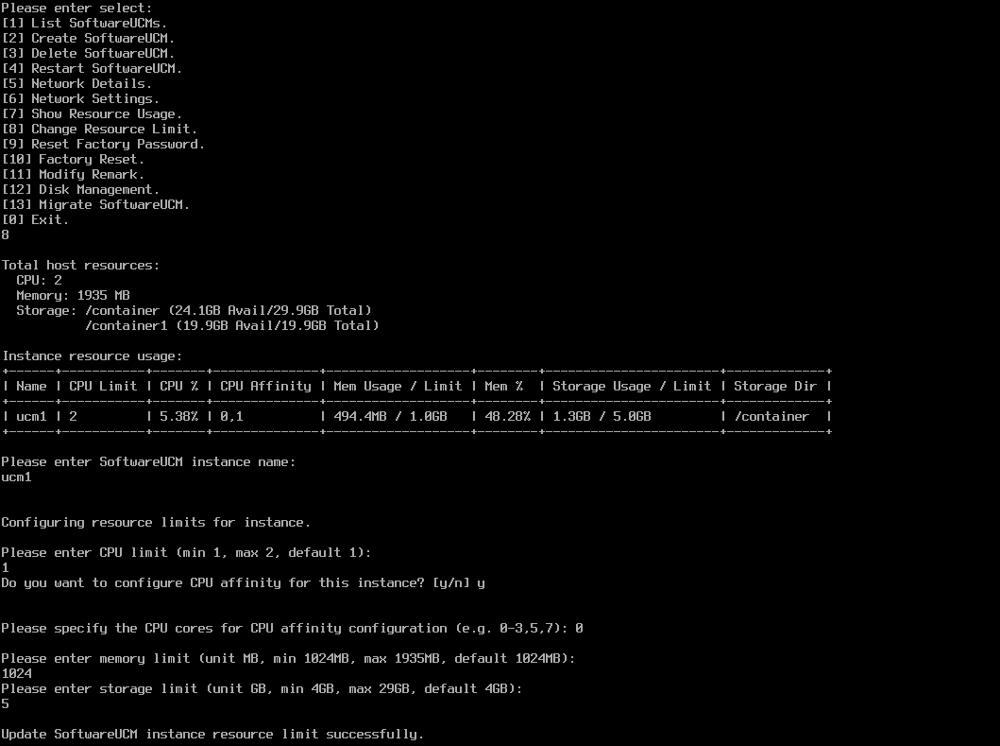
View The Resource Allocation of The Current Instance
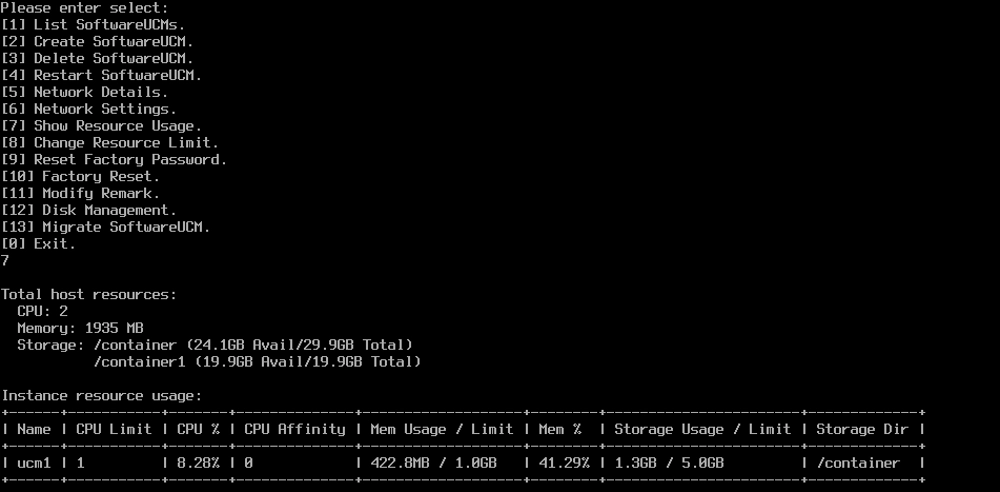
To view the resources allocated to each of the instances, follow the options displayed on the menu. The figure displayed below shows an example of viewing the resources of each instance. The user can view, in real time, Number of CPUs/cores, the CPU usage, memory usage, storage usage, as well as the memory limit and storage limited allocated for each instance.
Change Instance Resource Limits
When creating an instance, the user sets the resource limits for the instance. If the user wants to increase the capacity of the resources of the instance after the creation, they can follow the menu and the prompts of the console.
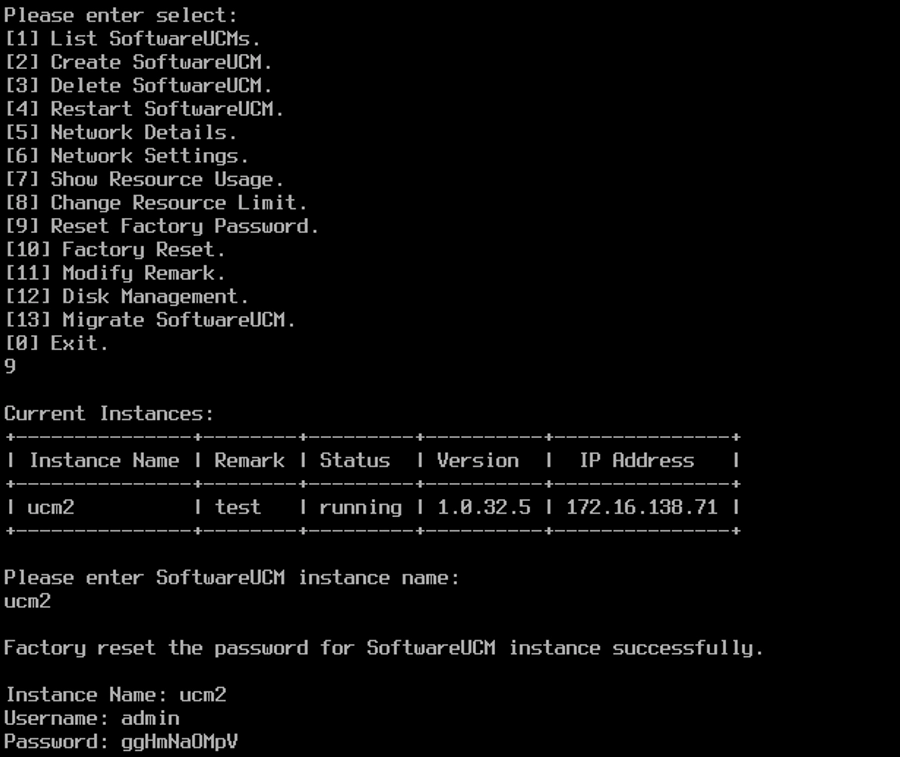
Reset The Account and Password Instance of The Factory
The user can reset the password of the administrator of SoftwareUCM PBXs from the console menu. Follow the instructions on the menu to reset it successfully.
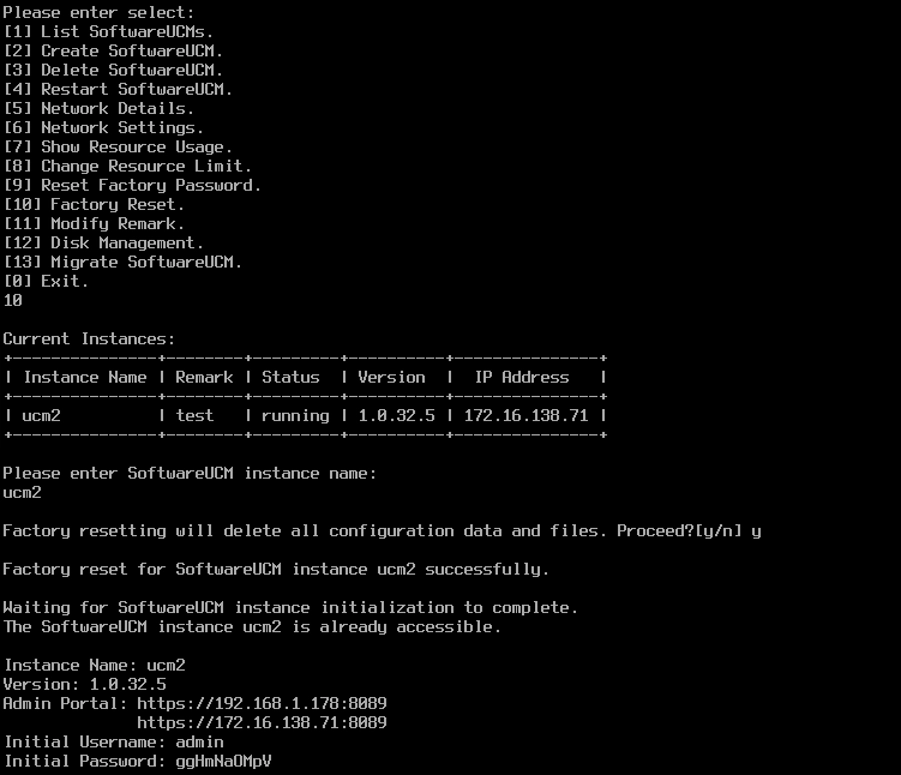
Factory Reset the Instance
The user can reset a specific instance to factory reset using the console menu.
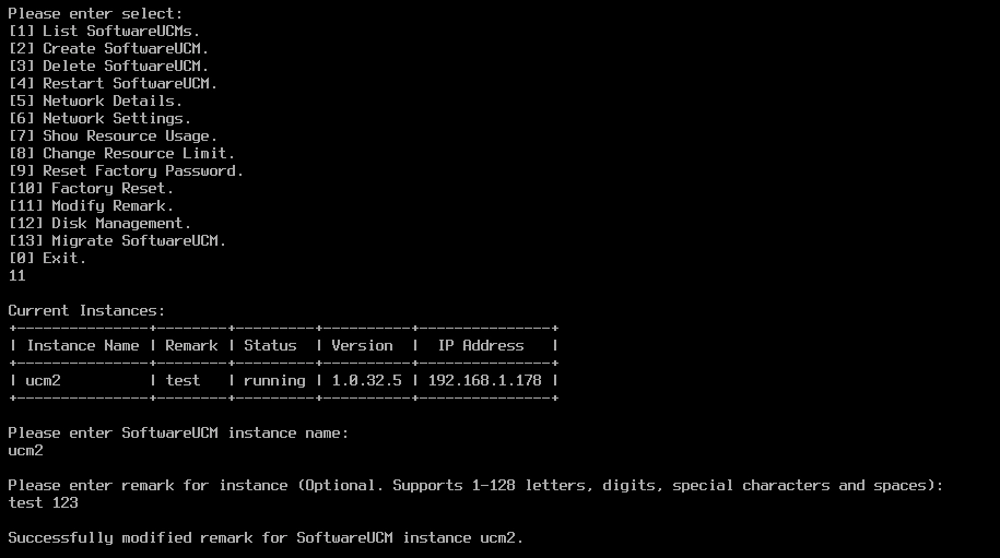
Modify Remark
The administrator can add a remark for each SoftwareUCM instance as a description to help identifying each instance easily.
Disk Management
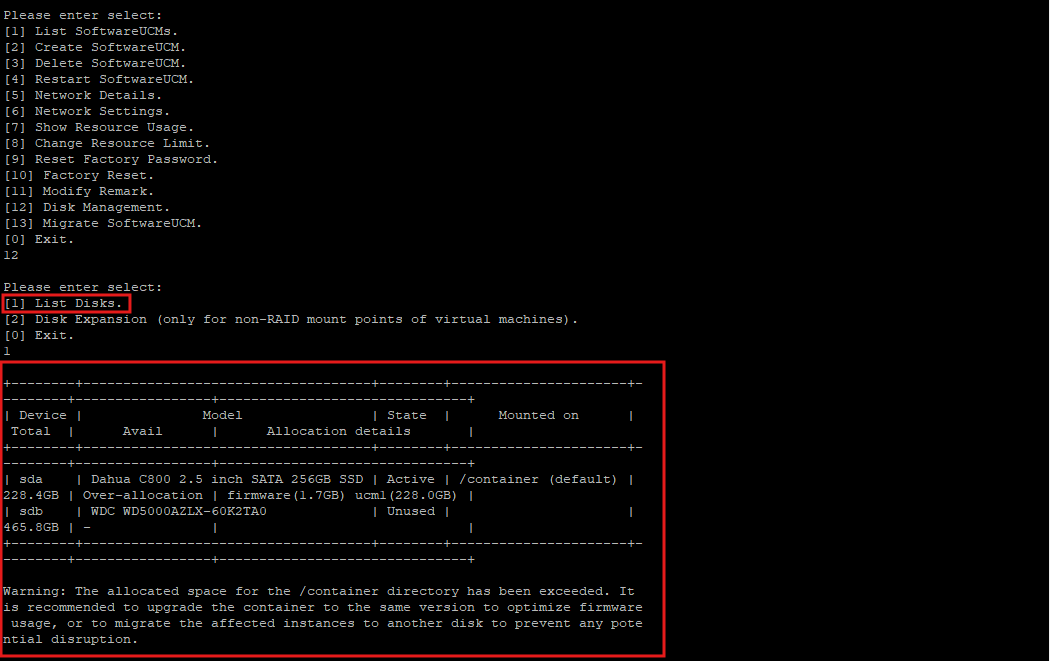
List Disks
In Disk Management, the user can view information about the disk(s) attached to the system. The information displayed include the disk name, the total capacity of the disks, the disk model, whether the disk is used or not, and on which container the disk is mounted.
Disk Expansion
Please refer to the following guides for disk expansion depending on the hypervisor used.
- VMware Workstation: https://documentation.grandstream.com/knowledge-base/softwareucm-disk-expansion-vmware-workstation/
- Oracle Virtualbox: https://documentation.grandstream.com/knowledge-base/softwareucm-disk-expansion-virtualbox/
- KVM: https://documentation.grandstream.com/knowledge-base/softwareucm-disk-expansion-kvm/
- HyperV: https://documentation.grandstream.com/knowledge-base/softwareucm-disk-expansion-hyperv/
Migrate SoftwareUCM
Using this feature, the user can migrate the SoftwareUCM files from one partition to another or from a disk to another.
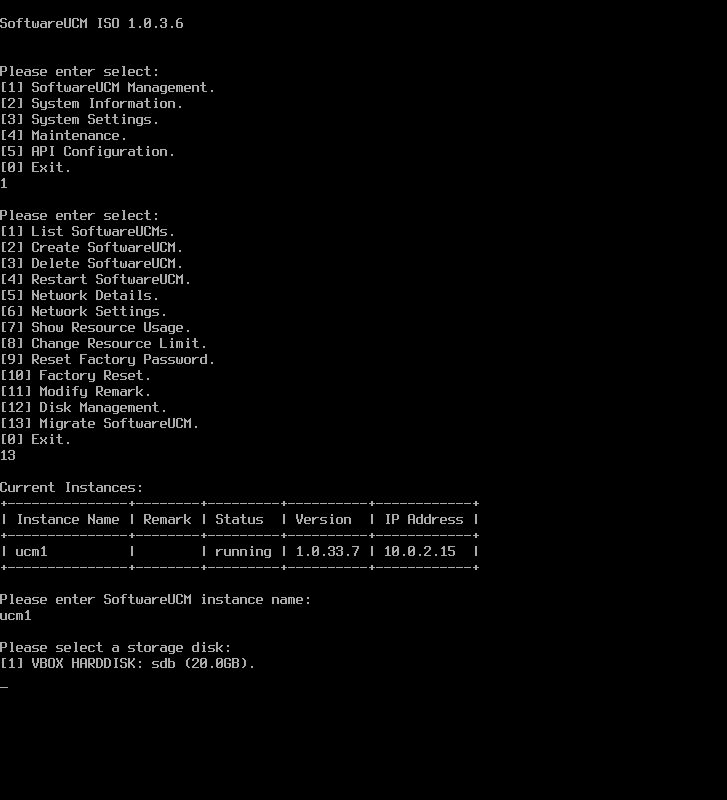
Follow the instructions below to migrate a SoftwareUCM to a different disk.
- Access “SoftwareUCM Management” by typing 1, press enter.
- Access “Migrate SoftwareUCM” by entering 13.
- Enter the name of the instance of the SoftwareUCM.
- Enter the number that corresponds to the disk that you want to migrate the files to.
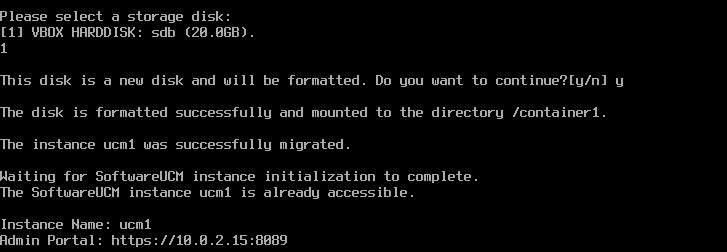
- Wait for migration process to finish. Once done, the message in the screenshot below will be displayed.
SYSTEM STATUS
View System Status
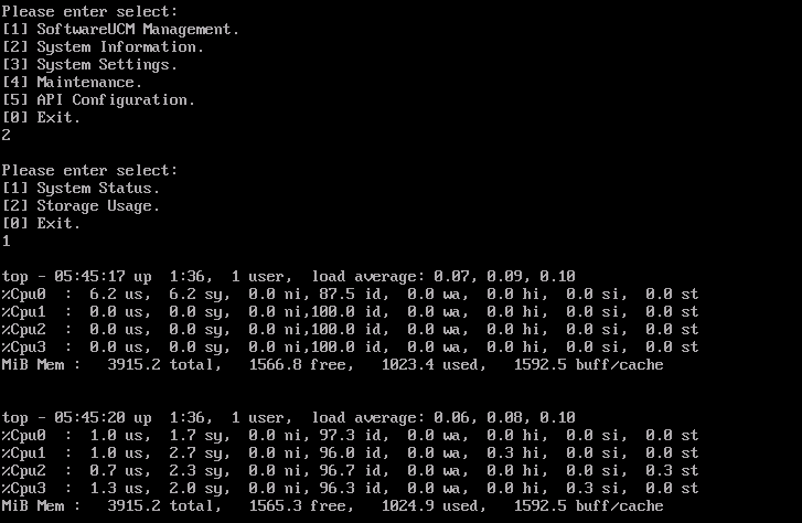
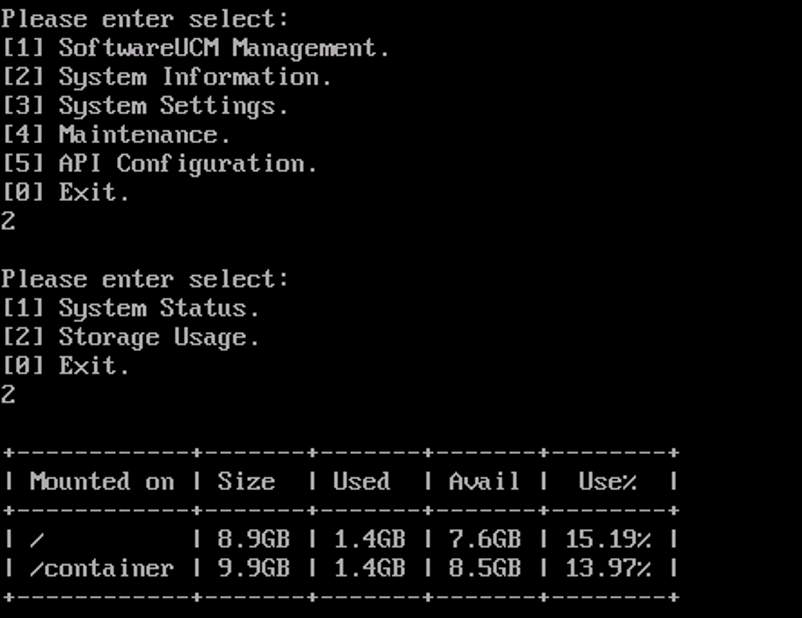
To view the resources occupied by SoftwareUCM system access “System Information”, then access “System Status”, the console will display periodic updates about the resources of the system.
View Disk Usage
The system allows viewing the information related to the disk(s). To display the disk usage statistics, access “System Information”, then access “Storage Usage”.
SYSTEM SETTINGS
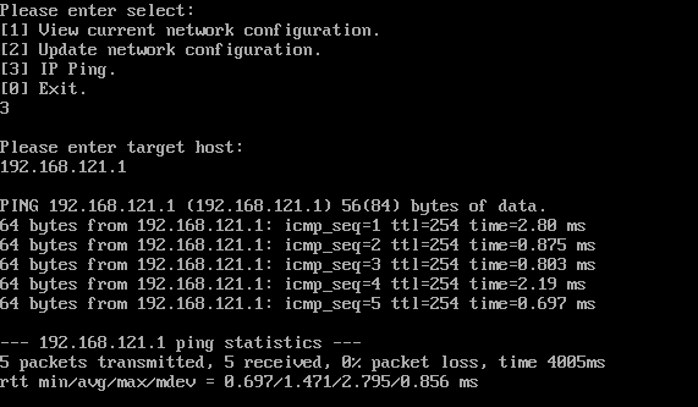
The System Settings menu allows the user to view and change the network settings of the system, and perform a ping test to ensure that the system can reach LAN and WAN hosts.
Network Settings
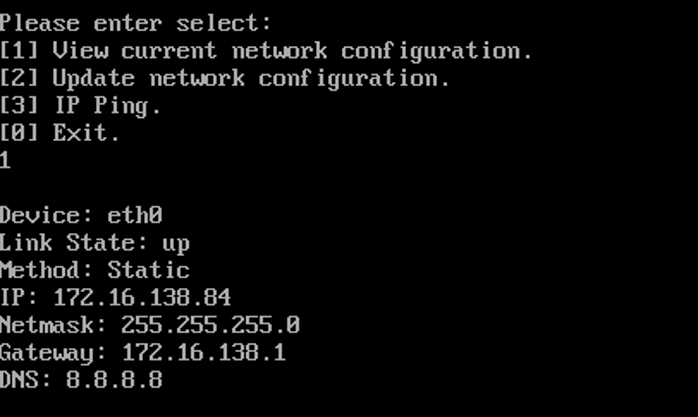
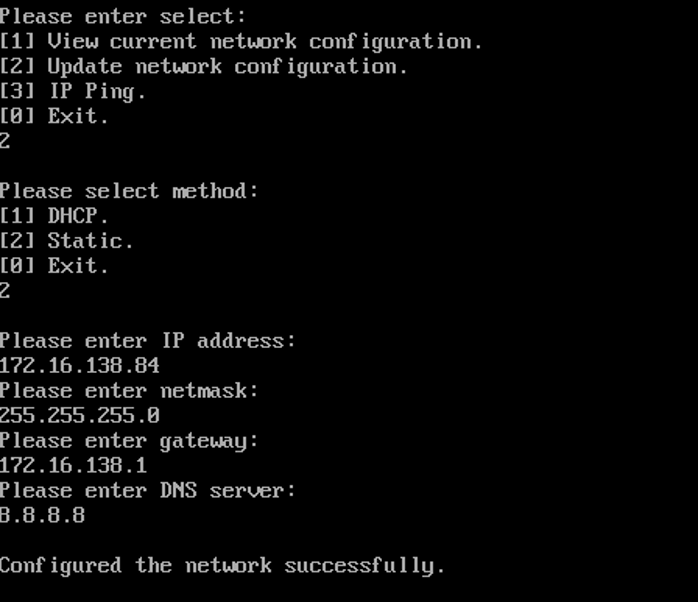
Enter network settings by following the instructions.
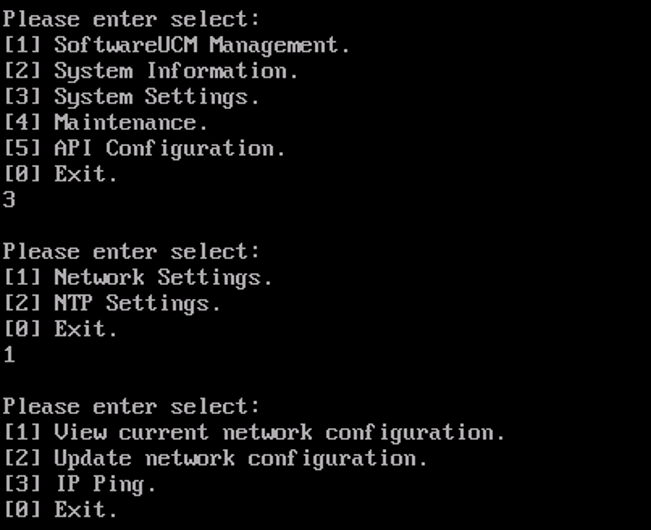
- View current network configuration
- Update network configuration
- Initiate ping request from SoftwareUCM
NTP Settings
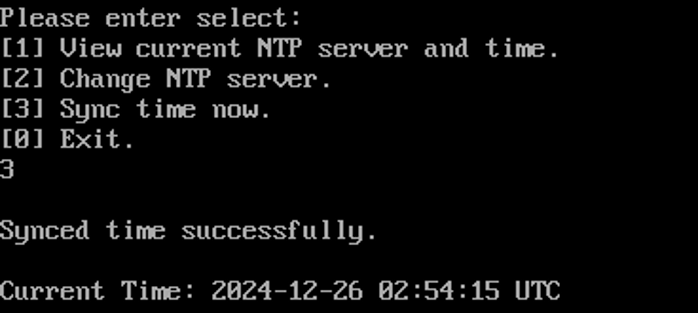
In NTP settings, the user can define an NTP server address from which the system will acquire the date and time configuration.
- Enter NTP Settings
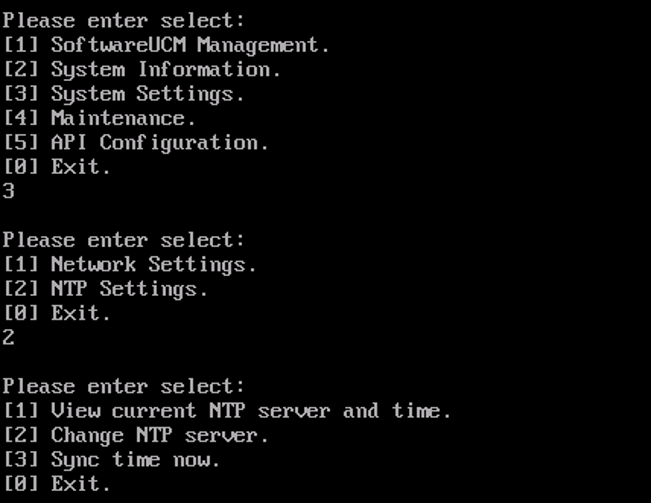
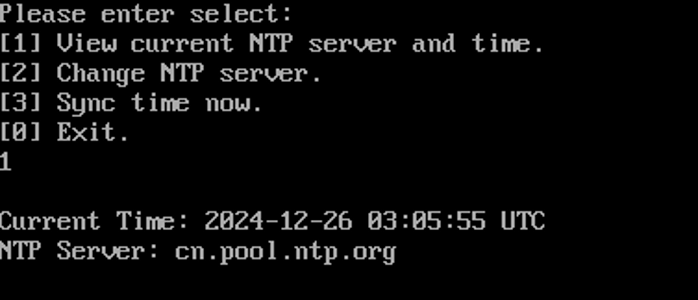
- View the current NTP server and time
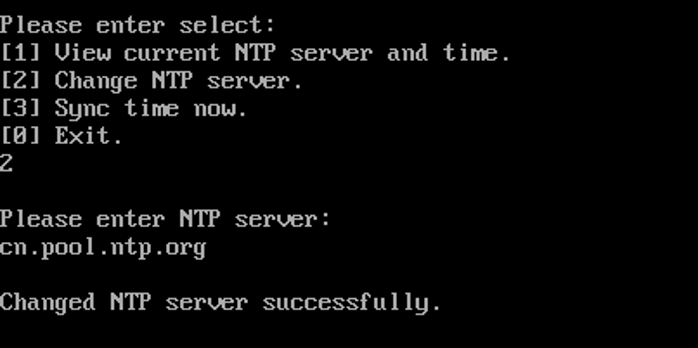
- Change the NTP server.
- Sync time now
RPS (Receive Packet Steering)
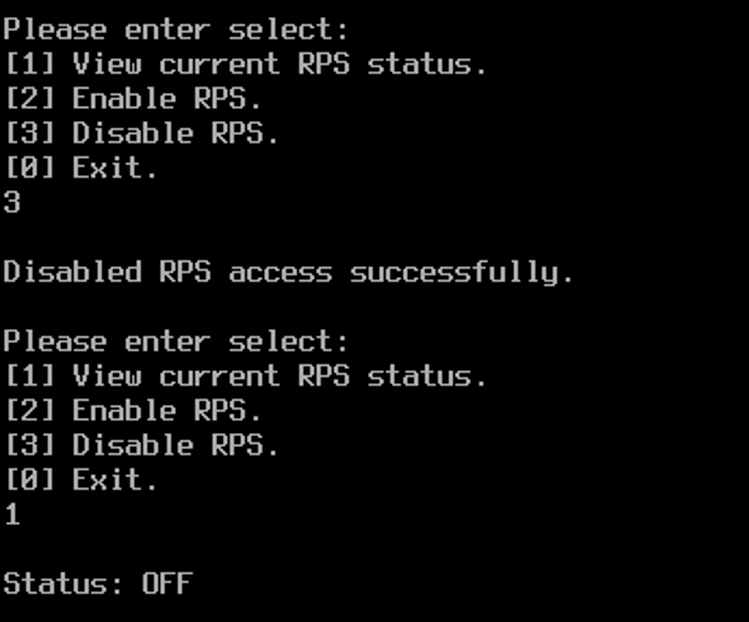
Receive Packet Steering is a technique that used to balance the load between multiple network interfaces to avoid receiving and sending network data over one interface resulting in creating a bottleneck.
- Enter RPS Settings
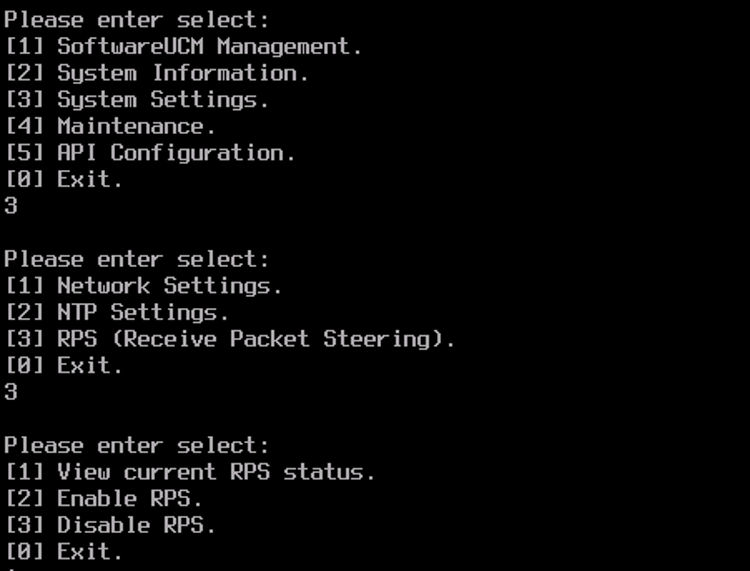
- View current RPS Status
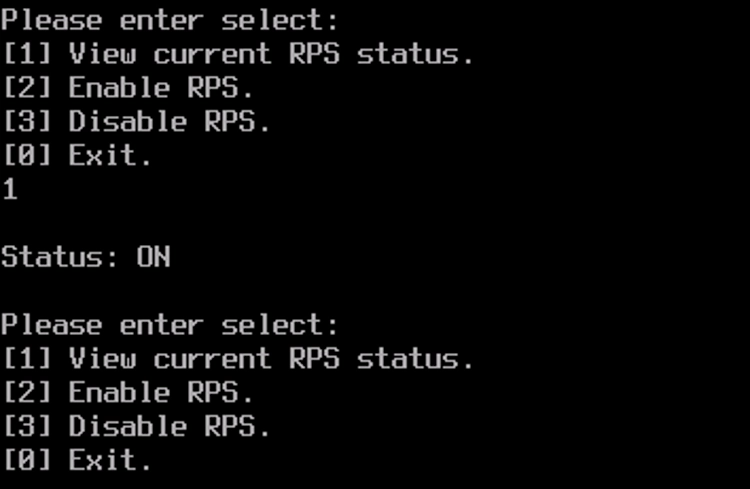
- Enable RPS
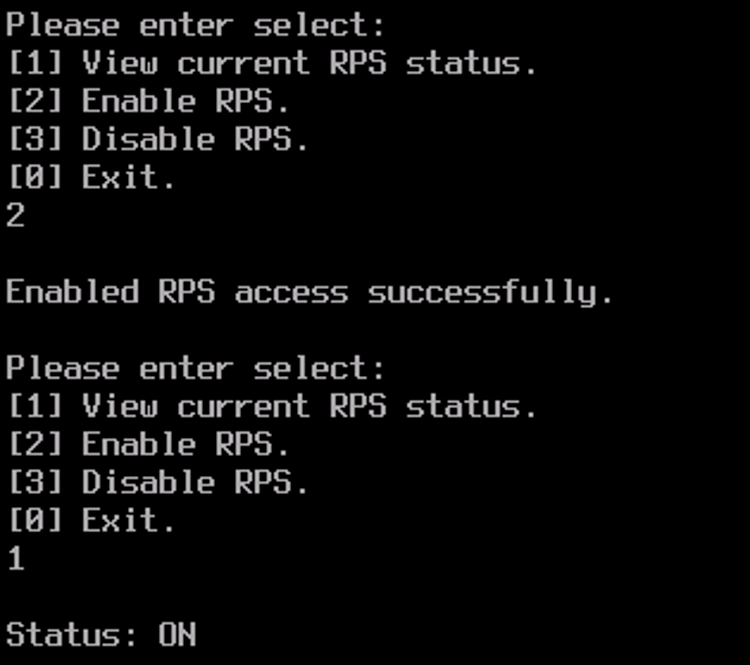
- Disable RPS
MAINTENANCE
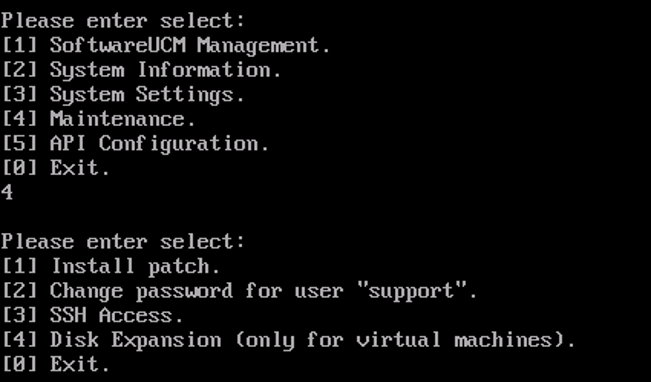
Under the Maintenance section, the user can do the following:
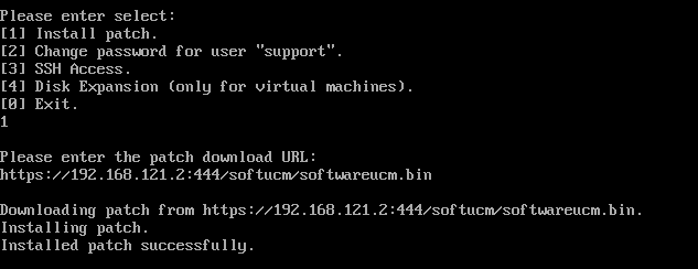
- Install a patch for the system.
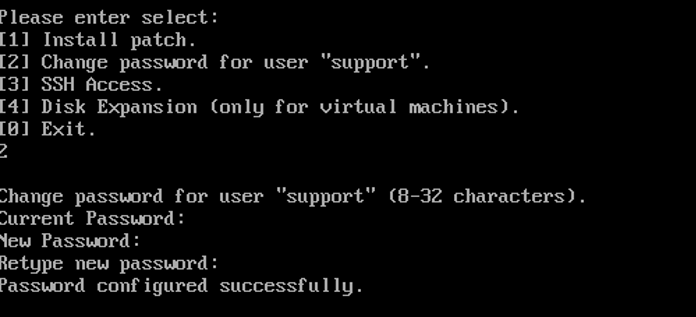
- Change the password for the user “support”.
- Enable or disable SSH access.
- Expand the storage space for the system, in case it is installed on a virtual machine.
Install Patch
Change Password for User “support”
SSH Access Configuration
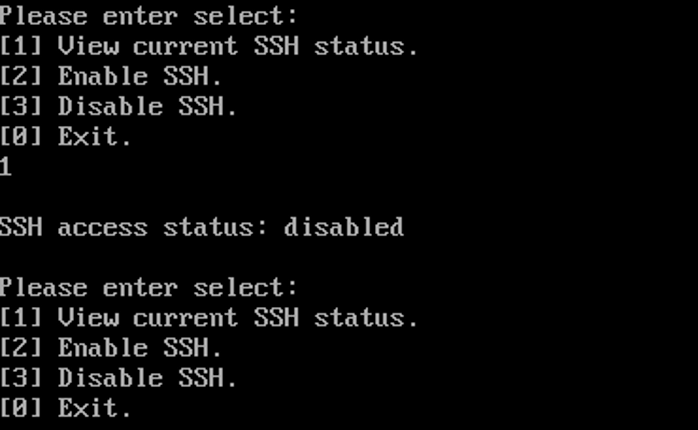
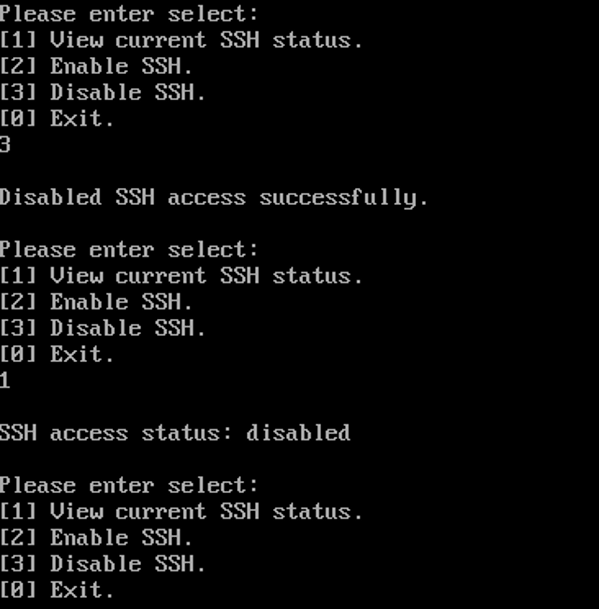
SSH allows to access and manage the system remotely. It requires enabling SSH from the console menu. The steps below illustrate how to enable SSH.
- Enter SSH Access.
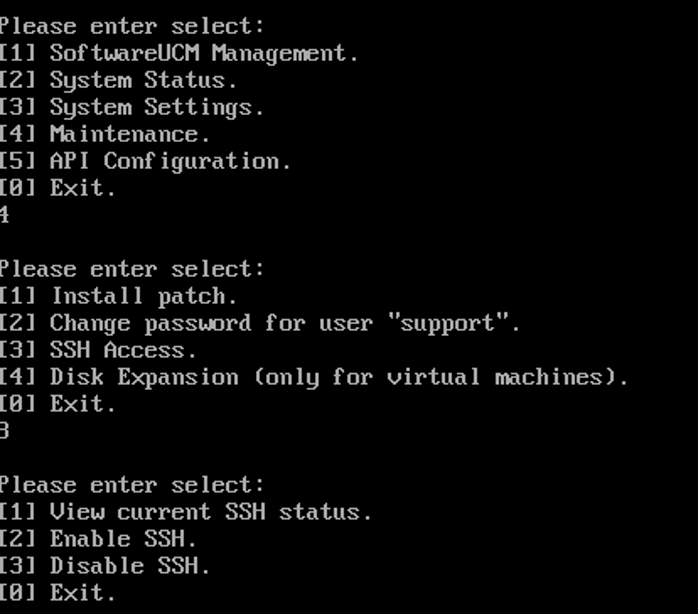
- View current SSH status.
- Enable SSH.
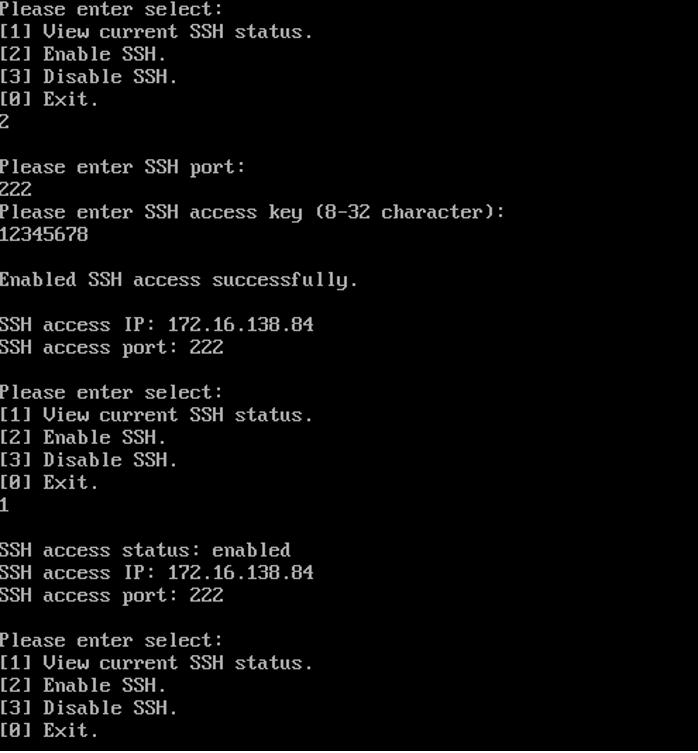
If the user is encountering issues with the general functioning of the SoftwareUCM, the user can provide the access IP address, the access port, and the access key.
- Disable SSH.
Disk Expansion (Only for virtual machines)
Please refer to the Disk Expansion user guides.
- SoftwareUCM Disk Expansion – VMWare Workstation Guide.
- SoftwareUCM Disk Expansion – VirtualBox Guide.
- SoftwareUCM Disk Expansion – KVM Guide.
- SoftwareUCM Disk Expansion – Hyper-V Guide.
API CONFIGURATION
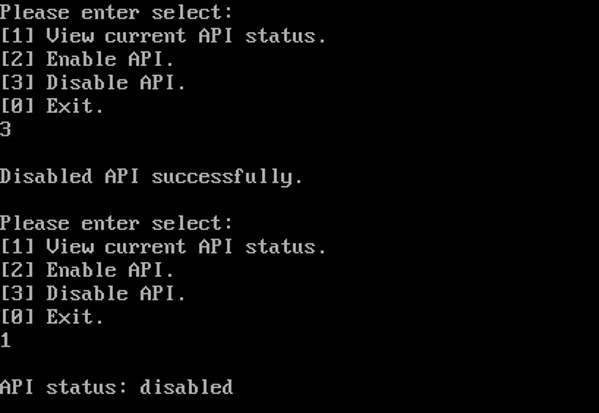
API Configuration menu allows the user to enable/disable access to the API of the SoftwareUCM instance(s).
- Enter the API Configuration.
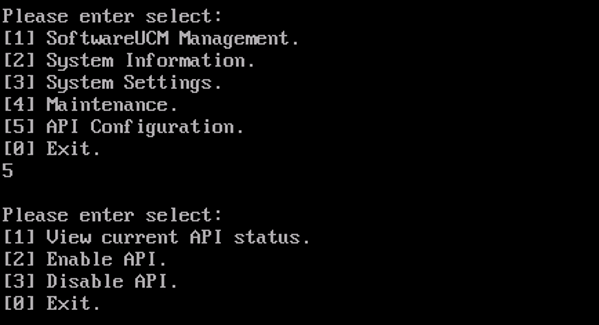
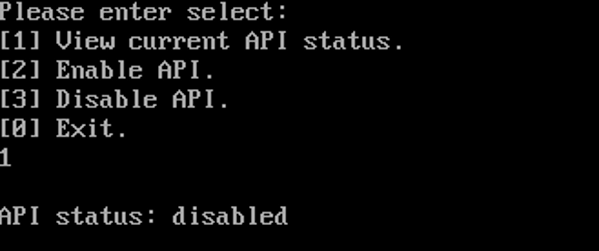
- View API’s current status.
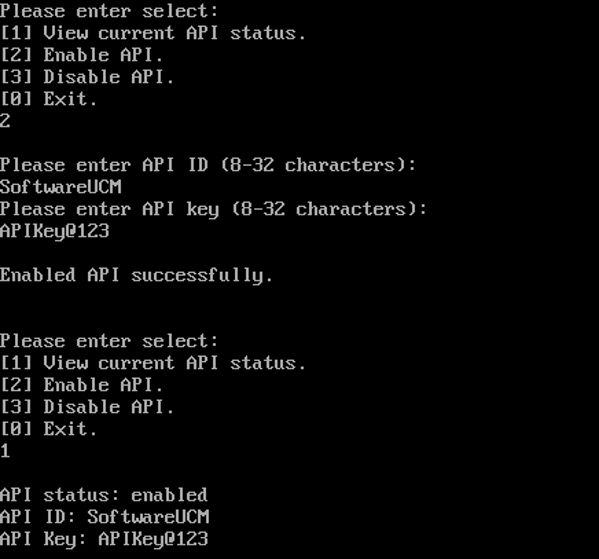
- Enable API.
- Disable API.