
WELCOME
Manage the network-based devices at any time from anywhere using an Android device with the GWN app. This free app links seamlessly with devices registered in GWN.Cloud or GWN Manager, and allows users to conveniently monitor and manage the network established by GWN devices. The GWN app extends web features to smartphones to allow you to manage the network and be productive while on the go: monitor network/device/client status in different periods, notify alert information once an alert event occurs, add the device to the network via phone camera scanning or manually fill in device MAC and its corresponding password, monitor device details including usage and other information, support debug tools for problem-tracking, configure your network as well as devices according to your needs, and much more. There is no purchase necessary to manage the network-based devices with the GWN app.
GETTING STARTED
Getting GWN App
GWN app is compatible with most Android devices running Android 5.0 or higher, including mobile phones, tablets, etc.
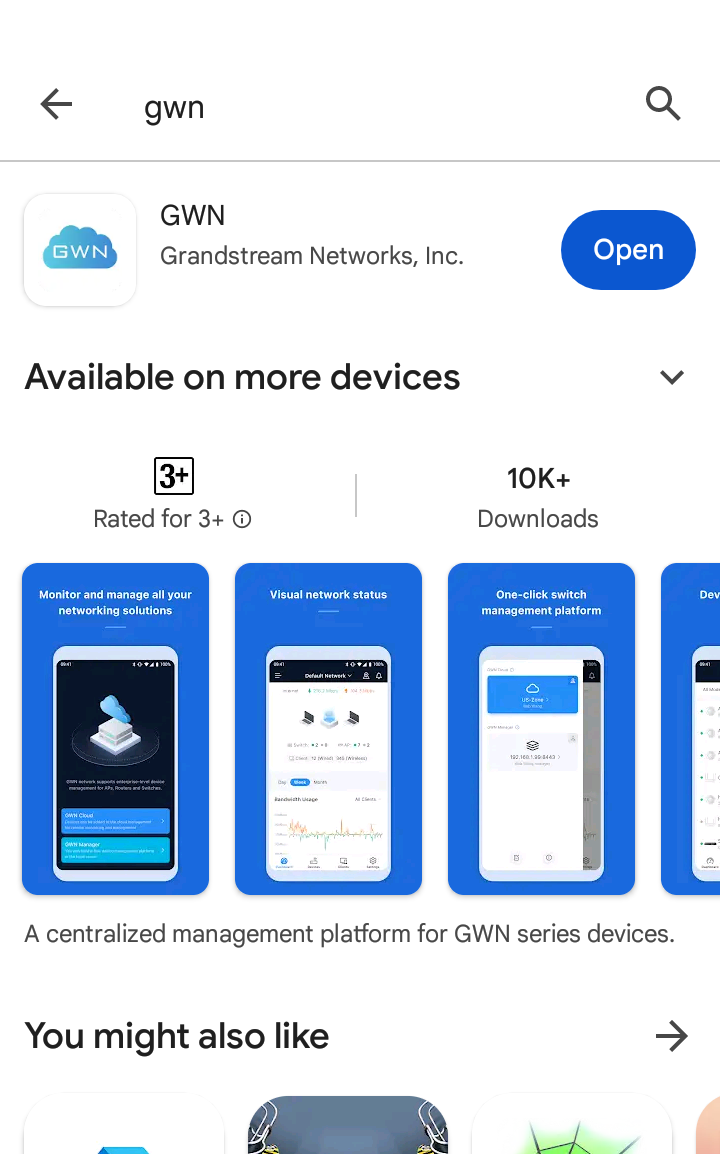
The app is available on Google Play.
Login to the GWN App
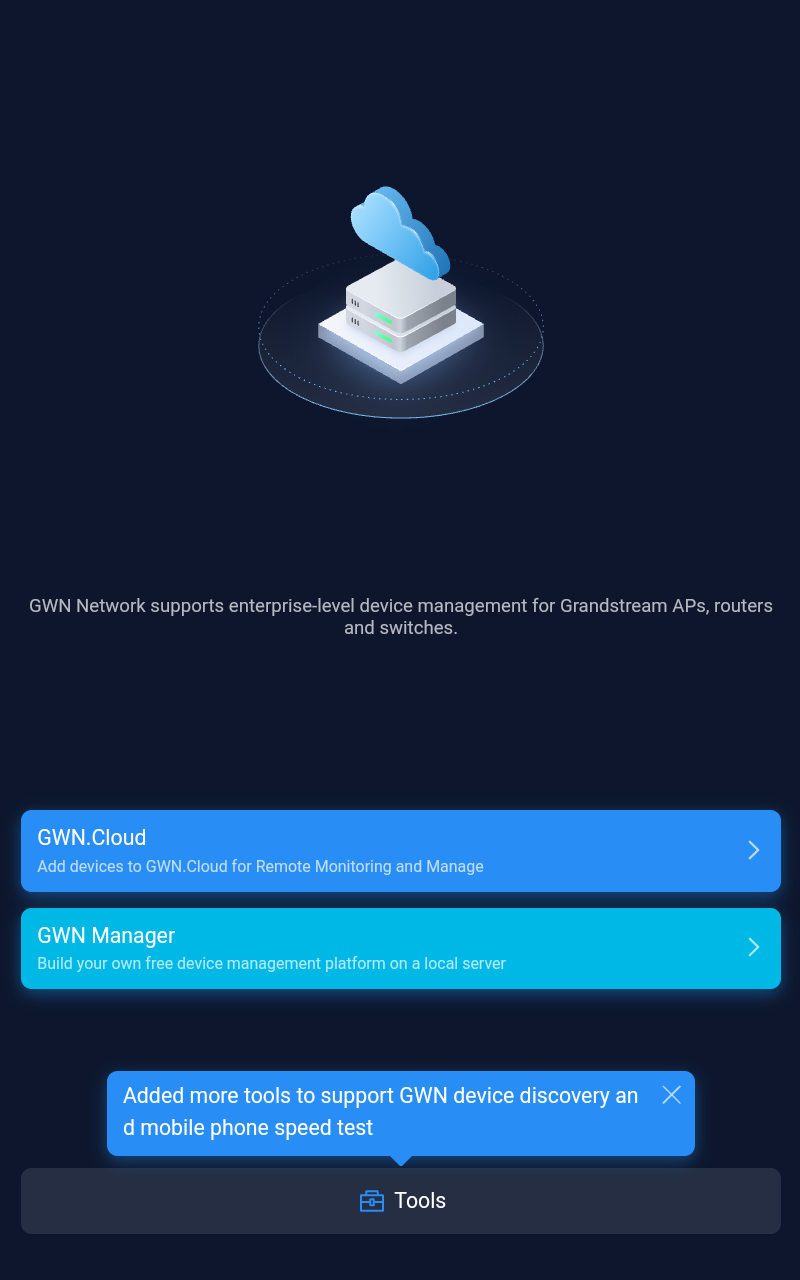
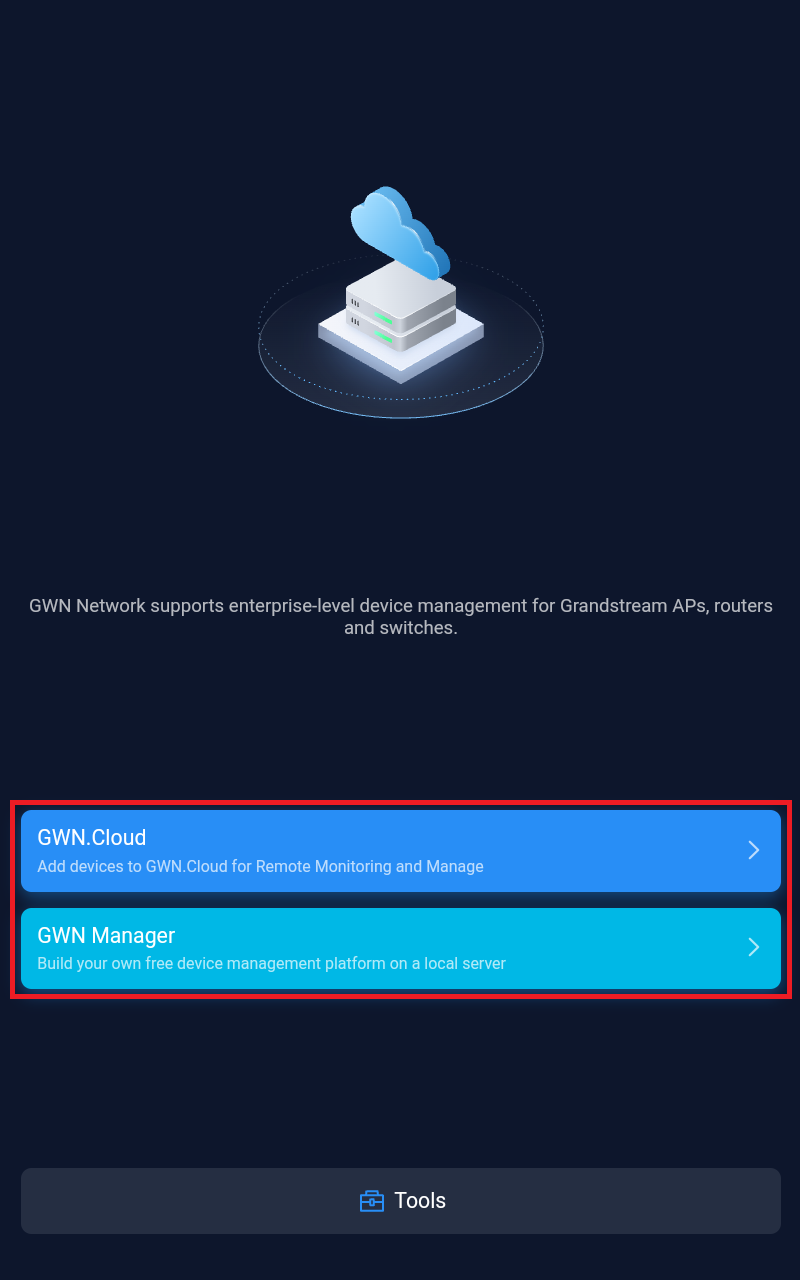
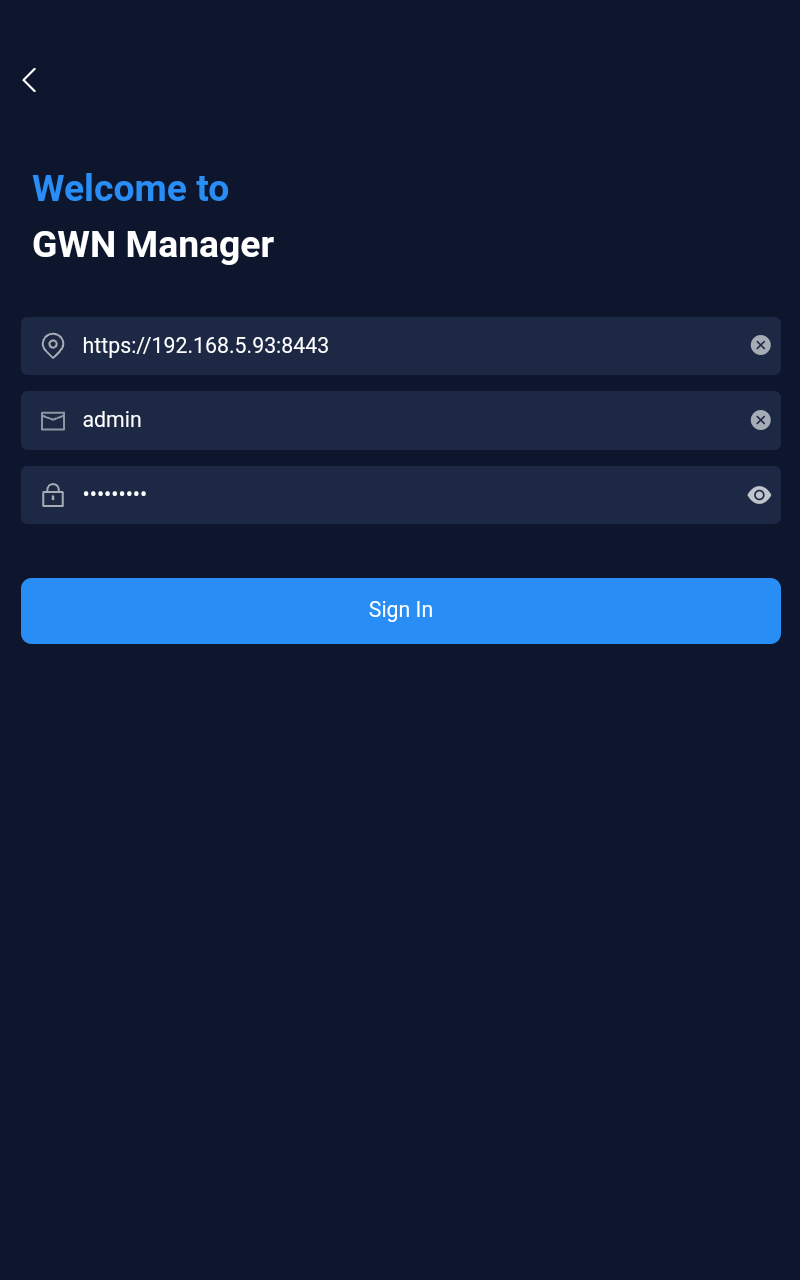
When you open the GWN app, you will be greeted by a screen that has two options, one for the GWN Cloud platform (GWN.Cloud), and one for the GWN on-premise management platform (GWN Manager). Please refer to the screenshot below.
To use the GWN app, users need to have an account previously created on a GWN Management Platform or be assigned a role/custom role by the GWN Management Administrator.
- Refer to this link to sign up for GWN.Cloud: https://www.gwn.cloud/login
- Refer to these links to install GWN Manager and create an account after that:
GWN Manager – Quick Installation Guide
GWN Manager – Deploying a Virtual Machine from an OVA file
Login screen tools
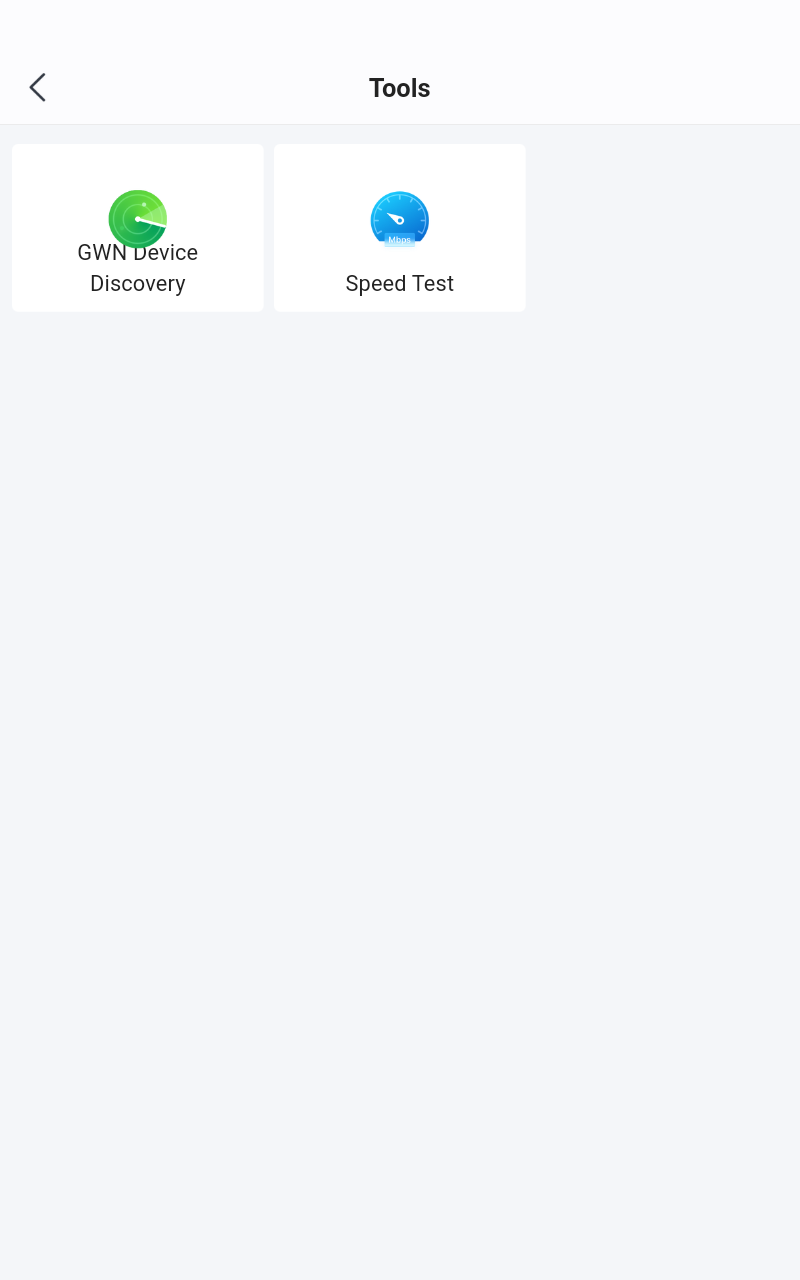
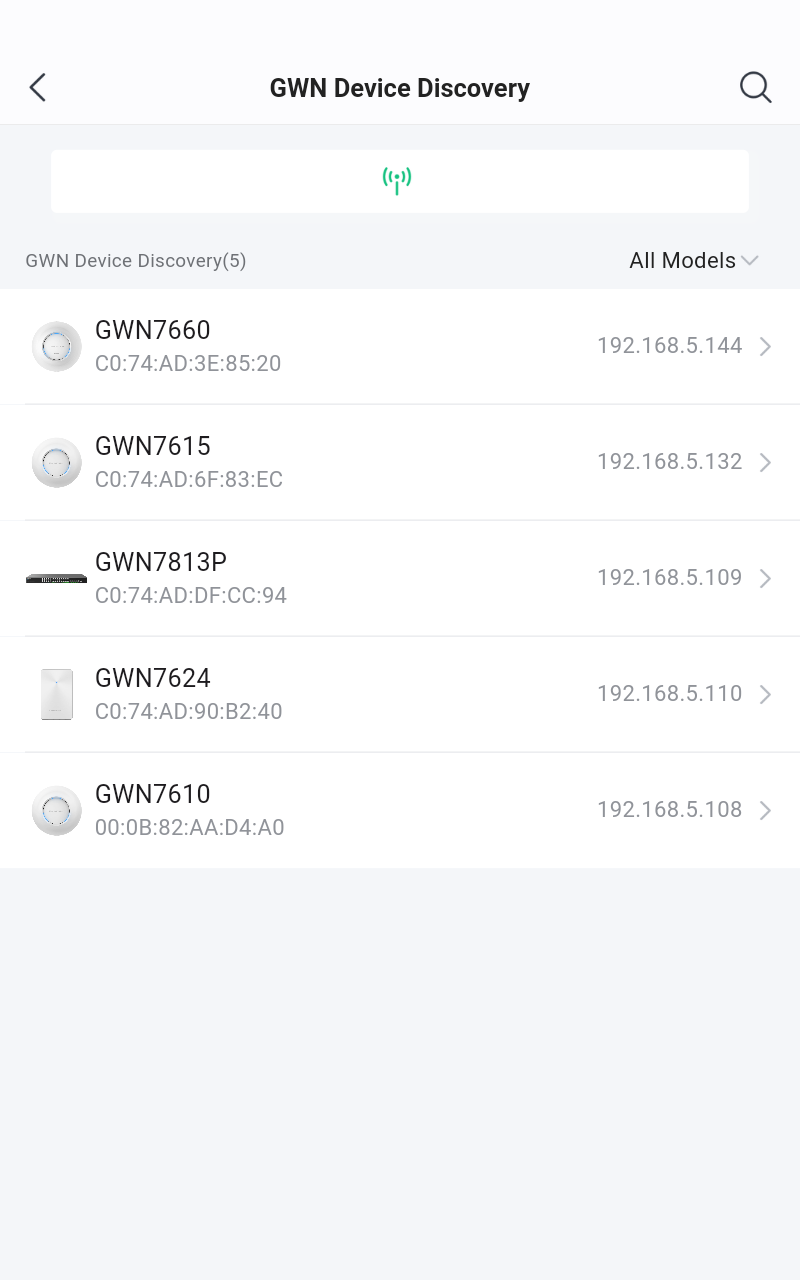
Even before login, the user has some tools to use to either discover GWN devices on the same network or run a mobile speed test to evaluate the network performance and know how many GWN devices are discoverable on the network with very useful information like the GWN device IP/MAC addresses, device model, version number and type (master or slave). Please refer to the figures below:
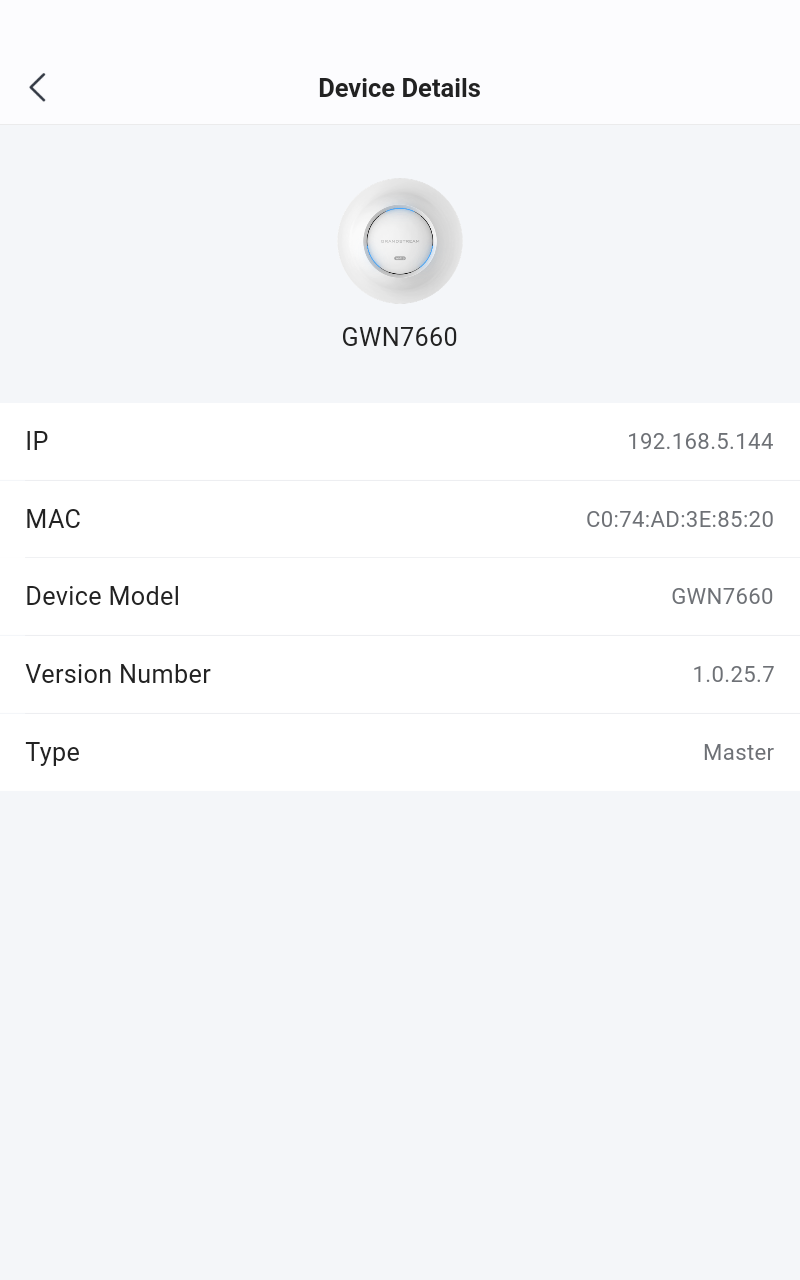
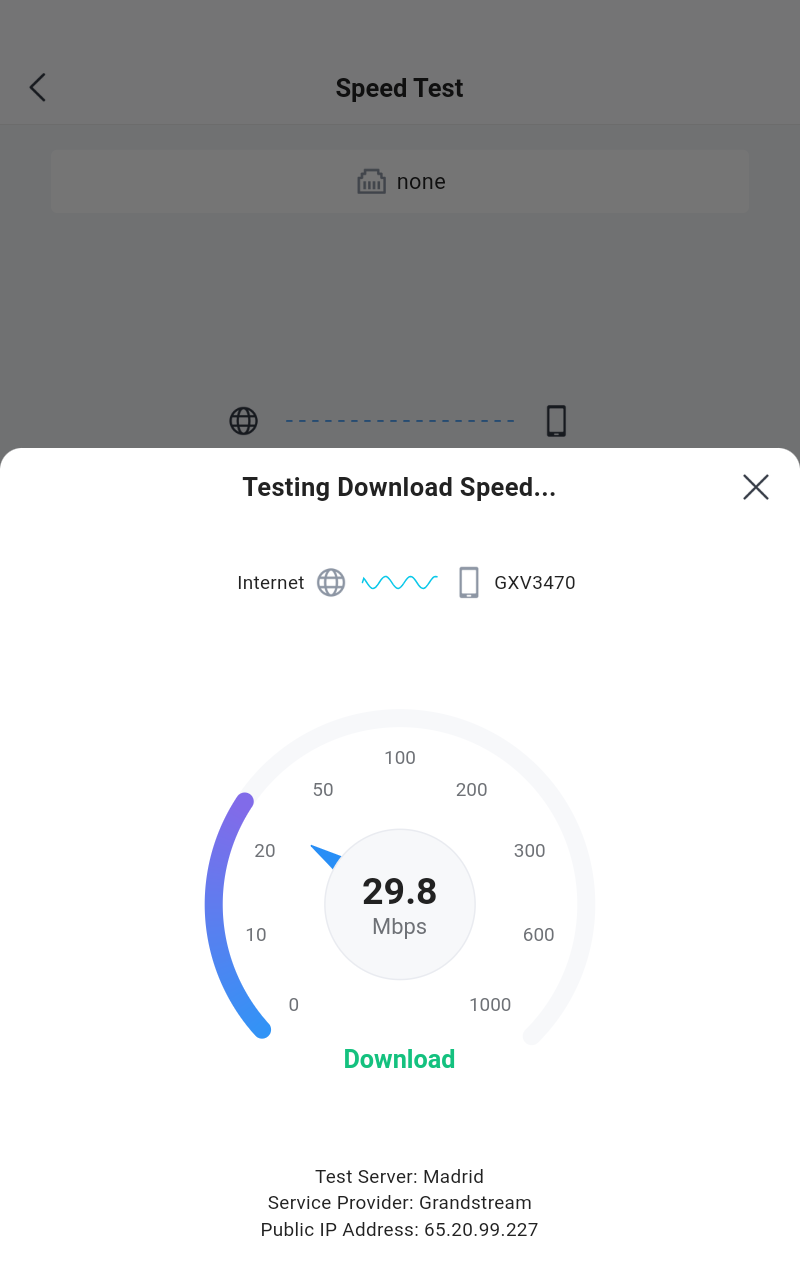
For more details about Speed Test, please AP Details – Tools.
Once the GWN app is installed on your device, click on the app icon to start it, then click on GWN.Cloud or GWN Manager to log in.
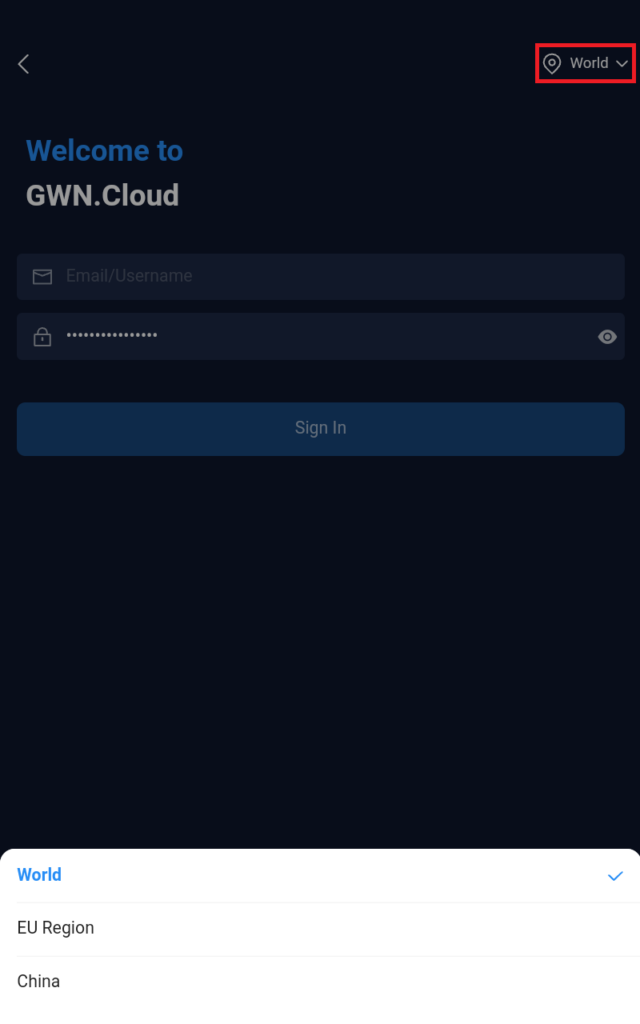
- GWN.Cloud: enter the Email/Login Name and Password of the account previously created.
- GWN Manager: enter the server address (IP address), Email/Login Name, and password.
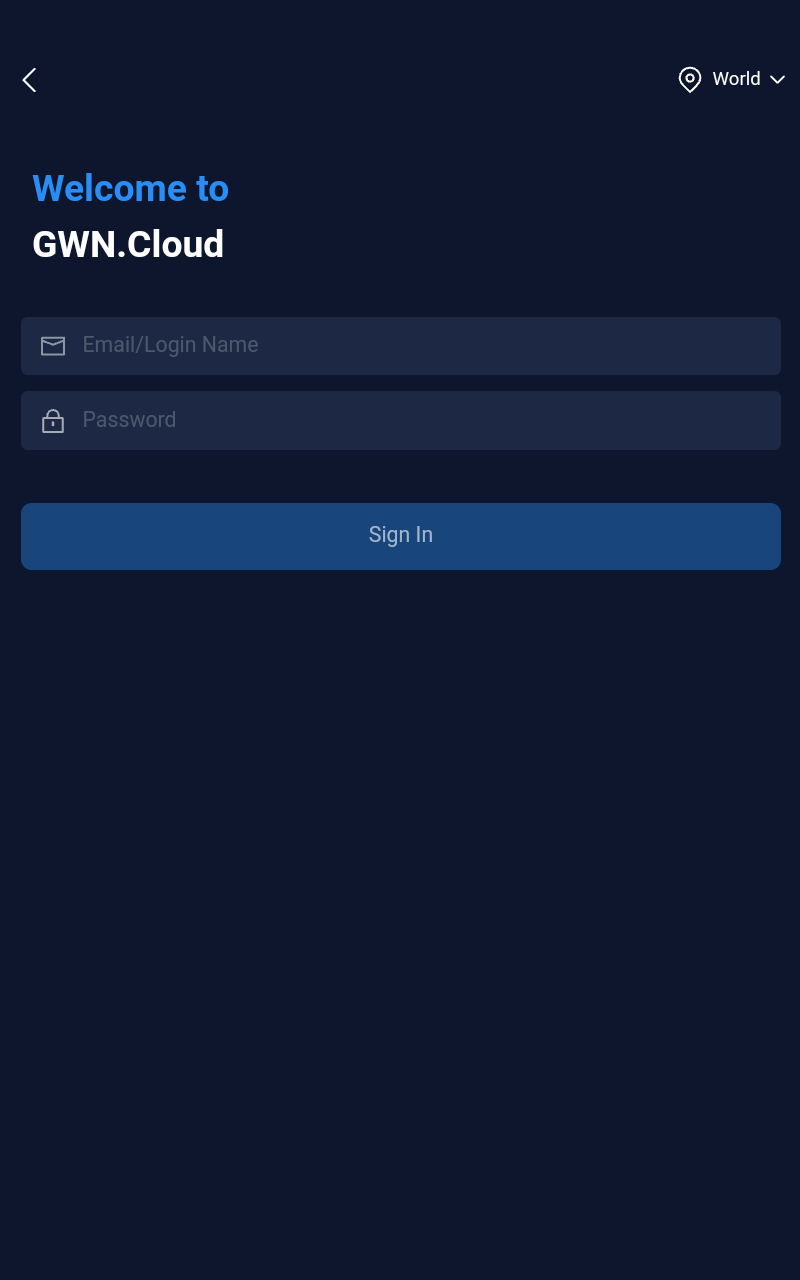
For GWN.Cloud, on the top right corner, users could specify which zone to use:
- Select the proper Zone World, EU, or China Region for your GWN.Cloud Account
About
The About page shows the version of the app installed on your mobile phone and if an upgrade is available.
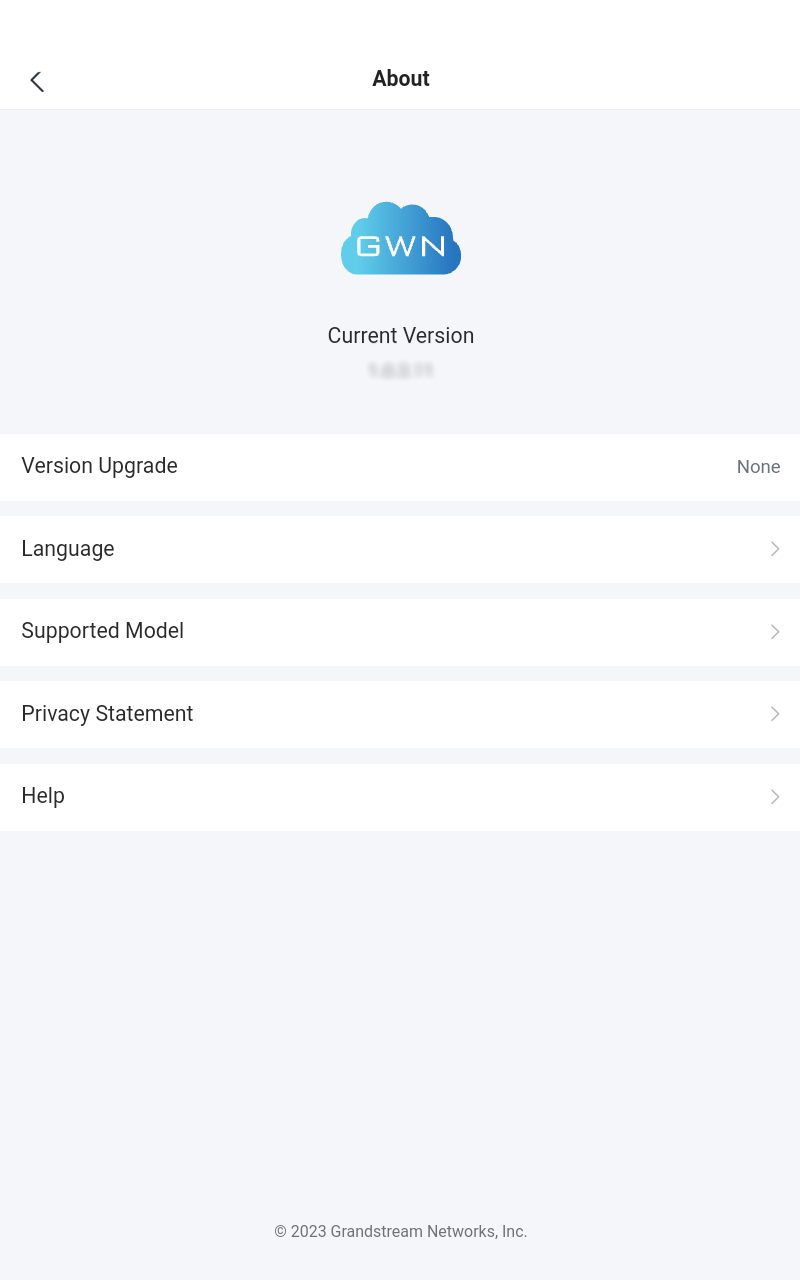
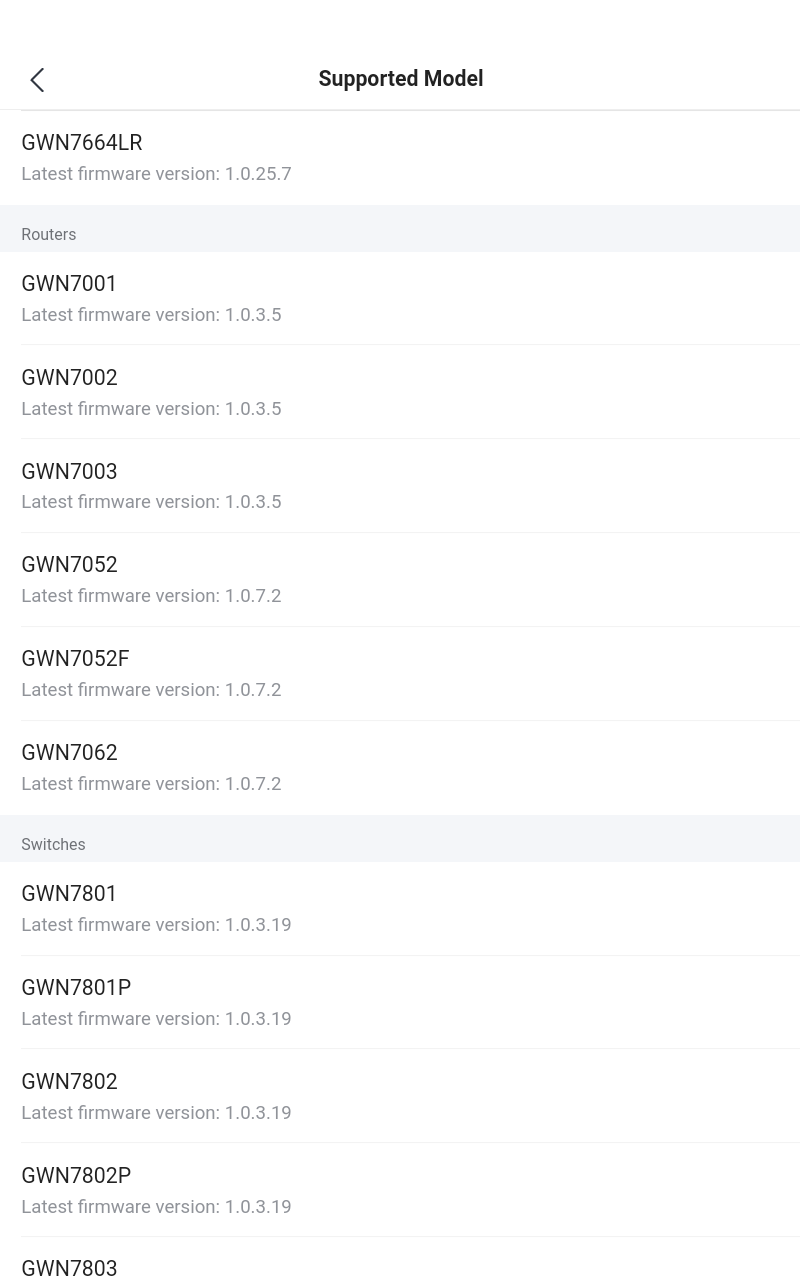
The user can also click on “Supported Model” to see the supported models and the latest firmware version for each device.
Dashboard
The Dashboard page provides general information that can be used to monitor both networking devices and clients connected to them.
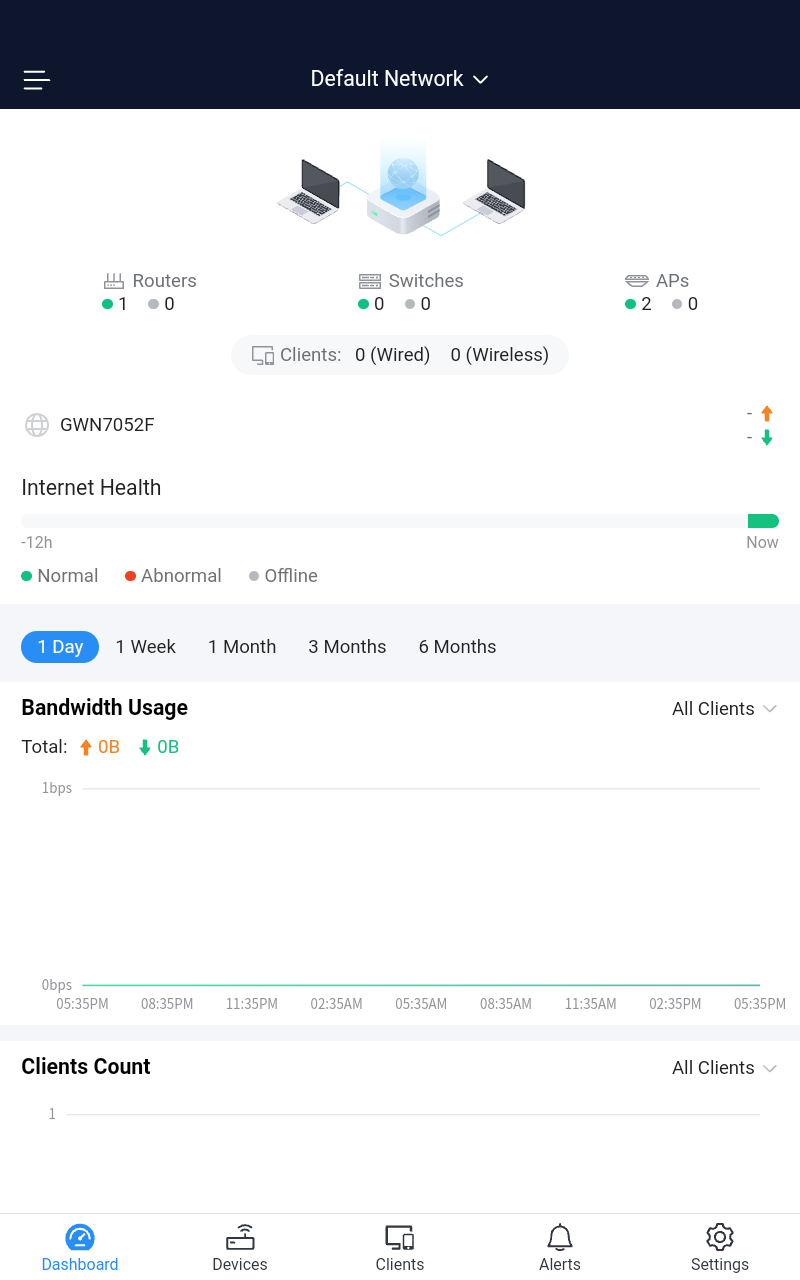
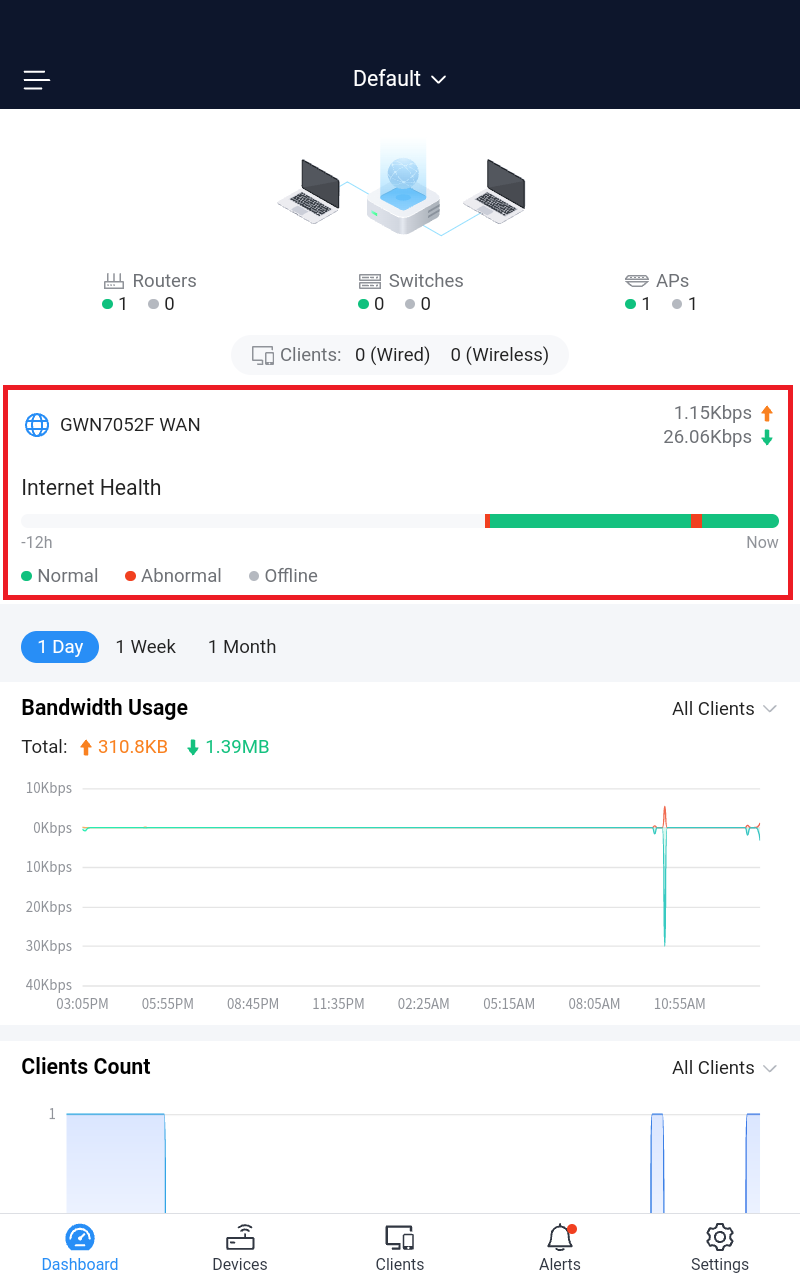
Internet Health
Network Health Monitor is a feature that monitors the WAN (WAN ports or Device group) and displays the WAN status for the last 12 hours for each WAN with color code: Green (Normal), Red (Abnormal), and Grey (Offline).
On the Dashboard screen under Internet Health, a graphical representation of the network health is displayed for the last 12 hours. Please refer to the figure below:
Bandwidth Usage and Clients Count
From the Bandwidth usage and Clients count interface, users can monitor their bandwidth as well as the number of clients connected per time. The time range for monitoring can be set to 1 Day, 1 Week, or 1 Month.
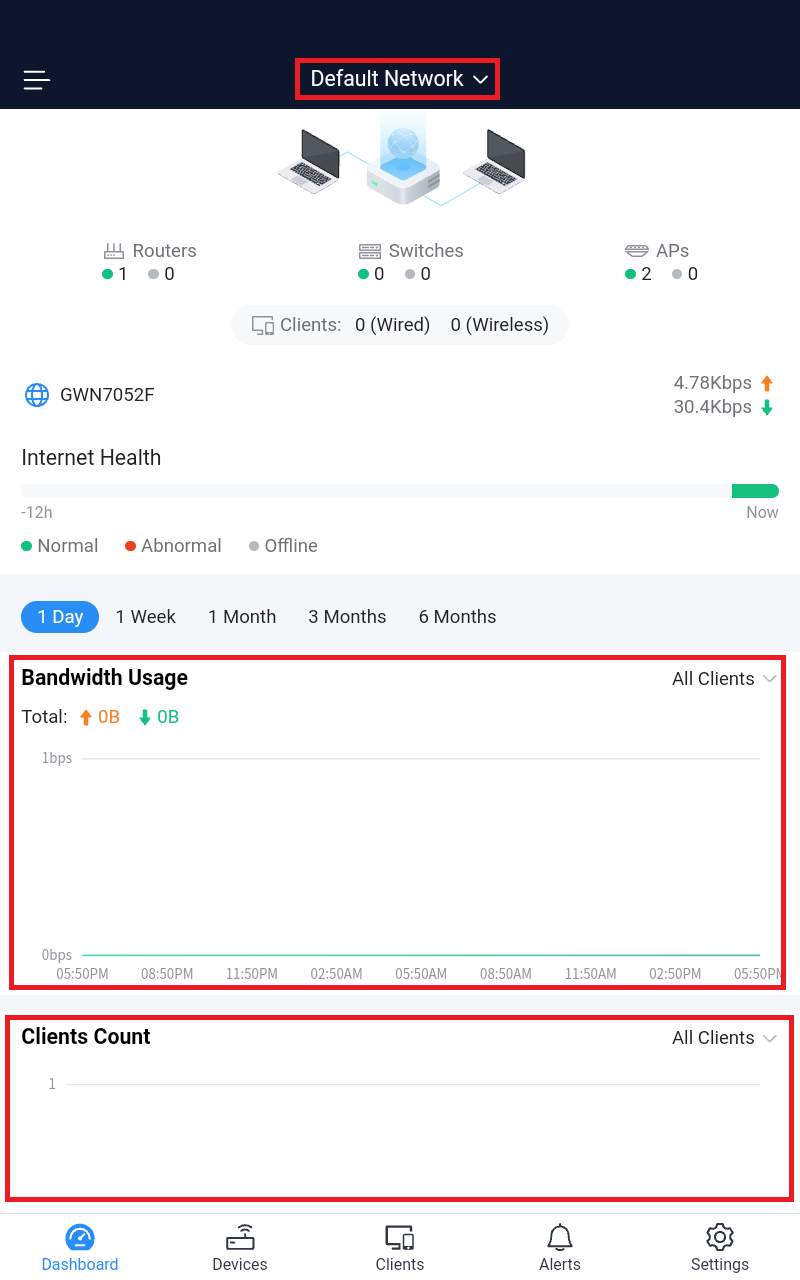
- Press the drop-down arrow on the top to choose your network
- Available information:
- Bandwidth Usage Upload/Download
- Clients Count
- Select to display information either in 1 day, 1 week, 1 month, 3 months or 6 months.
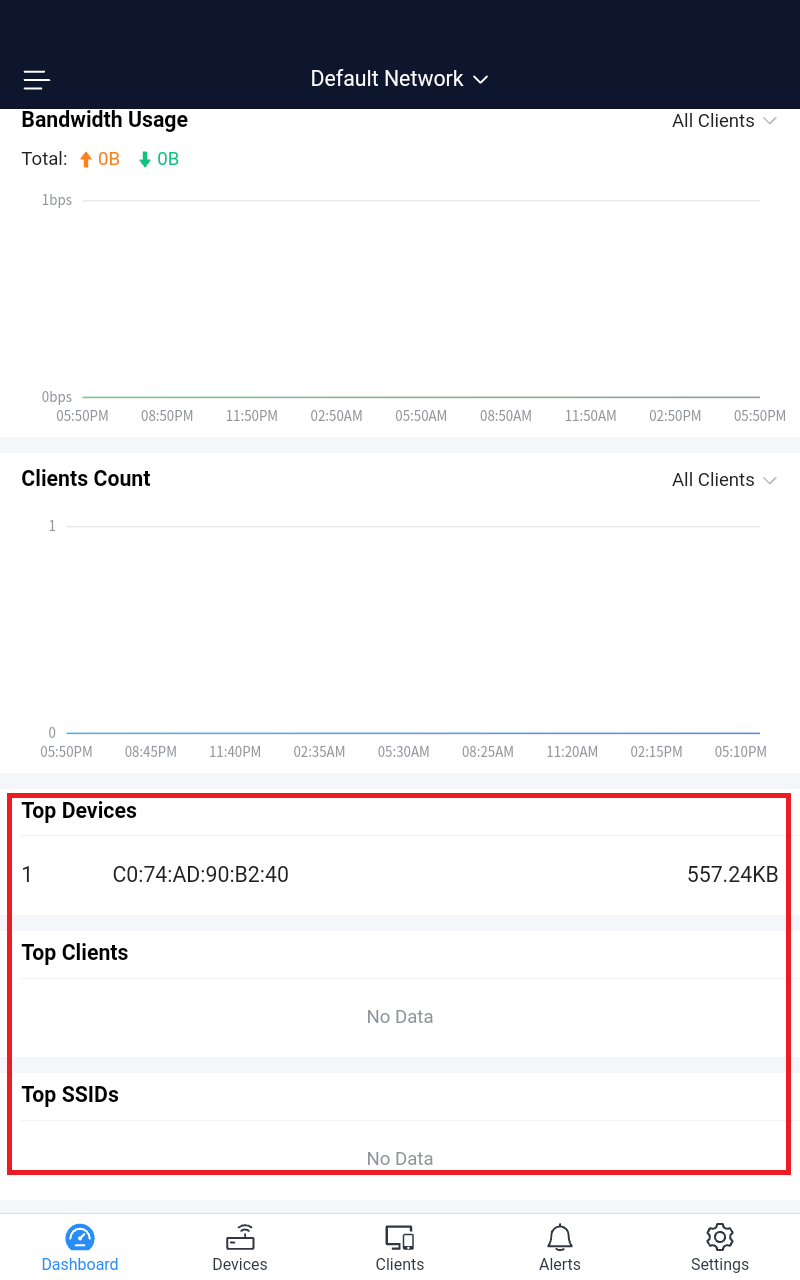
Top Devices, Clients, SSIDs, Websites
The top Devices, Clients, SSIDs, and Websites interface as the name suggests displays the top Devices, Clients, SSIDs, and Websites based on the data/Bandwidth usage.
Devices
The Devices tab displays the list of devices paired with the GWN platform for each Network/Model and allows users to add new GWN devices.
The following tables show the requirements of Grandstream networking products including GWN Access Points, GWN Routers, GWN Switches, and GWN App versions (Android and iOS) for GWN Management Platforms (GWN.Cloud & GWN Manager):
- GWN Access Points: minimum and recommended version
Model | Minimum | Recommended |
GWN7600 | 1.0.15.20 | 1.0.25.10 |
GWN7600LR | 1.0.15.20 | 1.0.25.10 |
GWN7602 | 1.0.15.20 | 1.0.25.10 |
GWN7605 | 1.0.15.18 | 1.0.25.10 |
GWN7605LR | 1.0.15.18 | 1.0.25.10 |
GWN7610 | 1.0.15.18 | 1.0.25.10 |
GWN7615 | 1.0.15.18 | 1.0.25.10 |
GWN7624 | 1.0.21.5 | 1.0.25.10 |
GWN7625 | 1.0.21.5 | 1.0.25.10 |
GWN7630 | 1.0.15.20 | 1.0.25.10 |
GWN7630LR | 1.0.15.20 | 1.0.25.10 |
GWN7660 | 1.0.19.4 | 1.0.25.10 |
GWN7660LR | 1.0.19.4 | 1.0.25.10 |
GWN7661 | 1.0.23.26 | 1.0.25.10 |
GWN7662 | 1.0.23.27 | 1.0.25.10 |
GWN7664 | 1.0.21.4 | 1.0.25.10 |
GWN7664LR | 1.0.23.4 | 1.0.25.10 |
AP minimum and recommended version
- GWN Routers: minimum and recommended version
Model | Minimum | Recommended |
GWN7001 | 1.0.1.6 | 1.0.5.30 |
GWN7002 | 1.0.1.6 | 1.0.5.30 |
GWN7003 | 1.0.1.6 | 1.0.5.30 |
GWN7052 | 1.0.5.34 | 1.0.9.34 |
GWN7052F | 1.0.5.4 | 1.0.9.34 |
GWN7062 | 1.0.5.34 | 1.0.9.34 |
Router minimum and recommended version
- GWN Switches: minimum and recommended version
Model | Minimum | Recommended |
GWN7801 | 1.0.3.19 | 1.0.3.37 |
GWN7801P | 1.0.3.19 | 1.0.3.37 |
GWN7802 | 1.0.3.19 | 1.0.3.37 |
GWN7802P | 1.0.3.19 | 1.0.3.37 |
GWN7803 | 1.0.3.19 | 1.0.3.37 |
GWN7803P | 1.0.3.19 | 1.0.3.37 |
GWN7806 | 1.0.1.14 | 1.0.1.14 |
GWN7806P | 1.0.1.14 | 1.0.1.14 |
GWN7811 | 1.0.1.8 | 1.0.1.20 |
GWN7811P | 1.0.1.8 | 1.0.1.20 |
GWN7812P | 1.0.1.8 | 1.0.1.20 |
GWN7813 | 1.0.1.8 | 1.0.1.20 |
GWN7813P | 1.0.1.8 | 1.0.1.20 |
GWN7816 | 1.0.3.8 | 1.0.3.8 |
GWN7816P | 1.0.3.8 | 1.0.3.8 |
GWN7830 | 1.0.3.3 | 1.0.3.3 |
GWN7831 | 1.0.3.3 | 1.0.3.3 |
GWN7832 | 1.0.3.3 | 1.0.3.3 |
Switch minimum and recommended version
- GWN App: minimum and recommended version
Platform | Minimum | Recommended |
iOS | 1.0.5 | 1.6.7 |
Android | 1.0.0.14 | 1.0.6.7 |
App minimum and recommended version
Adding New GWN Device
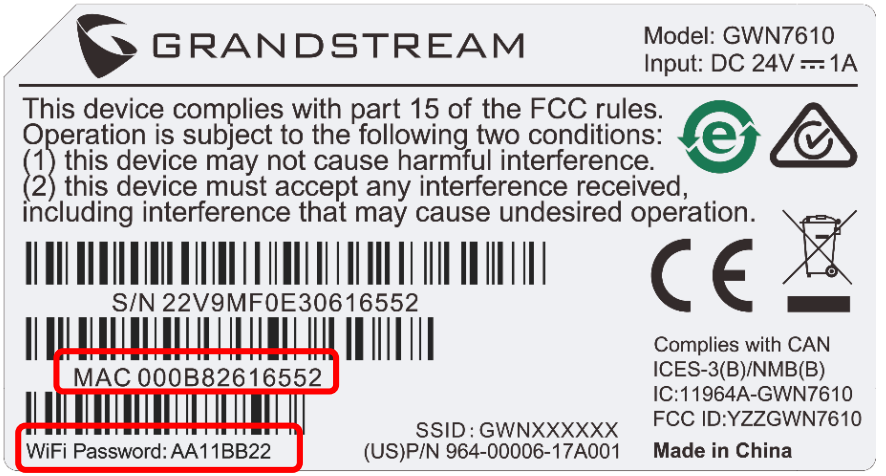
To add a device to GWN.Cloud, the administrator needs two pieces of information:
- MAC address of the device.
- Password printed on the device sticker.
Adding a new device to your GWN.Cloud Account
There are 2 methods to add a GWN device to the cloud using the GWN App:
- Method 1: Adding a new device manually
- Method 2: Adding a new device by scanning the Barcode
Method 1: Adding a new device manually
- Locate the MAC address on the MAC tag of the unit, which is on the device, or the package.
- Locate the Password.
- From the Devices tab, click on the “Plus” button and select Manual Add, then enter device information:
Once, the GWN device information is filled in, please click on the “Done” button.
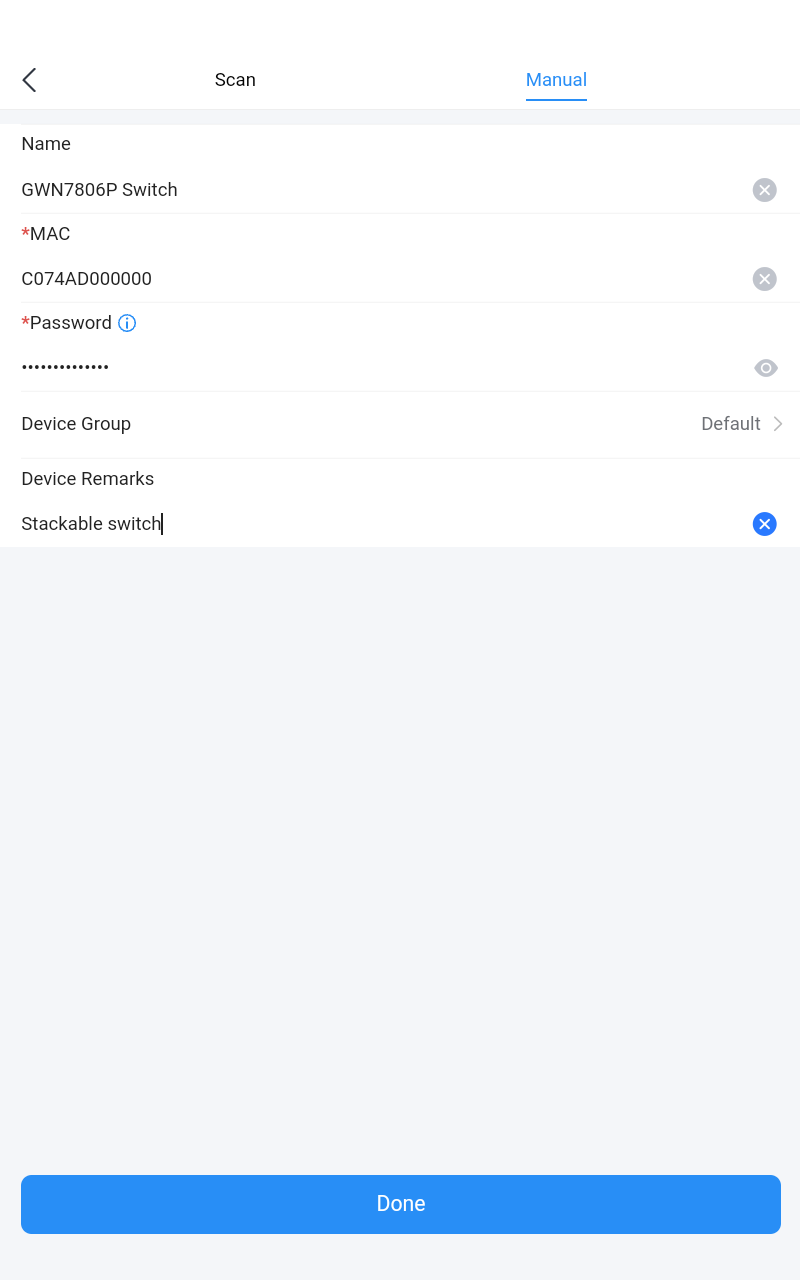
The following table describes the required parameters to add a new device to GWN.Cloud using GWN App.
| Section | Description |
| Name | Enter a name for the new device to identify it easily. |
| MAC | Enter the MAC address of the new device. |
| Password | Enter the device Password. |
| Device Group | Select the device group from the list |
| Device Remarks | Enter a device remarks |
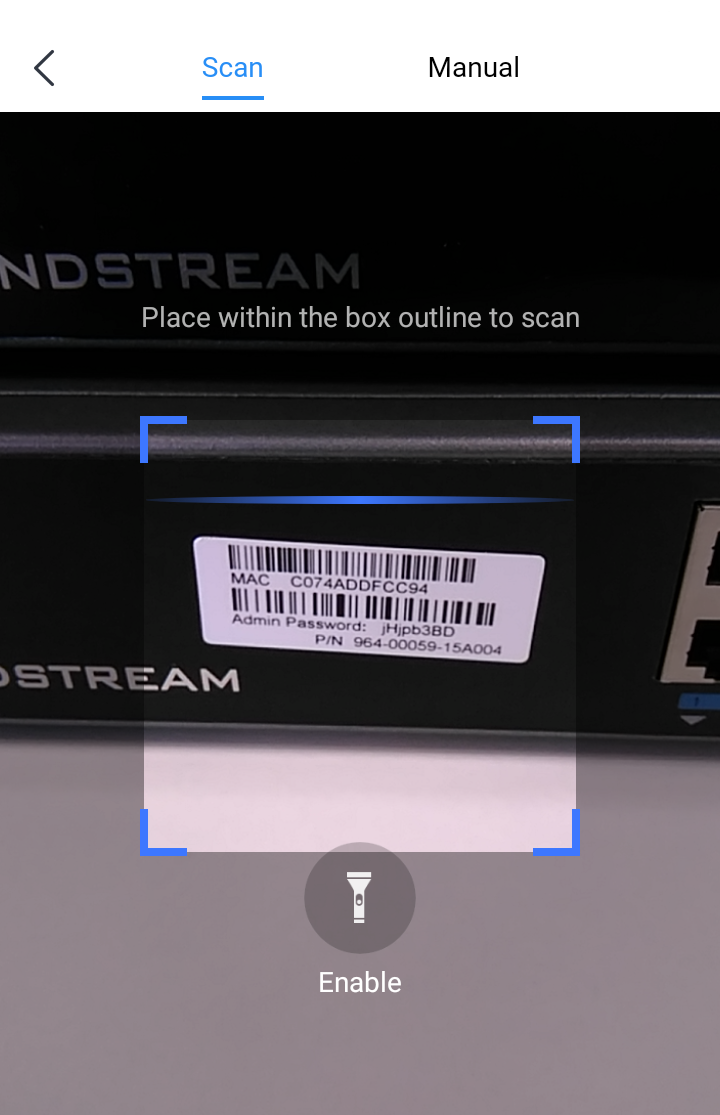
Method 2: Adding a new device by scanning the Barcode
New devices can also be added to GWN.Cloud by Scanning the Barcode from the device sticker using a mobile phone camera.
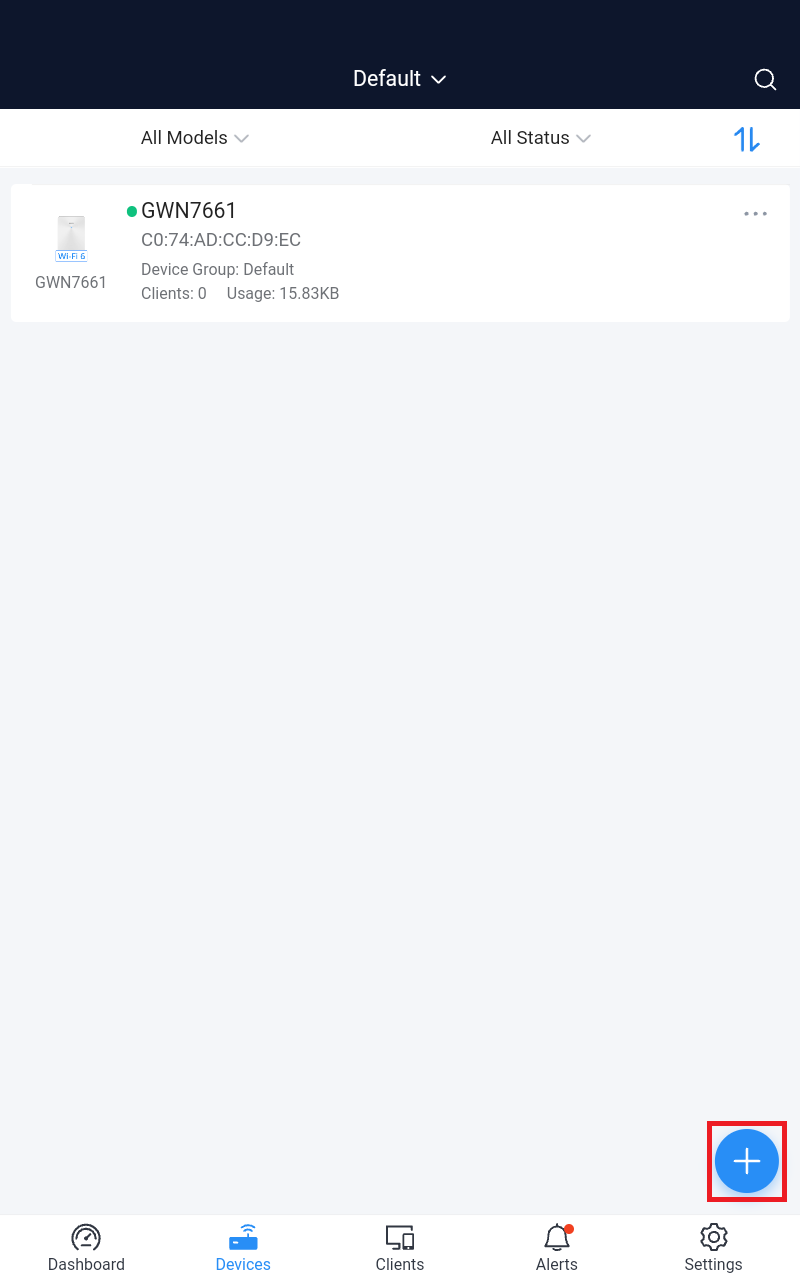
- From the Devices tab click on the “Plus” button and select Scan Add, then point the mobile phone camera to the device’s sticker.
- Once added, the list of devices will be displayed on the Devices tab as shown below:
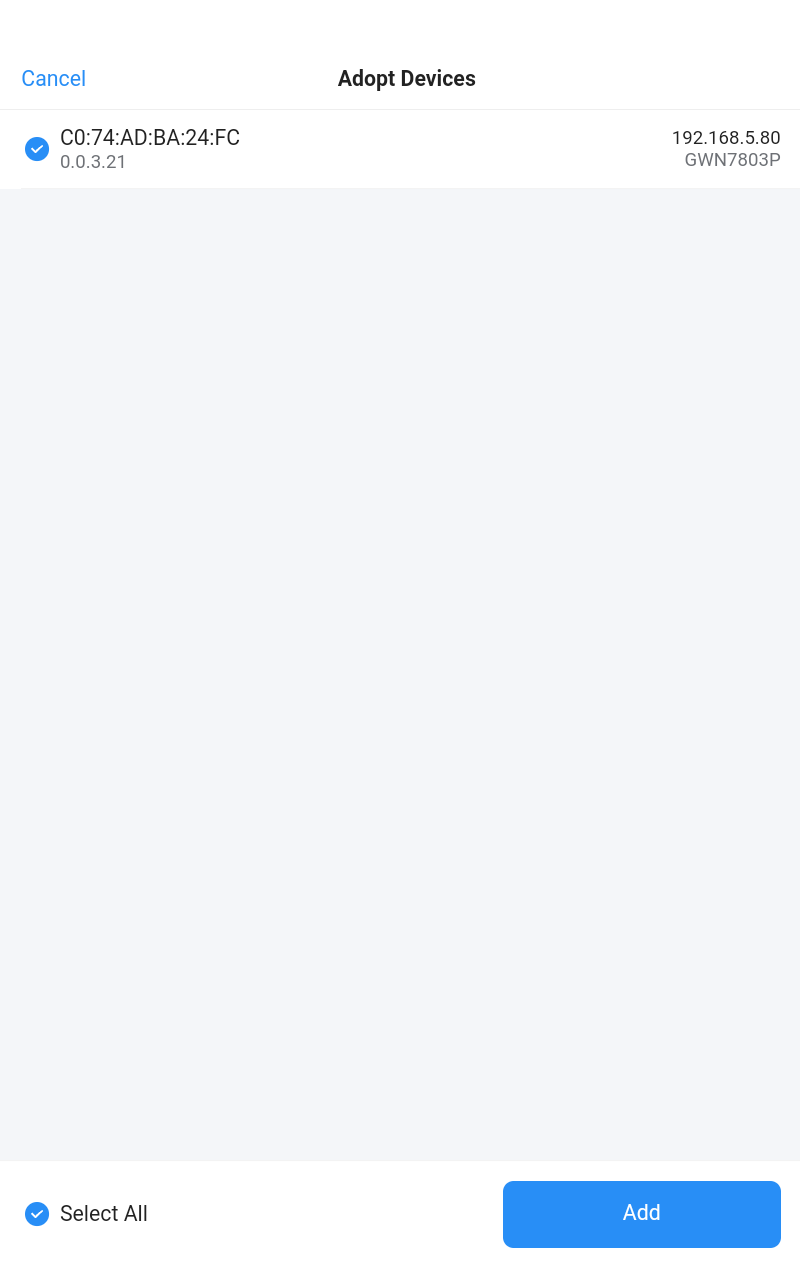
Adopt a new device to your GWN Manager Account
The GWN Manager will automatically scan and detect the available devices on your Network.
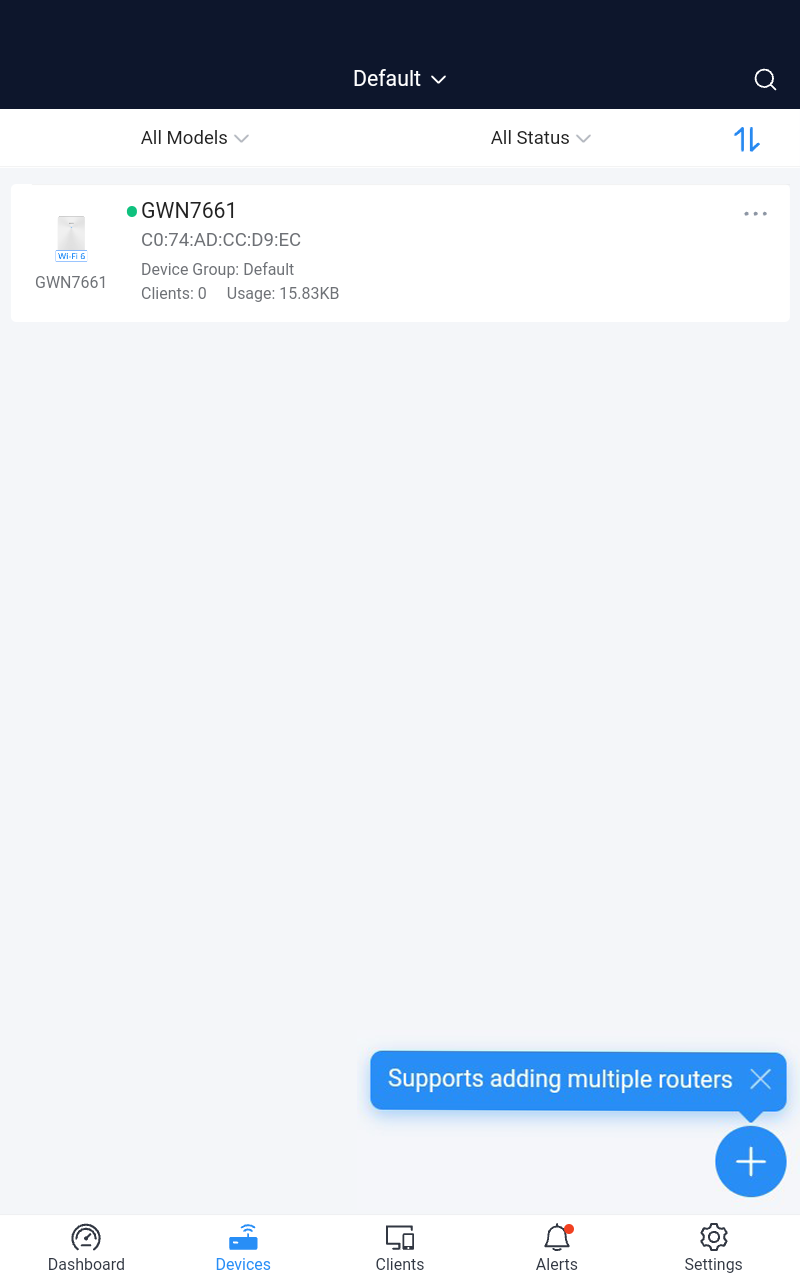
- From the “Devices” tab, click on the “Plus” button.
- The available GWN devices on the same network will be listed here, select the GWN device then click on the “Add” button below.
Then, a pop-up dialog will be displayed to confirm that the GWN device has been added to the GWN Manager successfully.
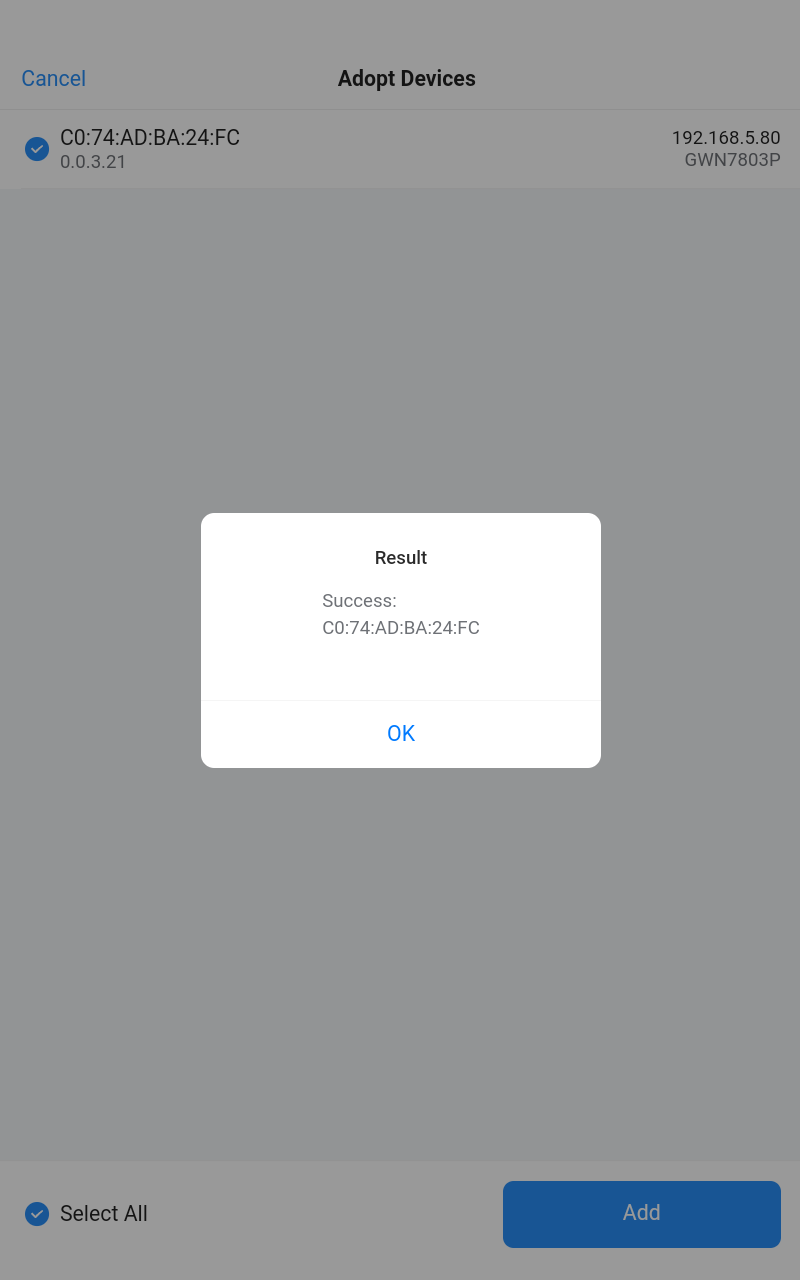
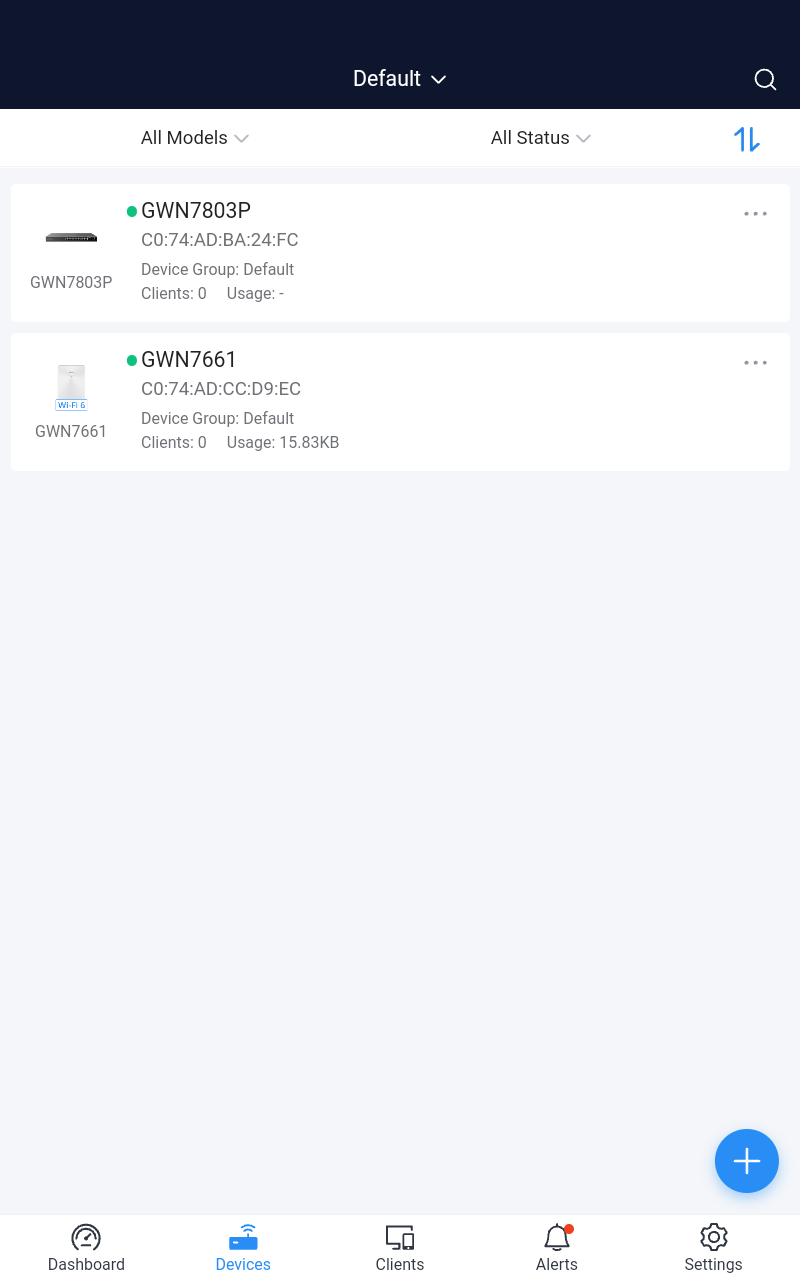
The adopted devices can be found under the “Devices” tab.
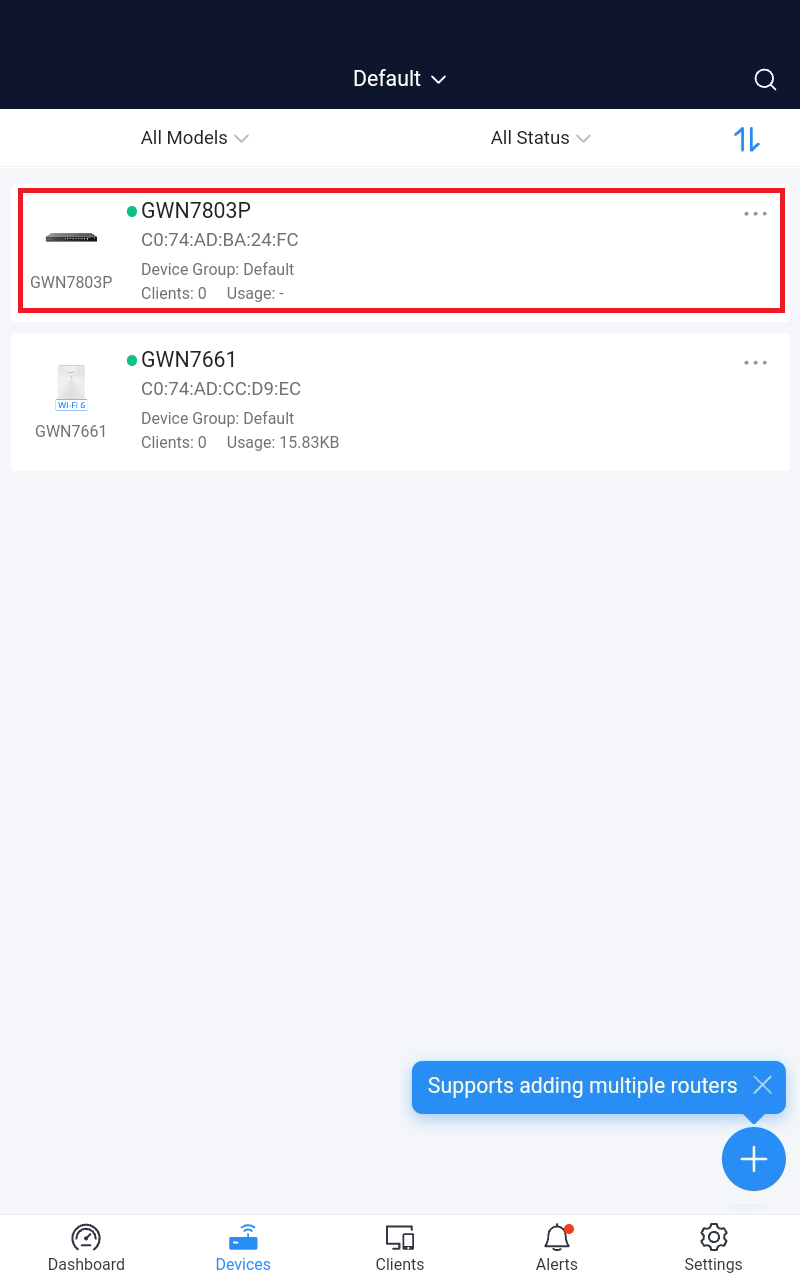
Search/Filter GWN Devices
Select a network from the list and all the devices assigned to it will be displayed then you can filter based on the models or GWN devices’ status (Online, Offline). To search the devices please click on the search icon on the right side. Refer to the figures below.
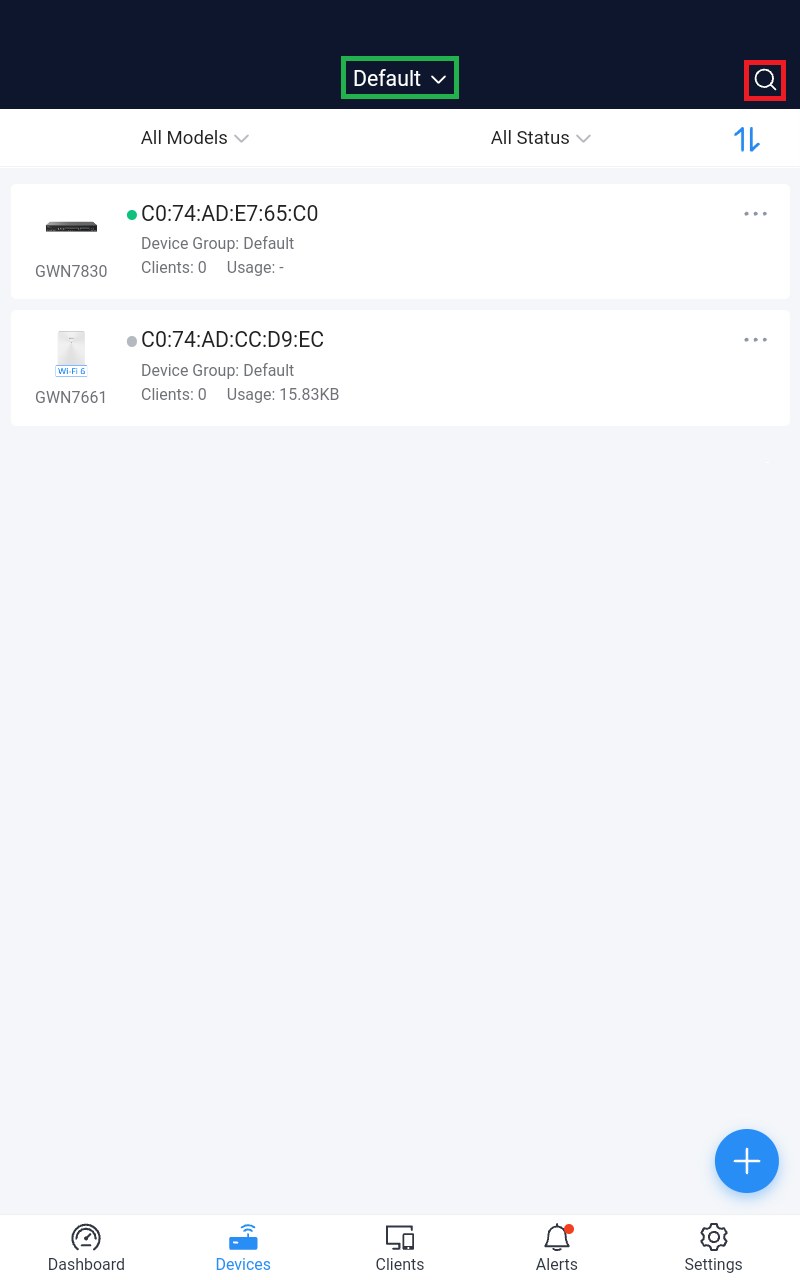
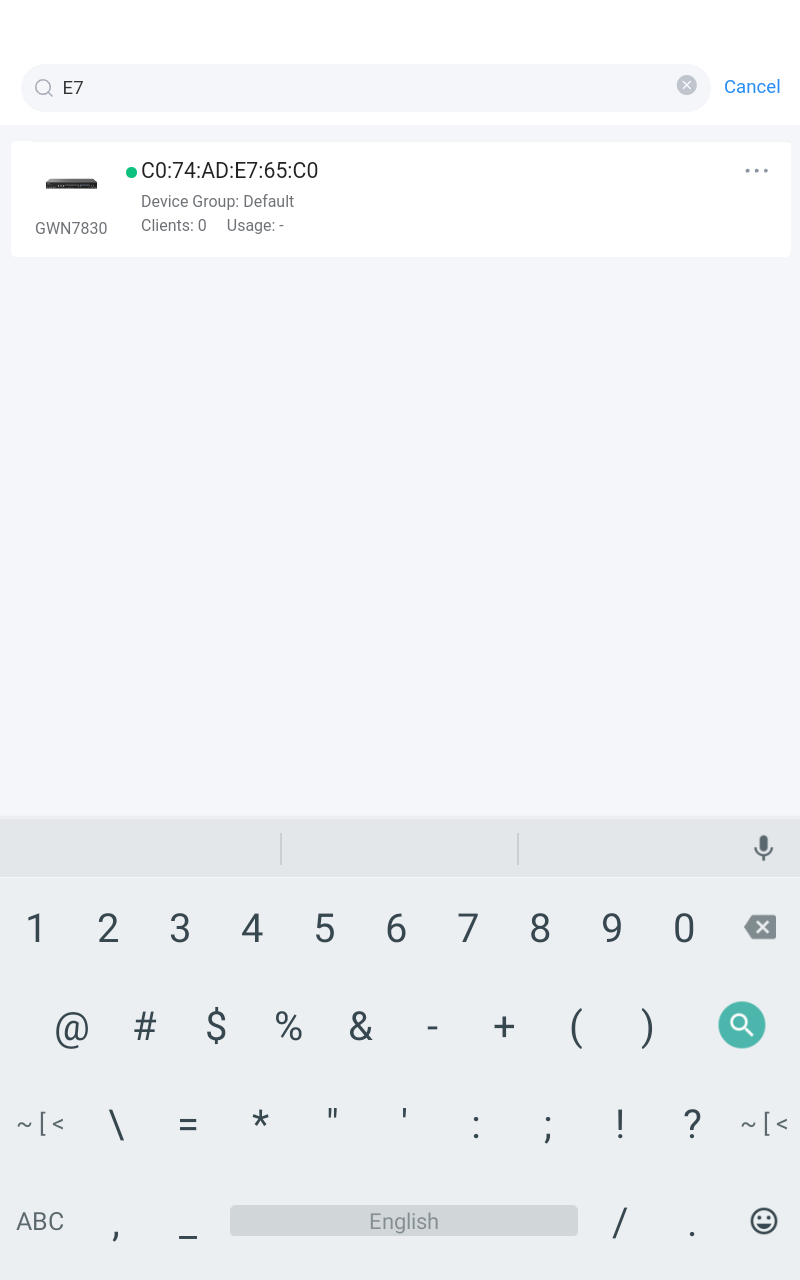
For each device, the application displays the number of clients connected as well as the data usage. Users can search devices by name or MAC address.
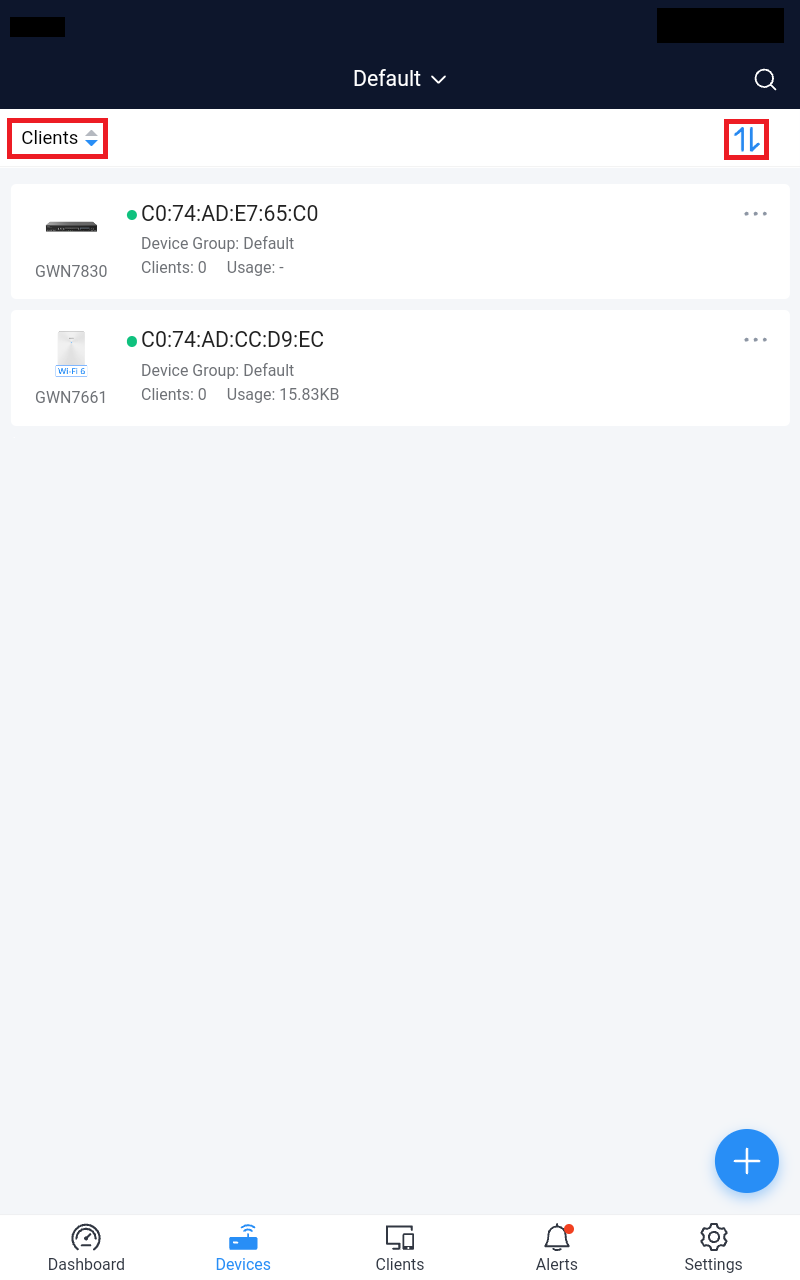
Click on ![]() to sort GWN devices by the number of connected clients.
to sort GWN devices by the number of connected clients.
Device Details
Click on a device to view more details about it and monitor it in real time. The Device Details page contains 4 subsections
- Usage
- Info
- Tools
- Configuration
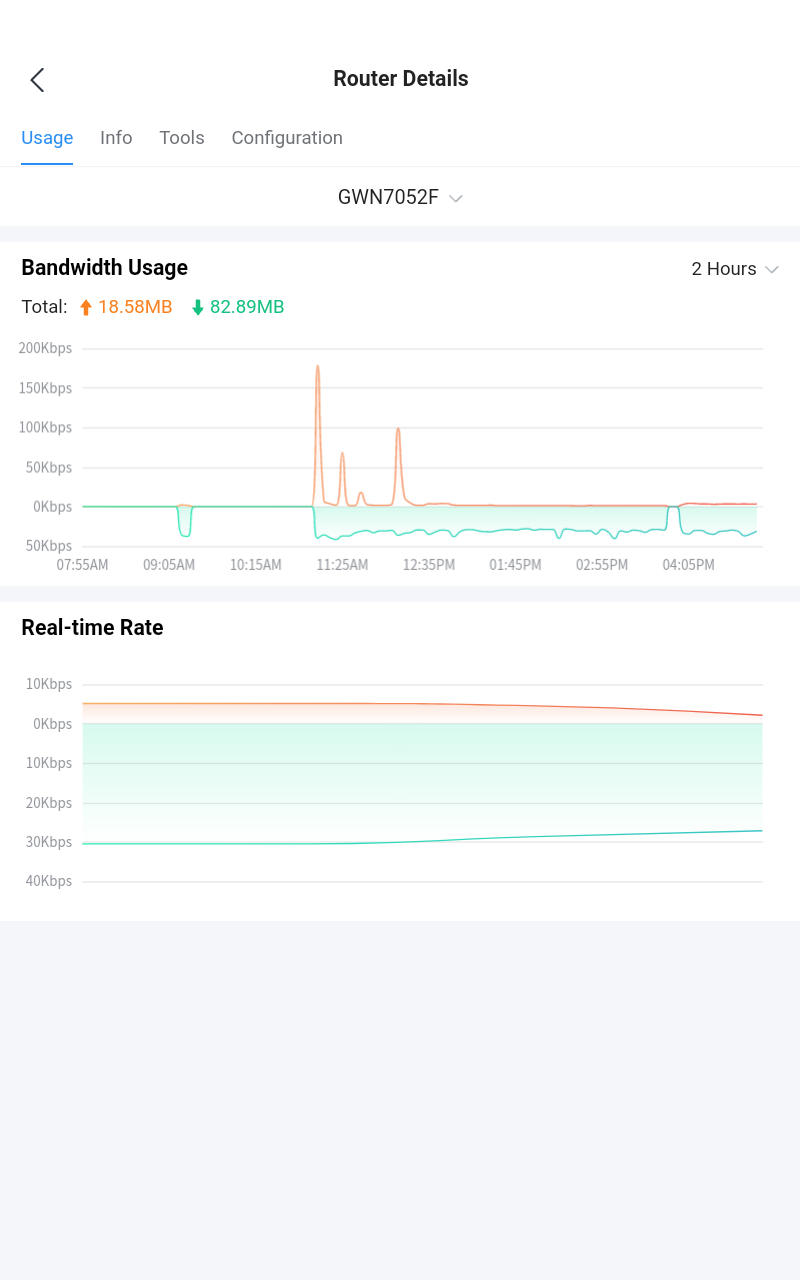
Usage
The usage tab displays a graph for Bandwidth usage and client count monitoring for the selected device.
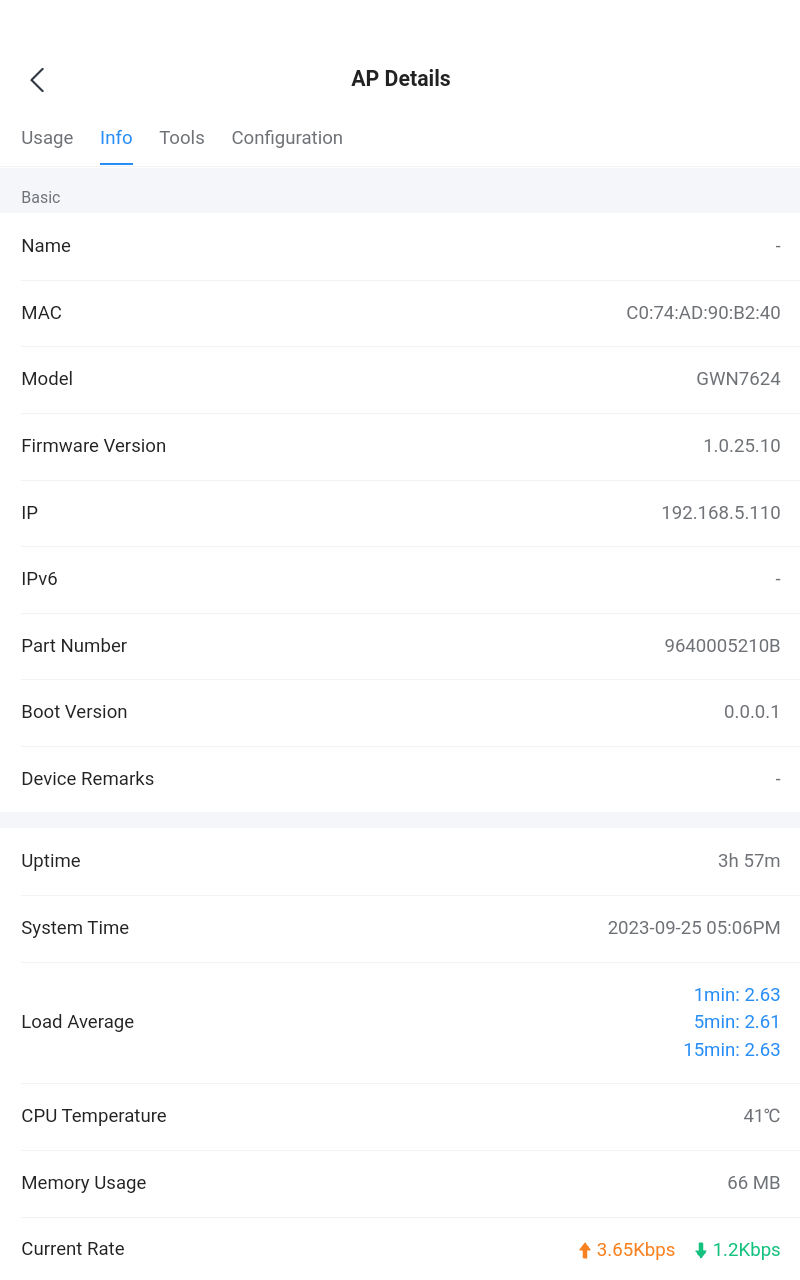
Info
The info tab displays all the information related to the selected device including Model, Firmware Version, IP, MAC address, etc.

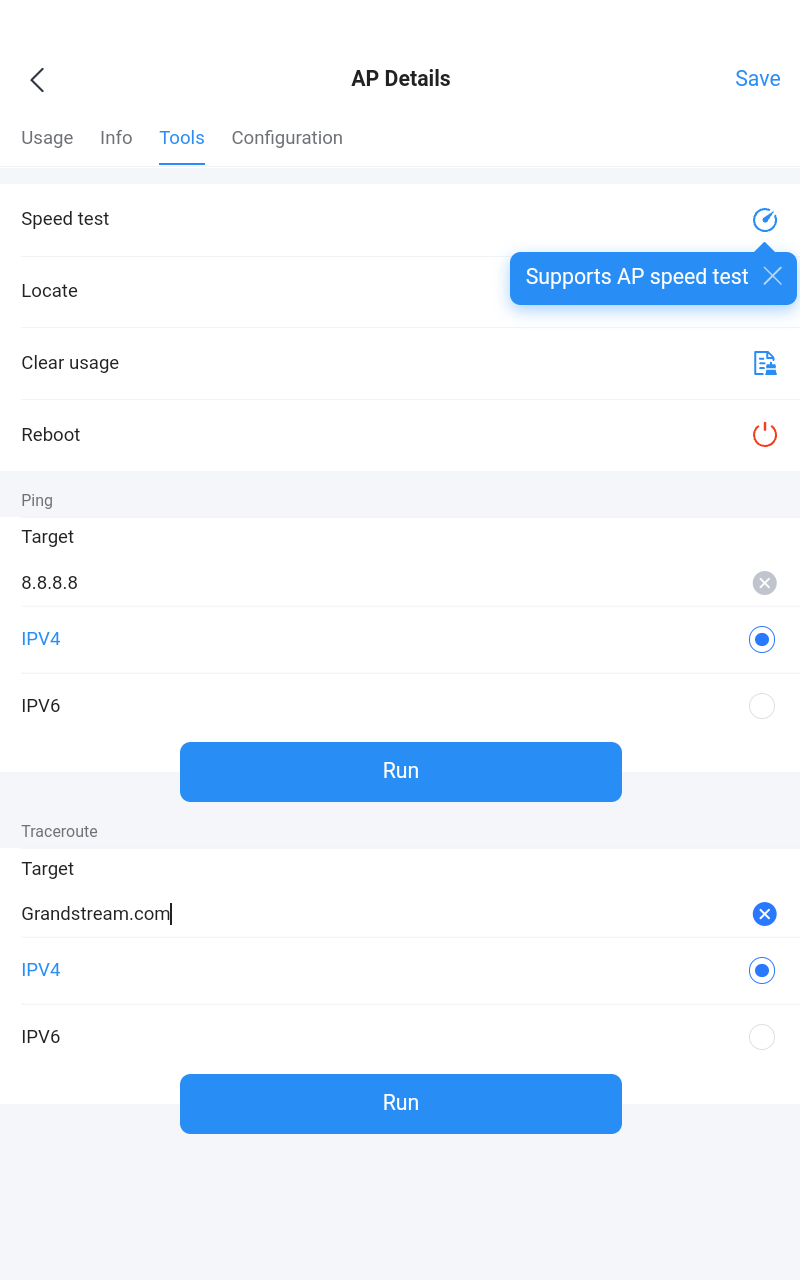
Tools
The GWN app provides different tools to monitor and troubleshoot issues related to the selected devices from the app, users can locate the devices, clear usage, run ping and traceroute tests and even run a speed test right from the app itself.
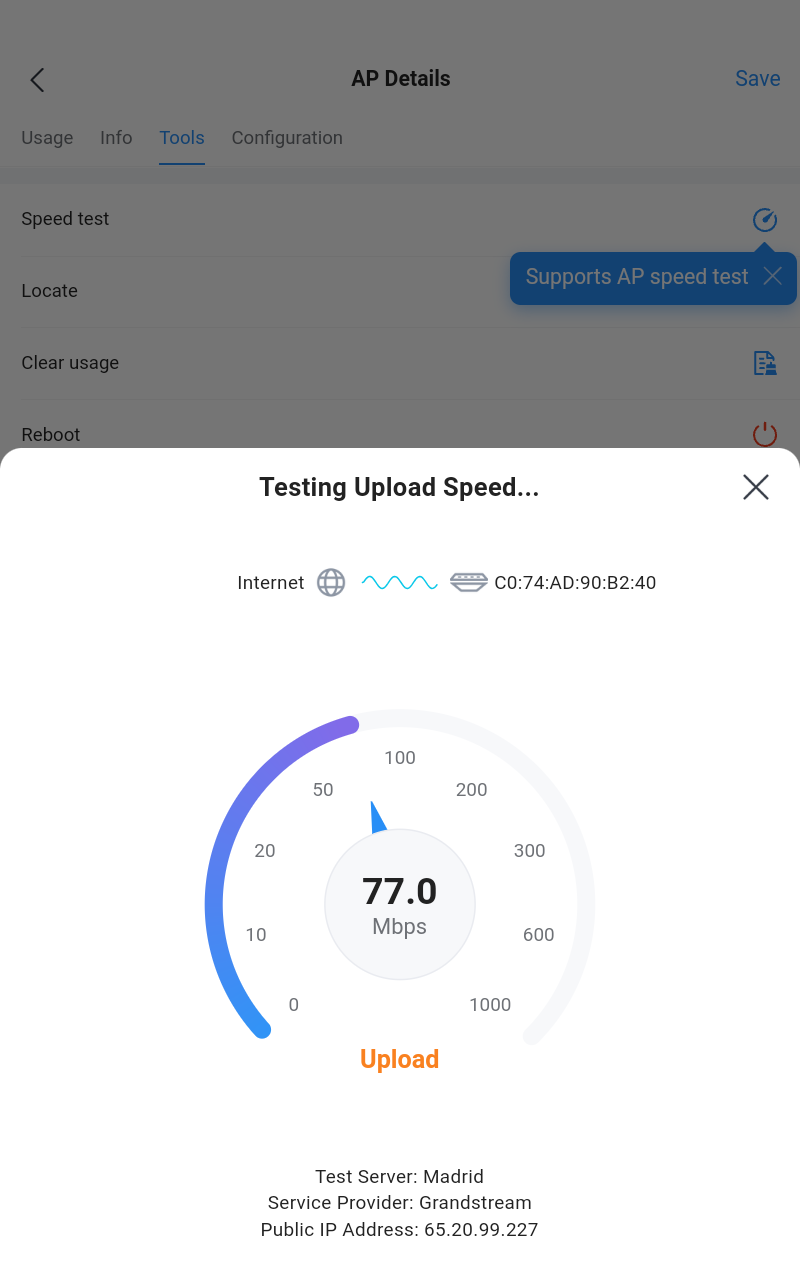
To run a speed test, please click on the “Speed Test icon” as shown below:
The first speed test is testing download speed.
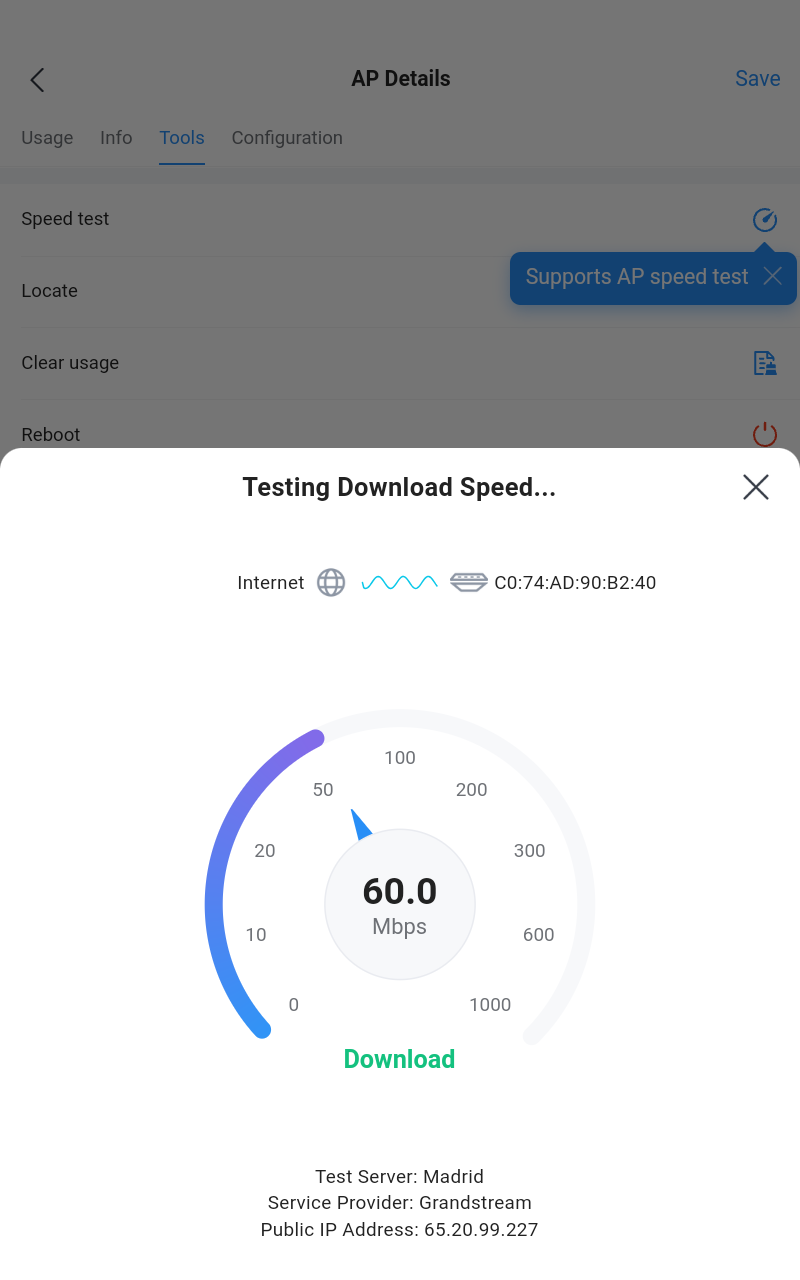
Once, the download speed test is over, the second test is testing upload speed.
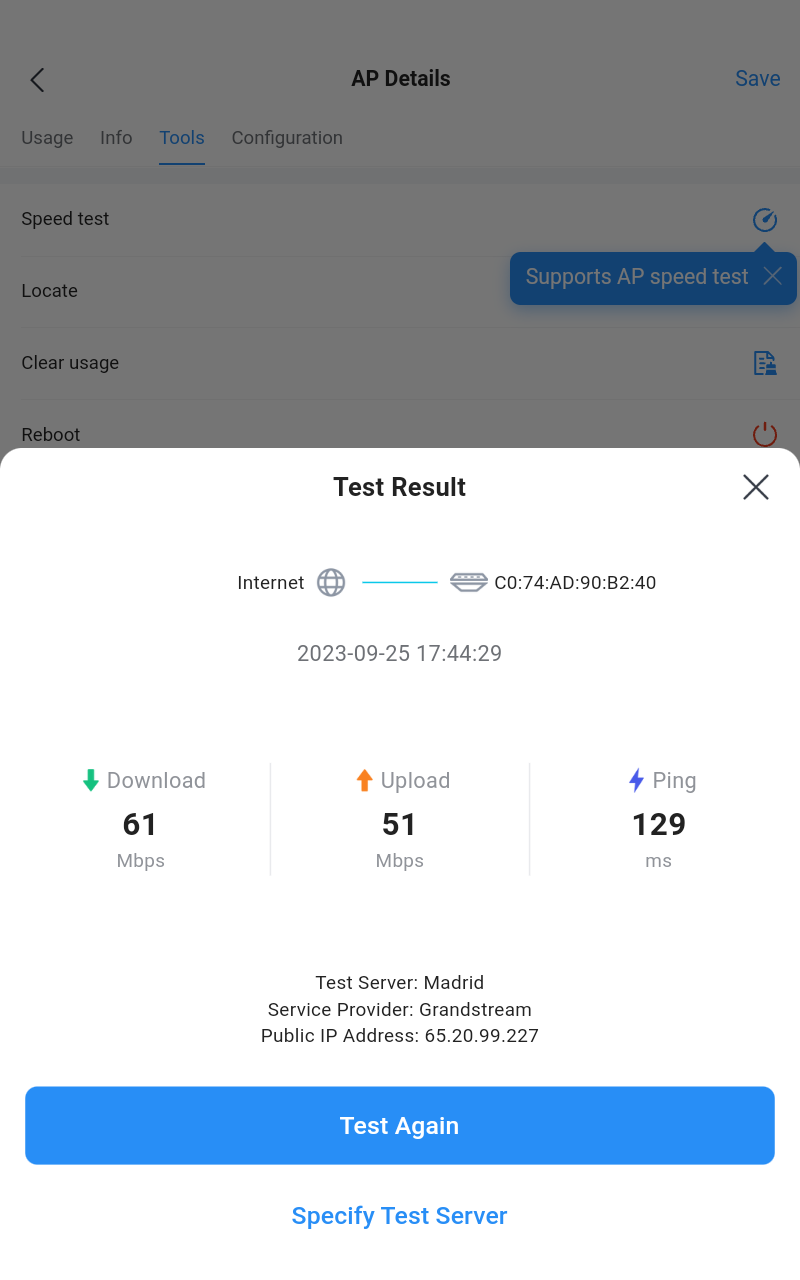
Finally, the user will be able the see the final result, including Download/Upload speed and also the Ping response time in ms (Millisecond). To run the speed test again, click on the “Test Again” button or to change the test server click on the “Specify Test Server” text.
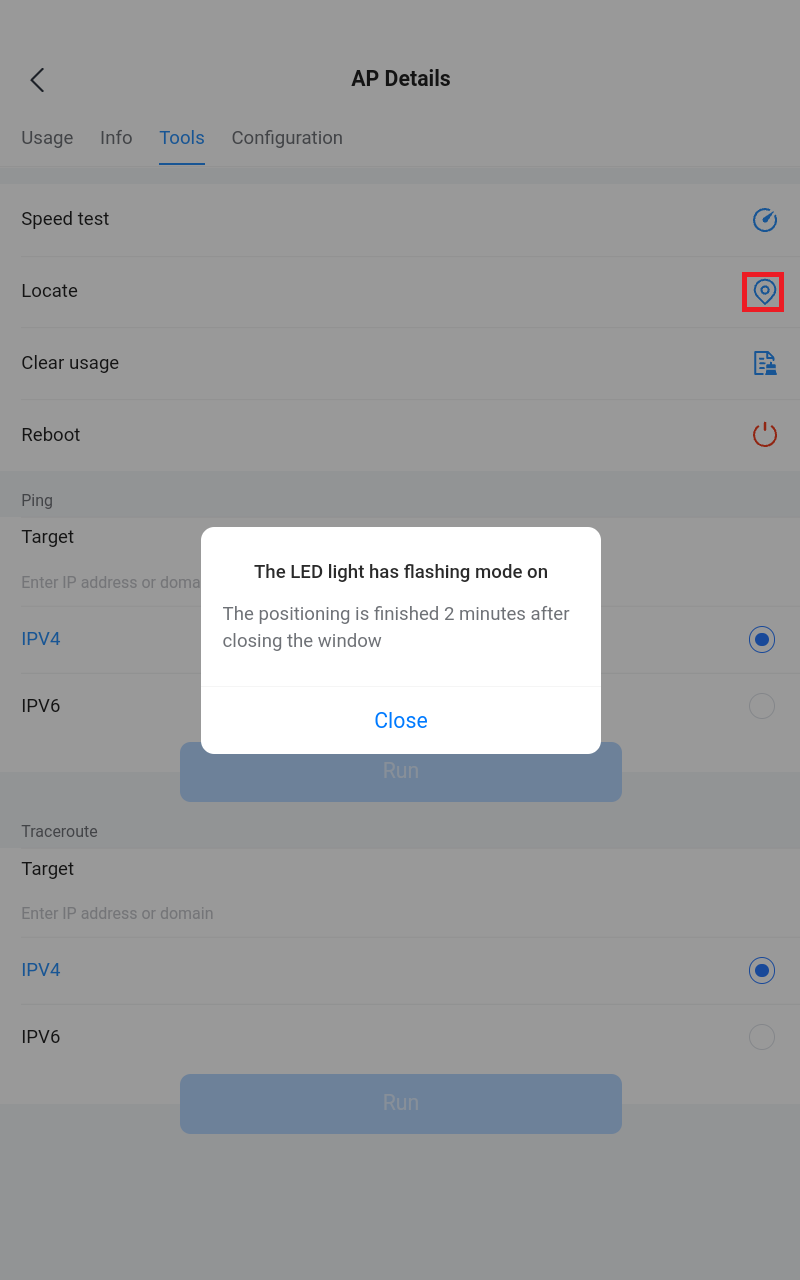
- Locate a device
To locate the selected device, click on the “Locate” icon, the LED lights of the device will start blinking for 2 minutes, click on Close to end the location.
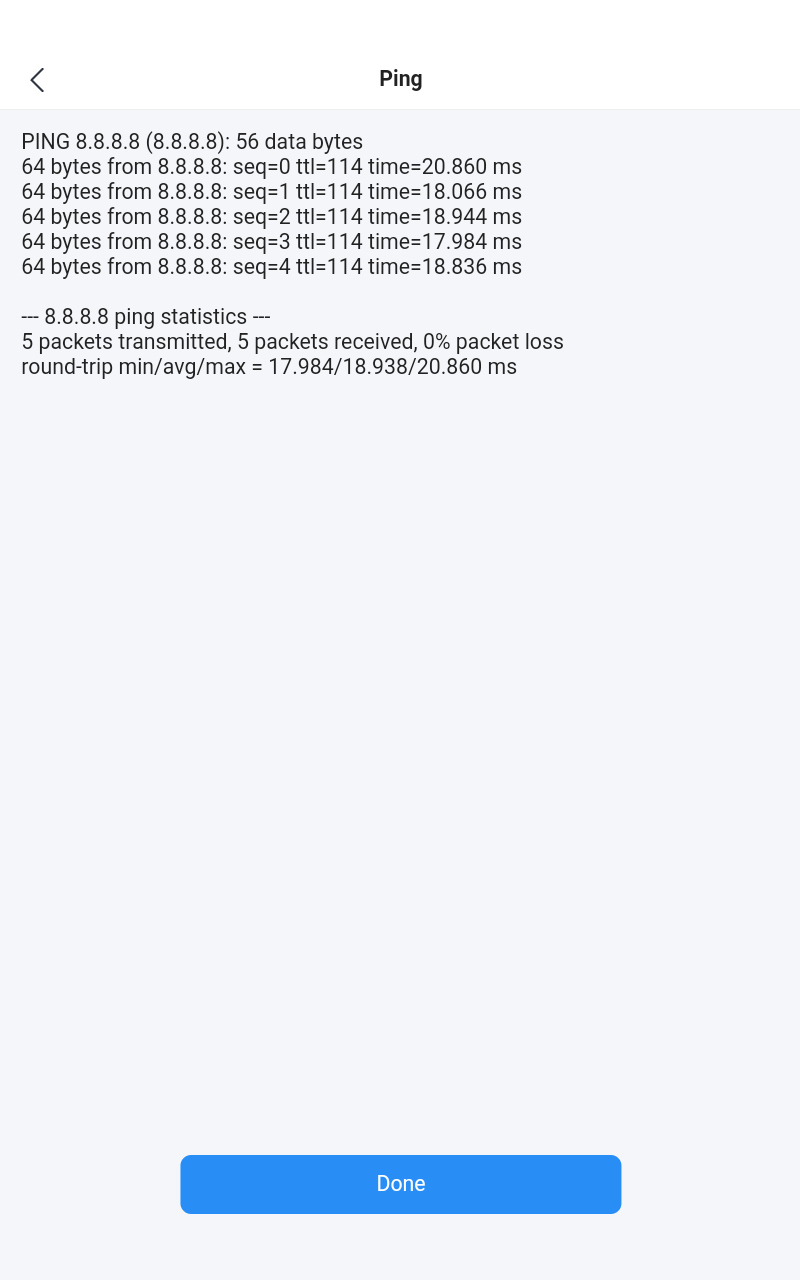
- Ping
The ping tool is used to ping a remote device to test the connectivity. To ping another device from the GWN app, set the target to the IP address or domain of the remote device, then click on the Run button, the result will be displayed on a new page:
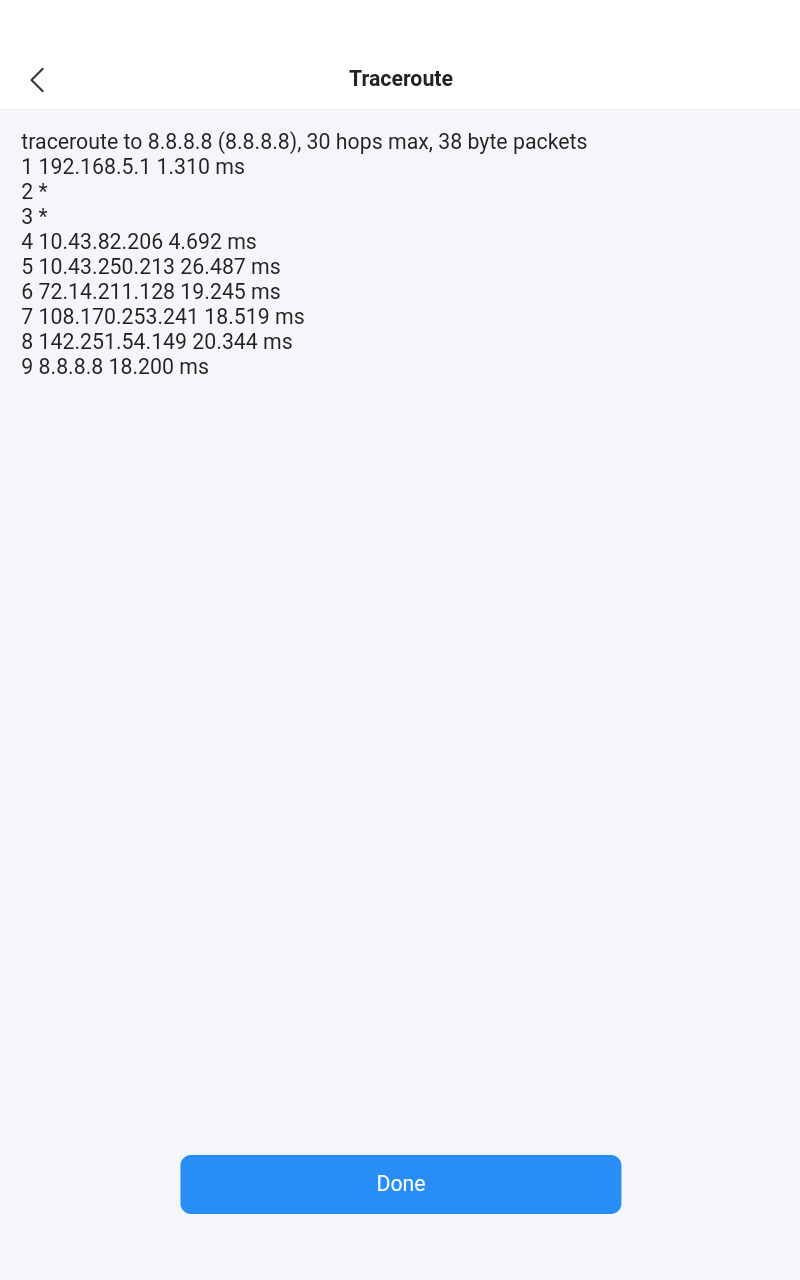
- Traceroute
Traceroute allows users to check the number of hops between the devices as well as all the gateways traversed to reach the destination.
For more details, please visit GWN Management Platforms – User Guide (Configure a device)
CLIENTS
The Clients tab allows monitoring wired or wireless clients as well as Guests that are connected using Captive Portal. In addition, this tab allows searching for a specific client by its MAC or Hostname and sort clients by data usage. Please refer to the figure below:
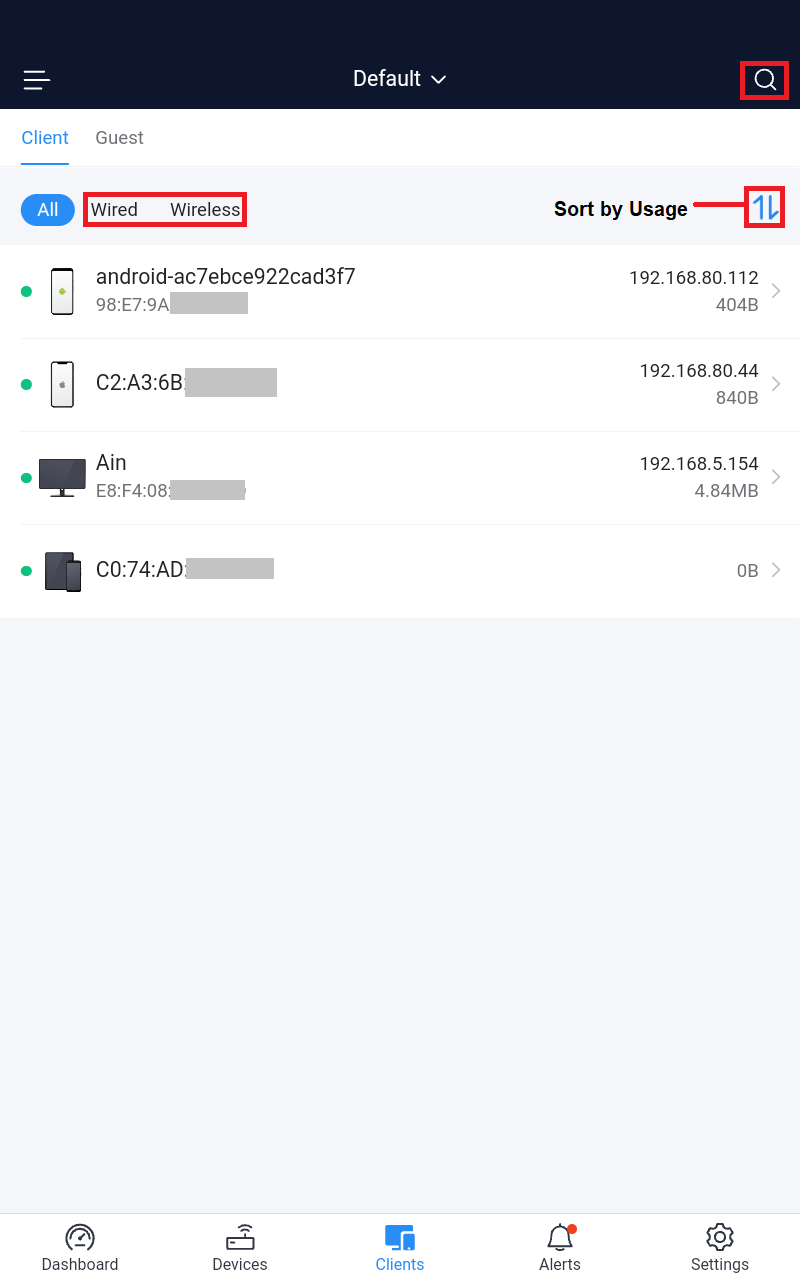
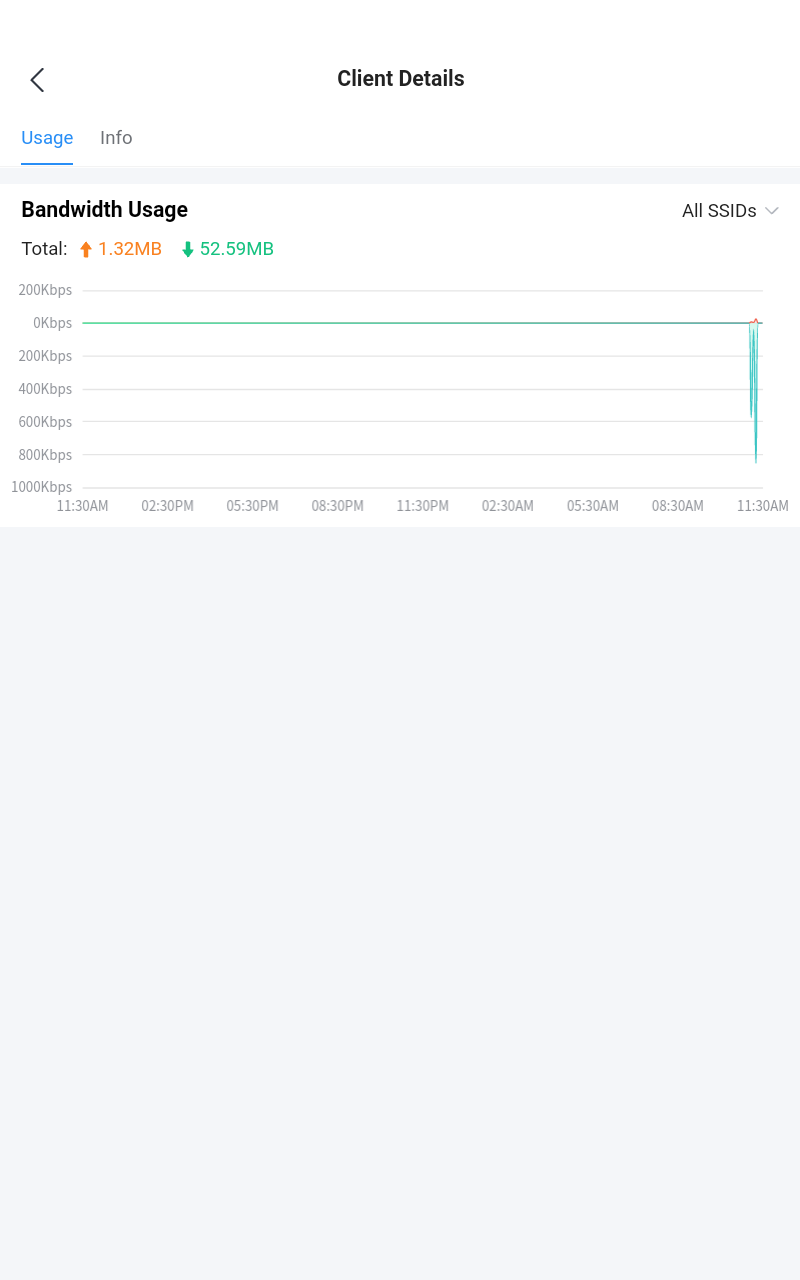
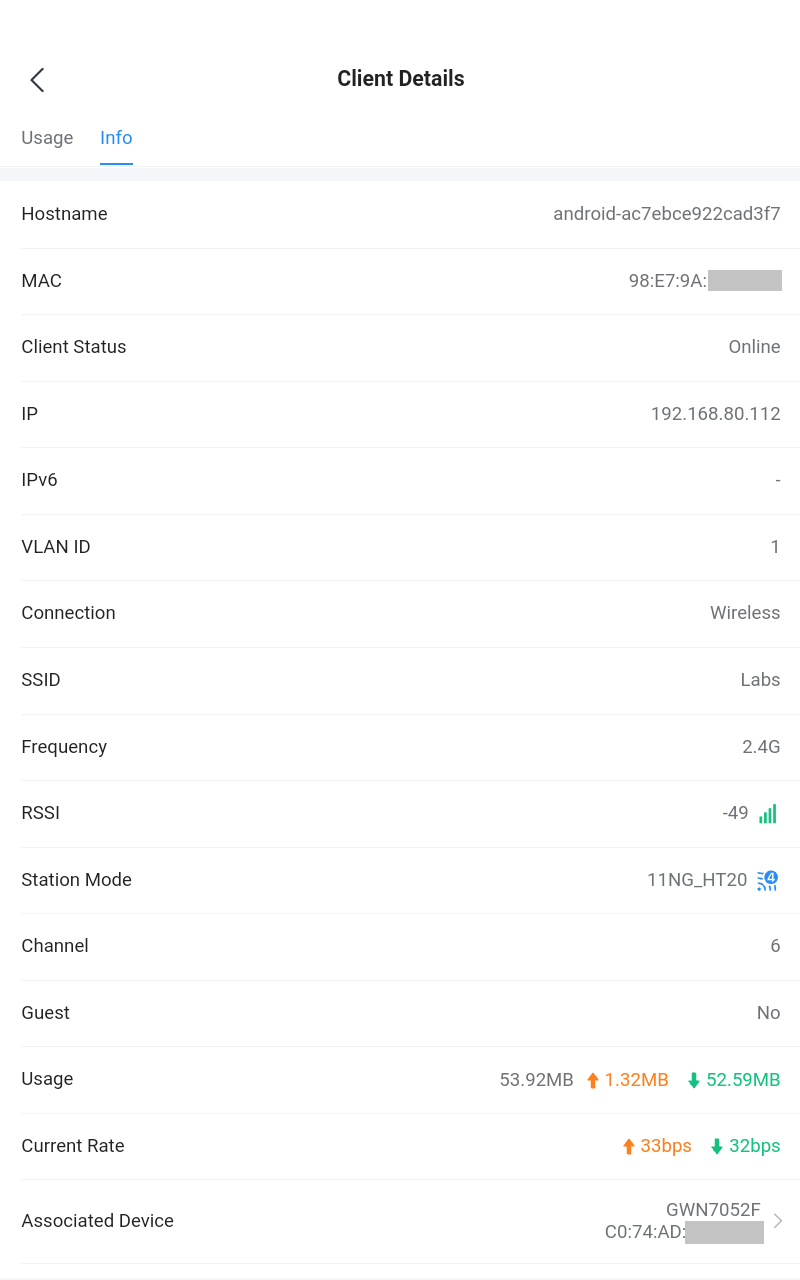
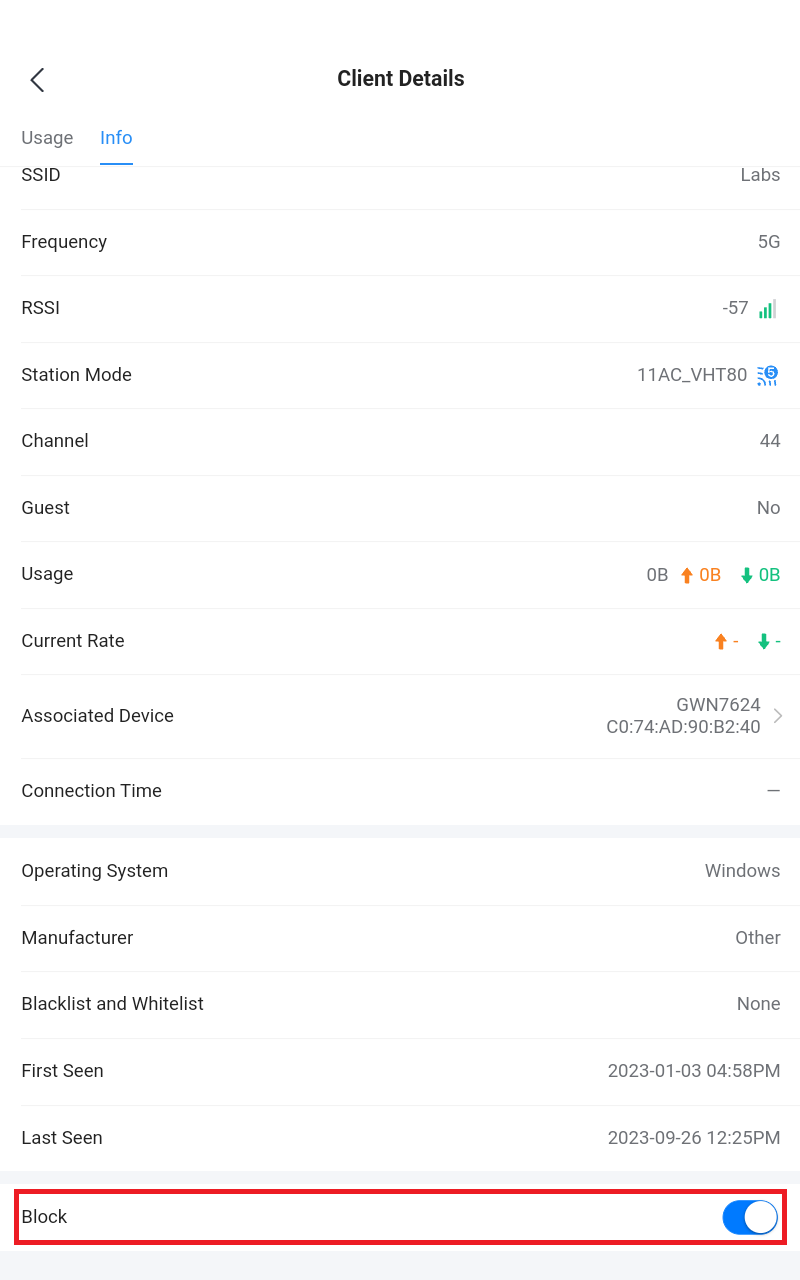
Click on each client to view its bandwidth usage and info including the following: MAC address, IP, Client Status, SSID connected to, Channel, etc. Refer to the figures below:
Block Client
To block a client, navigate to The Clients tab, then either select the client from the list or search the client either by the MAC Address or Hostname, tab on the client then on the Info tab scroll down to the bottom of the page then toggle ON Block. Please refer to the figure below:
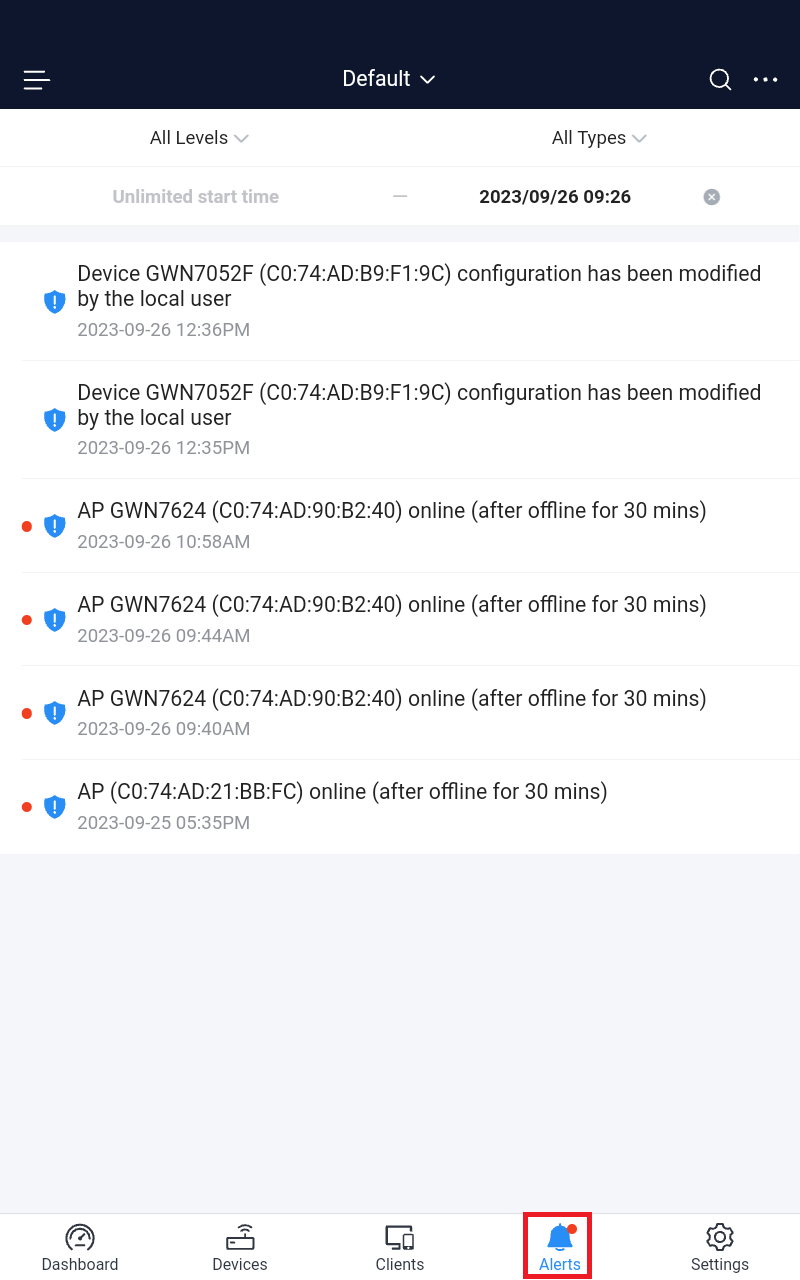
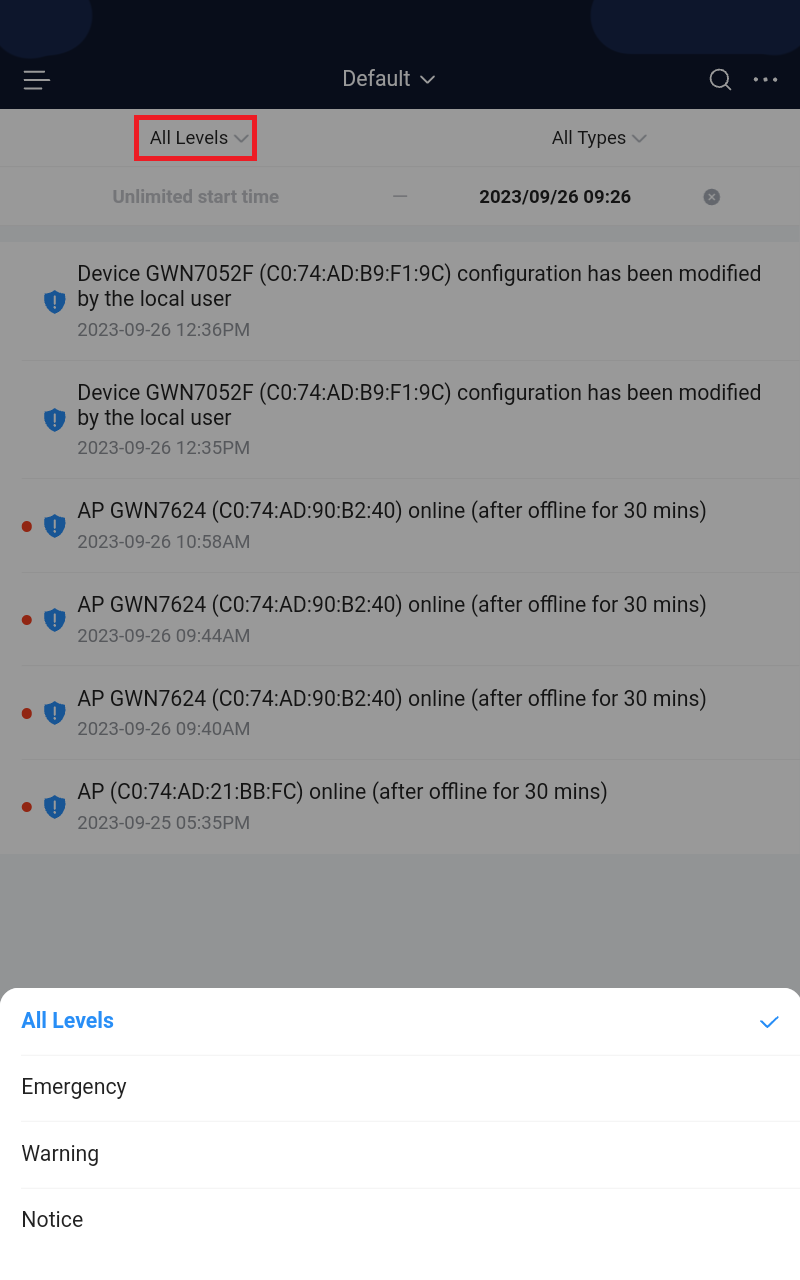
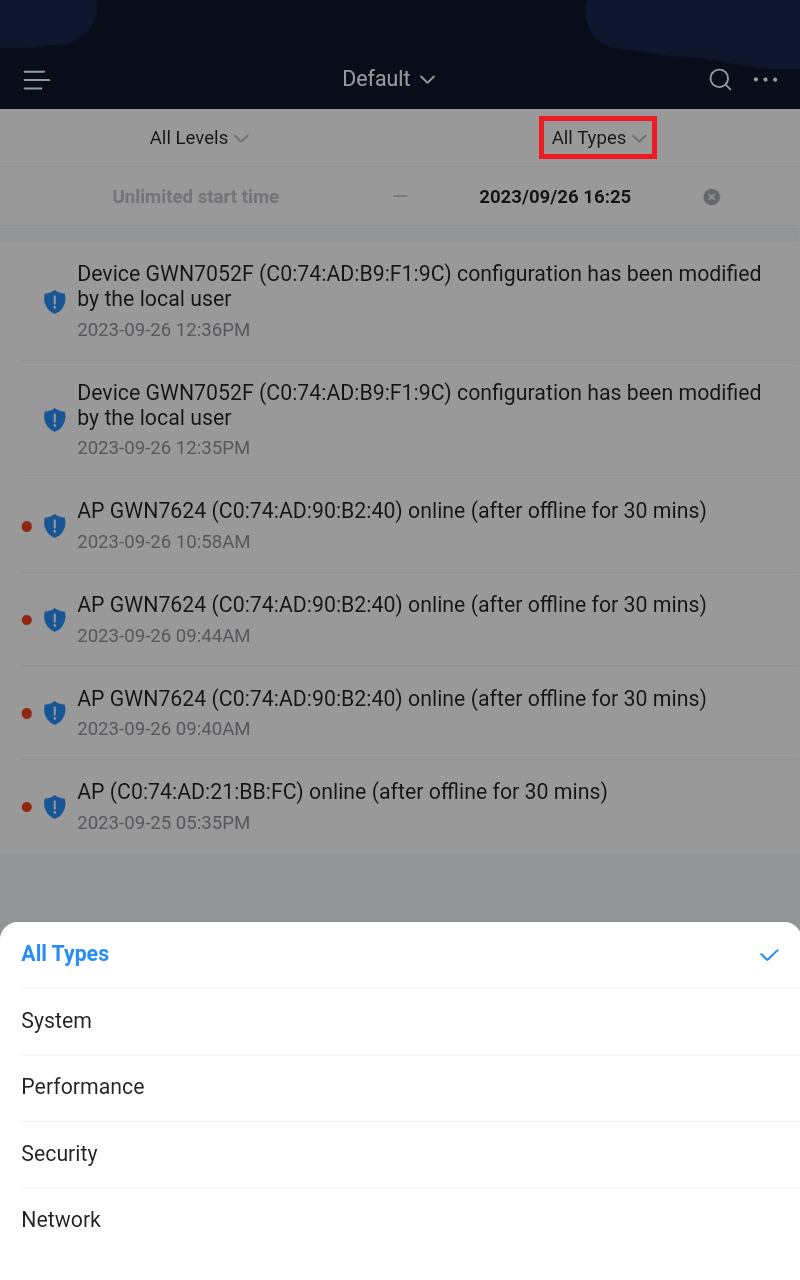
Alerts
The Alerts page displays alerts about the network, the user can specify to display only certain types (System, Performance, Security, or Network) or the levels (Emergency, Warning, or Notice). To check the alerts that have been generated, please navigate to the Alerts tab page. Please refer to the figures below:
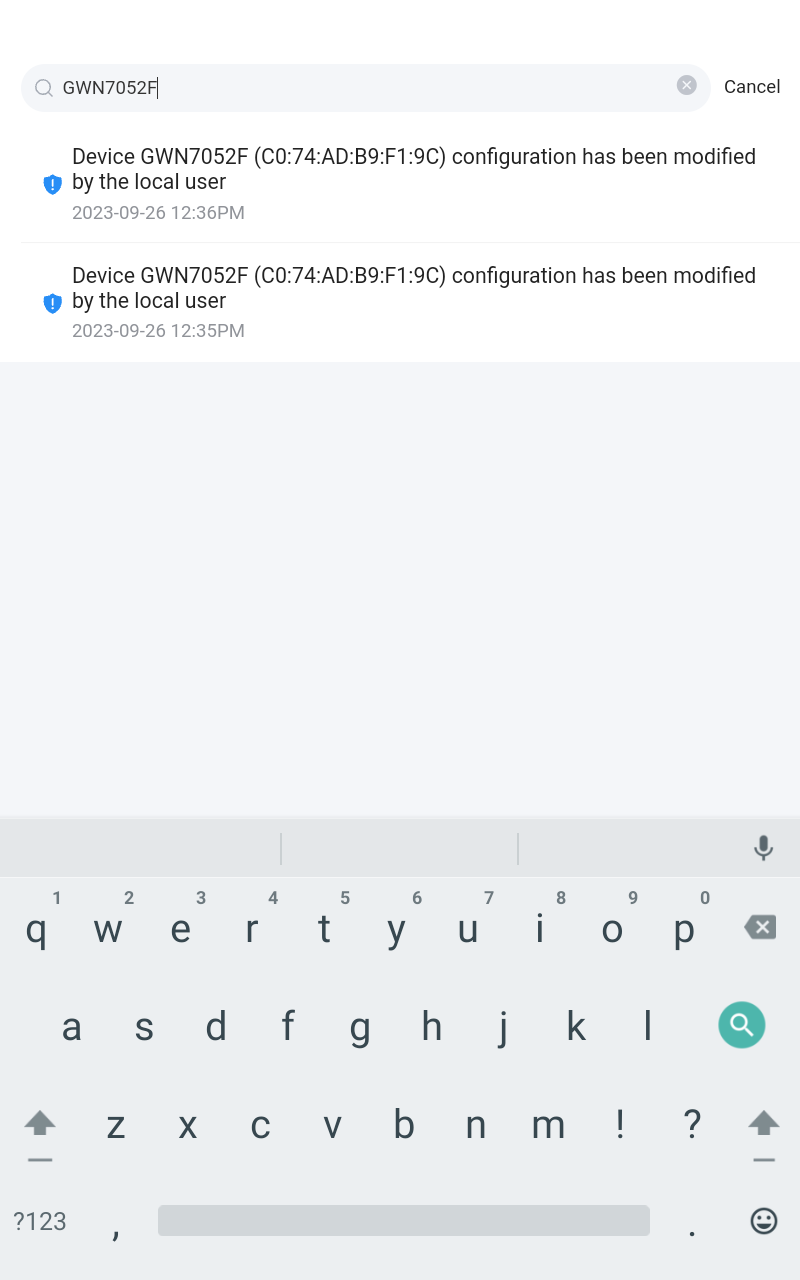
The alerts can be displayed either by type or level. However, that is not the only way to display them. The user can filter through the alert log using a date interval or search by MAC address or device name.

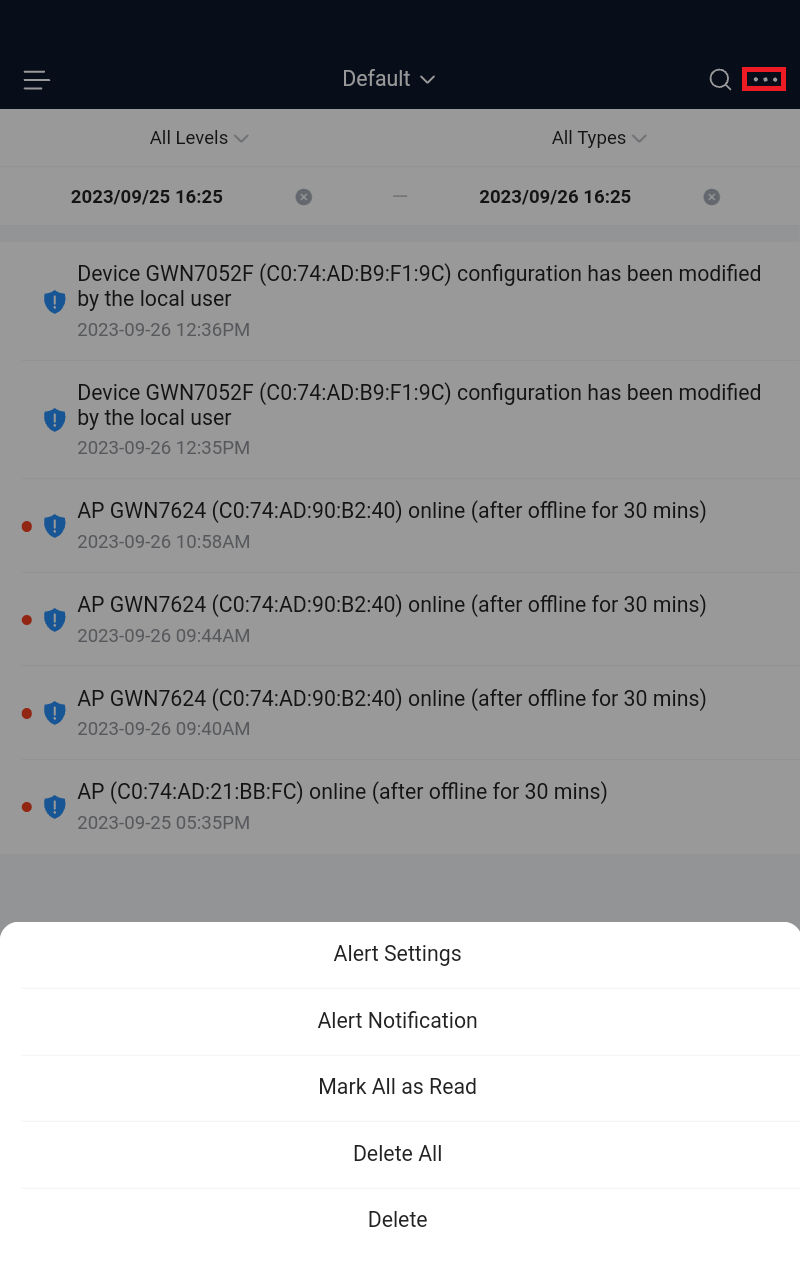
For more options, please click on the “…” three dots on the top right corner of the screen as shown in the figure below:
The user can mark all notifications as read, delete all, or delete the selected ones.
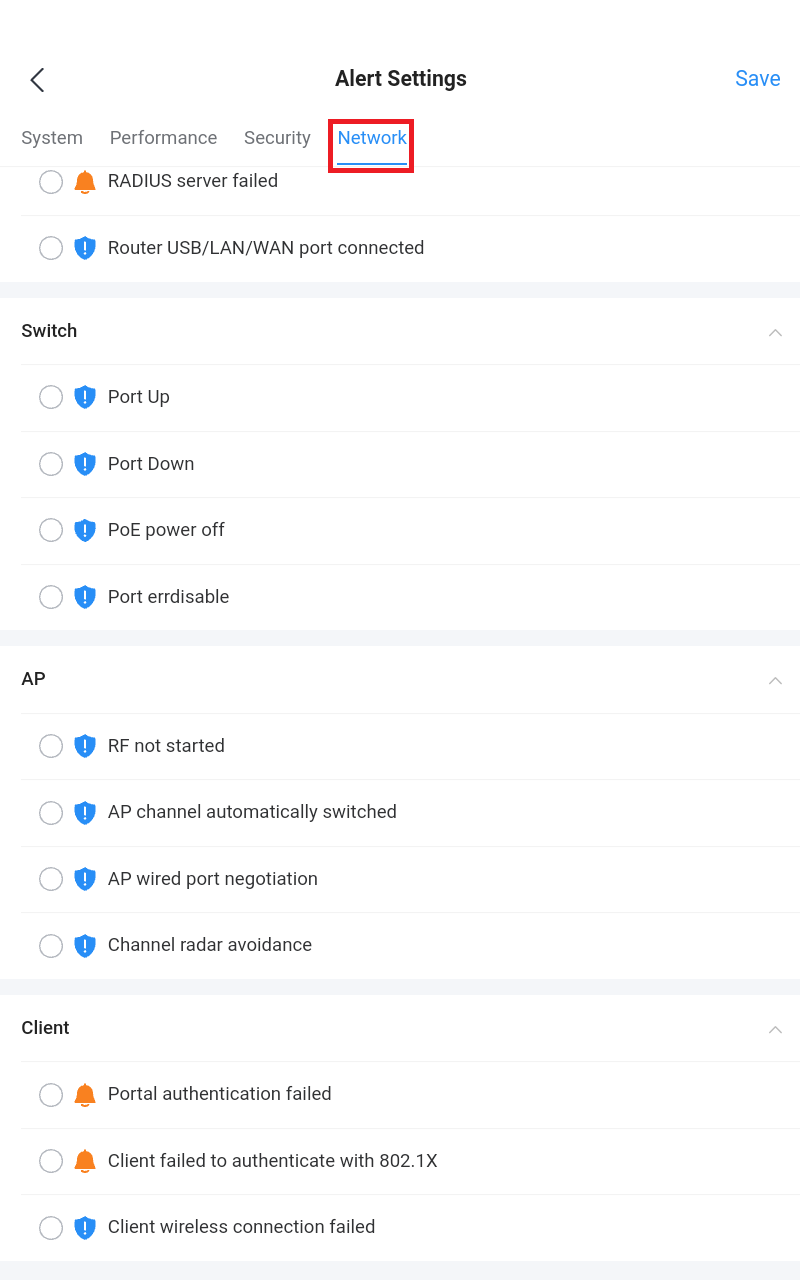
Alert Settings
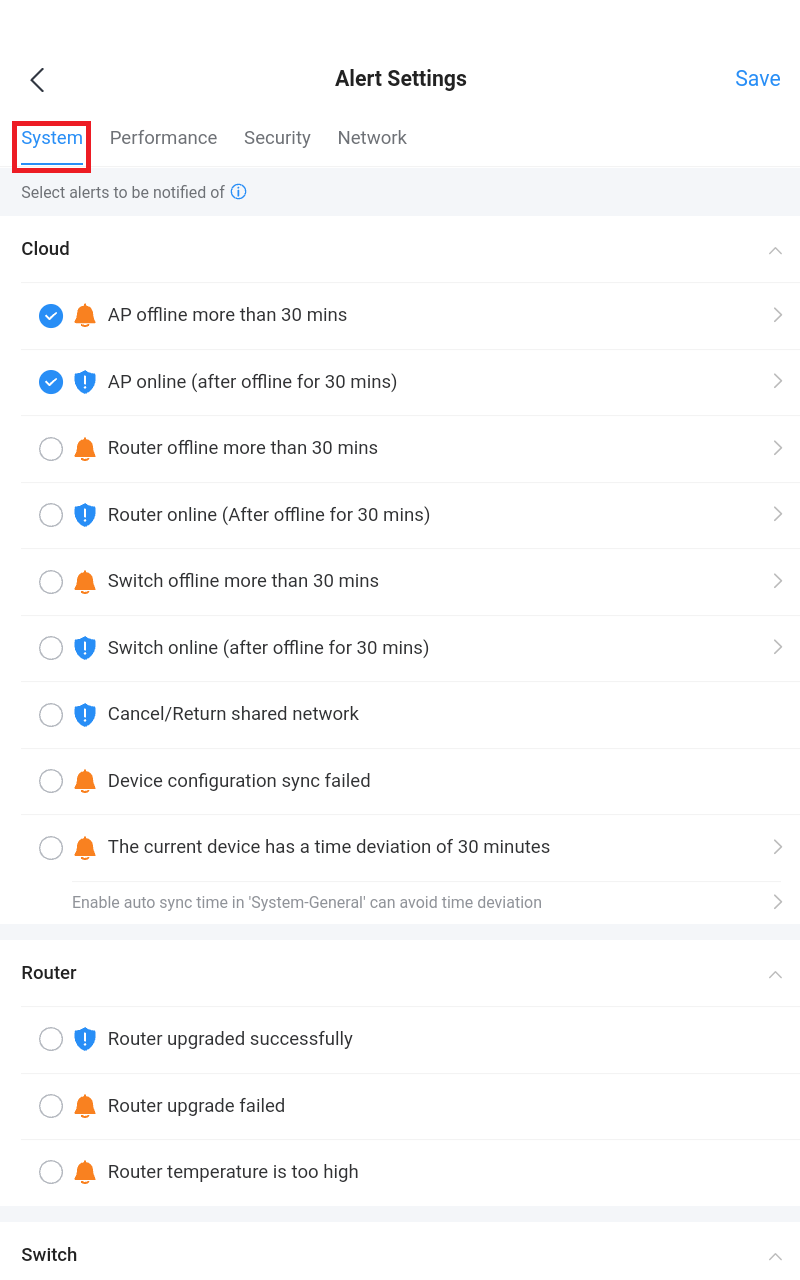
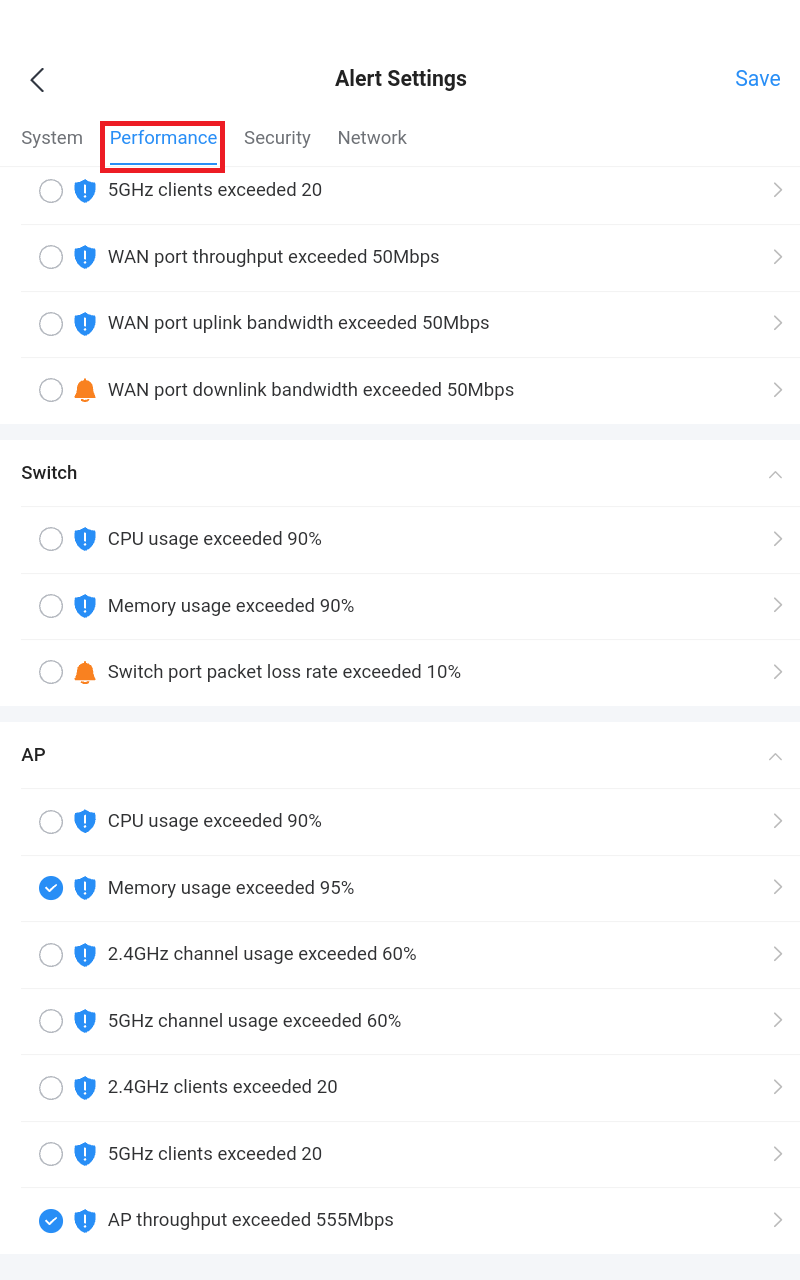
On this page the user can select the alerts to be displayed, four categories or alerts are available (system, performance, security, and network) and each category has even more options. Please check the figures below:
- System Alert includes GWN.Cloud/GWN Manager, GWN Routers, GWN Switches, and GWN Access points.
- Performance Alert includes GWN.Cloud/GWN Manager, GWN Routers, GWN Switches, and GWN Access points.
- Security Alert: GWN Access points (Rogue AP).
- Network Alert includes GWN Routers, GWN Switches, GWN Access points, and Clients.
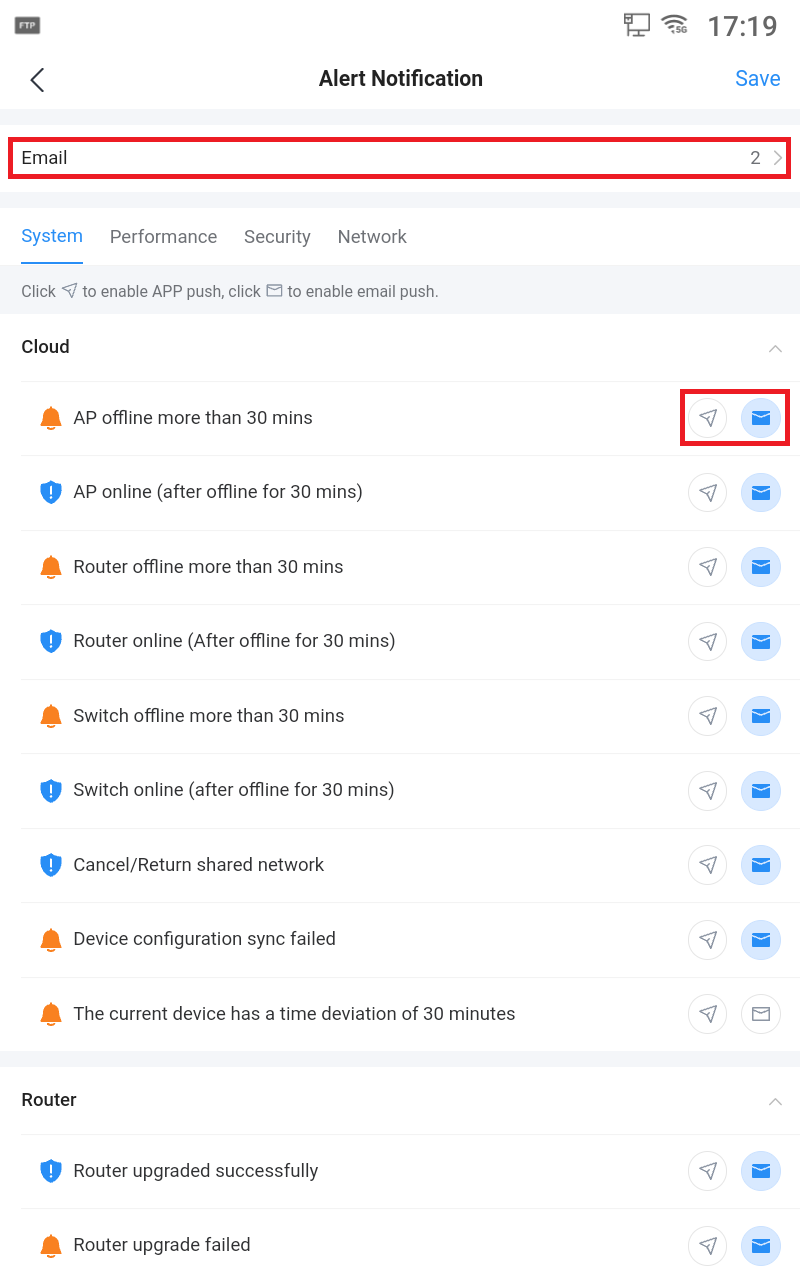
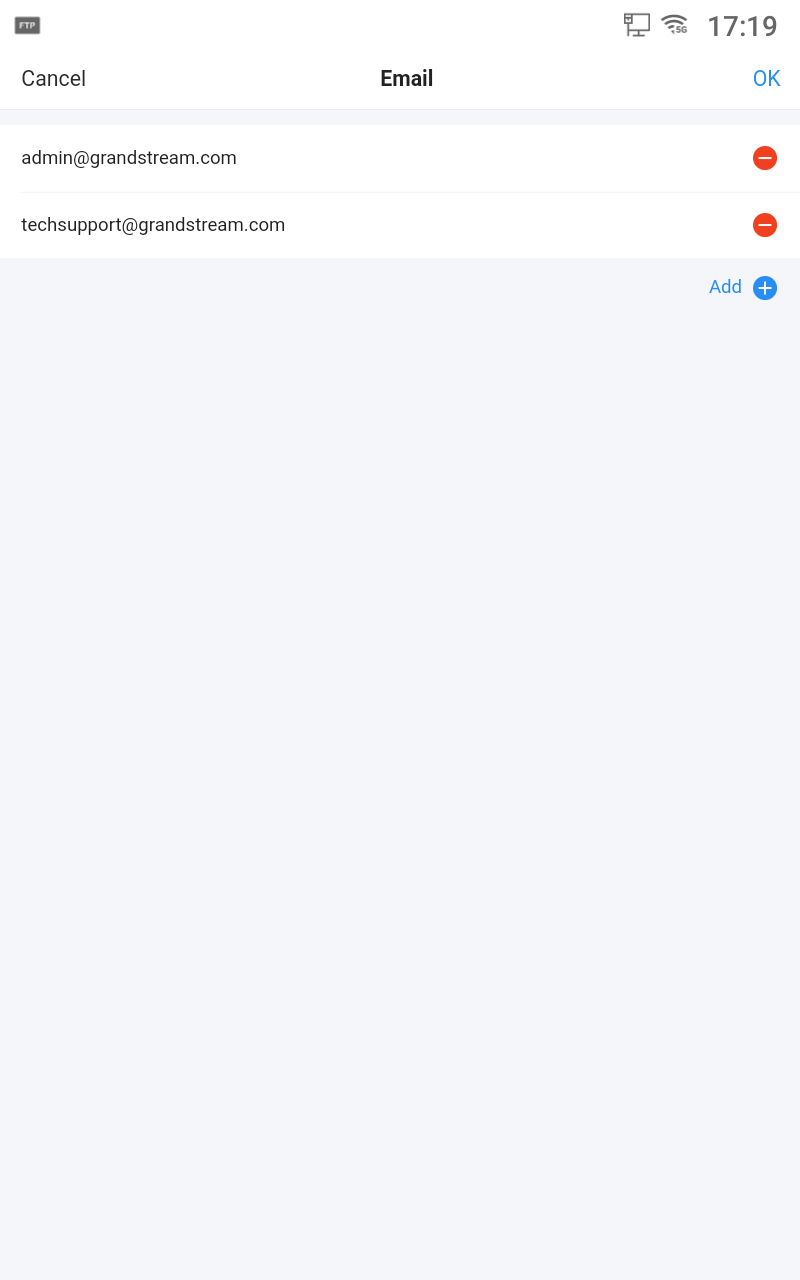
Alert Notification
In this screen, Email addresses can be specified to receive notifications for the selected alerts, the notifications can be sent to the configured emails or pushed to the APP.
To enable APP push or email push, click on the respective icon as shown below:
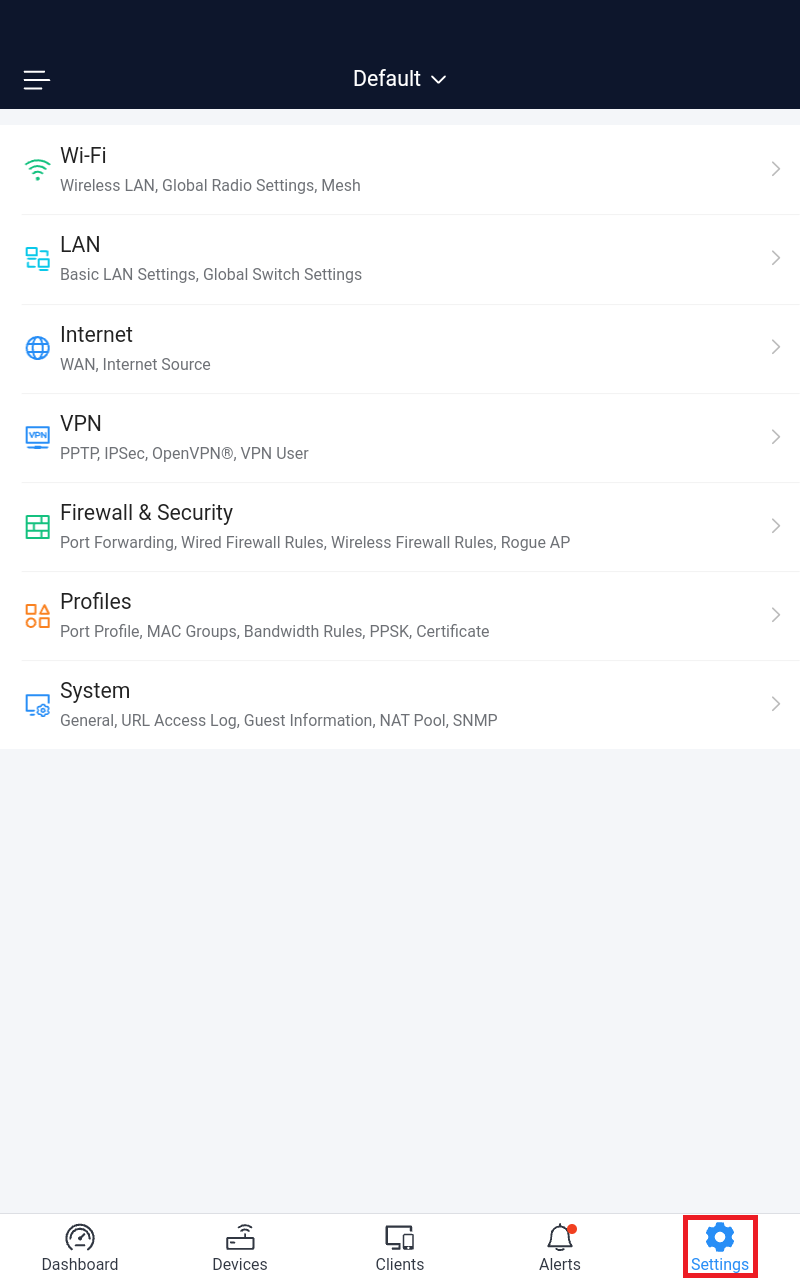
SETTINGS
The Setting tab allows users to check or configure: Wi-Fi, LAN, Internet, VPN, Firewall and security, Profiles, and System.
To access the Settings tab, click on the icon “Settings” as shown below:
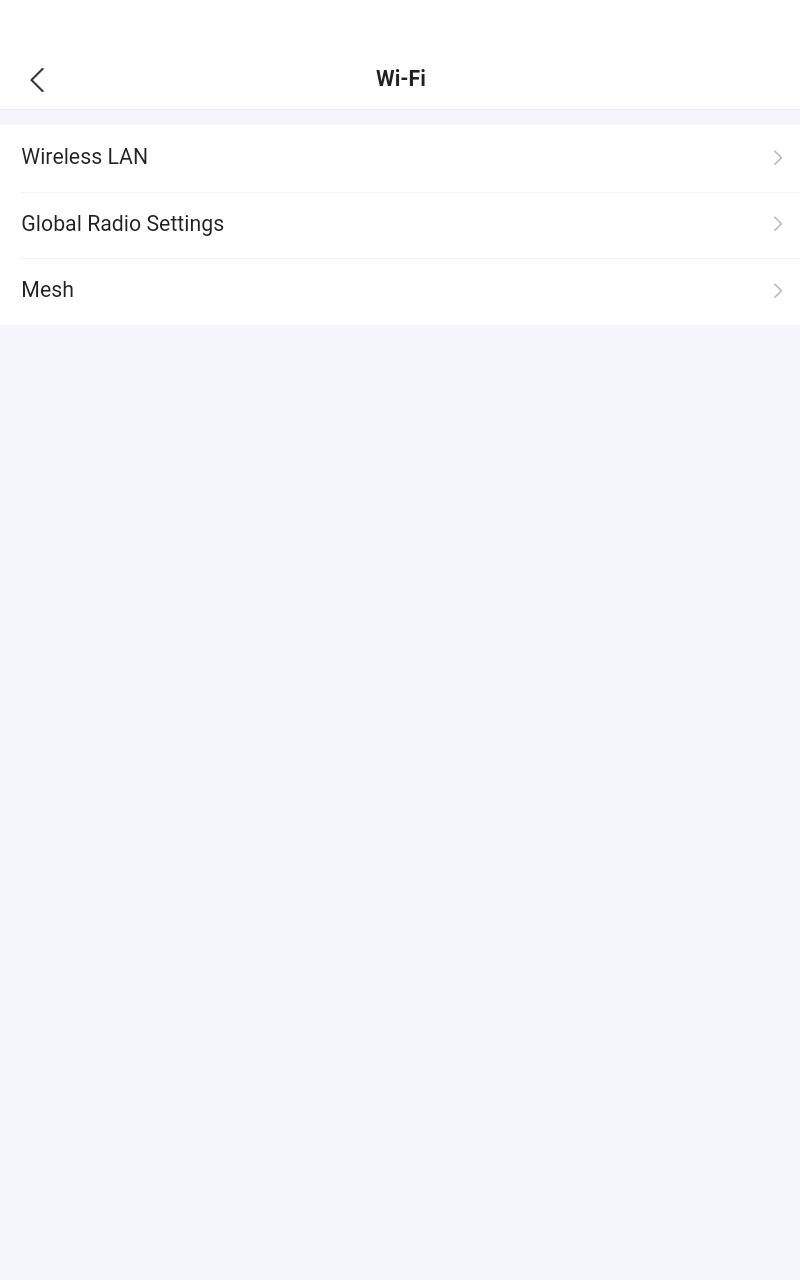
WiFi
In this section, the user can configure all the related Wireless settings including SSIDs, Radio Settings, and Mesh.
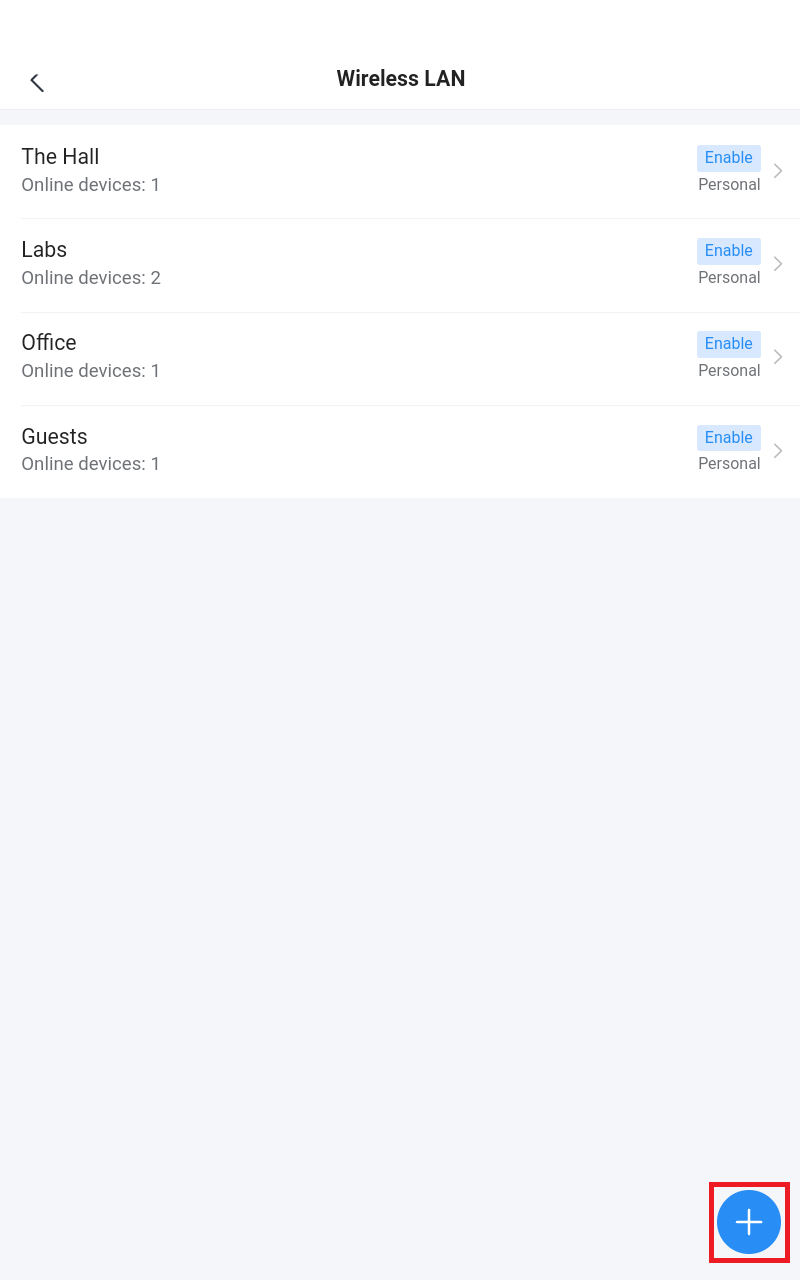
Wireless LAN
On this page, the user can Edit, Enable, Disable, or even Add another Wireless LAN (SSID). Click on the previously created Wireless LAN to edit or click on the “Plus” icon to add another Wireless LAN.
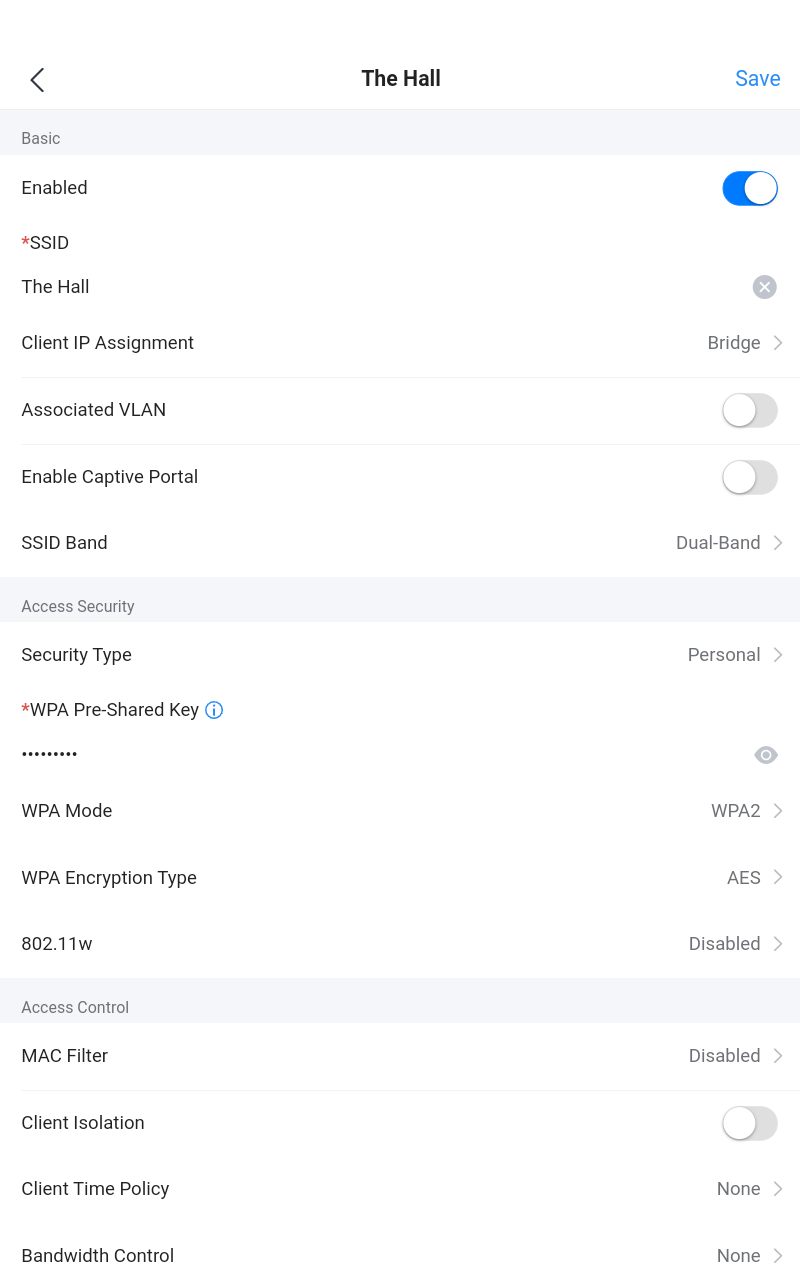
Please refer to the table below for the descriptions of the fields:
Basic | |
Enabled | Enable wireless LAN |
SSID | Specify the SSID name |
Client IP Assignment |
|
Associated VLAN | The VLAN ID associated with the wireless LAN. |
Enable Captive Portal | Enable or disable captive portal. If it's enabled, select the captive portal policy. |
SSID Band | Configure the wireless bands used for the transmissions.
|
Access Security | |
Security Type | Configure the security type of your wireless network.
|
WPA Pre-Shared Key | Enter the WPA Pre-Shared key |
WPA Mode | Select from the list:
|
WPA Encryption Type | Select the WPA encryption type, 2 options are available:
|
802.11w | The 802.11w standard is used to prevent certain types of WLAN DoS attacks. 802.11w extends strong cryptographic protection and provides data integrity and replay protection for broadcast/multicast Robust management frames. Set this option to be either Disabled or Required. • Optional: both of the client supported and unsupported 802.11w may have the network access authority; Required: only the client supported 802.11w have the network access authority. |
Access Control | |
MAC Filter | Enable filtering based on MAC address. Then select from blacklist or whitelist. |
Client Isolation | Enable client isolation. If it's enabled, select from client isolation mode (Radio, Internet or Gateway). |
Client Time Policy | Enable a client time policy. Note: Please note that GWN mobile application currently does not support configuring a client time policy. In order to set this feature, please use the web navigator to access to GWN platform or you can select from the previously created ones. |
Bandwidth Control | Enable bandwidth control.
Note: Please note that GWN mobile application currently does not support configuring a bandwidth control policy. In order to set this feature, please use the web navigator to access to GWN platform. |
Schedule | Schedule when the SSID would be functional. Note: Please note that GWN mobile application currently does not support configuring a schedule. In order to set this feature, please use the web navigator to access to GWN platform. |
Device Management | |
Method | Select the method of device selection either by devices or device group |
Member Devices | The list of all the devices which are members of this specific SSID. |
Advanced | |
SSID Hidden | Enable or disable to hide the SSID. |
DTIM Period | Set the DTIM period. |
Wireless Client Limit | Set a limit for the number of clients which can connect to the wireless network. |
Client Inactivity Timeout (seconds) | Configure the period of inactivity of a client before being disconnected from the wireless network |
Client Bridge | Click to toggle ON or OFF client bridge feature |
Multicast/Broadcast Suppression | Enable or disable multicast and broadcast.
|
Convert IP multicast to unicast | • When set to “Disabled”: none of the multicast package will be converted; • Passive mode: AP will never initiatively broadcast IGMP queries, and the IGMP snooping item will be aged out 300 seconds after it is registered, which may result in the failure of forwarding multicast data. • Active mode: AP will initiatively broadcast IGMP queries to keep updating of the IGMP snooping items. |
Enable Voice Enterprise | Check to enable/disable Voice Enterprise. The roaming time will be reduced once enable voice enterprise. • The 802.11k standard helps clients to speed up the search for nearby APs that are available as roaming targets by creating an optimized list of channels. • When the signal strength of the current AP weakens, your device will scan for target APs from this list. When your client device roams from one AP to another on the same network, 802.11r uses a feature called Fast Basic Service Set Transition (FT) to authenticate more quickly. FT works with both pre-shared key (PSK) and 802.1X authentication methods. • 802.11v allows client devices to exchange information about the network topology, including information about the RF environment, making each client network aware, and facilitating overall improvement of the wireless network. Note: 11R is required for the enterprise audio feature, 11V and 11K are optional. This field is available only when “Security Mode” is set to “WPA/WPA2” or “WPA2”. |
Enable 802.11r | Check to enable 802.11r. This field is available only when “Security Mode” is set to “WPA/WPA2” or “WPA2”. |
Enable 802.11k | Check to enable 802.11k |
Enable 802.11v | Enable or disable 802.11v |
ARP Proxy | This option will enable GWN device to answer the ARP requests from its LAN for its connected Wi-Fi clients. This is mainly to reduce the airtime consumed by ARP Packets |
Enable U-APSD | This option will allow the user to enable/disable the Unscheduled Automatic Power Save Delivery feature. |
Wireless LAN
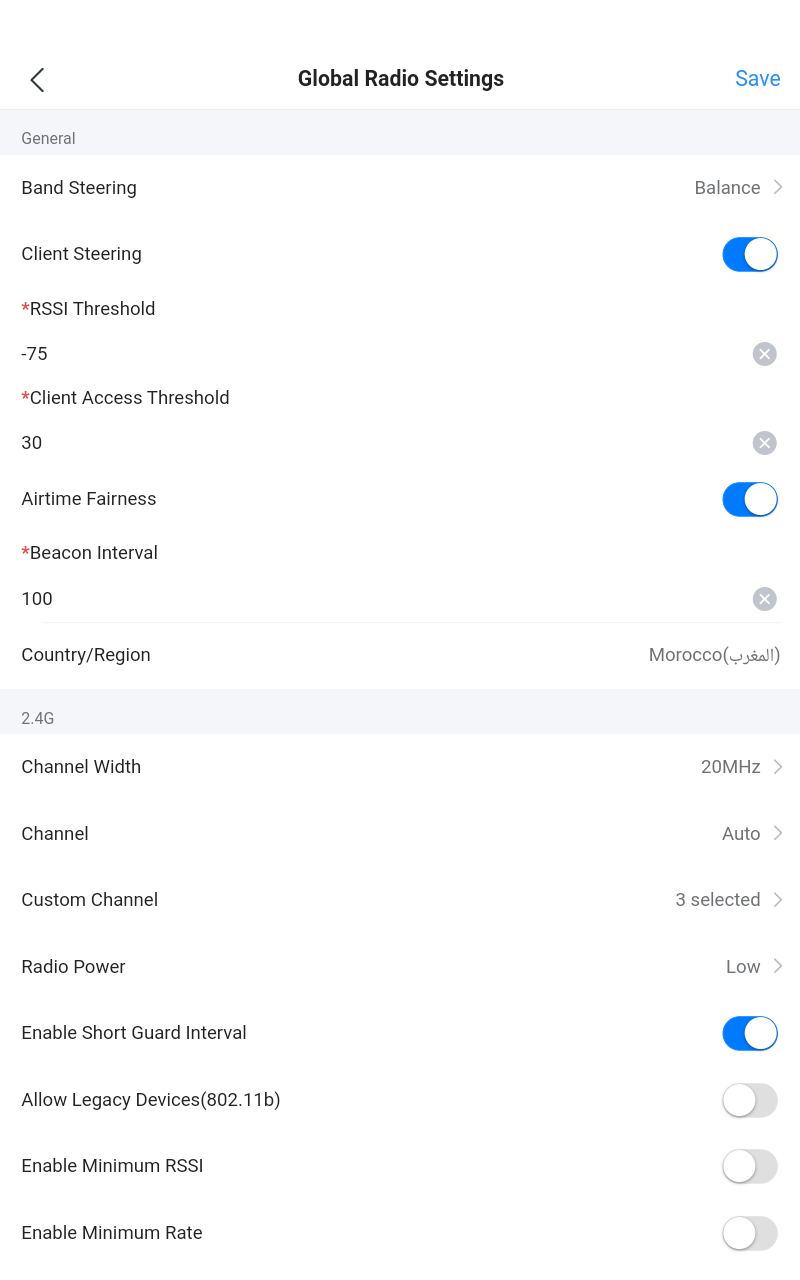
Global Radio Settings
On this page, users can edit the frequency band 2.4GHz or 5GHz that can be used by devices using Wireless LAN also general features can be configured here like Band Steering, Client Steering, Airtime Fairness, etc.
For more details, please visit GWN Management Platforms – User Guide (Global Radio Settings)
Mesh
In a Mesh Network, the wireless connection is established between multiple APs, which is used to pass through data traffic rather than client association. Each AP will evaluate the performance of the wireless channel based on several factors and choose one or multiple appropriate APs to set up the connection.
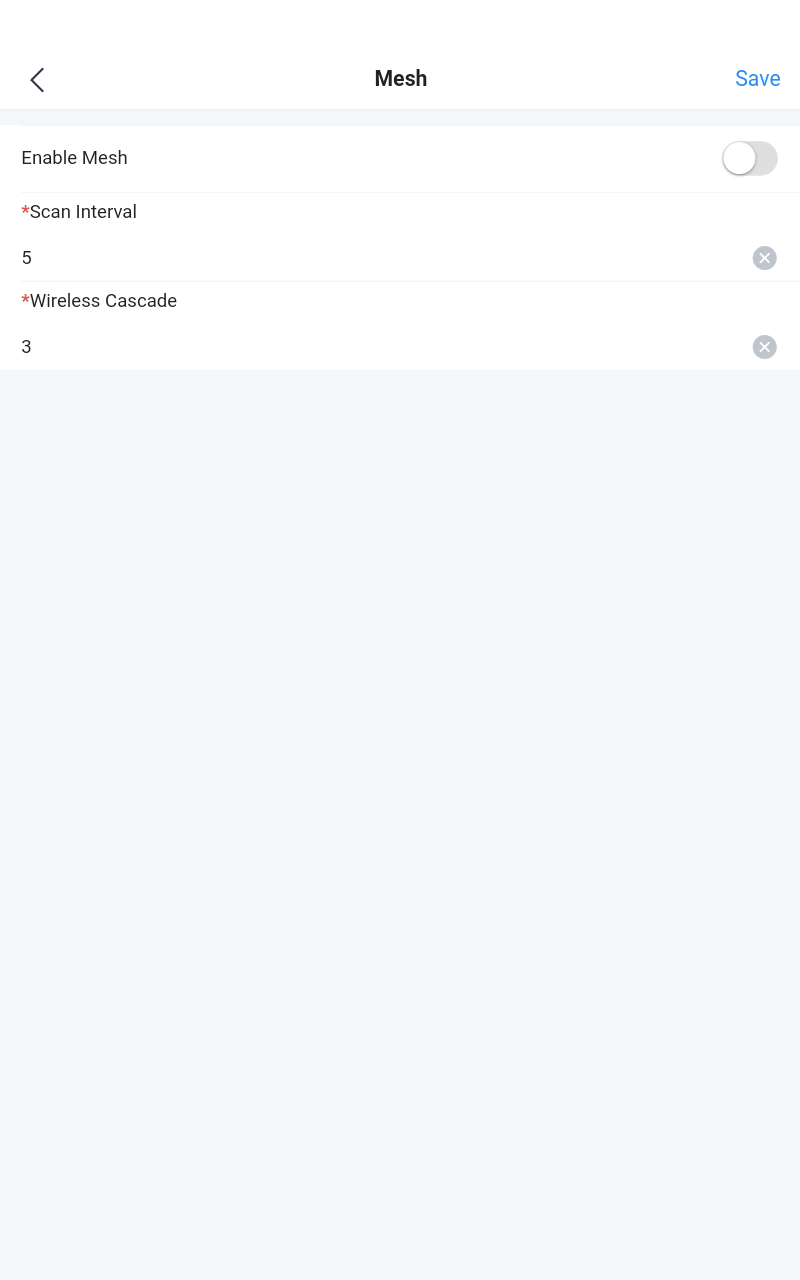
Enable Mesh | Enable or disable Mesh. |
Scan Interval | The time period before a scan for new APs is triggered. |
Wireless Cascade | The maximum number of wireless cascade which are allowed. |
For more details please visit GWN76xx – User Manual (Mesh)
LAN
On this tab, the user can add/edit VLANs or configure the global switch settings that affect all the added GWN switches.
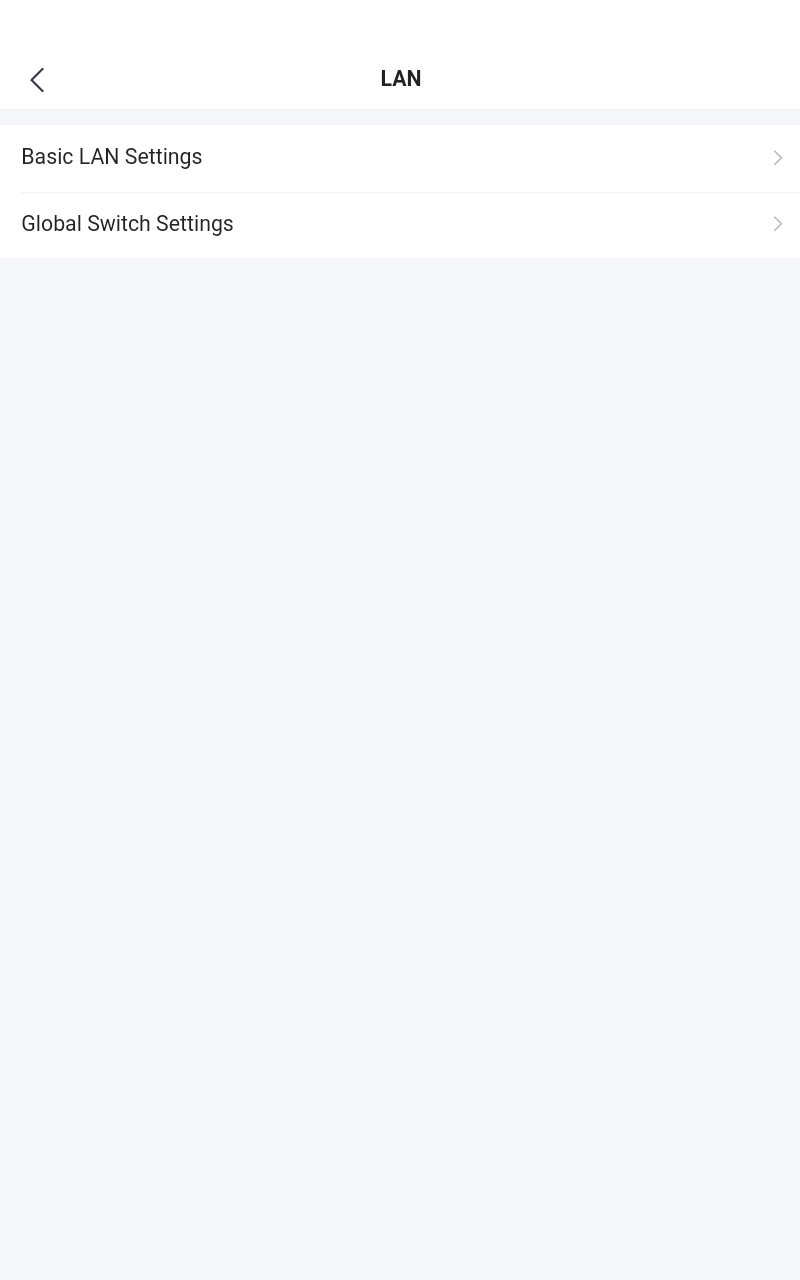
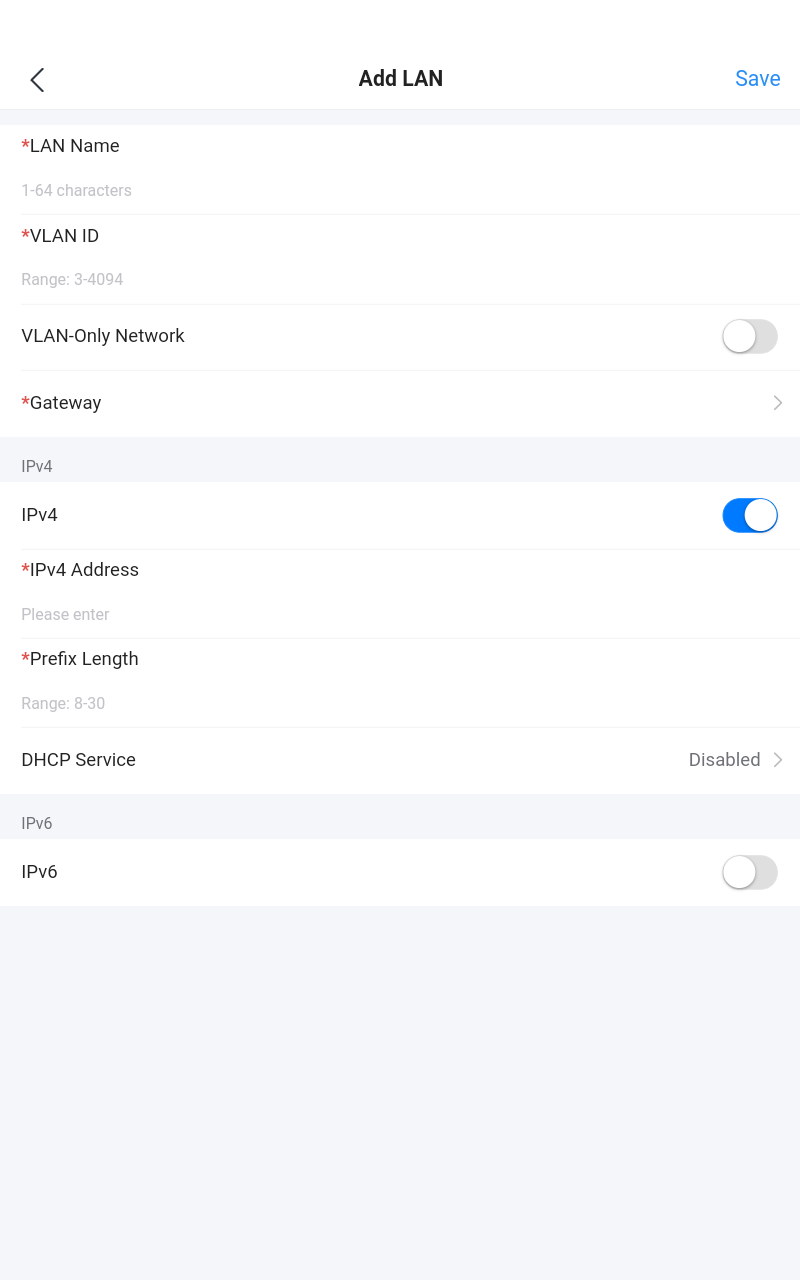
Basic LAN Settings
This page shows all the created VLANs as well as the Default VLAN (Default LAN), click on the LAN created to edit it or click on the “Plus” icon at the bottom to create a new LAN (VLAN).

Global Switch Settings
Global Switch Settings allow the user to configure the general settings for all the GWN78XX switches which have been added to the account, instead of configuring the settings individually for each switch.
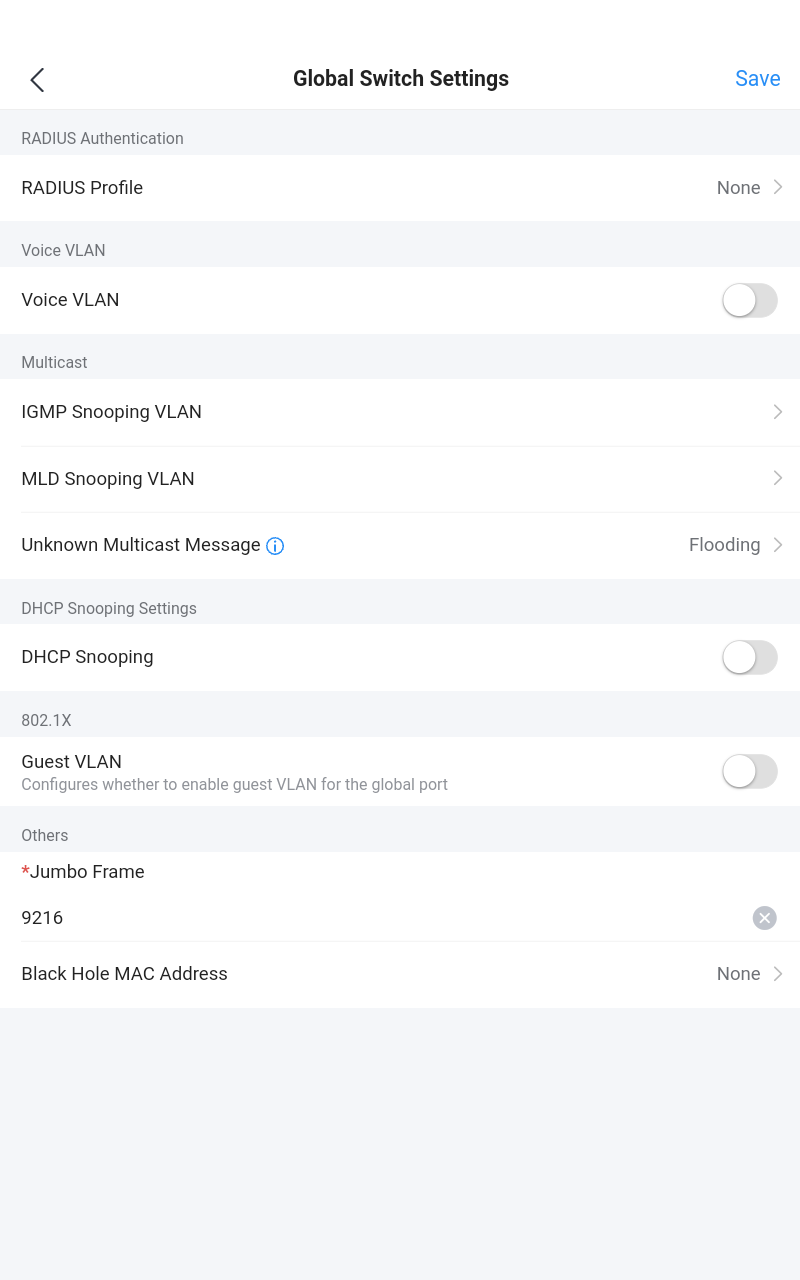
Radius Authentication | |
Radius Profile | Select a Radius server or click Add New RADIUS |
Voice VLAN | |
Voice VLAN | Toggle voice VLAN on/off. |
Multicast | |
IGMP Snooping VLAN | Select the IGMP Snooping VLAN. |
MLD Snooping VLAN | Select the MLD Snooping VLAN. |
Unknown Multicast Message | Configures how the switch (IGMP Snooping/MLD Snooping) handles packets from unknown groups. |
DHCP Snooping Settings | |
DHCP Snooping | Toggle DHCP Snooping on/off |
802.1X | |
Guest VLAN | Configures whether to enable the guest VLAN function for the global port. |
Other | |
Jumbo Frame | Enter the size of the jumbo frame. Range: 1518-10000 |
Black Hole MAC Address | Select a Black Hole MAC Address from the list or click Add New MAC group |
Global Switch Settings
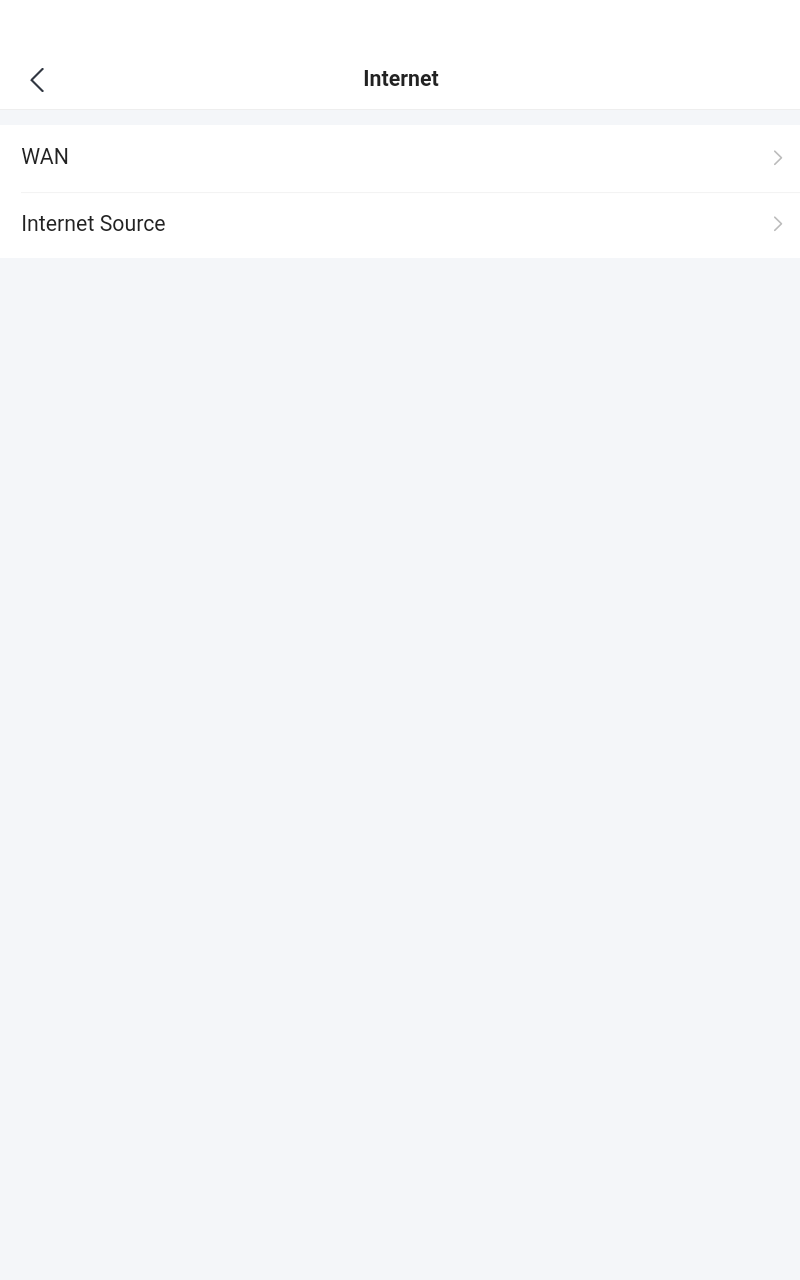
Internet
Internet configurations like adding/configuring WAN ports or configuring Load-balancing/backup (Failover) between the WANs ports are found here, these configurations are located under the Settings tab → Internet.
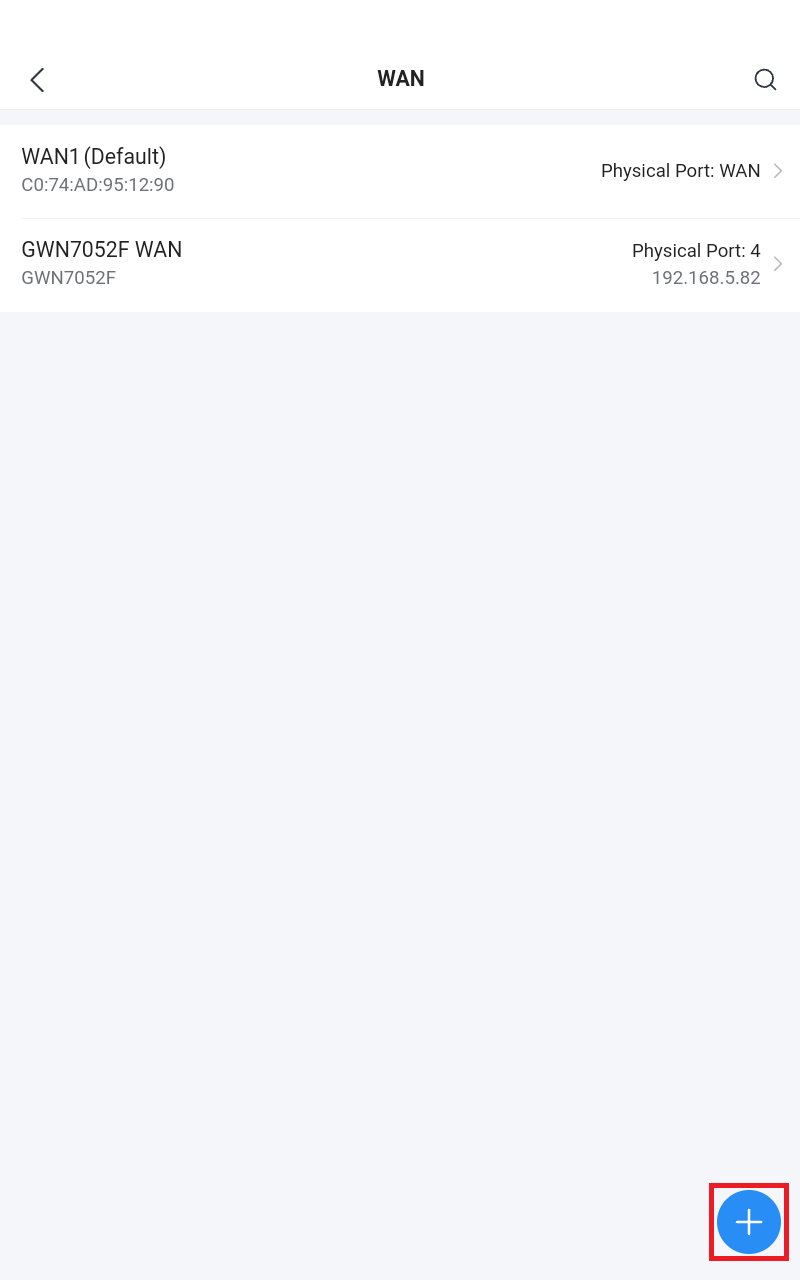
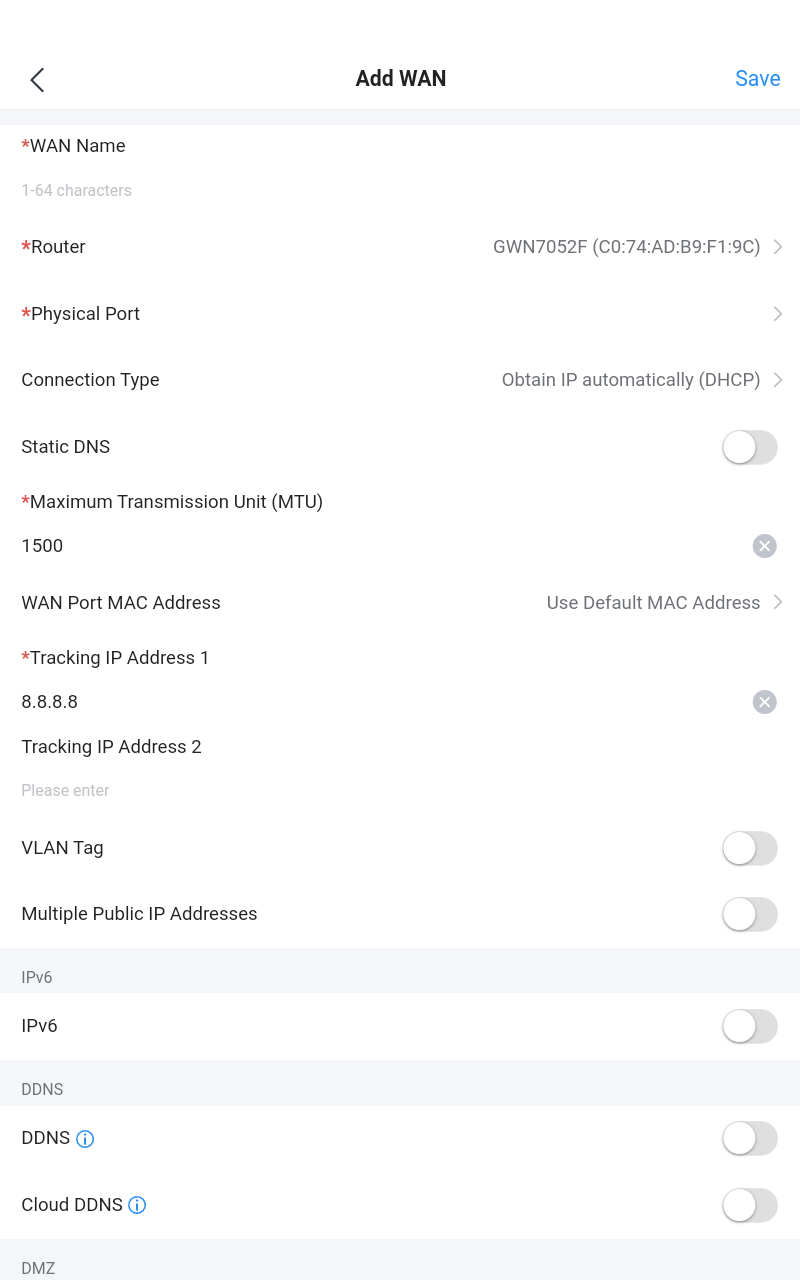
WAN
In this section, the user can add WAN (router WAN port or a device group) or edit previously created WAN ports, and the number of WAN ports is determined by how many GWN routers are added/adopted to GWN.Cloud/GWN Manager accordingly.
To add/edit a WAN, please navigate to Settings tab → Internet → WAN.
For more details please visit GWN Management Platforms – User Guide (WAN)
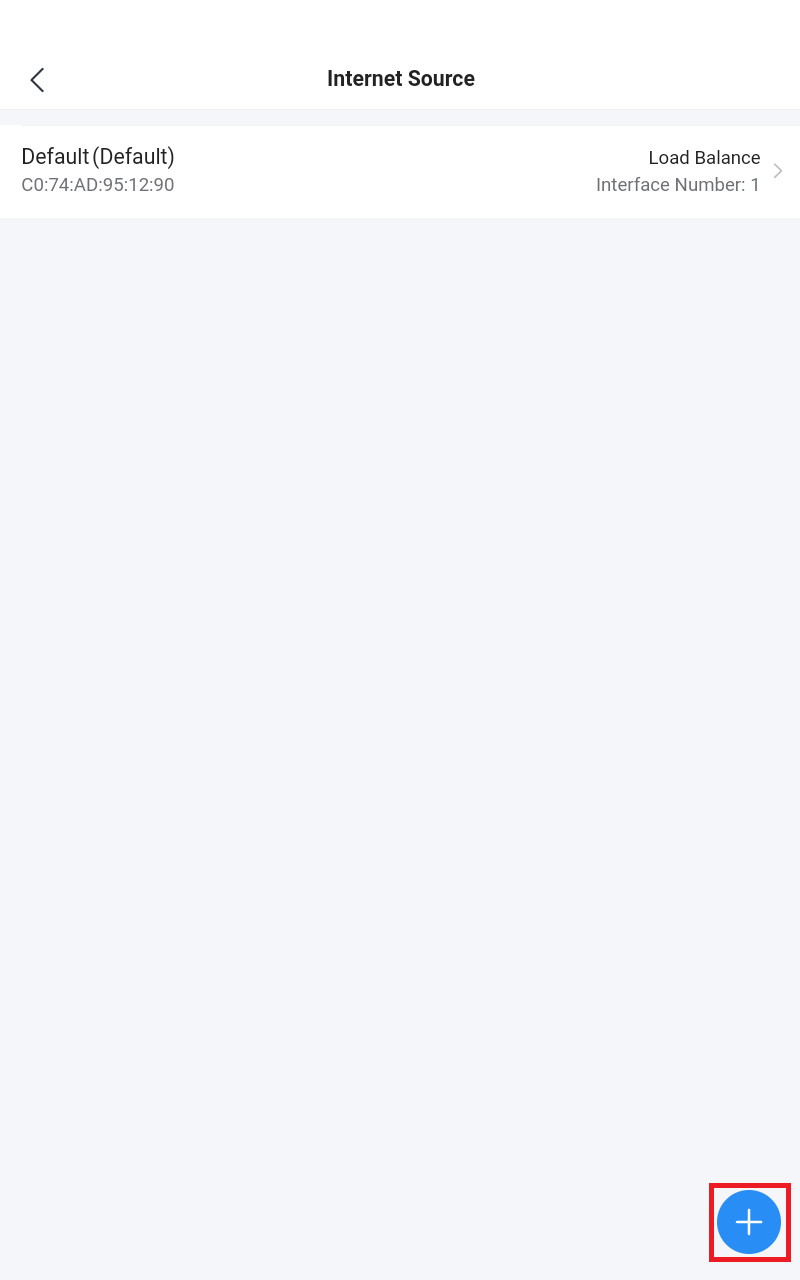
Internet Source
In this section of internet configuration, under internet source, the user can configure load balancing or backup (Failover) between the previously added WANs. Either click on the entry or “Configure icon” to edit previously added internet sources or click on the “Add” button to add a new one, refer to the figure below:
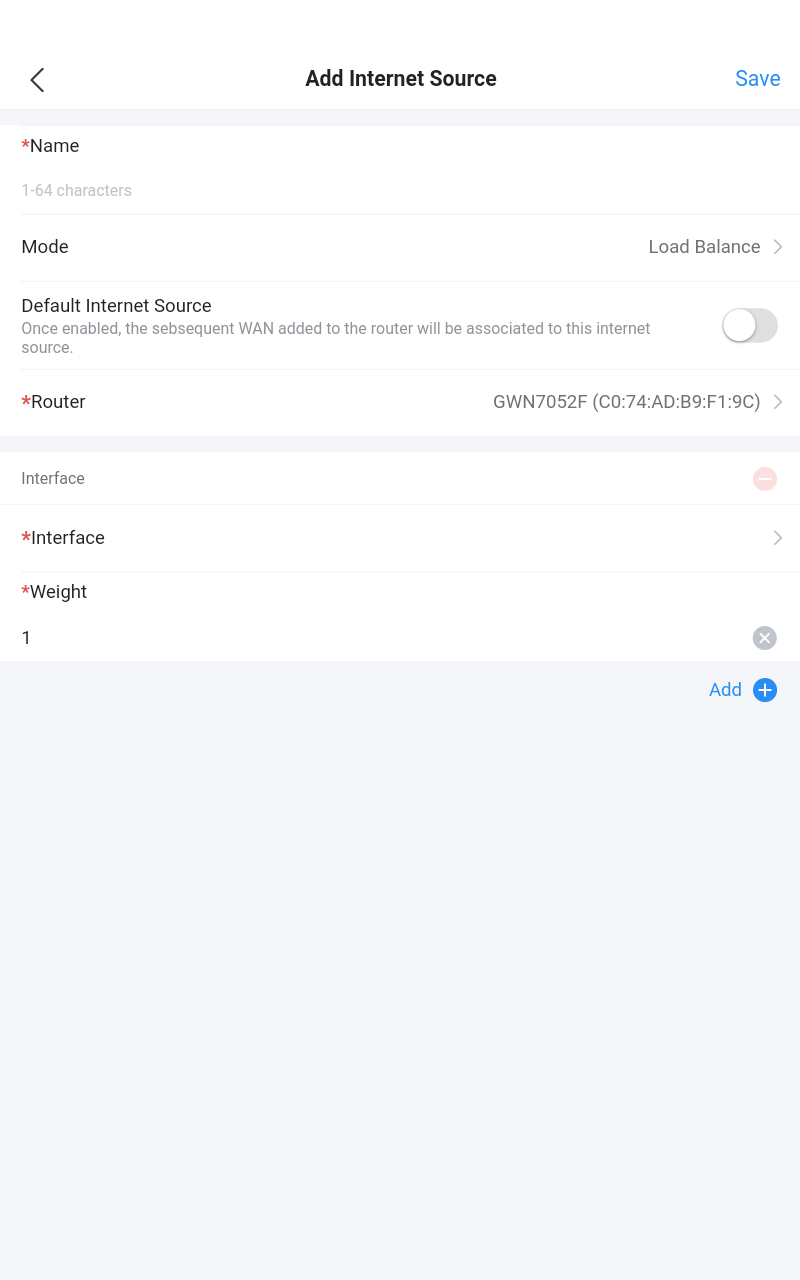
For more details, please visit GWN Management Platforms – User Guide (Internet Source)
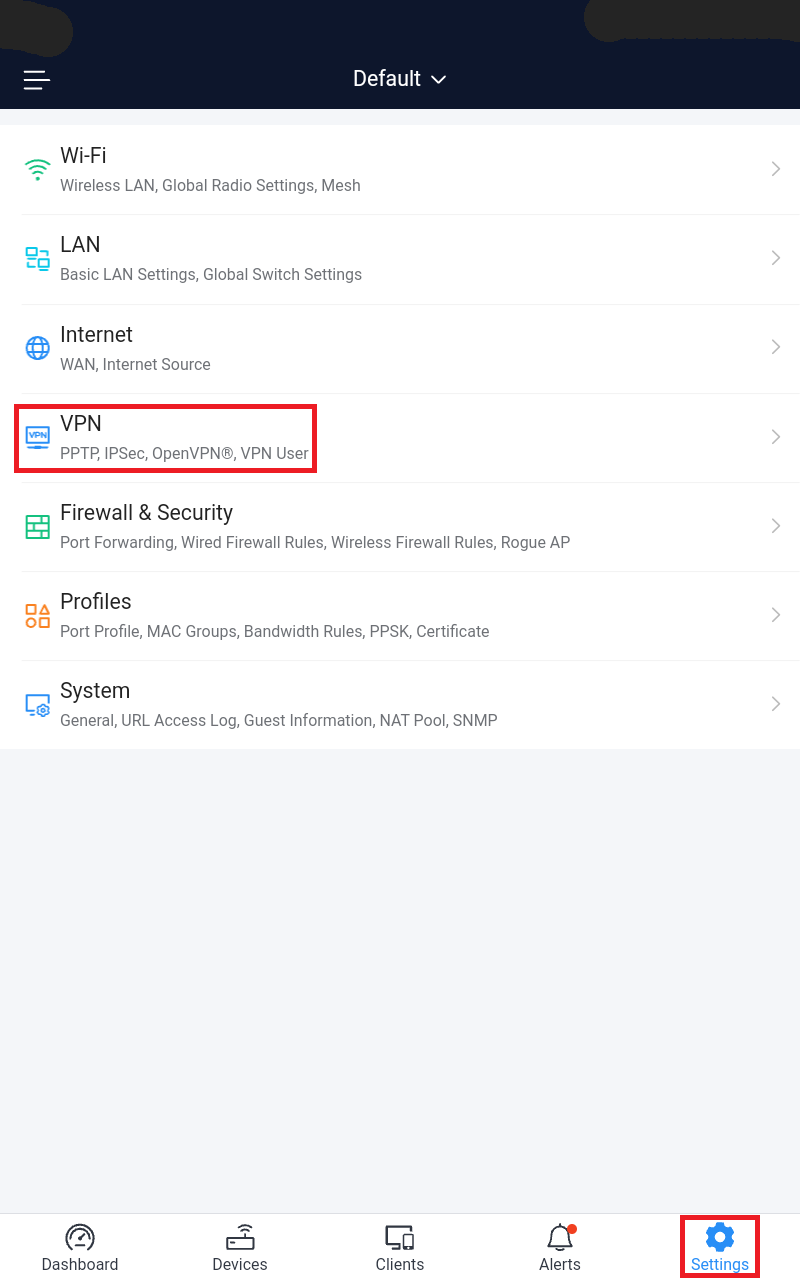
VPN
GWN Management supports many VPNs including PPTP, IPSec (support auto networking mode), OpenVPN®, and WireGuard®. On the GWN app, the user can configure:
- PPTP: supports client and server.
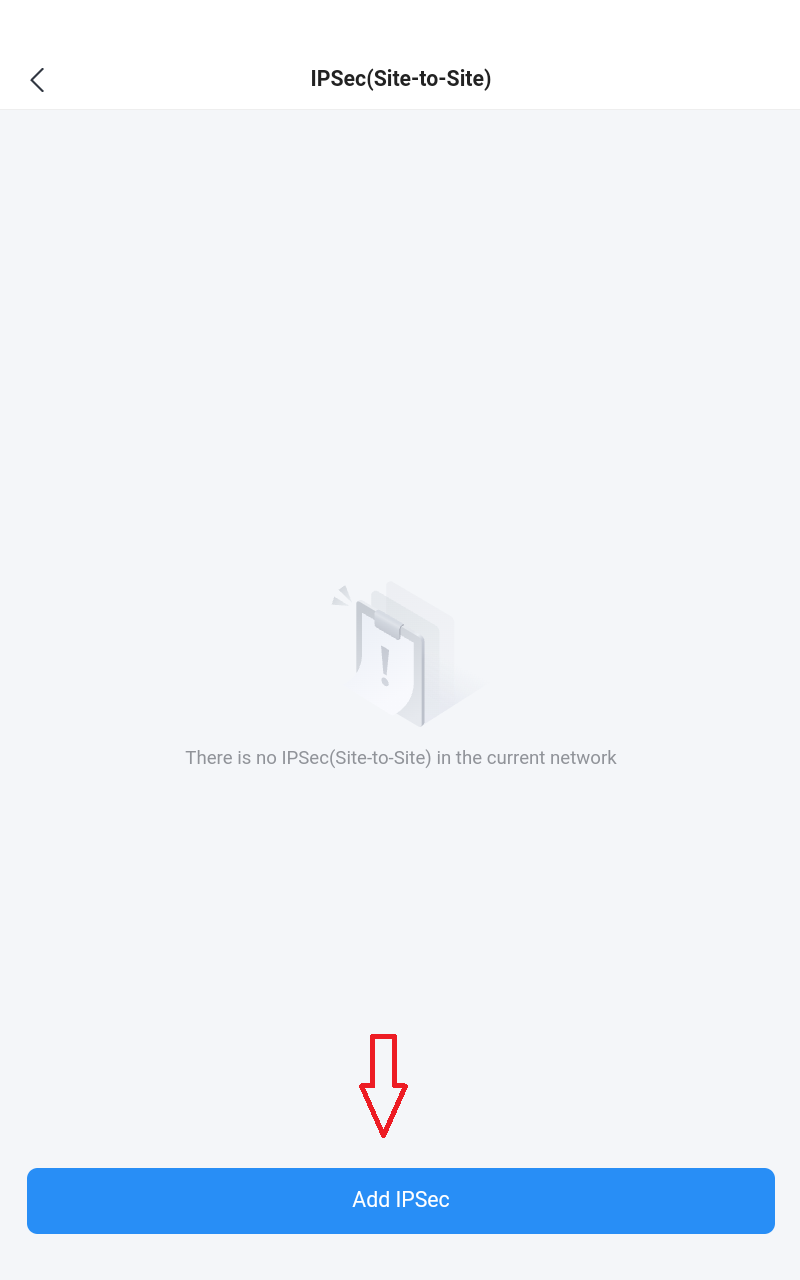
- IPSec (Site-to-Site): supports manual and auto mode.
- OpenVPN®: supports client and server.
GWN Management supports more than one GWN router with single or multi-WAN on the same network, thus when configuring a VPN it’s important to specify which router (WAN/Device group) and interface will be used.
To add a new VPN or a VPN user, please navigate to the Settings tab → VPN, then click on the VPN type as shown in the figures below:

For more details, please visit GWN Management Platforms – User Guide (VPN)
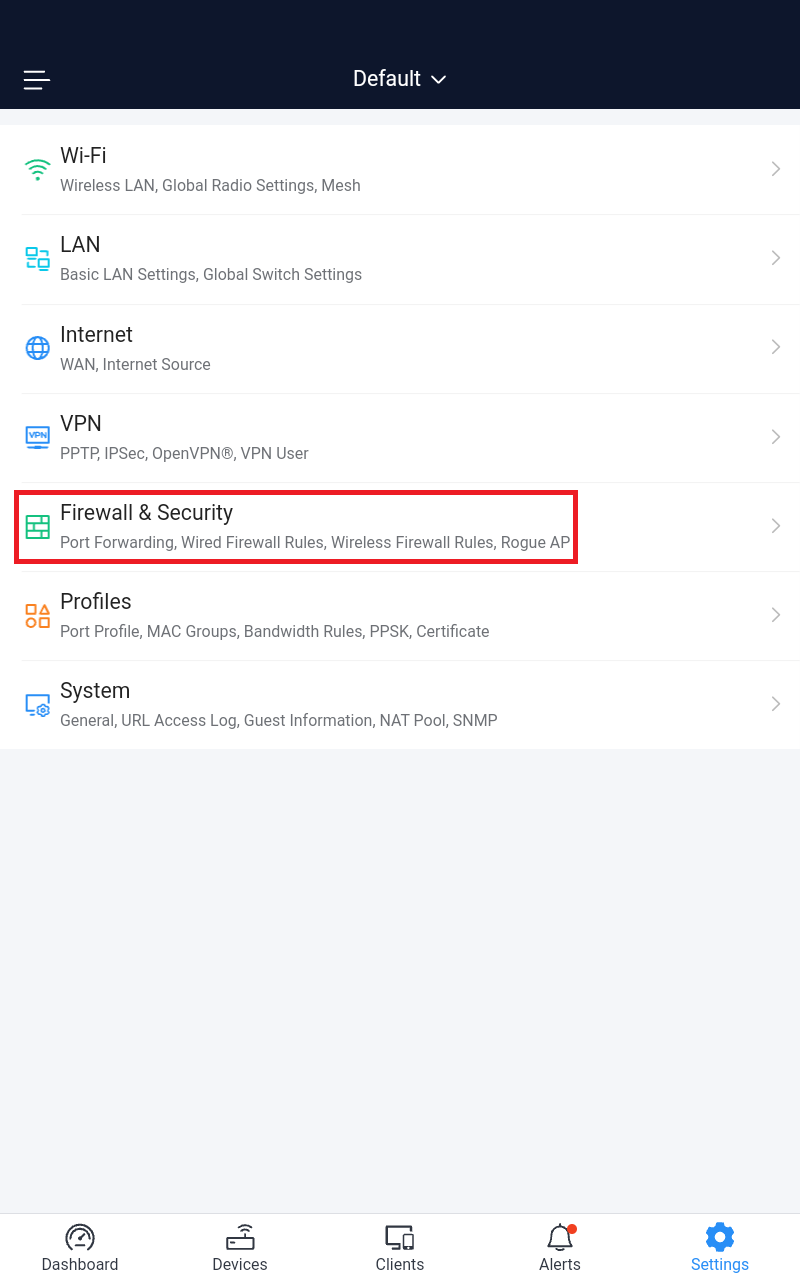
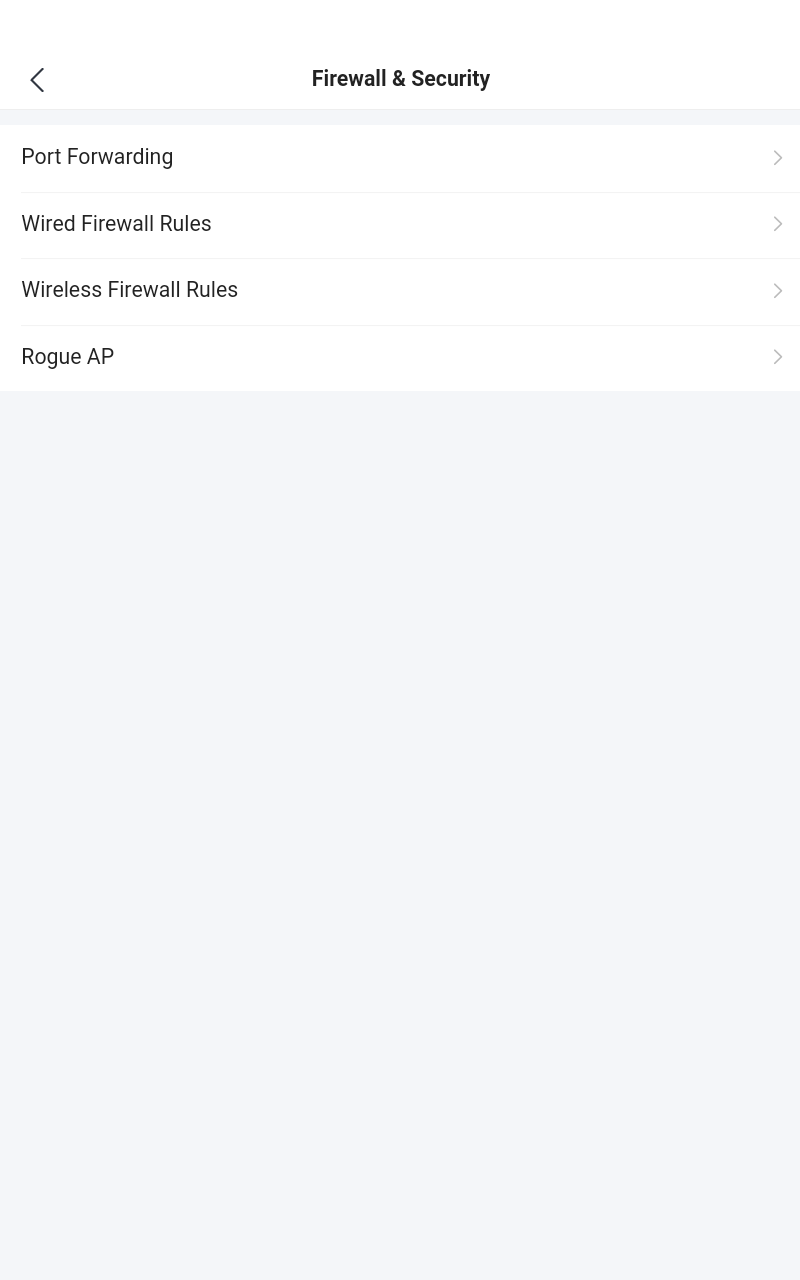
Firewall & Security
The Firewall & Security screen combines all the related configurations related to firewall and security, split into 4 sections (Port Forwarding, Wired Firewall Rules, Wireless Firewall Rules, and Rogue AP).
Navigate to Settings screen → Firewall & Security, then click on an entry to configure the corresponding option.
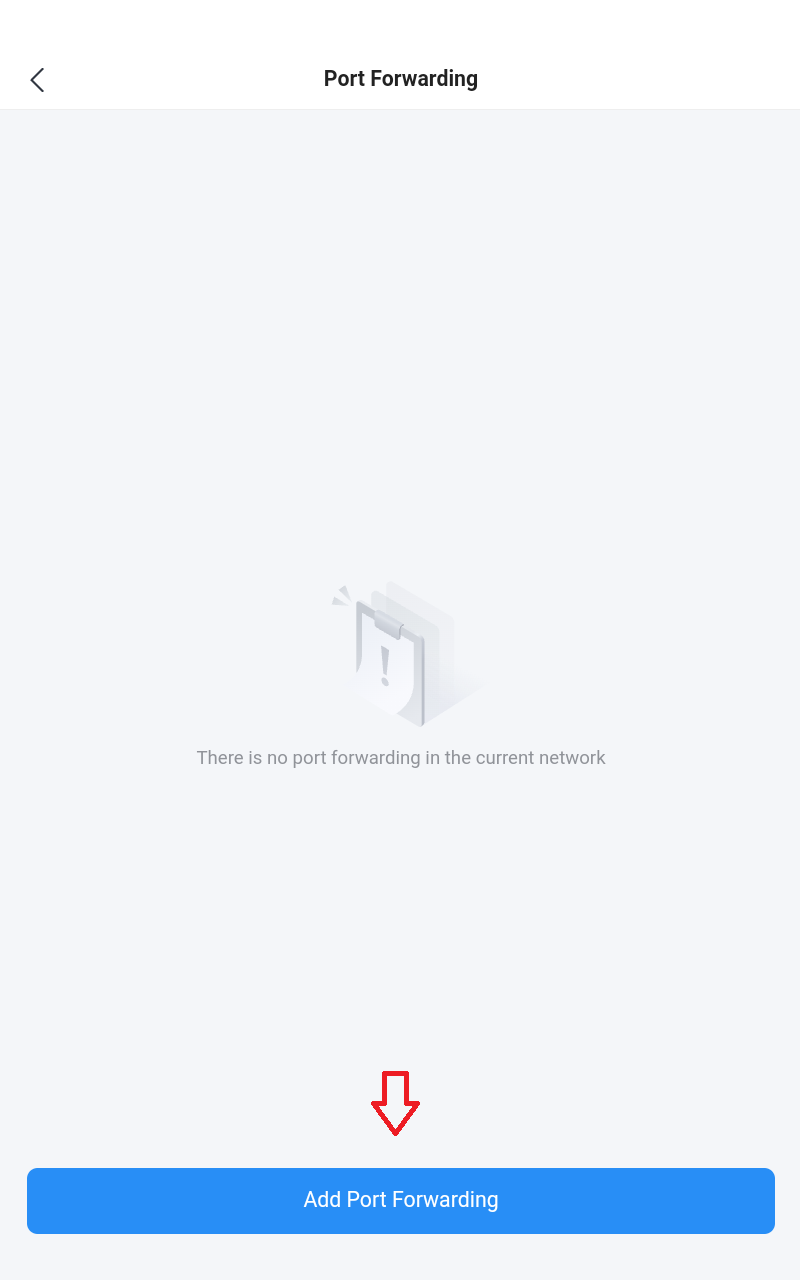
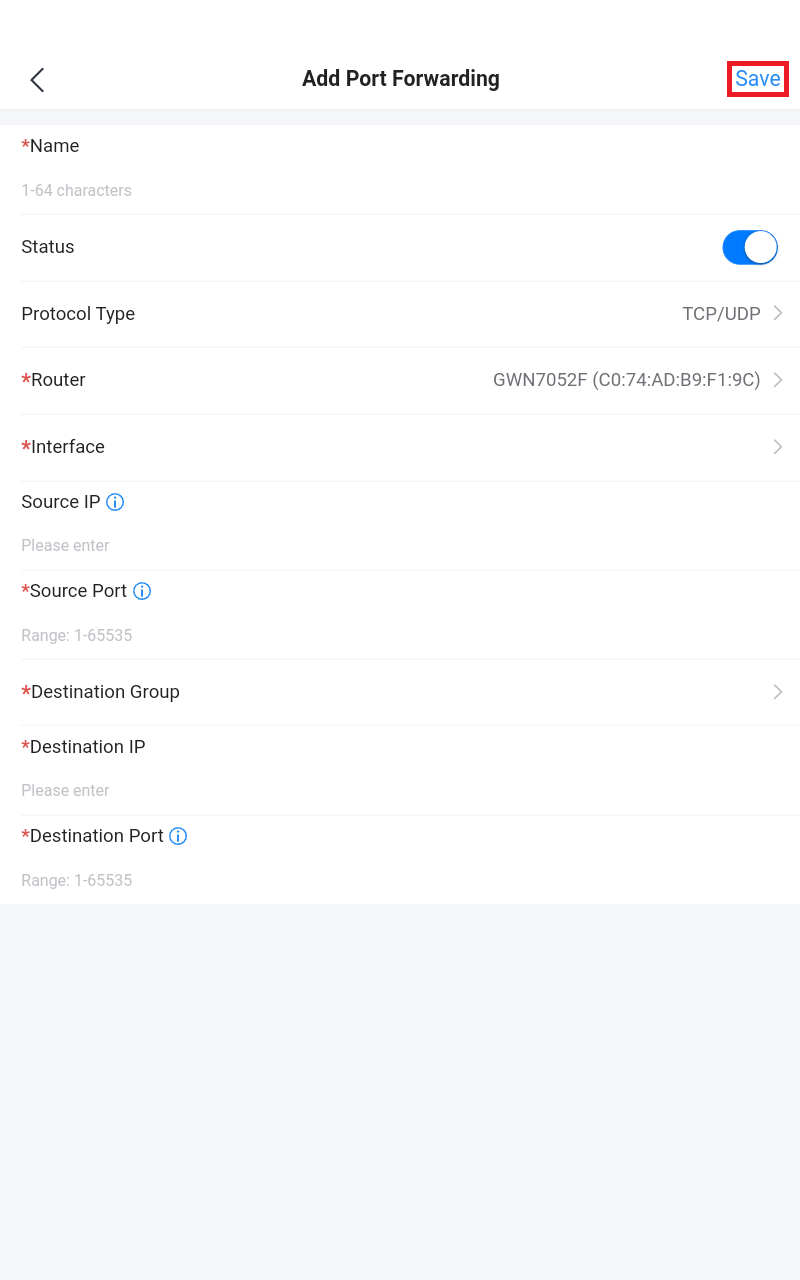
Port Forwarding
Port forwarding is redirecting the communication request from one address and port to another address and port. A source IP Address and port will be mapped to a Destination IP Address, port, and Group.
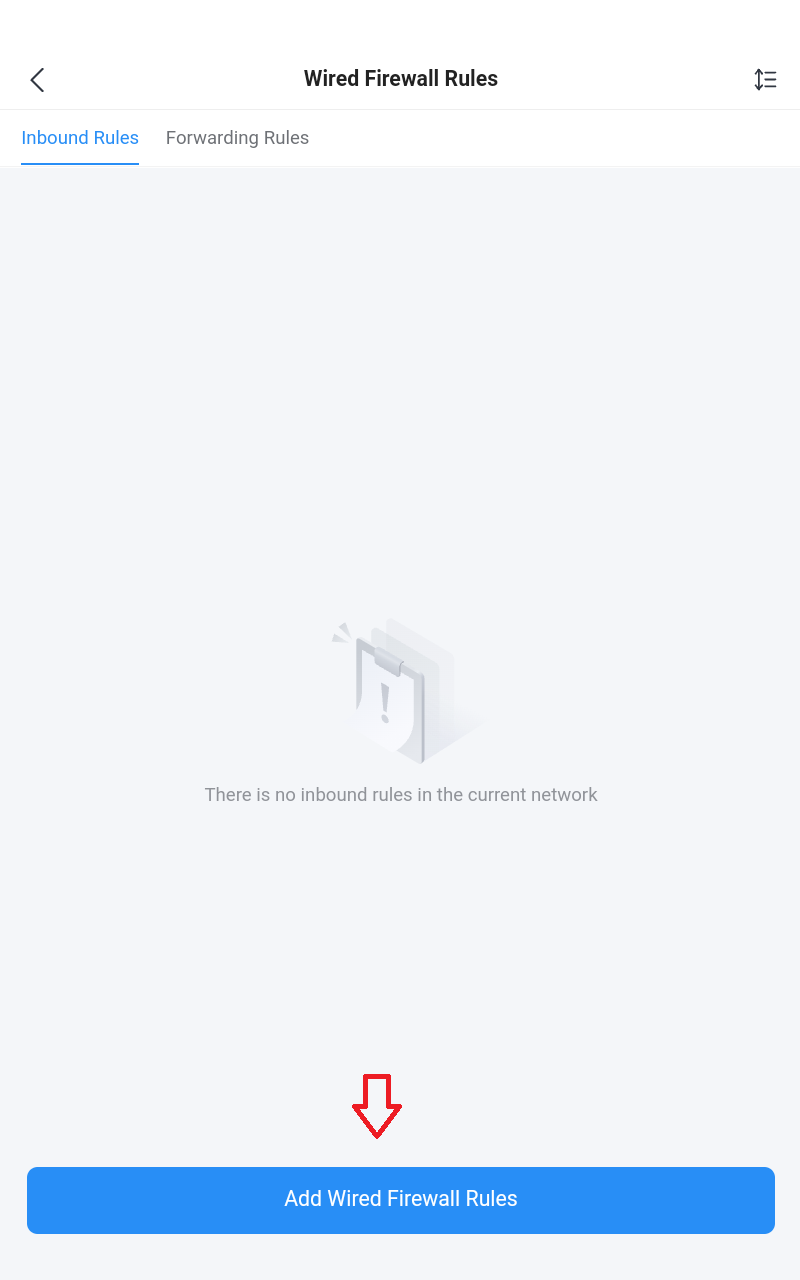
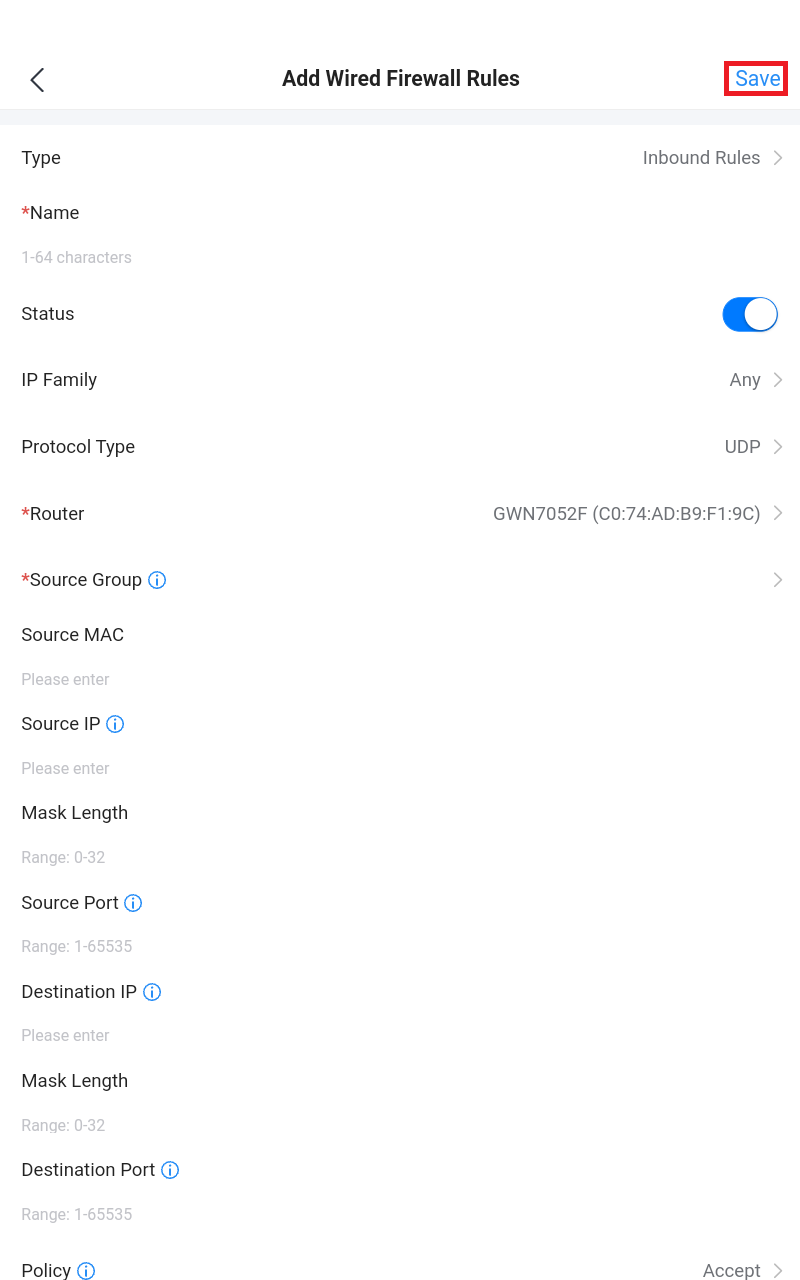
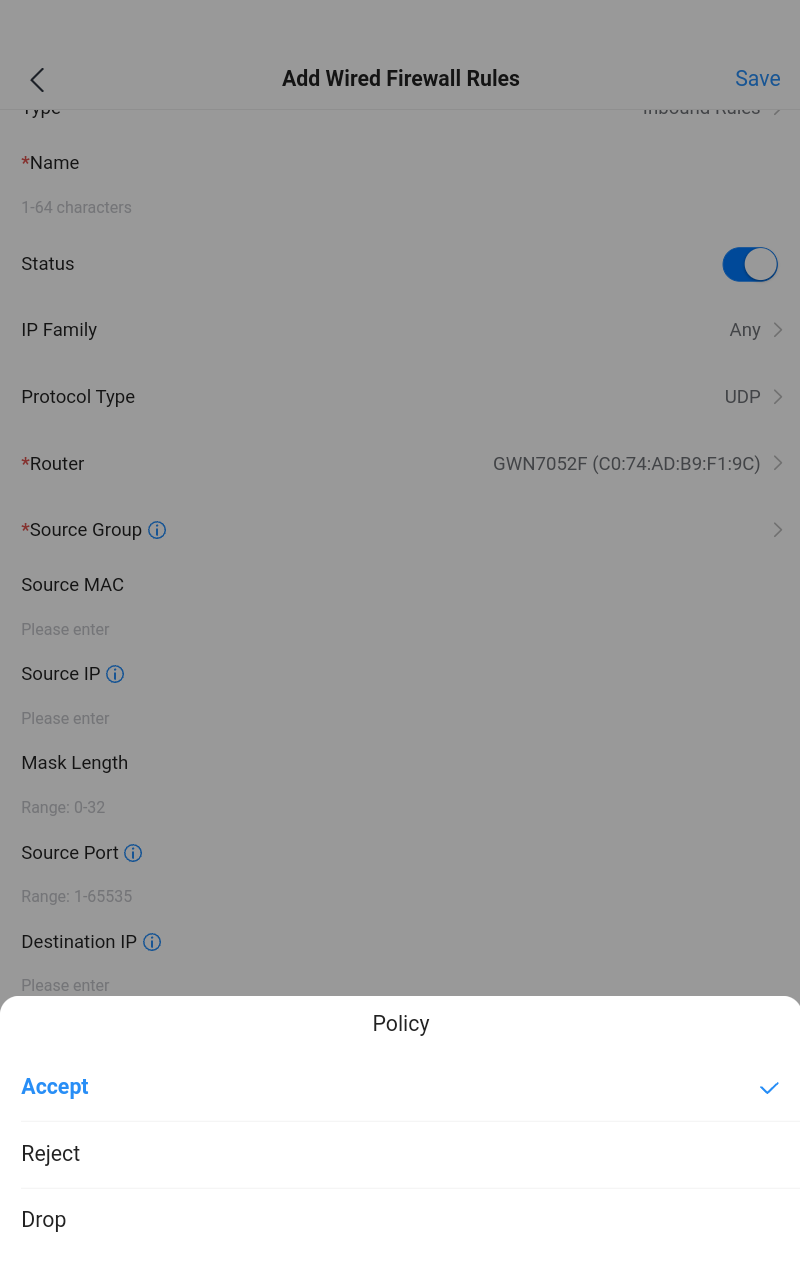
Wired Firewall Rules
From this screen, the administrator can Accept, Reject, or Drop wired traffic using inbound rules or forwarding rules,
- Accept: To allow the traffic to go through.
- Deny: A reply will be sent to the remote side stating that the packet is rejected.
- Drop: The packet will be dropped without any notice to the remote side.
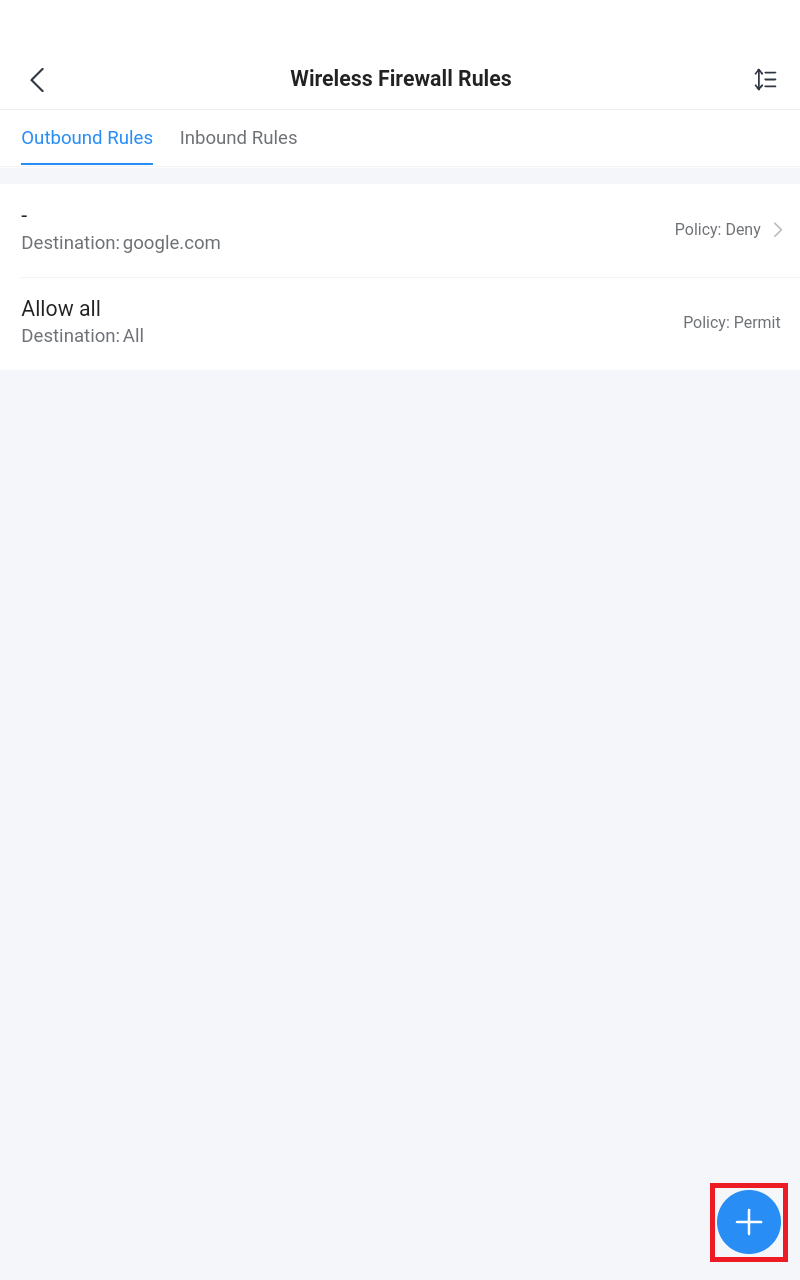
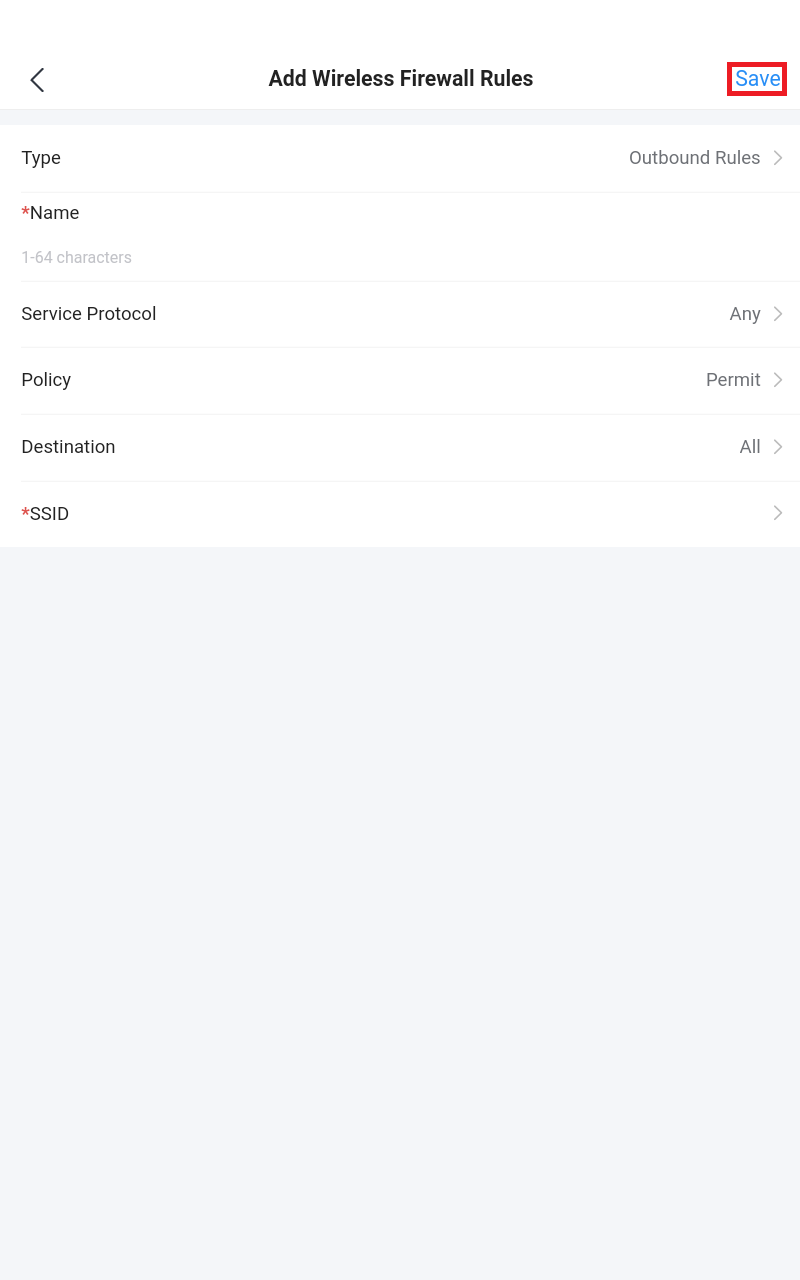
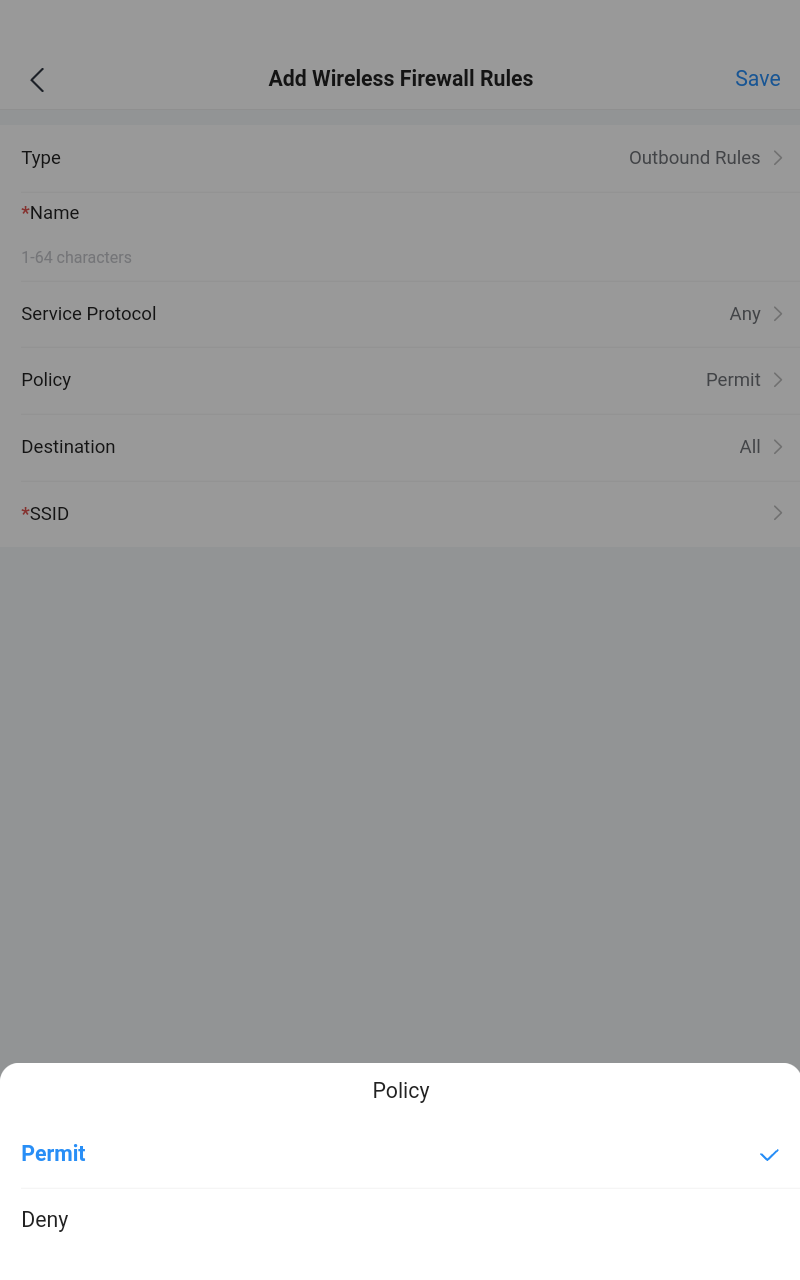
Wireless Firewall Rules
This screen does allow users to control the outgoing and incoming traffic from clients connected to the adopted/paired GWN devices by manually setting up policies to either deny or permit the traffic for wireless traffic based on protocol type and by specifying SSIDs and destinations.
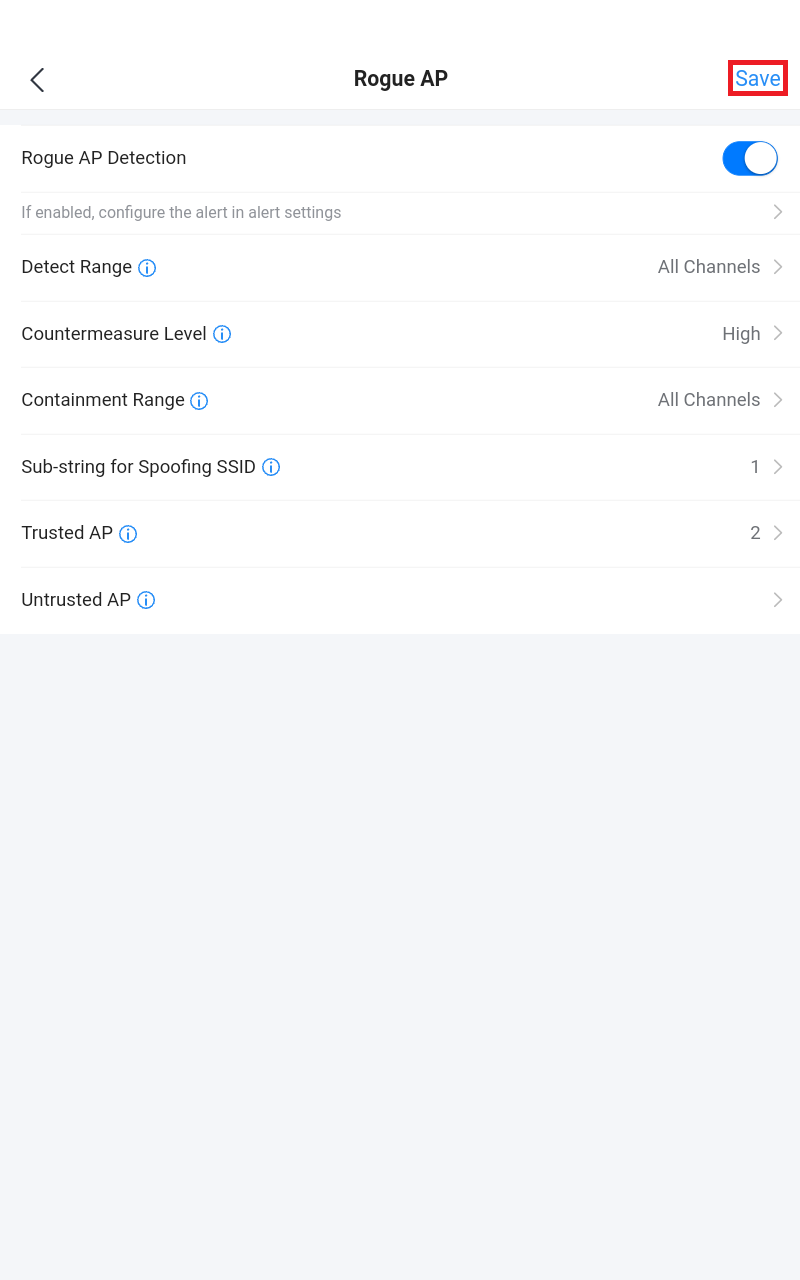
Rogue AP
GWN Cloud and GWN Manager offer the ability to prevent malicious intrusion to the network and increase the wireless security access of clients when introducing the Rogue AP detection feature to the adopted/paired GWN devices. The detected devices will be listed with all the details under “Alerts” page for further intervention.
For more details, please visit GWN Management Platforms – User Guide (Firewall & Security)
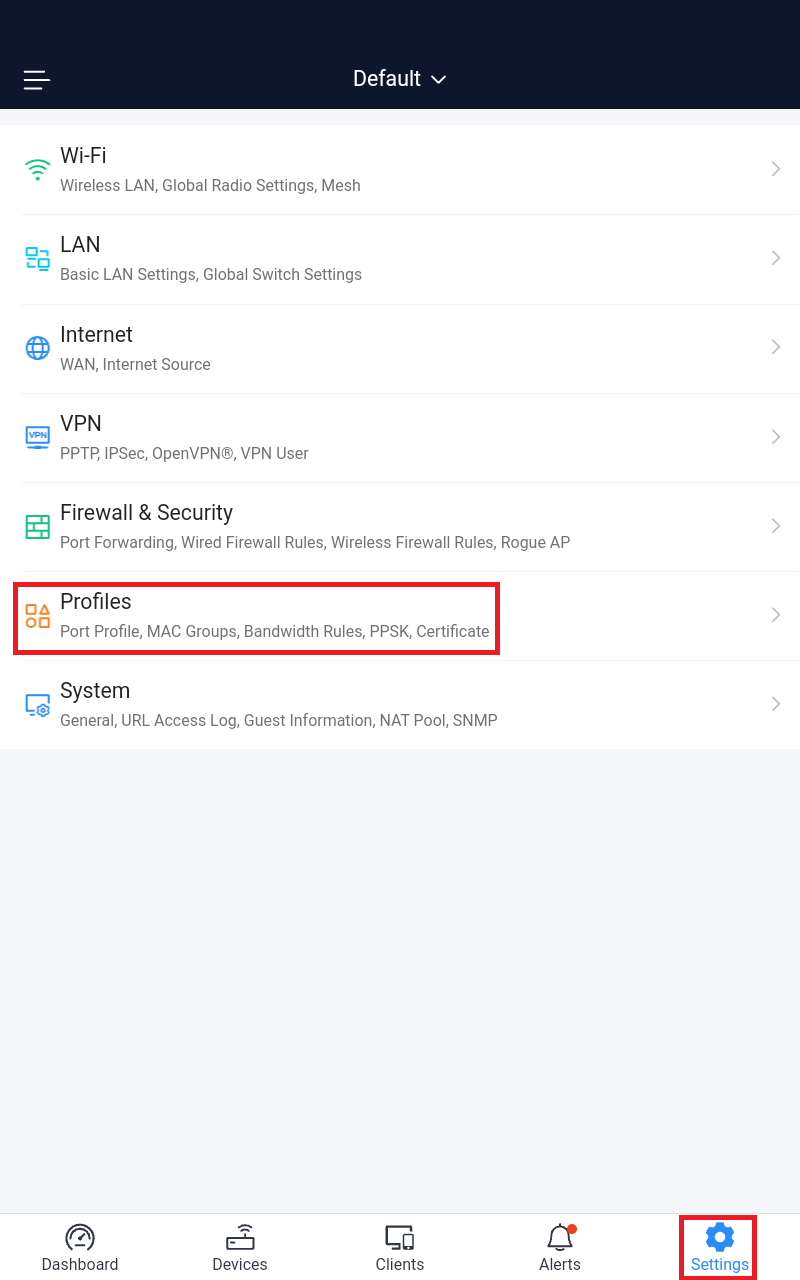
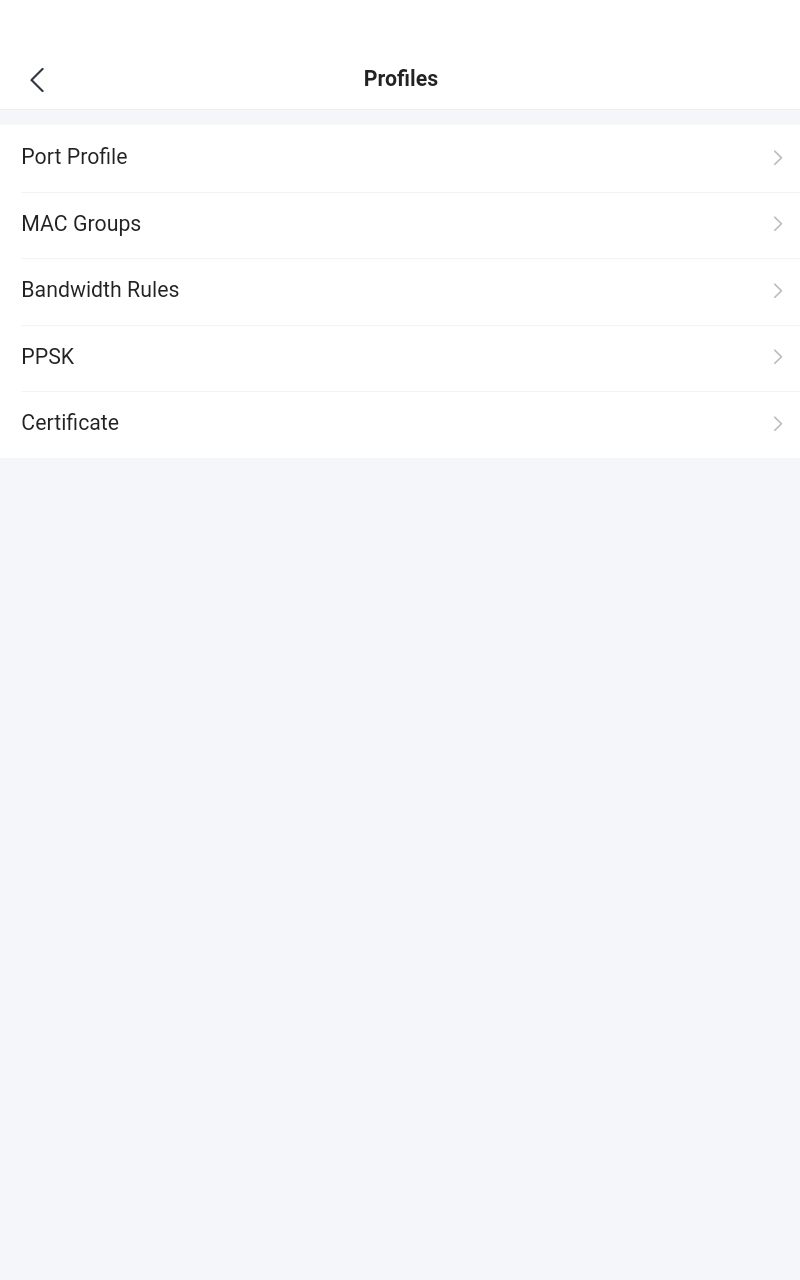
Profiles
The profiles screen contains some common configurations for GWN devices like Port Profile, MAC Groups, Bandwidth rules, PPSK and Certificate.
Navigate to Settings screen → Profiles, then click on an entry to configure the corresponding option.
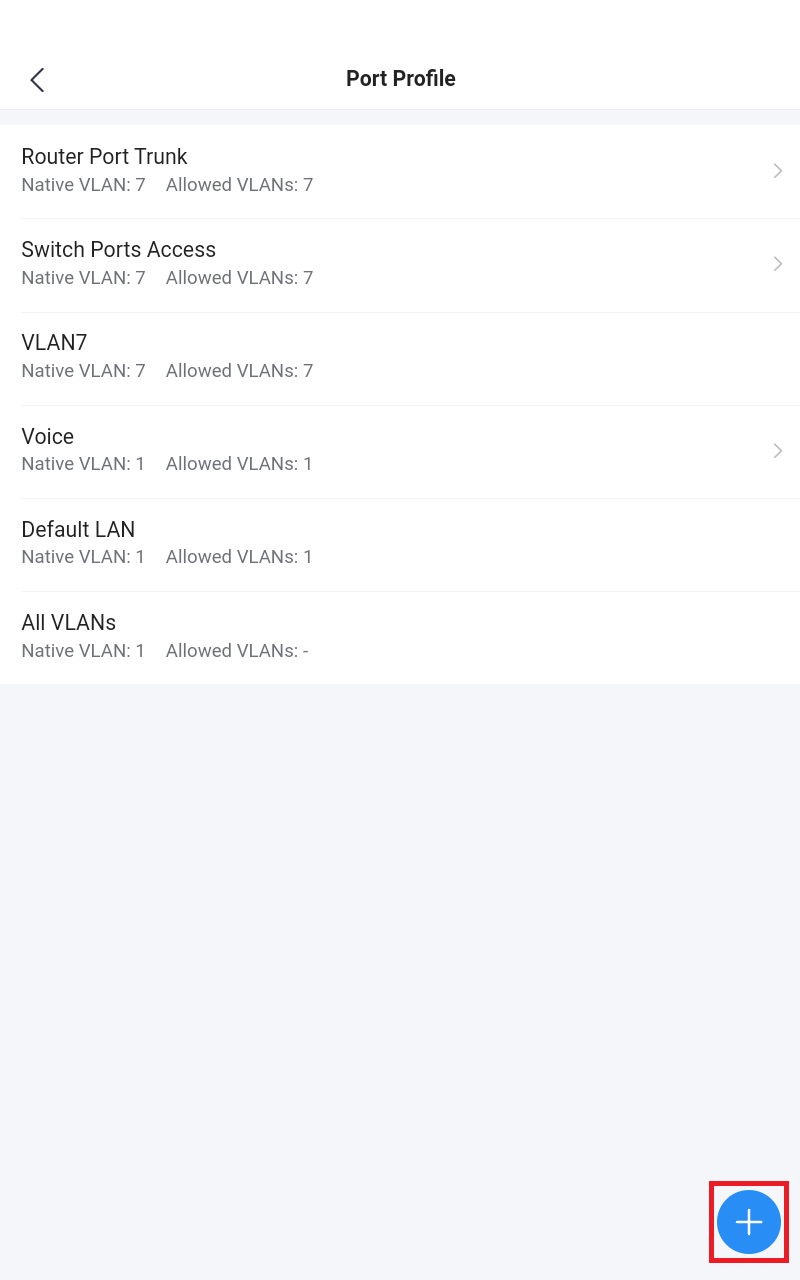
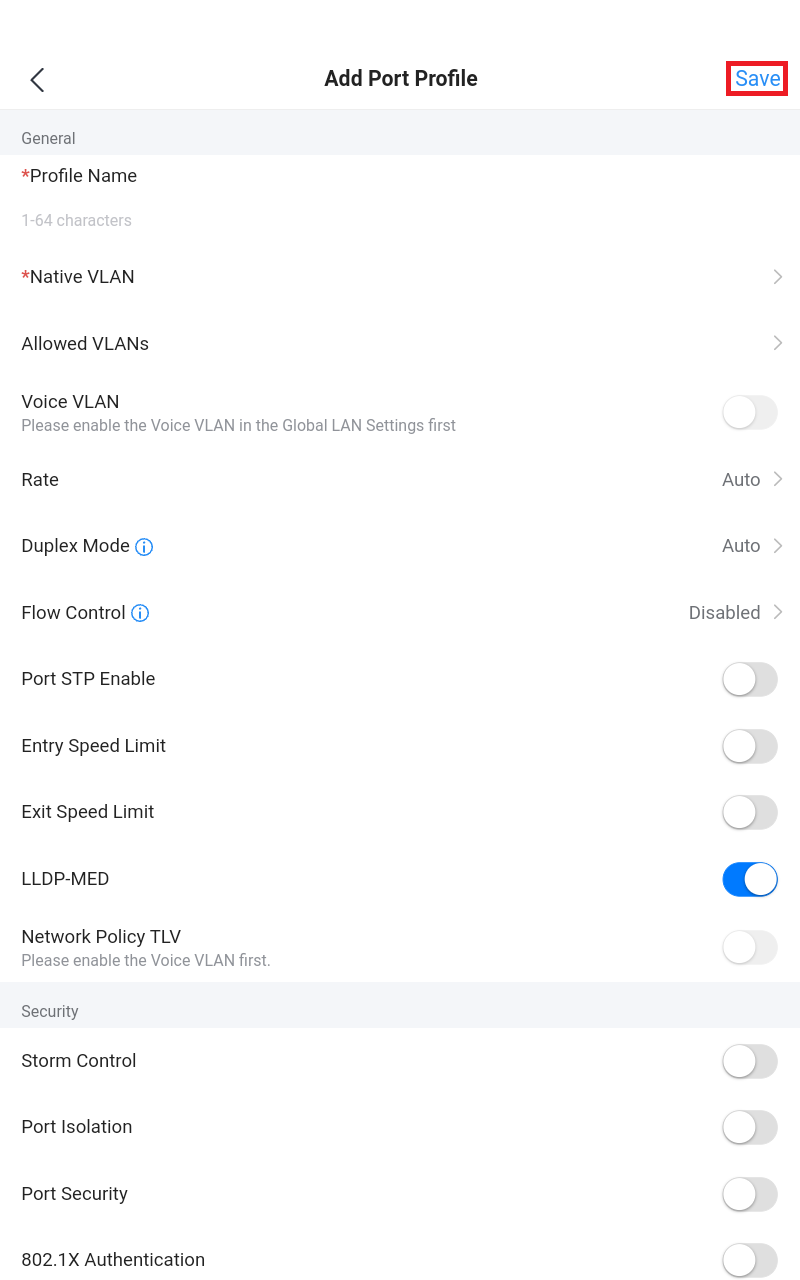
Port Profiles
Port profiles is a convenient way to provision a GWN device (ex: GWN switches or a GWN router) interfaces easily. Name a profile then select the relevant configurations, like VLAN, Rate, Speed limit, LLDP, etc. Also for security we can enable Storm control, Port Isolation, Port Security and 802.1X Authentication.
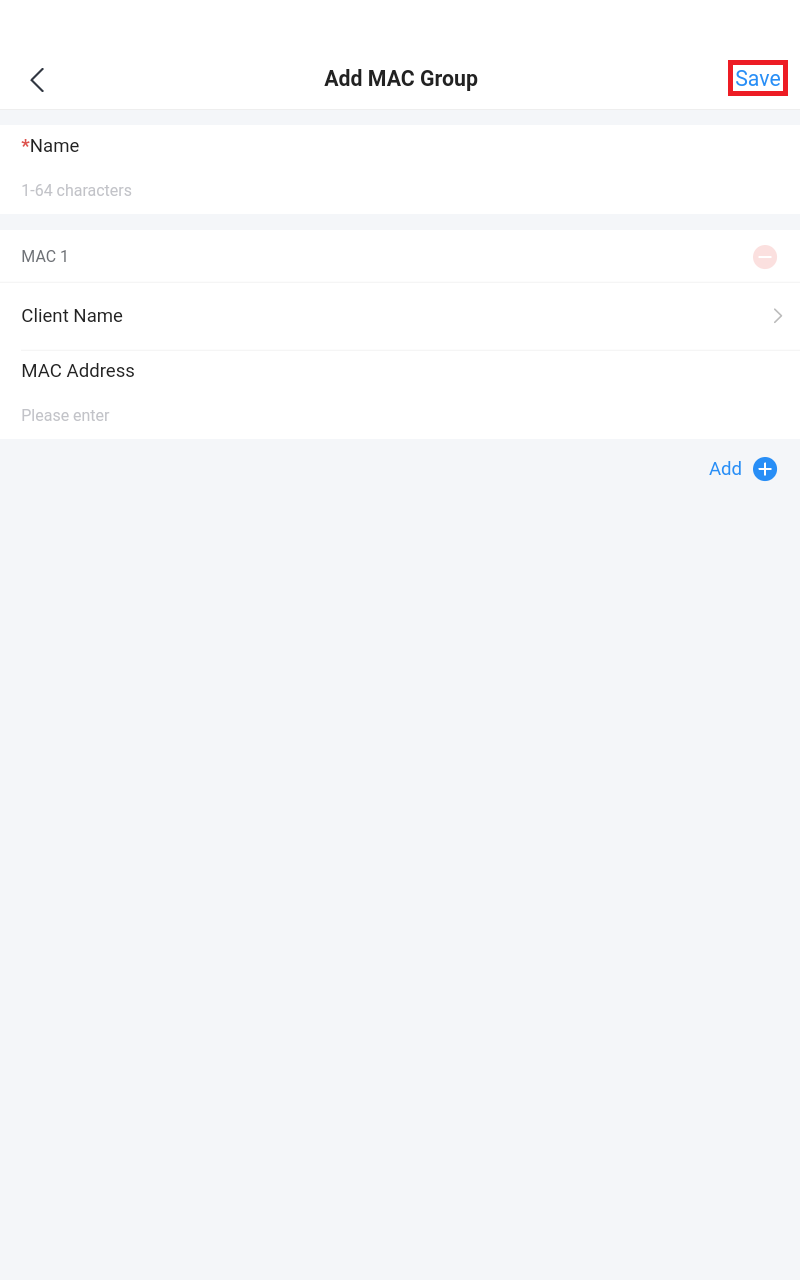
MAC Groups
The user can create a group of MAC addresses that can be used for example on GWN switches with the feature of Black Hole MAC Address under Settings screen → LAN → Global Switch Settings to block these addresses.

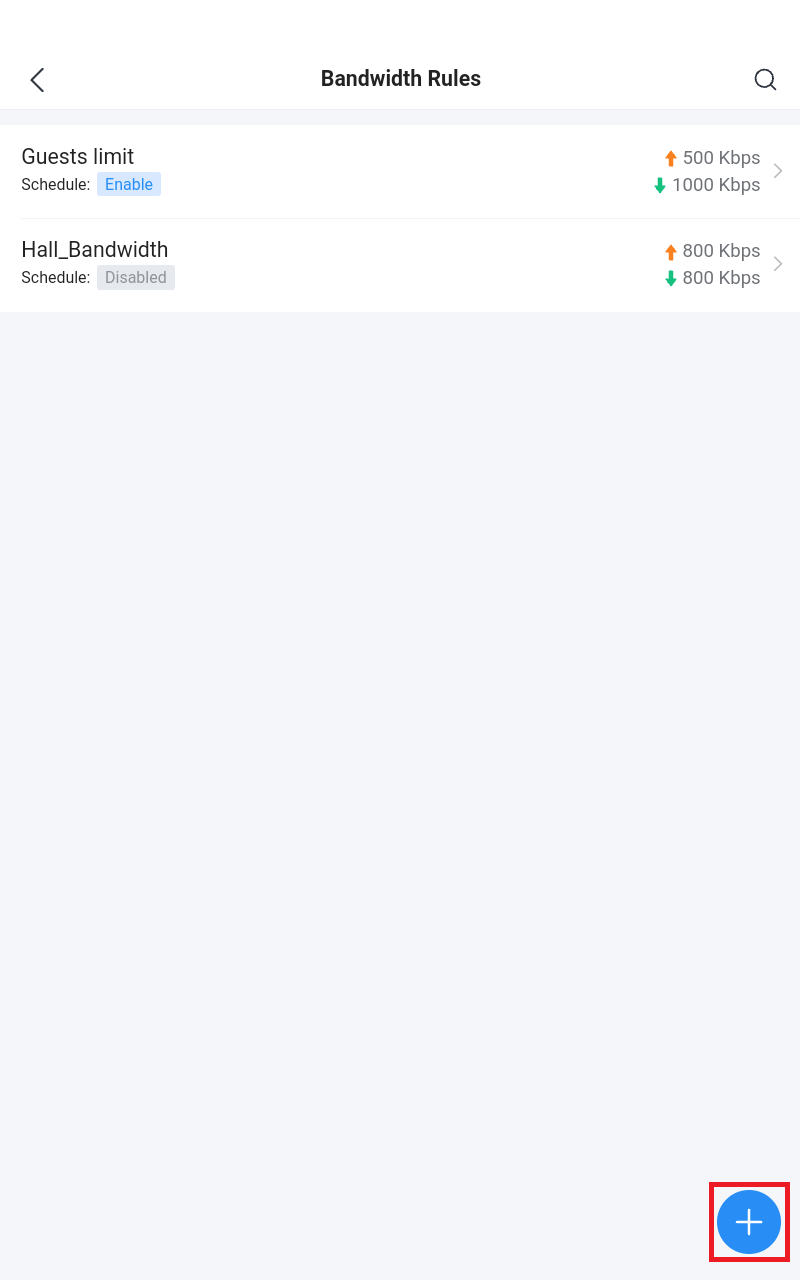
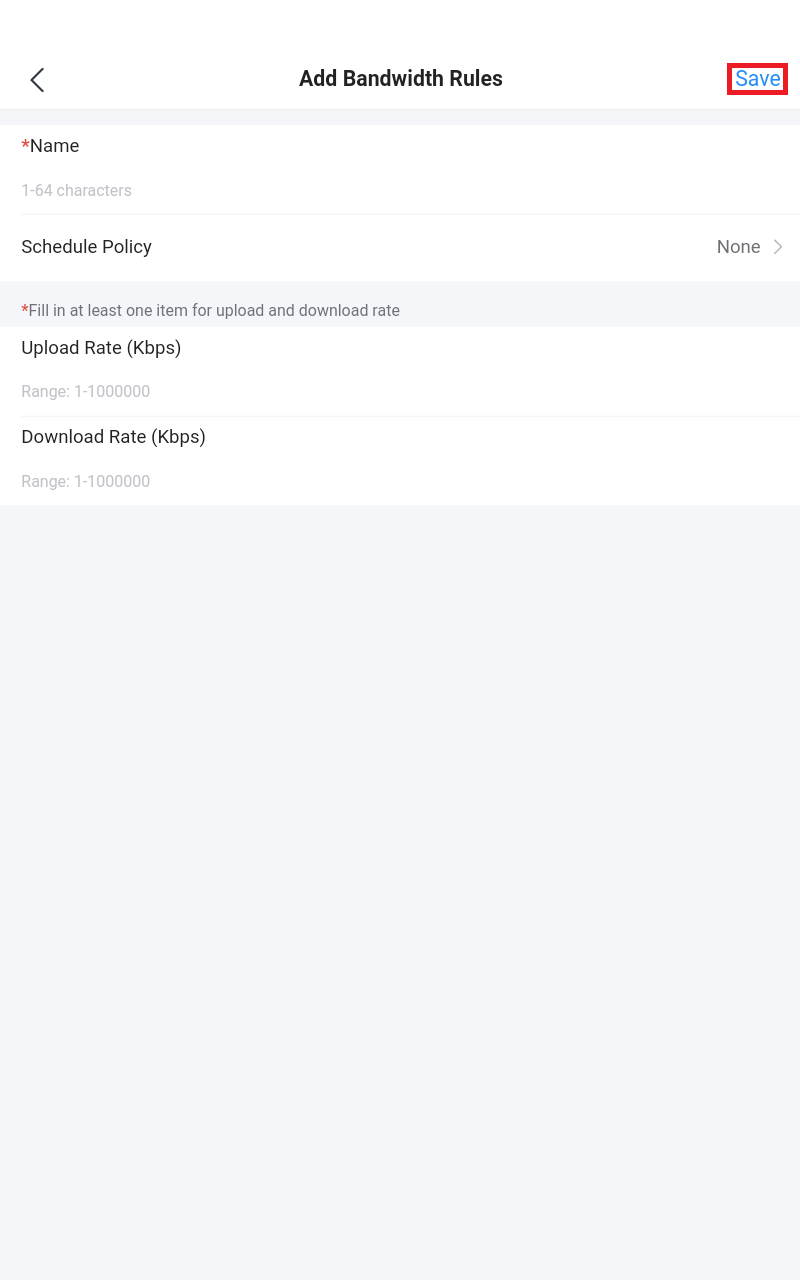
Bandwidth Rules
Bandwidth rules feature can be used with a wireless LAN (Wi-Fi or SSID) to limit bandwidth per client or SSID under Settings screen → Wi-Fi → Wireless LAN.
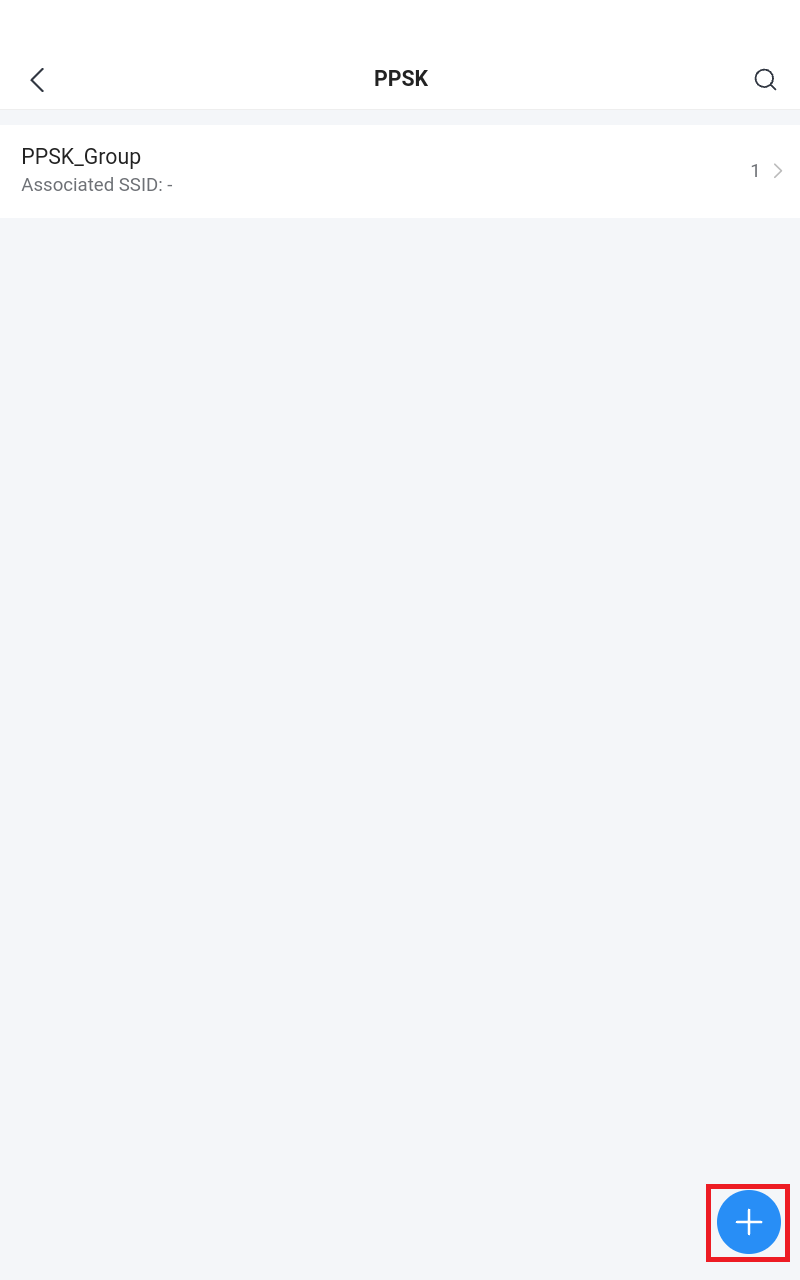
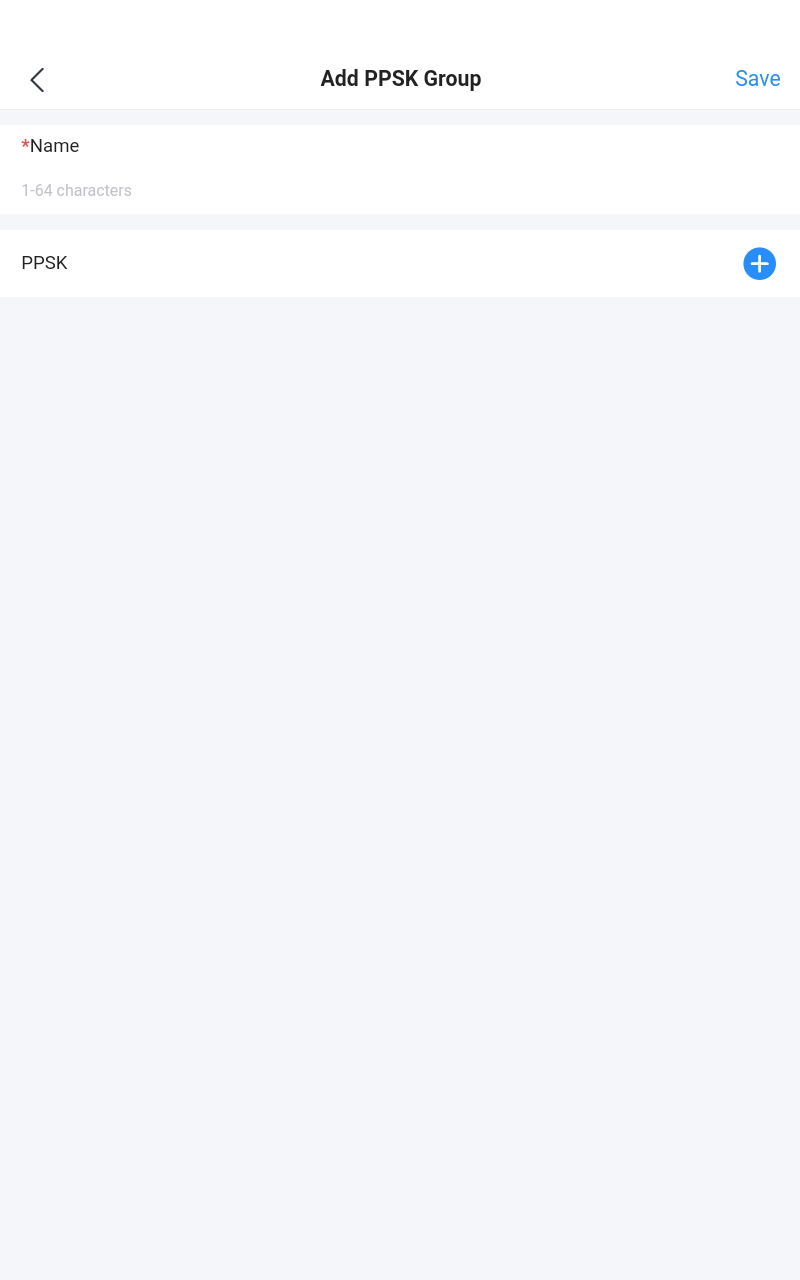
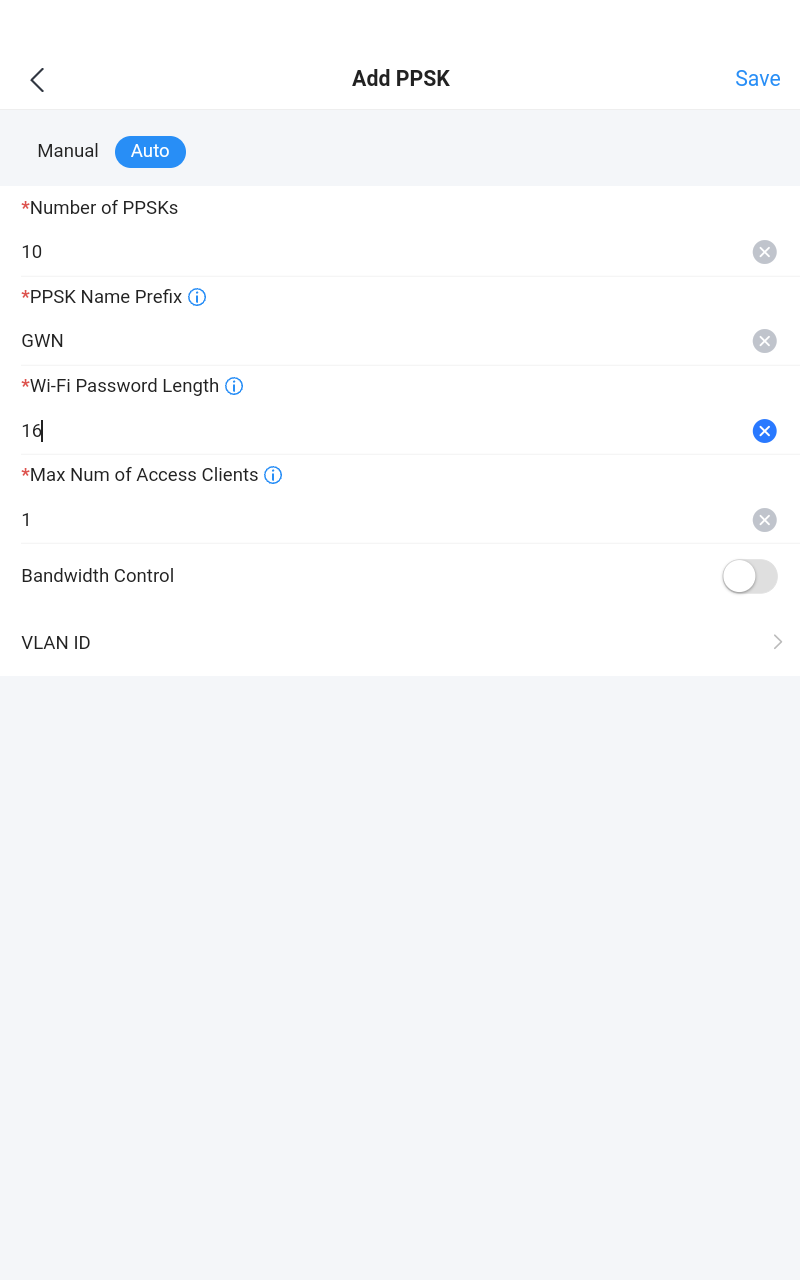
Private Pre-Shared Key (PPSK)
PPSK (Private Pre-Shared Key) is a way of creating Wi-Fi passwords per group of clients instead of using one single password for all clients. Then this PPSK group can be used with a wireless LAN (Wi-Fi or SSID) to grant access to clients under Settings screen → Wi-Fi → Wireless LAN.
- Click on “+” button to create a PPSK Group.
- Click on “+” button to create a PPSK.
- Select Manual or Auto (specify the number of PPSKs, name prefix, password … etc).
Please refer to the figures below:
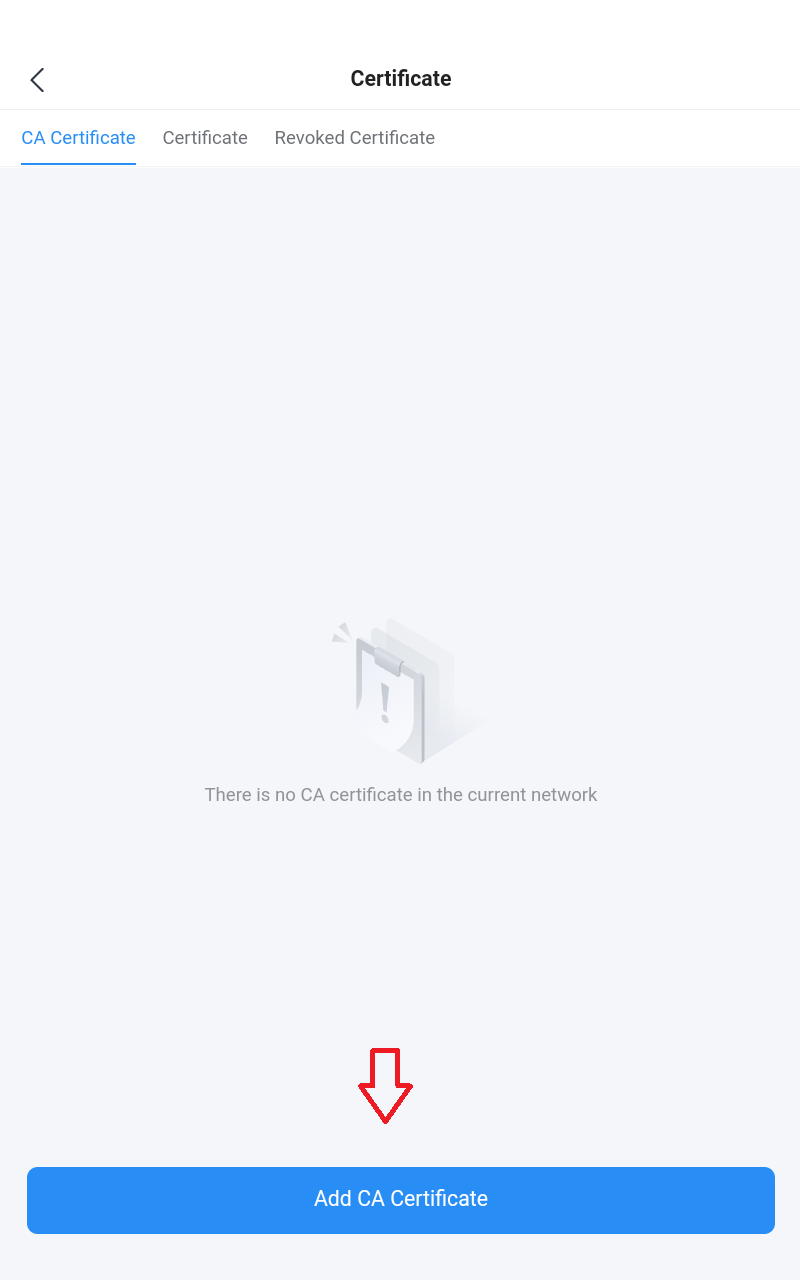
Certificate
In this section, the user can create CA, Client and Server certificates that can be used with OpenVPN either for client or server side.
Click on “Add CA Certificate” or the “Add Certificate” button under CA Certificate or Certificate tab.

For more details, please visit GWN Management Platforms – User Guide (Profiles)
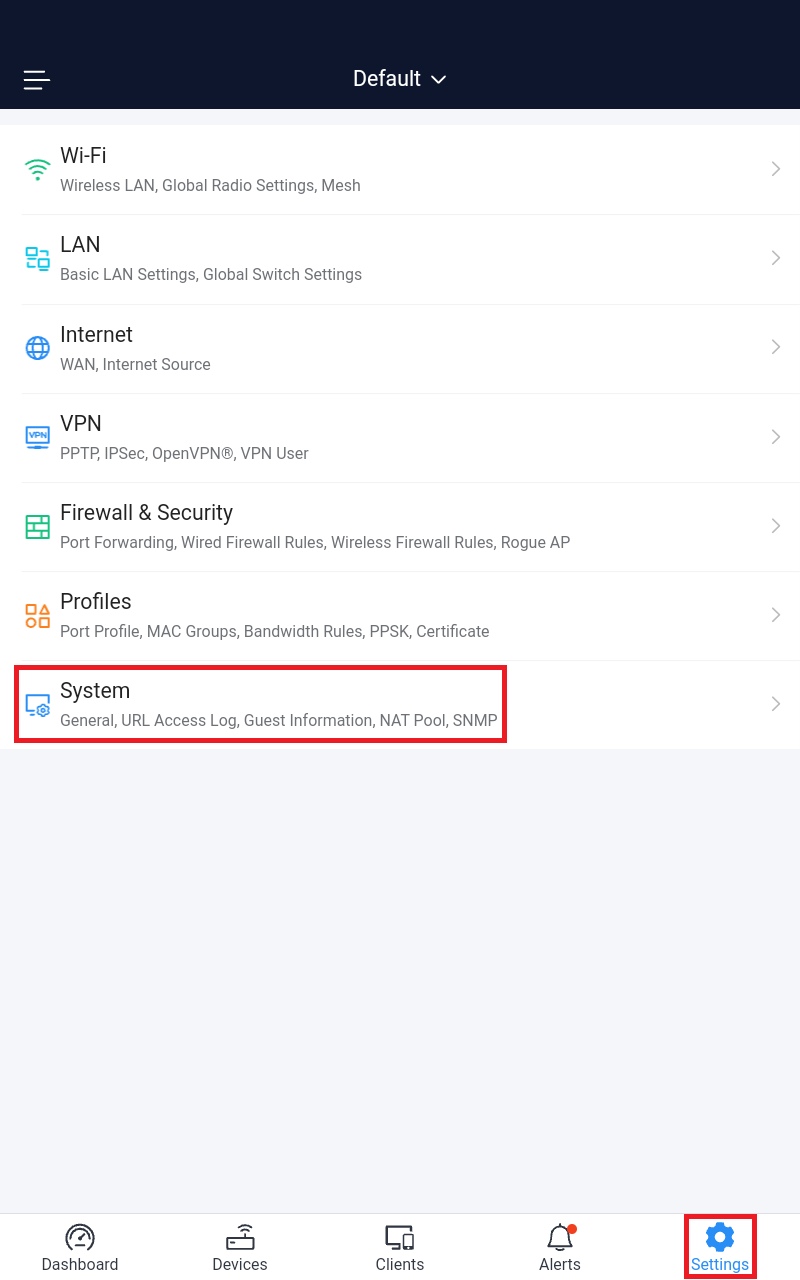
System
On the system screen, as shown below, the user can configure Country/Region, time, LED … under General, also URL Access log, Guest Information, NAT and SNMP.
Navigate to Settings screen → System.

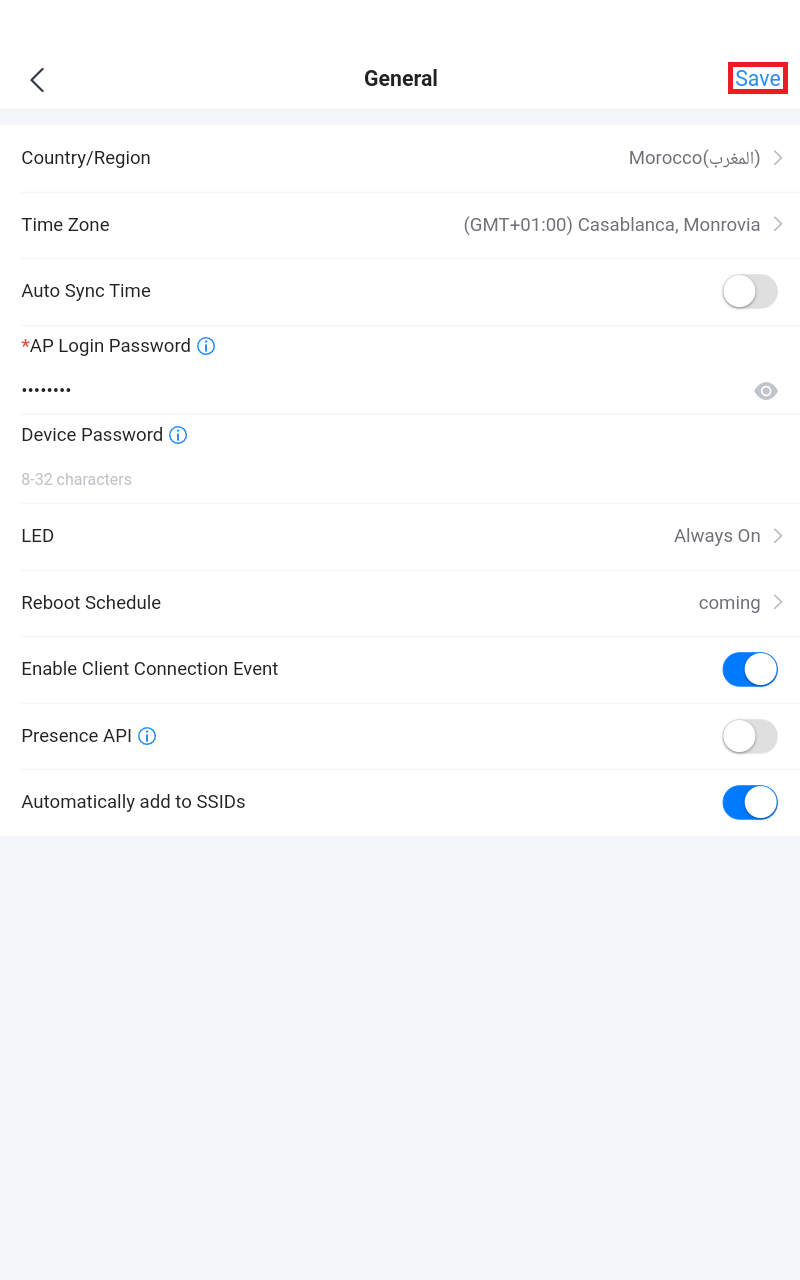
General
In this section, General configuration can be set like time zone, Device password … etc. Please refer to the figure and table below:
Country/Region | Select the country or region from the drop-down list. This can affect the number of channels depending on the country standards. |
Timezone | Configure time zone for GWN APs. Please reboot the device to take effect. |
Auto Sync Time | If enabled, all managed devices' system times will be synced with GWN Cloud |
AP Login Password | Sets the APs login password with up to 8 characters. Alphanumeric characters and special characters - _ | are supported |
Device Password | Set the devices SSH remote login password other than APs (Routers and Switches), which is also the device web login password. |
LED | Select whether to always turn ON or OFF the LEDs on the APs or apply a schedule for this function. |
Reboot Schedule | Once scheduled, the current network will not work for a while during the scheduled period. |
Enable Client Connection Event | When enabled, then Client connects/disconnects events are listed under Devices → GWN device → Info page. |
Presence API | Onced enabled, will detect and collect wireless device info. near the AP, which can be used for device positioning, pedestrian flow monitoring and so on. |
Automatically add to SSIDs | GWN devices will be added to SSID automatically |
System – General
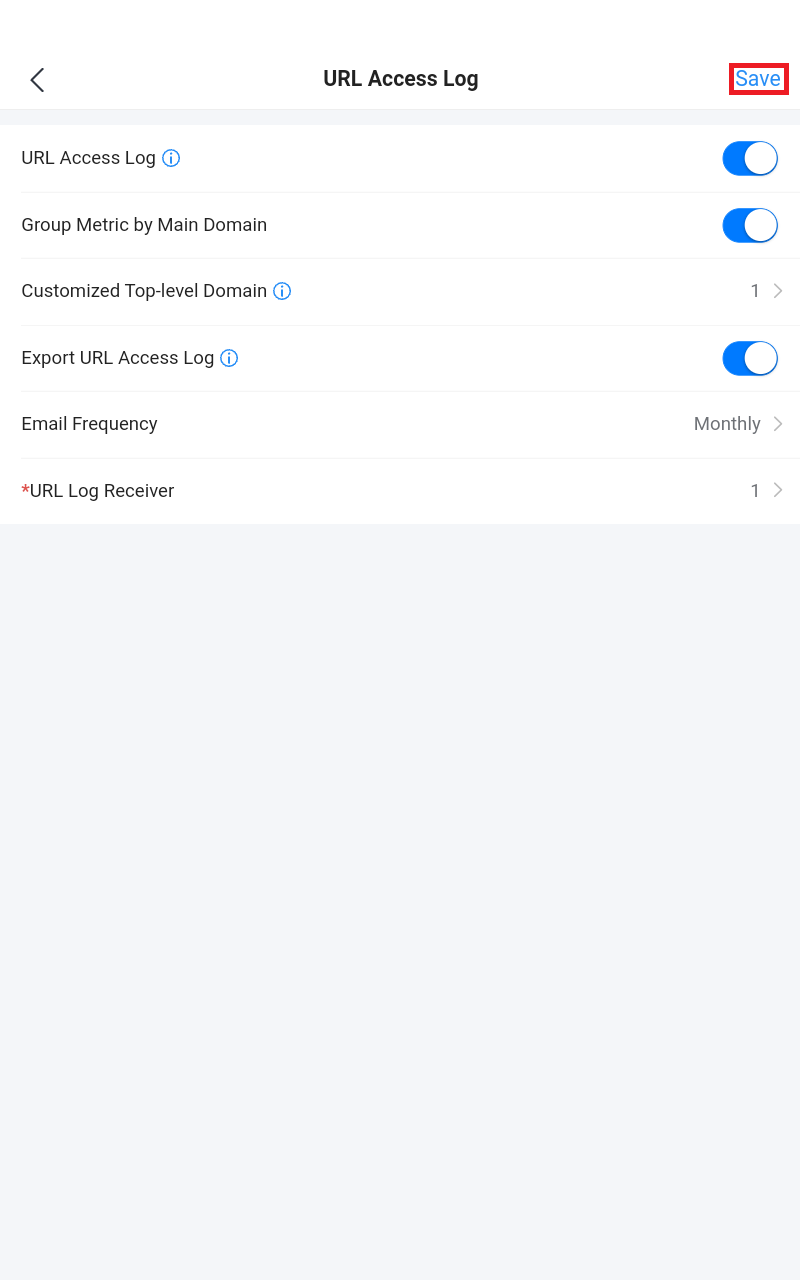
URL Access Log
Administrators can easily configure the platform to record, monitor, and maintain a log of all the websites visited by the clients connected to the paired GWN devices.
The platform System will send these logs via Email to the configured Log Receiver in a form of downloadable link providing a CSV file format containing all the websites logs visited for each client during the defined period (daily, weekly or monthly basis).
To enable this feature, follow below steps:
- Go under “Settings screen → System → URL Access Log section” and enable URL Access Log field, this will configure the GWN management platform (GWN.Cloud or GWN Manager) to start recording the website logs visited by the clients.
- The option “Group Metric by Main Domain” can be also enabled then the user can configures the top domains to be merged. This will merge the page views for the configured domains. The regular top domains will automatically merge without any configuration (such as. com).
- Enable Export URL Access Log.
- Administrators can choose to set the Email Frequency to be generated either on a daily, weekly or monthly basis.
- Configure the URL Log Receiver Email.
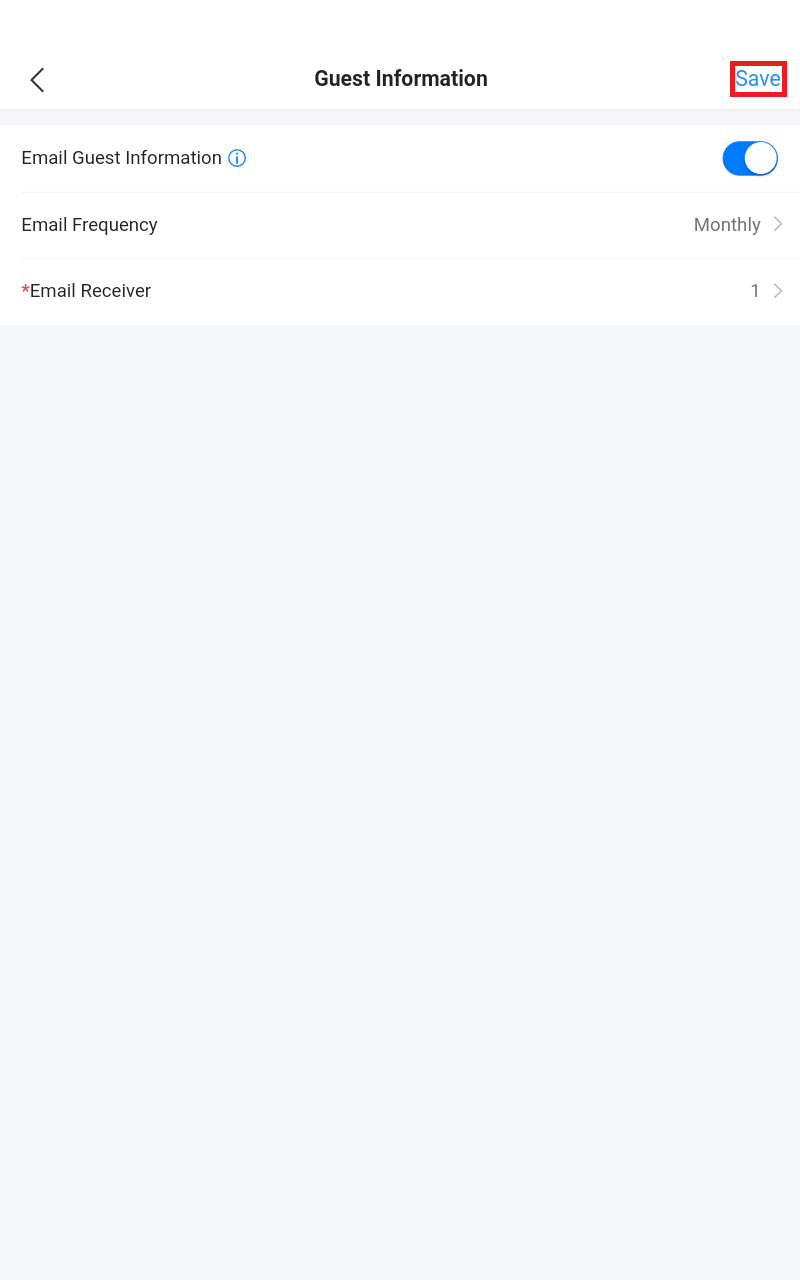
Guest Information
If enabled, the server will periodically send out the guest’s log download link based on the configured email settings. In order to enable this feature, follow below steps:
- Go under “Settings screen → System → Guest Information section“ and enable Guest Information field.
- Choose to set the Email Frequency to be generated either on a daily, weekly or monthly basis.
- Configure the Email Receiver.
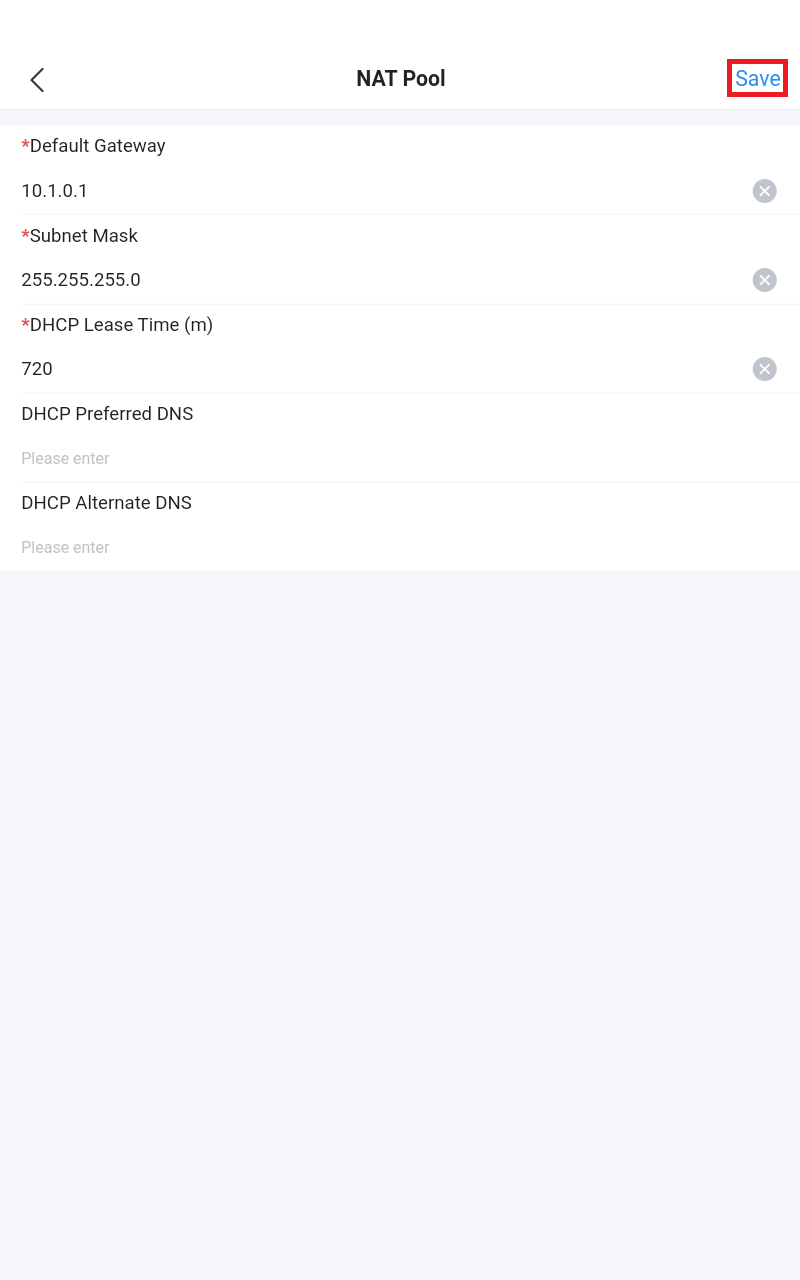
NAT Pool
Users can use this feature to set an address Pool from which the clients that are connected to the adopted/paired devices will acquire their IP address in that way GWN devices will act as a lightweight router.
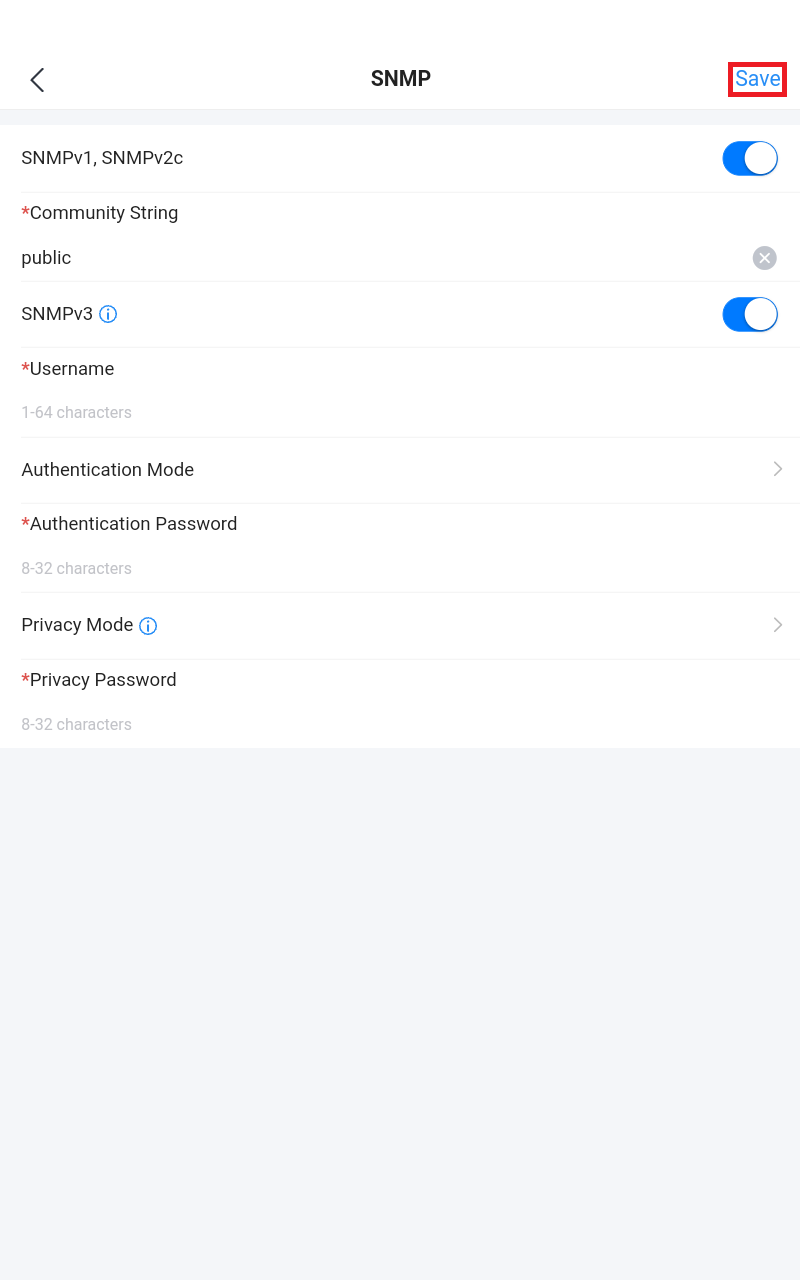
SNMP
This section lists the SNMPv1, SNMPv2c, and SNMPv3 options available to integrate the adopted/paired GWN devices with enterprise monitoring systems.
Users can enable the SNMP feature under the Settings screen → System → SNMP.
For more details, please visit GWN Management Platforms – User Guide (System)
EXPERIENCING GWN APPLICATION
Please visit our Website: http://www.grandstream.com to receive the most up-to-date updates on firmware releases, additional features, FAQs, documentation, and news on new products.
We encourage you to browse our product-related documentation, FAQs, and User and Developer Forum for answers to your general questions. If you have purchased our products through a Grandstream Certified Partner or Reseller, please contact them directly for immediate support.
Our technical support staff is trained and ready to answer all your questions. Contact a technical support member or submit a trouble ticket online to receive in-depth support.
Thank you again for using the Grandstream GWN Cloud application, it will be sure to bring convenience to both your business and personal life.
CHANGE LOG
This section documents significant changes from previous versions. Only major new features or major document updates are listed here. Minor updates for corrections or editing are not documented here.
GWN Application Version 1.0.4.9
- Added support for custom role users to login to GWN APP. [Login to GWN App]
GWN Application Version 1.0.3.14
- Added GWN Device Discovery and Speed Test Tools [Tools]
- Added PPTP, IPSec(support auto networking mode), OpenVPN® [VPN]
- Added Guest under Clients [Clients]
- Added 12-hours WAN ports health monitoring [Internet Health]
- Added Cloud DDNS service to generate domain for managed WAN [WAN]
- Added VLAN interface configuration under router configuration [Devices]
- Added new alerts, and improved the layout [Alert]
- Added VLAN ID info under Client page [Client]
- Support multiple routers on one network [Devices]
- Support Device Password under System page [System]
GWN Application Version 1.0.1.11
- Support GWN Router (GWN7052 & GWN7062) unified management
- Support GWN Switch
- New UI design
- Redesigned dashboard
- New alerts design and support more alert events
- Optimized clients display, integrate the old known clients function into clients page
- Optimized SSID security type
GWN Application Version 1.0.0.19
- Added support for “Local Server”.
GWN Application Version 1.0.0.2
- This is the initial version of the GWN Cloud Application for Android.
Android is a trademark of Google LLC.