
The GWN7000 is a powerful enterprise-grade router. Ideal for enterprises, office buildings, retail stores, shopping centers, hotels, hospitals, convention centers and more, the GWN7000 allows businesses to build comprehensive Wi-Fi or VPN Networks via many wireless access points that can be shared across many different physical locations.
Along to its built-in web GUI, the GWN7000 does support configuration via command line interface using secure SSH connection.
This guide contains necessary steps to connect and configure GWN7000 using CLI command line interface.
CONNECTING AND ACCESSING THE GWN7XXX
Connecting GWN7000
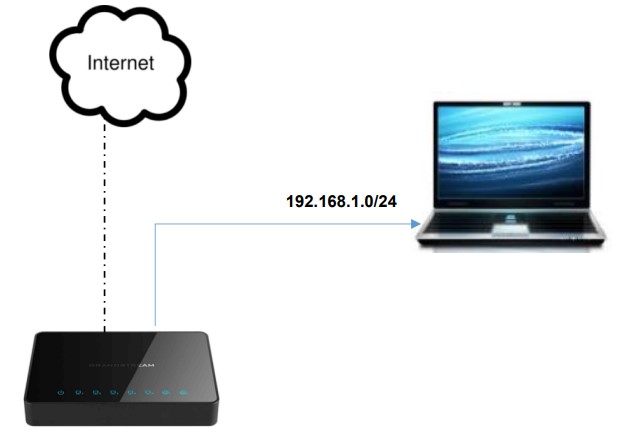
To set up the GWN7000, follow the steps below:
- Connect one end of an RJ-45 Ethernet cable into the WAN1 or/and WAN2 port(s) of the GWN7000.
- Connect the other end of the Ethernet cable(s) into a DSL modem or router(s).
- Connect the 12V DC power adapter into the power jack on the back of the GWN7000. Insert the main plug of the power adapter into a surge-protected power outlet.
- Wait for the GWN7000 to boot up and connect to internet/network. In the front of the GWN7000 the Power LED will be in solid green, and the WAN LED will flash in green.
- Connect one of the LAN ports to your computer, the associated LED ports will flash in green.
SSH Access
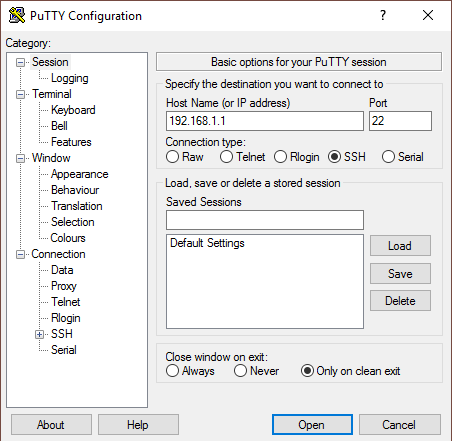
By default, secure SSH access is enabled on the GWN7000, the following steps illustrate the SSH access using Putty.
- Connect a computer to a LAN Port of the GWN7000.
- Ensure the device is properly powered up, and the Power, LAN port LEDs light up in green.
- Open your SSH client (ex: Putty) on the computer and enter the IP address of the GWN7000 router (192.168.1.1).
- Enter the administrator’s login and password to access the CLI Menu. The default administrator’s username and password are “admin” and “admin”.
Note:
USING THE CLI MENU
This section contains the commands line interface menu and the steps to navigate, change and save settings.
Menu Structure and Navigation
After successfully login, users are directed to the CLI main menu which is structured on a tree form for convivial and easy navigation, following screenshot shows the main menu:
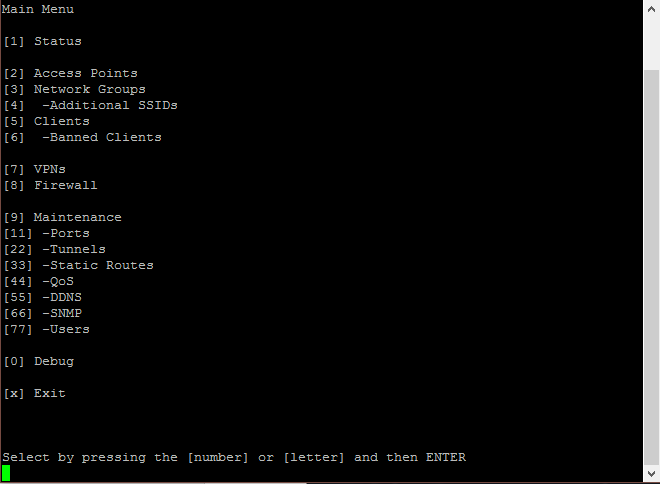
As shown on the help notice, the user can simply press the number (ex: 33 to access to Static Routes) to enter the sub-menu in order to see the available options and change their values, also users can press the corresponding letter to apply the required operation(s) (eg: press [b] to ban clients when you access the menu showing the list of connected Clients to the managed Wi-Fi network by the router, or pressing [f] to factory reset the router when you access to the maintenance men).
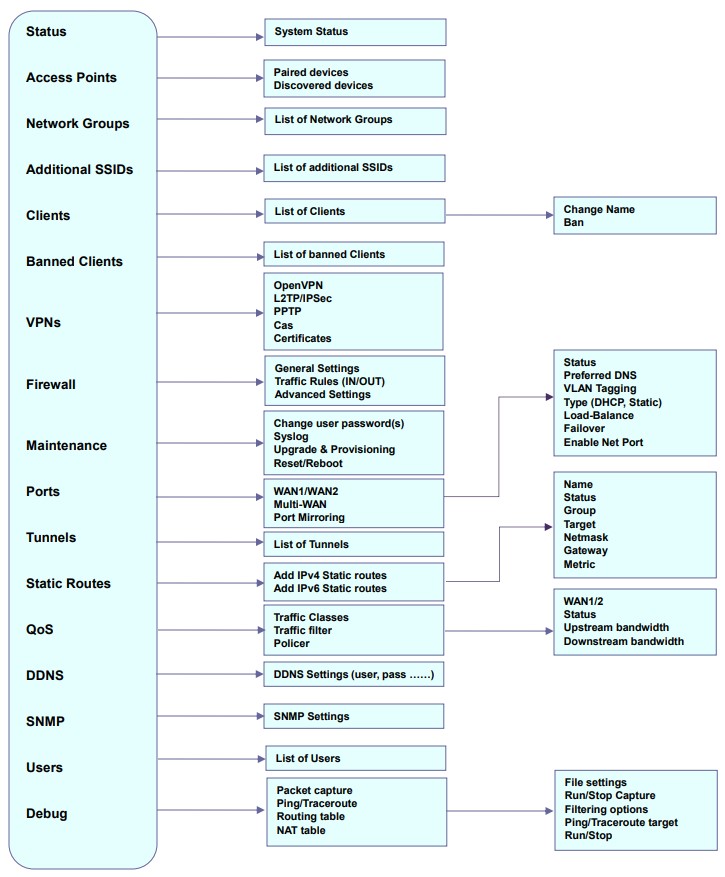
The following table gives an overview about the available menus:
Status | Displays the status of the router with related information such as MAC address, firmware version… |
Access Points | Lists the paired GWN access points and gives the ability to ban some of APs. |
Network groups | Lists, adds and manages the available network groups. |
Additional SSIDs | Lists, adds and manages the available SSIDs from this menu. |
Clients | Displays the list of clients connected to the router under. |
Banned Clients | Displays the list of the banned clients connected to the router under this section. |
VPNs | Creates, edits and manages the VPN connections and certificate files from this menu. Note: GWN does support OpenVPN, L2TP and PPTP. |
Firewall | Configures the firewall parameters including port forwarding, DMS, inter-group routing, Traffic rules and advanced settings. |
Maintenance | Configures maintenance settings such as upgrade and provisioning, reboot, factory reset and setting/changing passwords can be done from this menu. Note: Make sure to save changes by pressing [s]. |
Ports | Configures the WAN and LAN ports by enabling and configuring the IP mode for the port. Note: Port mirroring can be enabled and set from this menu. |
Tunnels | Lists, adds and manages the tunnels. |
Static Routes | Configures the static routes, first the user should choose either [1] to set IPv4 Static routes or press [2] to set IPv6 Static routes. |
QoS | Manages Quality of Service. Note: For QoS, GWN support traffic shaping and policer. |
DDNS | Configures dynamic DNS options. Note: Make sure to save changes by pressing [s]. |
SNMP | Configures SNMP options for monitoring purposes. |
Users | Access to this menu to list, add and manage users (requested for certificate files creation). |
Debug | Performs debugging operations from this menu, including packet captures, ping and traceroute utilities as well as checking routing and NAT tables. |
Selecting Options and Configuration
For selecting an option to configure it, users could follow the steps mentioned on the previous section in order to navigate through the sub-menus and find the correct option to set, once found they can choose it by typing its corresponding number and set the required value, (sometime users will be prompted with more menu choices or can enter the value manually).
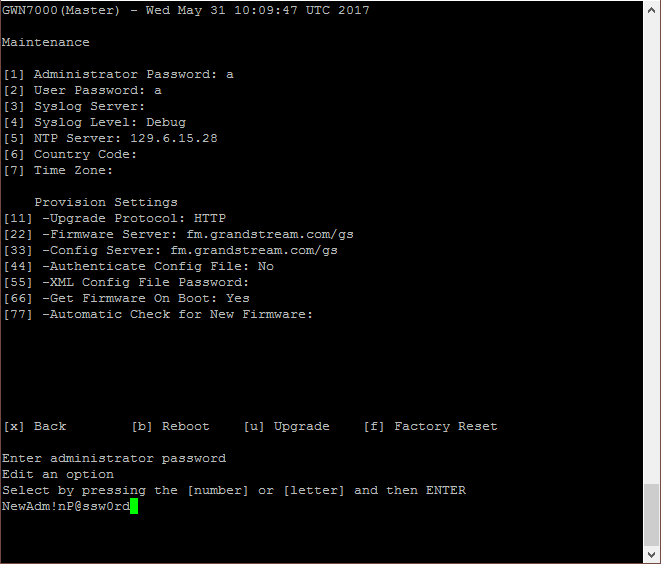
For example: in order to change the administrator password, users could press 9 to access the Maintenance Menu, then press 1 to change the admin password then re-enter the same password for confirmation as shown on the following screenshot.
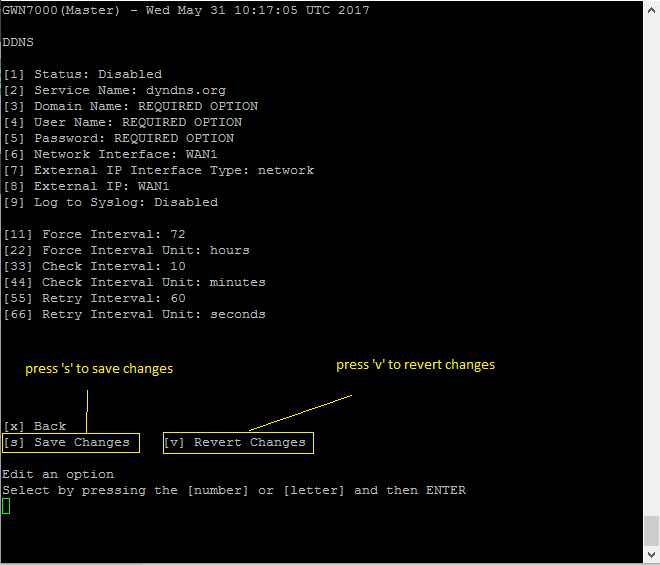
Saving The Changes
After changing any option or parameter, users need to save the changes by entering [s], otherwise the change will not take effect. Users could also revert the changes by entering [v] command.
Note: