Overview
This long range WiFi access point is designed to provide extended coverage support and is ideal for outdoor WiFi solutions thanks to its waterproof casing and heat resistant technology. The GWN7600LR comes equipped with dualband 2×2:2 MU-MIMO with beam-forming technology and a sophisticated antenna design for maximum network throughput and extended WiFi coverage range of up to 300 meters. To ensure easy installation and management, the GWN7600LR uses a controller-less distributed network management design and an embedded controller within the product’s web user interface. This allows each access point to manage a network of up to 30 GWN APs independently without needing separate controller hardware/software and without a single pointof-failure. Its easy installation and management features packed with extra coverage support and advanced performance features, make the GWN7600LR an ideal outdoor access point for mid-size wireless network deployments.
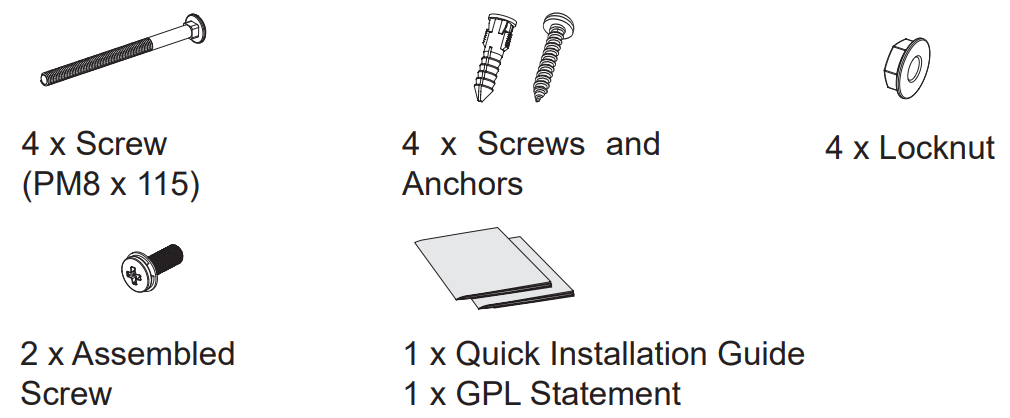
Package Contents

GWN7600LR Ports

| Port | Description |
|---|---|
| NET/POE | Ethernet RJ45 port (10/100/1000Mbps) supporting PoE/PoE+. |
| NET | Ethernet RJ45 port (10/100/1000Mbps) to your router or another GWN76xx |
| RESET | Factory reset button. Press for 7 seconds to reset factory default settings. |
Powering and Connecting the GWN7600LR
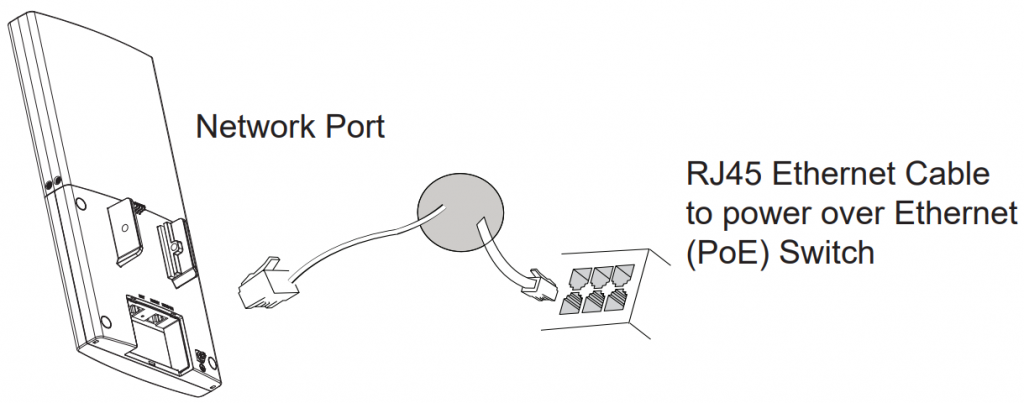
GWN7600LR can be powered on using PoE switch using following steps:
Step 1: Plug a RJ45 Ethernet cable into the network port of GWN7600LR.
Step 2: Plug the other end into the uplink port of the power over Ethernet (PoE) switch.
Hardware Installation
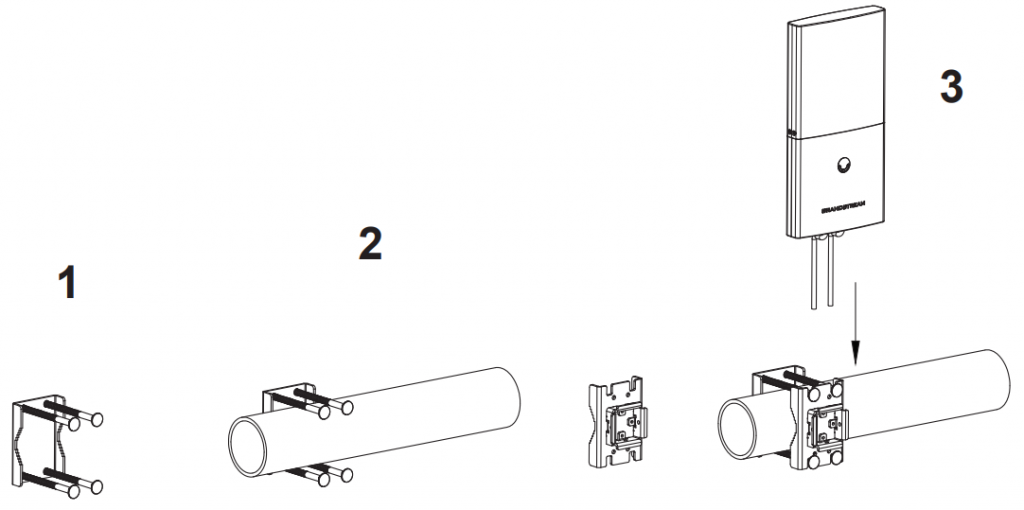
GWN7600LR can be mounted horizontally or vertically on a metal bar.
Please refer to the following steps for the appropriate installation.
Vertical Mounting
1.Prepare the Cover Bracket by inserting the 4 screws (PM8) into corresponding holes.
2.Attach the Cover Bracket with screws on the vertical Mounting Bolt where GWN7600LR will be installed.
3.Assemble the Base Bracket with the Cover Bracket using provided locknuts and screws (PM8).

- Connect the Ethernet cable (RJ45) to the correct ports of your GWN7600LR.
- Align the GWN7600LR with the Base Bracket and pull it down to the right position.
- Install the 2x Assembled screws to fix GWN7600LR on the Mounting Bolt.

Horizontal Mounting
1.Prepare the Cover Bracket by inserting the 4 screws (PM8) into corresponding holes.
2.Attach the Cover Bracket with screws on the horizontal Mounting Bolt where GWN7600LR will be installed.
3.Assemble the Base Bracket with the Cover Bracket using provided locknuts and screws (PM8).
- Connect the Ethernet cable (RJ45) to the correct ports of your GWN7600LR.
- Align the GWN7600LR with the Base Bracket and pull it down to the right position.
- Install the 2x Assembled screws to fix GWN7600LR on the Mounting Bolt.

Connect to GWN7600LR Default Wi-Fi Network
GWN7600LR can be used as standalone access point out of box, or after factory reset with Wi-Fi enabled by default.
After powering the GWN7600LR and connecting it to the network, GWN7600LR will broadcast a default SSID based on its MAC address GWN[MAC’s last 6 digits] and a random password.
Accessing the Configuration Interface
A computer connected to the GWN7600LR’s SSID, or to the same network as the GWN7600LR can discover and access its configuration interface using one of the below methods:
Method 1: Discover GWN7600LR using its MAC Address
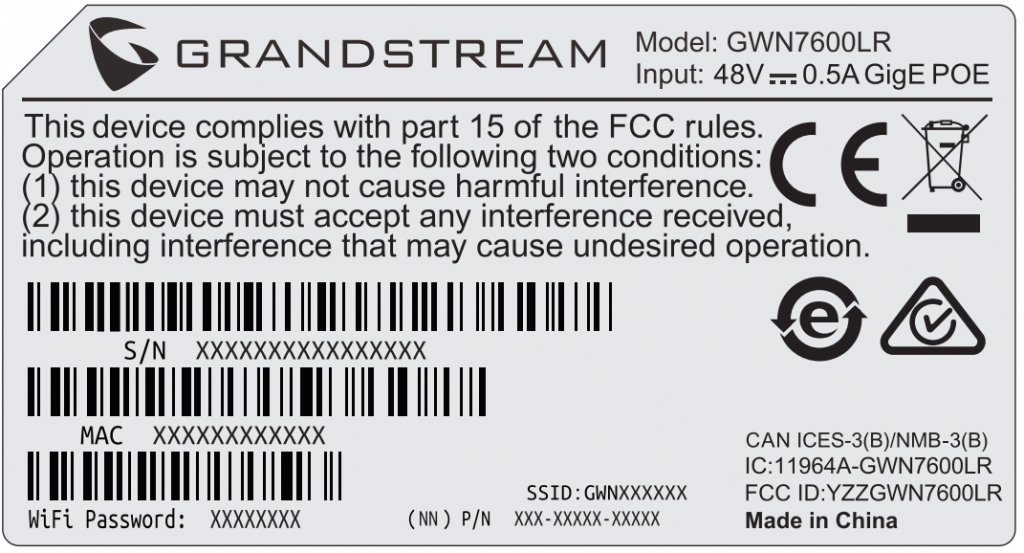
- Locate the MAC address on the MAC tag of the unit, which is on the underside of the device, or on the package.
- From a computer connected to same network as the GWN7600LR, type in following address using GWN7600LR’s MAC address on your browser https://gwn_.local
Method 2: Discover GWN7600LR using GWN Discovery Tool
- Download and install GWN Discovery Tool from the following link: https://www.grandstream.com/tools/GWNDiscoveryTool.zip
- Open the GWN DiscoveryTool, and click on Scan.
- The tool will discover all GWN76xx Access Points connected on the network showing their MAC and IP addresses.
- Click on Manage Device to be redirected directly to the GWN7600LR’s configuration interface, or type in manually the displayed IP address on your browser.


For Certification, Warranty and RMA information, please visit www.grandstream.com