OVERVIEW
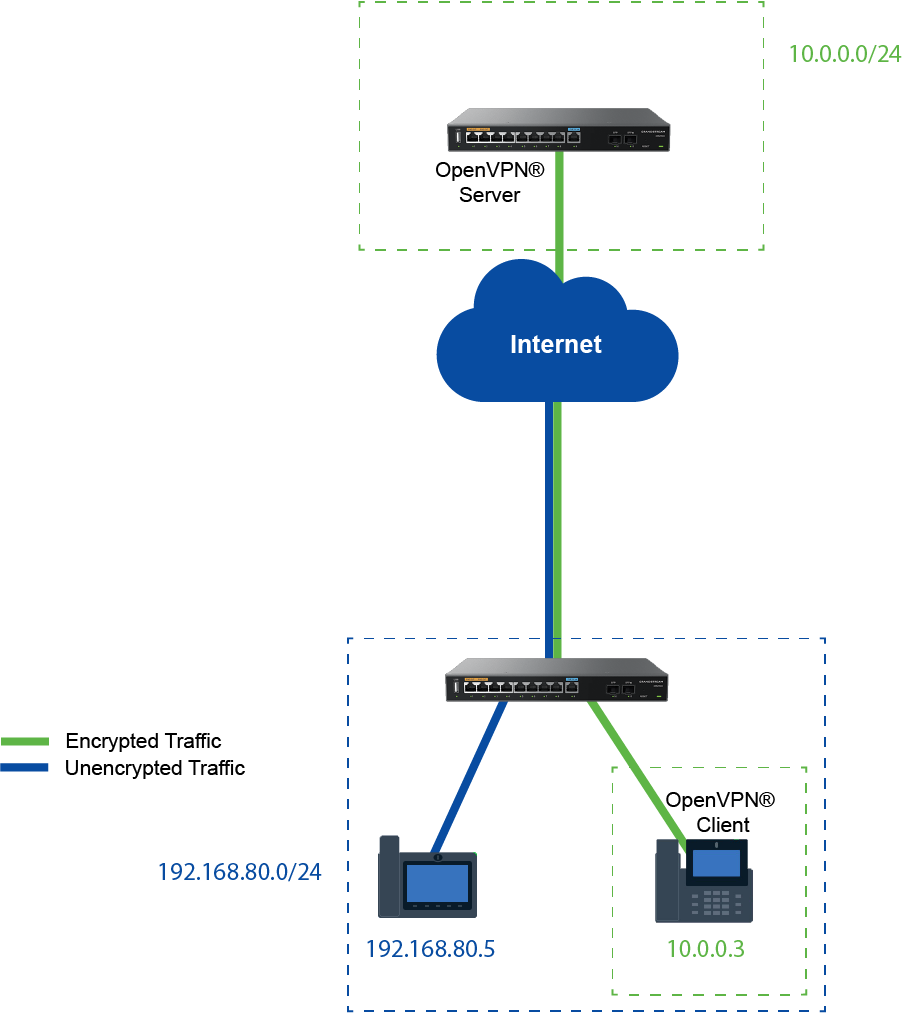
A VPN is a Virtual Private Network that allows the user to connect to a remote local network, and logically be a part of that remote network. In a typical VPN implementation, a server is required, typically deployed on the local network to which the clients will be connected. While a client is deployed on a remote network, the connection to the server is established through the public network. However, the connection between the client and the server is encrypted to ensure that the data remains confidential and secure.
OpenVPN® is an open-source protocol that establishes a VPN connection between two hosts. OpenVPN® supports many types of implementations, but in this guide, we will list the steps and the information to configure an OpenVPN® server. Then we will mention the steps to successfully connect an OpenVPN® client to the server.
Below is an illustration that shows how typically a server-client deployment of a VPN is done.
REQUIREMENTS
For this scenario, we are using a Grandstream GWN700X router as the server and a Grandstream GRP2614 IP phone as the client. The configuration is largely similar on all the other Grandstream devices that support OpenVPN® server/client.
CONFIGURATION
Server Configuration
Creating The Certificates
Create CA Certificate
A CA certificate is a certificate which is issued by a certification authority that ensures the authenticity of the client and the server certificates. The CA certificate is necessary to create the server and client certificates, and they both can be created under only one unique CA certificate. In our case, we will generate a self-issued CA certificate
To create a CA certificate, please access the Web UI of the GWN700X router then navigate to System Settings → Certificates→CA Certificates then click “Add”, or if you already have the CA certificate, click on “Import” then add your CA certificate. In case you clicked “Add” to generate a CA certificate, please follow the instructions below.
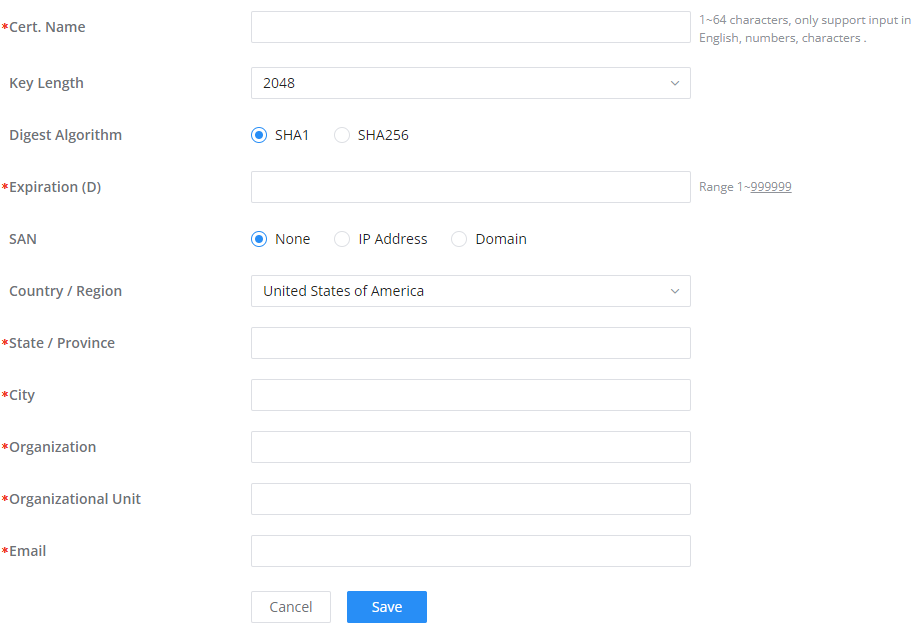
Cert. Name | Enter the Certificate name for the CA. Note: It could be any name to identify this certificate. Example: “CATest”. |
Key Length | Choose the key length for generating the CA certificate. The following values are available:
|
Digest Algorithm | Choose the digest algorithm:
Note: Hash is a one-way function, it cannot be decrypted back. |
Expiration (D) | Enter the validity date for the CA certificate in days. The valid range is 1~999999.. |
Country / Region | Select a country code from the dropdown list. Example: “United Stated of America”. |
State / Province | Enter a state name or province. Example: “Casablanca”. |
City | Enter a city name. Example: “SanBern”. |
Organization | Enter the organization’s name. Example: “GS”. |
Organizational Unit | This field is the name of the department or organization unit making the request. Example: “GS Sales”. |
Enter an email address. Example: “EMEAregion@grandstream.com” |
Create Server Certificate
Once the CA certificate has been created, please navigate to the Certificates tab under System Settings → Certificates, then click on “Add”.
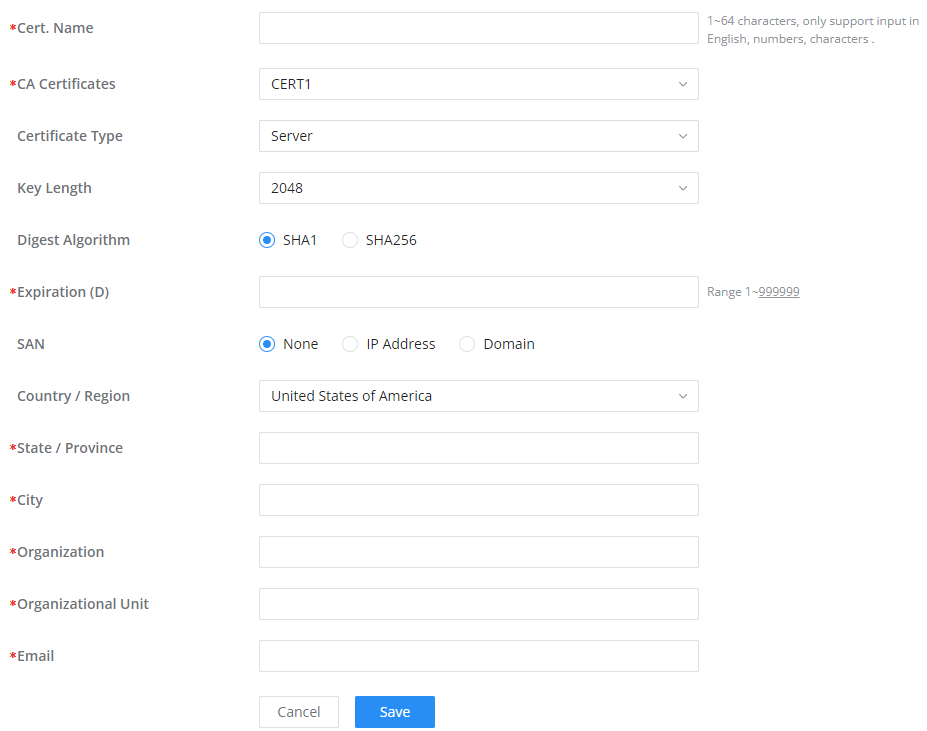
Cert. Name | Enter the certificate's name. |
CA Certificate | Select a certificate authority |
Certificate Type | Select the certificate type.
|
Key Length | Choose the key length for generating the CA certificate.The following values are available:
|
Digest Algorithm | Select the digest algorithm.
Note: Hash is a one-way function, it cannot be decrypted back. |
Expiration (D) | Select the duration of validity of the certificate. The number entered represents the days that have to elapse before the certificate is considered as expired. The valid range is 1 - 999999. |
SAN | Enter the address IP or the domain name of the SAN (Subject Alternate Name). |
Country / Region | Select a country from the dropdown list of countries. Example: "United States of America". |
State / Province | Enter a state name or a province. Example: California |
City | Enter a city name. Example: "San Diego" |
Organization | Enter the organization’s name. Example: “GS”. |
Organization Unit | This field is the name of the department or organization unit making the request. Example: “GS Sales”. |
Enter an email address. Example: “EMEAregion@grandstream.com” |
- In the CA Certificate field, choose the CA certificate which we have created earlier.
- Choose “Server” from the drop-down list on Certificate Type.
- On Key Length, choose “2048”.
- On Digest Algorithm, choose “SHA1”.
- Configure the rest of the parameters as preferred.
Create Client Certificate
The client certificate creation is similar to the server certificate creation. In the same tab, click on “Add” then choose “Client” as the Certificate Type. Please see the server certificate section above for the other parameters.
Import Certificates
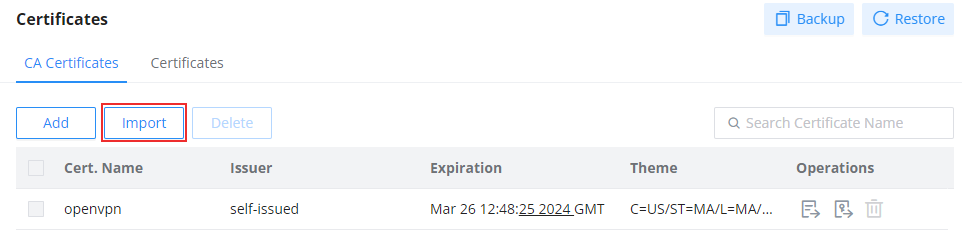
If the user has certificates that are issued by a third-party entity or have been backed up from a previous configuration, he/she can just import them into their respective pages. To import a CA certificate, please navigate to System Settings → Certificates → CA Certificates then click on “Import” as shown in the screenshot below.
For client and server certificates, please navigate to the Certificates tab, and follow the same example above.
Export Certificates & Private Keys
The certificates that we have created/imported will be uploaded to the client to establish the connection between the VPN server and the client. For this type of configuration where we are not using TLS to establish the connection, we will need the CA certificate, the client certificate, and the client key.
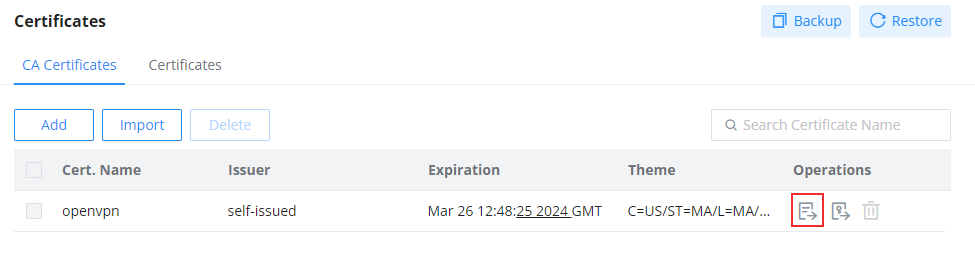
Use the button indicated in the screenshot below to export the CA certificate.
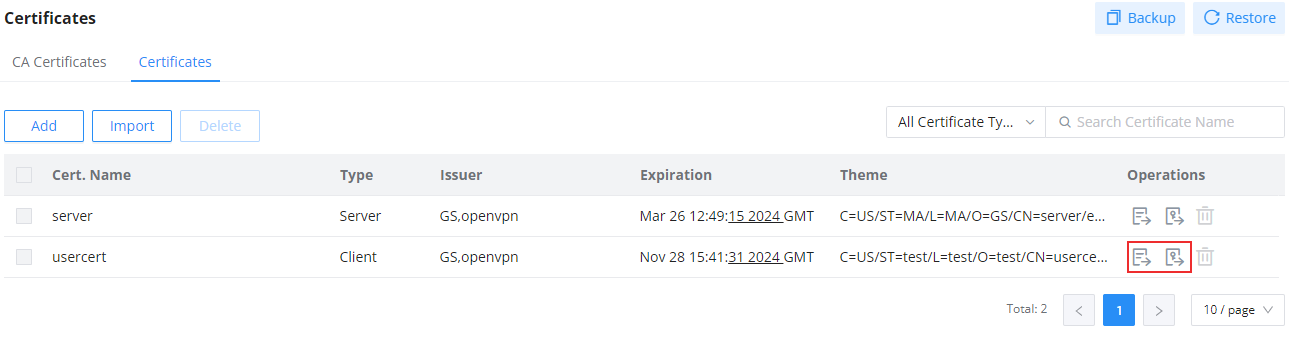
Use the buttons indicated in the screenshot below to export the client certificate and the private key, respectively.
Create Remote User Credentials
Remote user credentials are one way to authenticate your OpenVPN® clients into your OpenVPN® server. If the server has been configured to use user credentials to authenticate, then you need to create the credentials by navigating to VPN → Remote User, then click on “Add”.
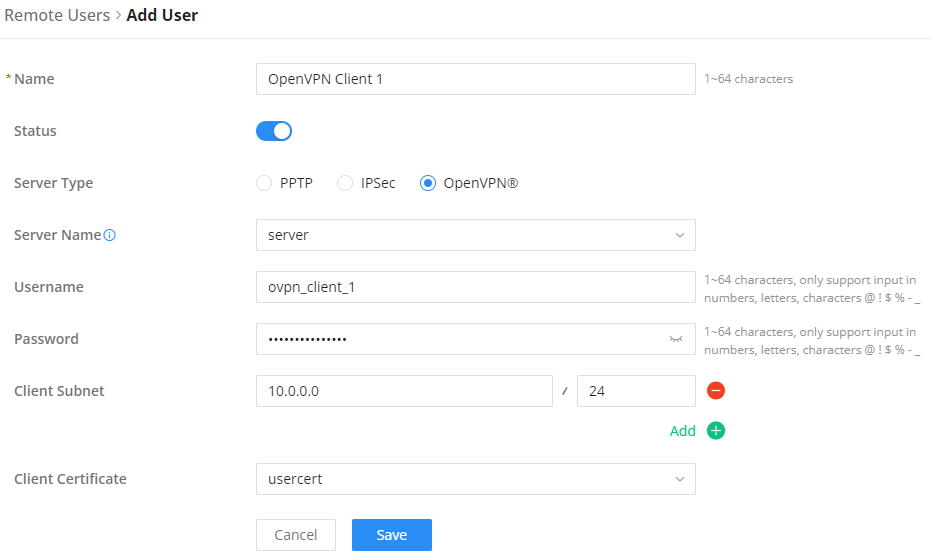
Name | Enter a name for the user. This name will not be used to log in. |
Status | Enable or disable this account. |
Server Type | Choose the type of the server.
|
Server Name | Enter the server's name. |
Username | Enter the username. This username will be used to log in. |
Password | Enter the password. |
Client Subnet | Specify the client subnet. |
Client Configuration
For this guide, we are using our Grandstream GRP2614 IP phone as an OpenVPN® client. The configuration should be similar for most of the products that support OpenVPN®.
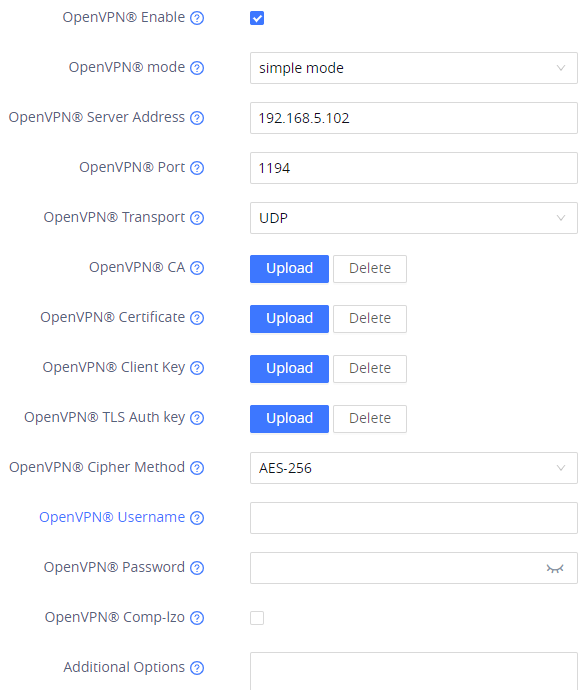
- Enter the IP address of the GWN700X router’s WAN port, then make sure you are using the same port and transport protocol as configured in the OpenVPN® server
- On “OpenVPN® CA”, upload the CA certificate which has been exported from the OpenVPN® server.
- On “OpenVPN® Certificate”, upload the client certificate which has been exported from the OpenVPN® server.
- On the “OpenVPN® key”, upload the private key which has been exported from the OpenVPN® server.
- Make sure that the cipher method matches the one configured on the OpenVPN® server.
- Make sure that the compression settings match the one on the VPN server.
- Save the configuration.
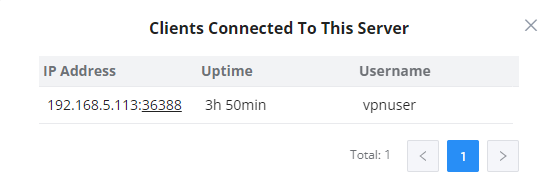
Once the configuration is saved, the client will connect to the OpenVPN® server, and the user can verify the connected clients by clicking on the “Client List” button indicated in the screenshot below.

SUPPORTED DEVICES
The following devices support the OpenVPN® server.
Model | Supported | Firmware |
GWN700X | Yes | 1.0.5.5 or newer |
GWN7062/GWN7052(F) | Yes | 1.0.7.2 or newer |
© 2002-2024 OpenVPN Inc. OpenVPN is a registered trademark of OpenVPN Inc.