OVERVIEW
WireGuard® is a free and open-source VPN solution that encrypts virtual private networks, easy to use, high performance, and secure. GWN70xx routers series support WireGuard® VPN with automatic peer generation and QR code scanning for mobile phones and devices with camera support.
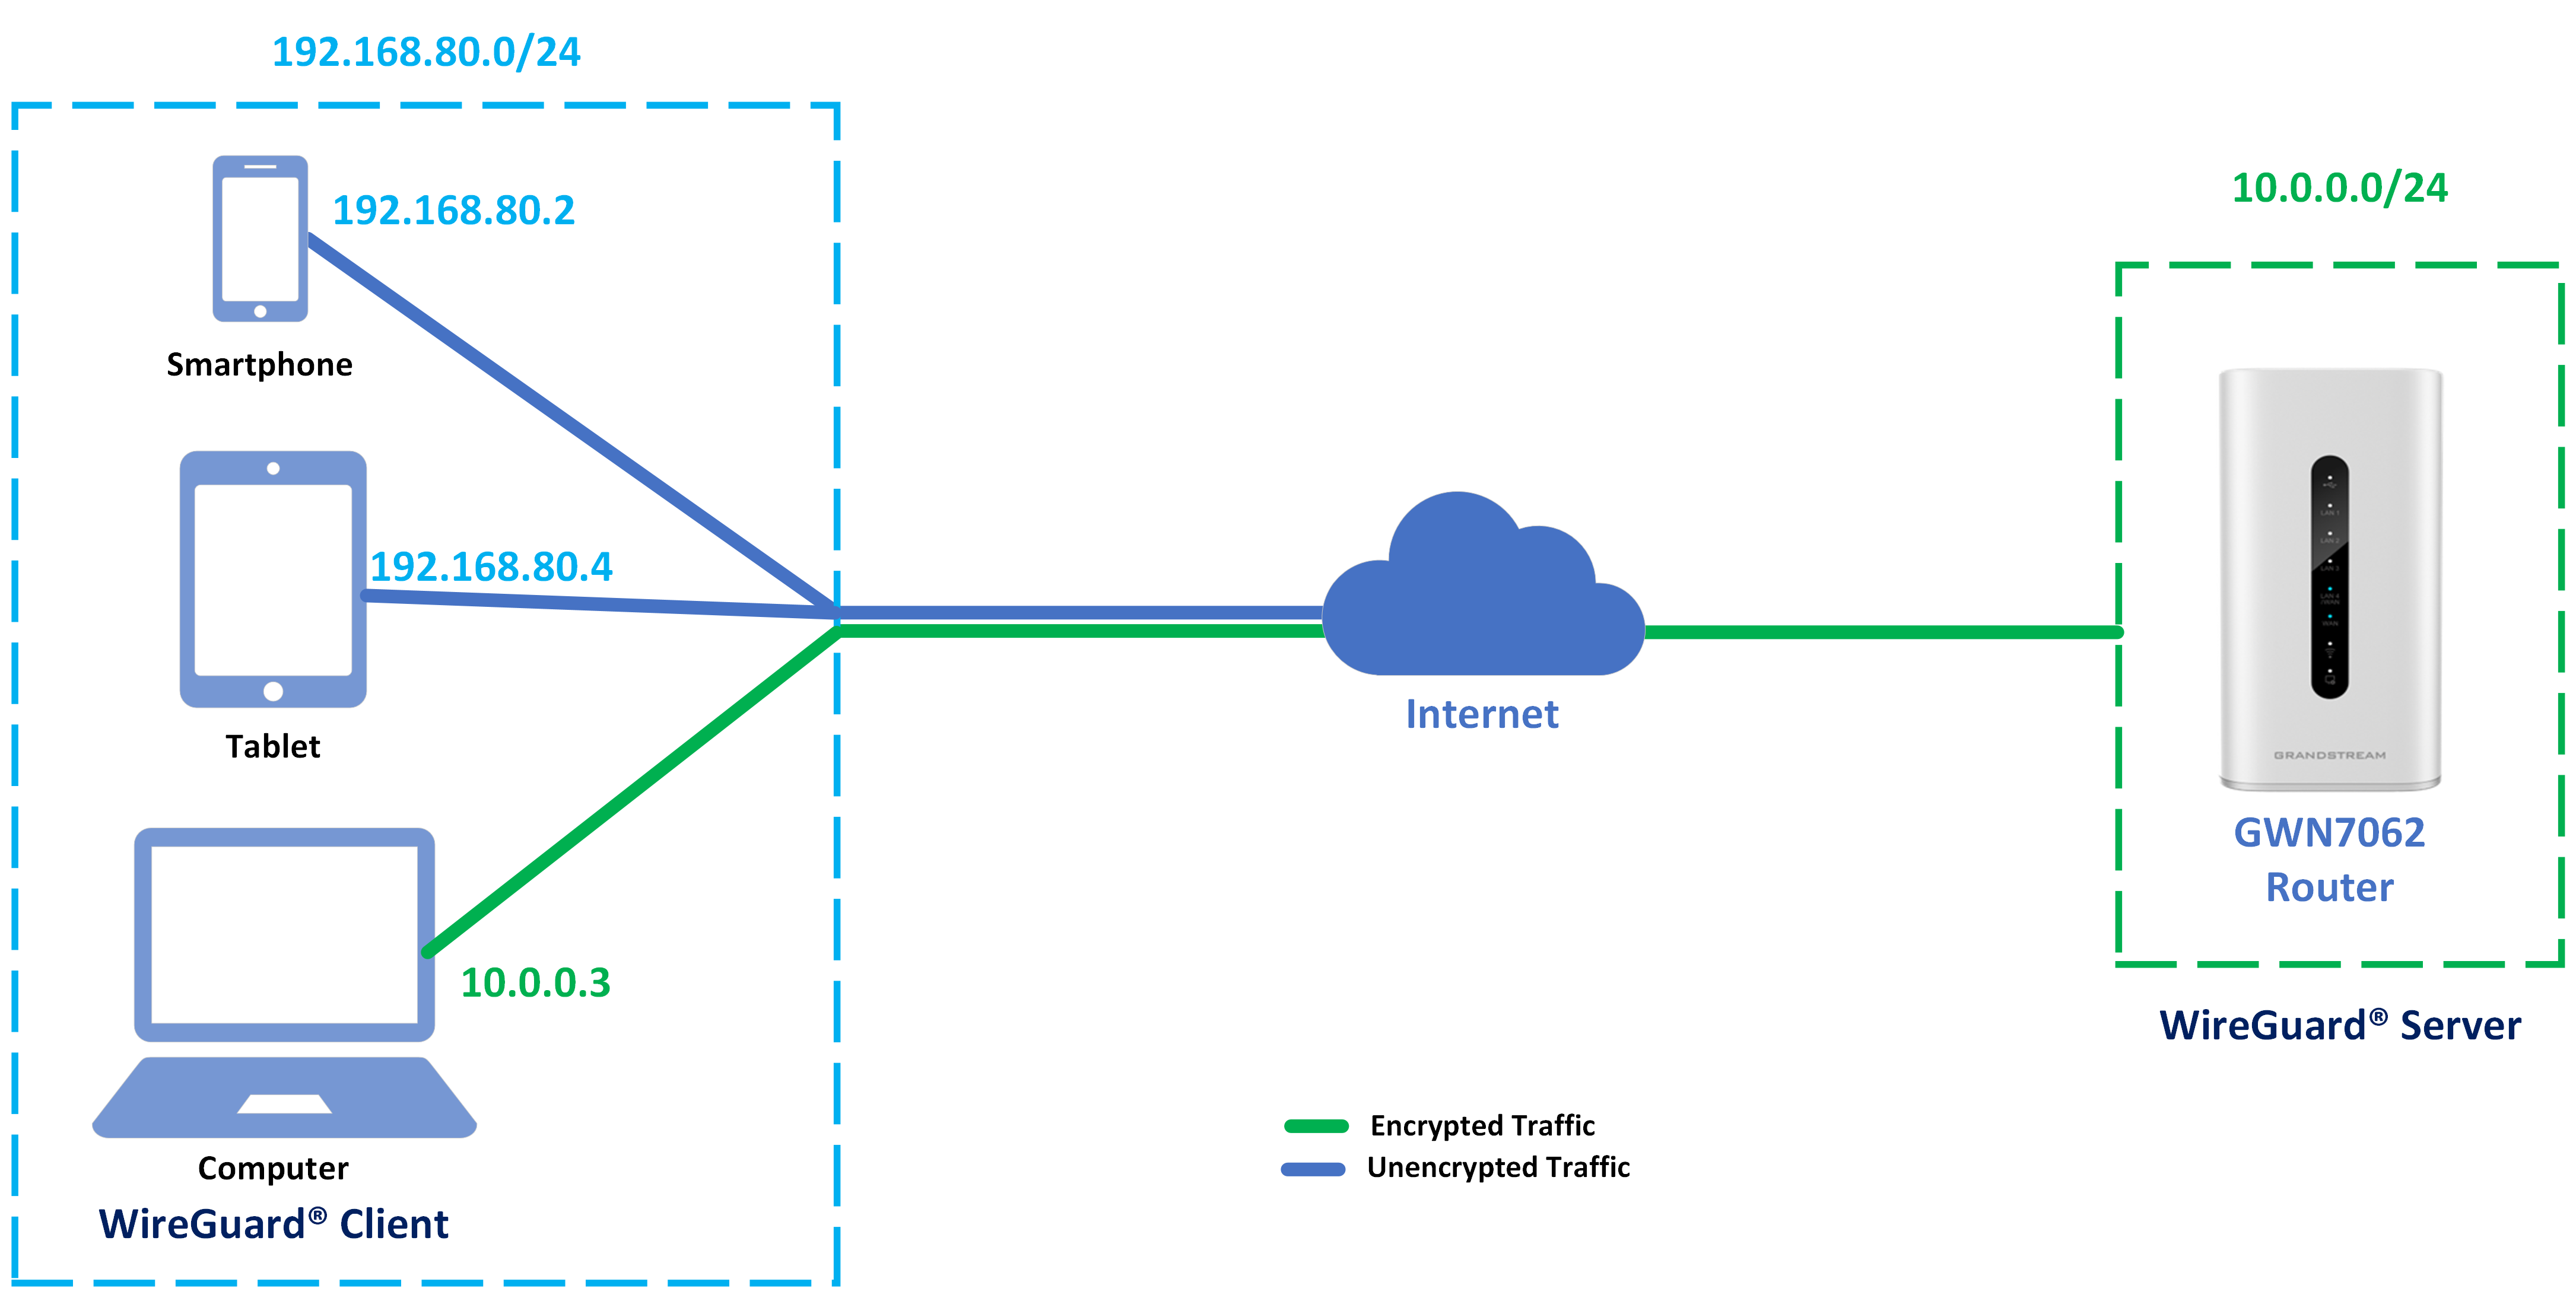
Below is an illustration that shows how typically a server-client deployment of a VPN is done.
REQUIREMENTS
For this scenario, we are using a Grandstream GWN7062 router as a WireGuard® server and a PC running a WireGuard® client application. The configuration is largely similar on all the other Grandstream devices that support WireGuard® server/client.
To install the WireGuard® client on your device, please visit the official WireGuard® site.
CONFIGURATION
Server Configuration
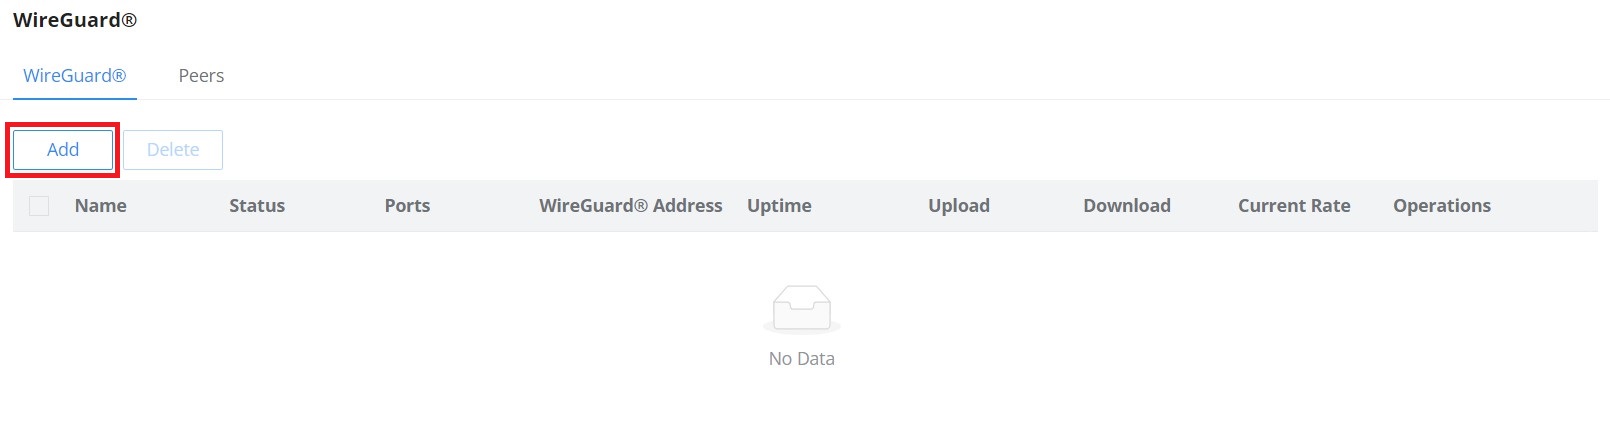
To start using WireGuard® VPN, please navigate to the Web UI → VPN → WireGuard® page. Click on the “Add” button to add a WireGuard® server as shown below:
Please refer to the figure and table below when filling up the fields.
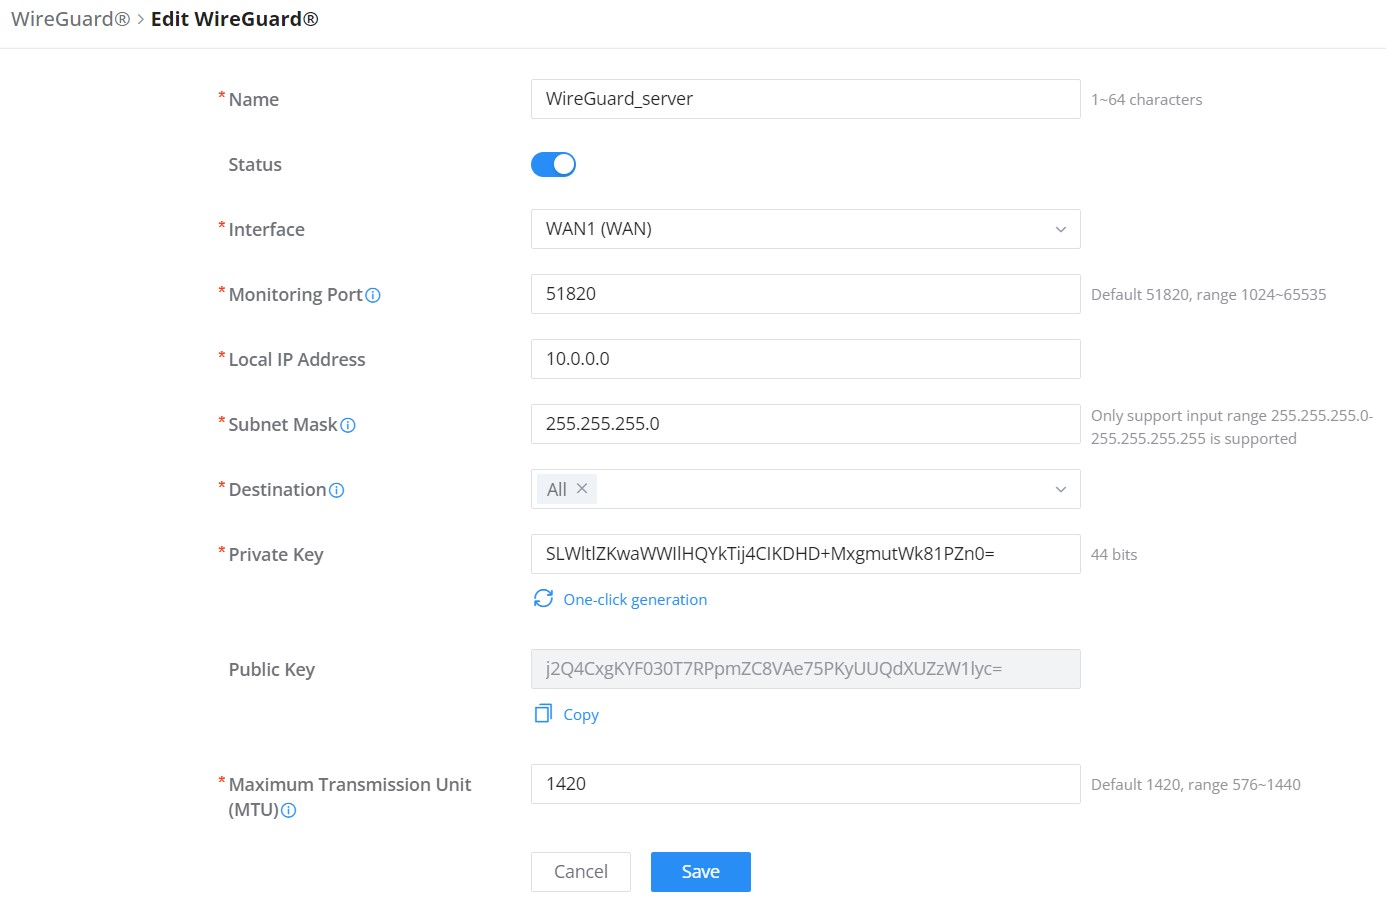
Name | Specify a name for Wireguard® VPN. |
Status | Toggle ON or OFF to enable or disable the Wireguard® VPN. |
Interface | Select from the drop-down list the WAN port. |
Monitoring Port | Set the local listening port when establishing a WireGaurd® tunnel. Default: 51820 |
Local IP Address | Specify the network that WireGuard® clients (Peers) will get IP address from. |
Subnet Mask | Configures the IP address range available to the Peers. |
Destination | Select the Destination(s) from the drop-down list. Note: When selecting "All", subsequent new interfaces will be automatically included. |
Private Key | Click on "One-Click Generation" text to generate a private key. |
Public Key | The public key will be generated according to the private key. Click on "Copy" text to copy the public key. |
Maximum Transmission Unit (MTU) | This indicates the size of the packets sent by the router. Please do not change this value unless necessary. By default is 1450. |
Add/Edit WireGuard®
Automatic peer generation
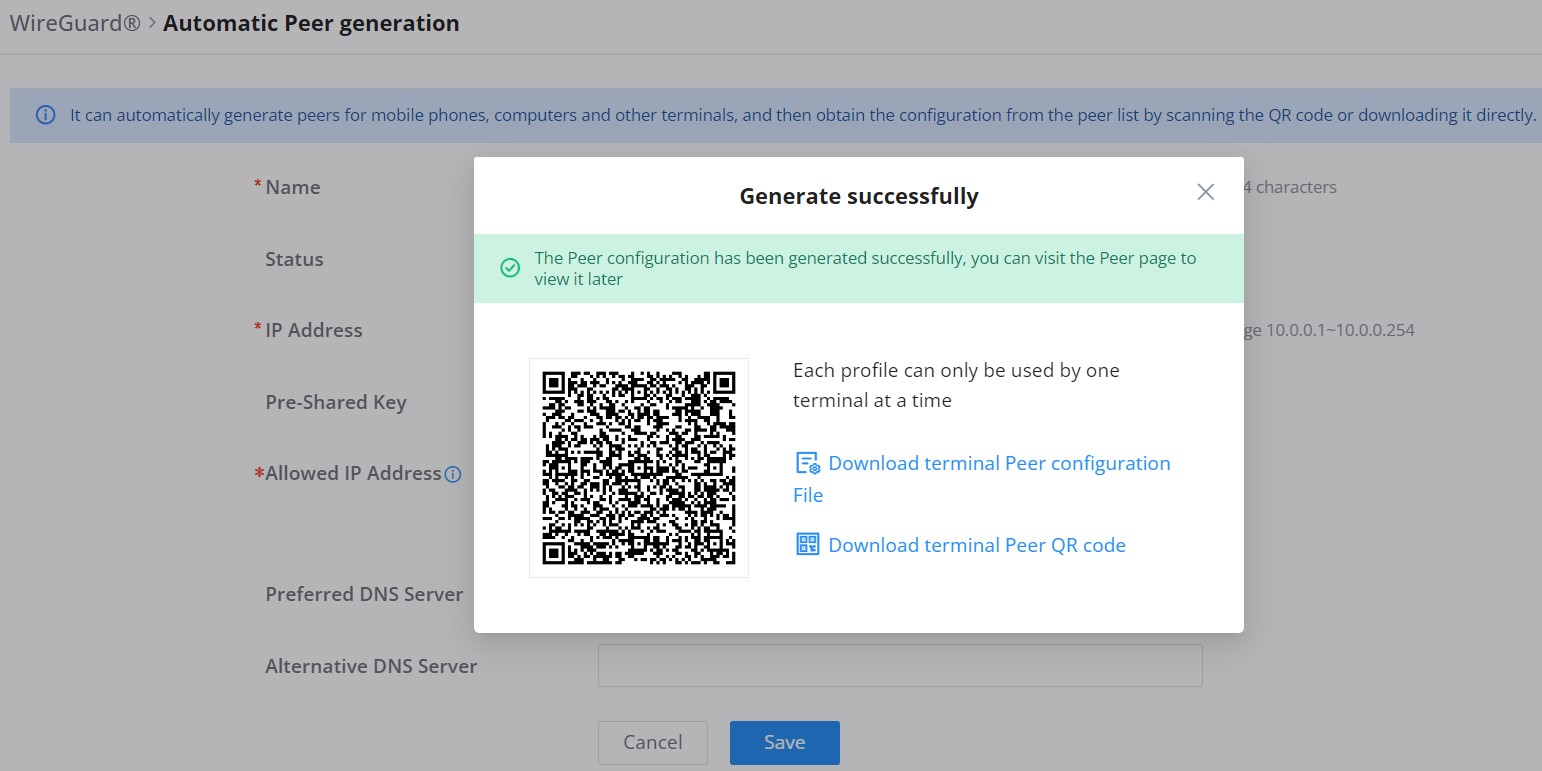
Once finished configuring WireGuard®, click on the “Automatic peer generation” icon to generate peers very quickly and easily as shown in the figures below:

Enter a name and toggle status ON then click on the “Save” button.
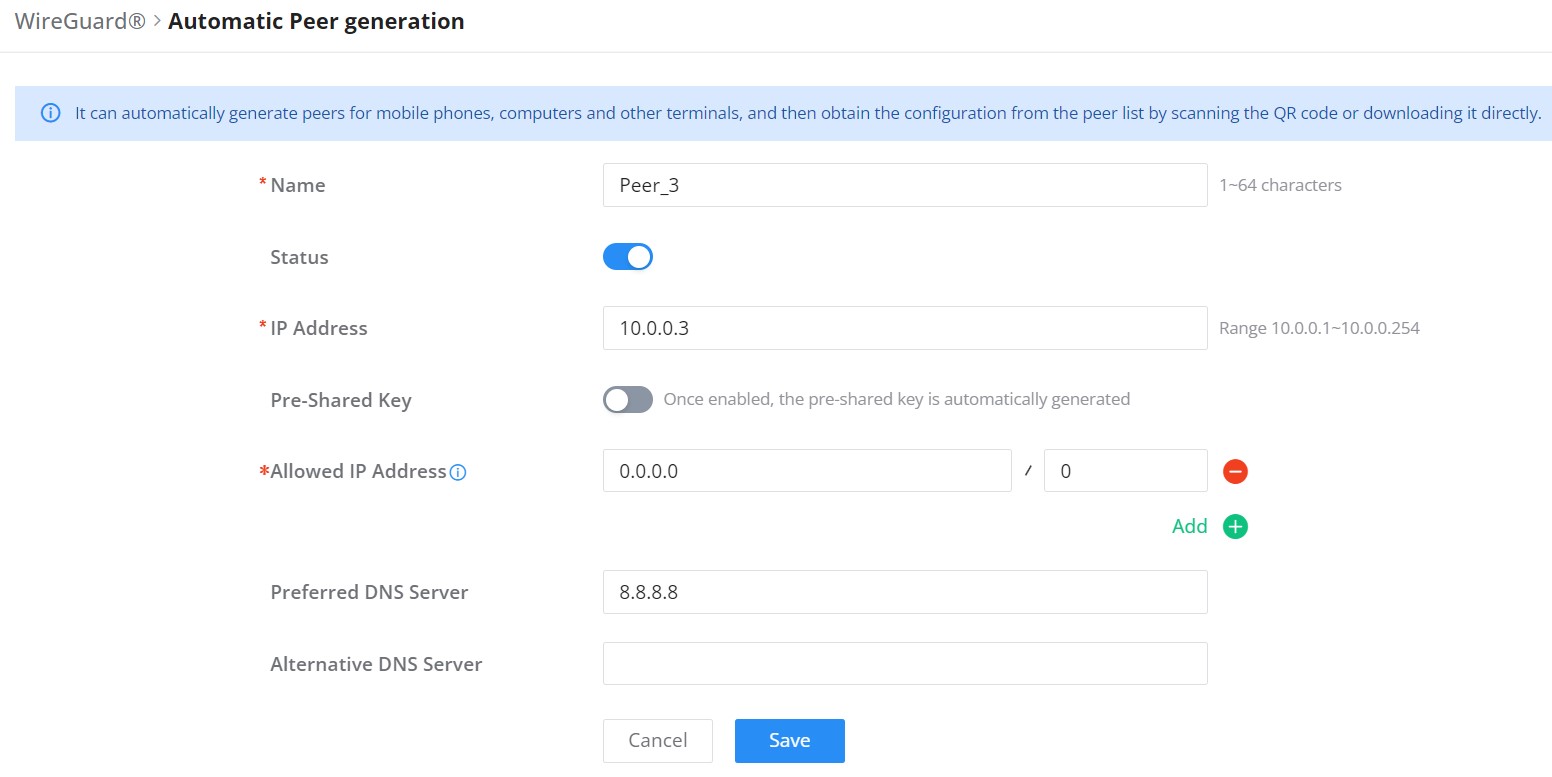
Name | Specify a name for the peer. |
Status | Toggle ON or OFF the peer. |
IP address | The IP address will be generated automatically. It's also possible to be modified. |
Pre-Shared Key | Toggle ON or OFF the Pre-Shared key. Note: Once enabled, the pre-shared key is automatically generated. |
Allowed IP Address | The source address range of VPN traffic allowed to enter the peer. The default is 0.0.0.0/0, which allows all traffic to enter this peer. |
Preferred DNS Server | Enter the preferred DNS Server, eg: 8.88.8. |
Alternative DNS Server | Enter an alternative DNS Server. |
WireGuard® Automatic Peer generation – part 1
Now, the user can either download the configuration file and share it, or download a QR code for devices like mobile phones to scan.
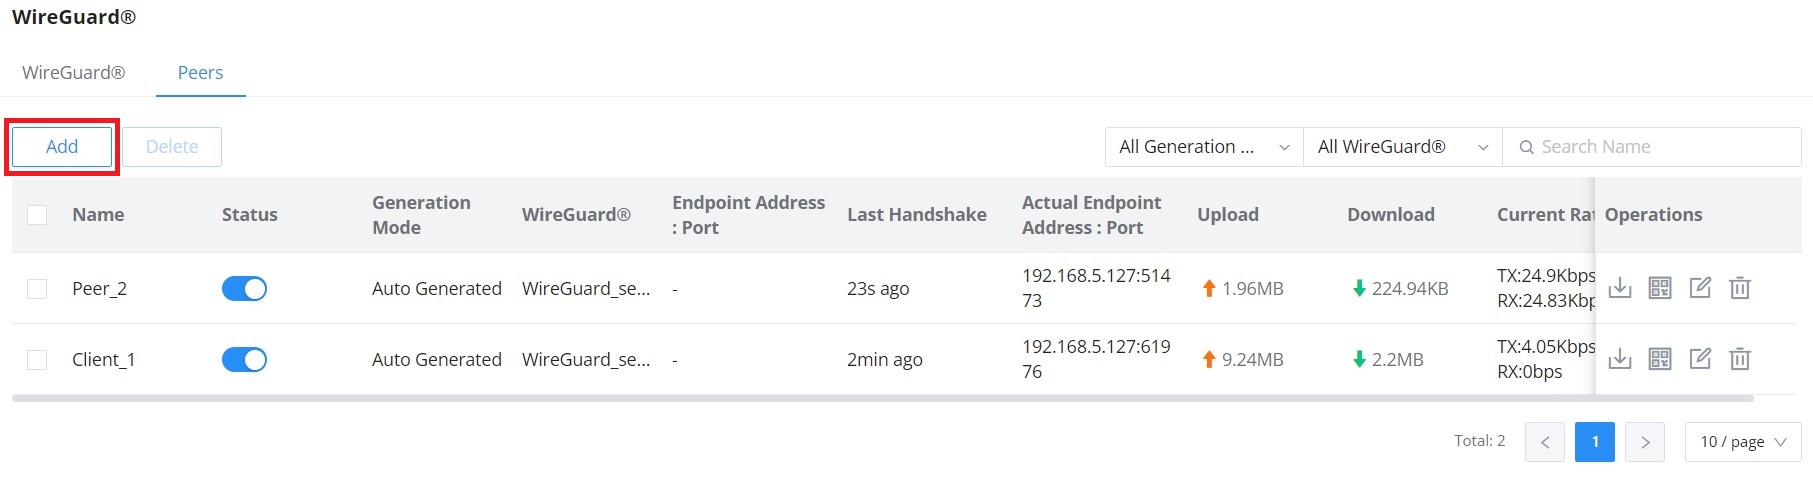
Peers
On the peers’ tab, the user can create peers manually by clicking on the “Add” button.
Please refer to the figure below when filling up the fields.
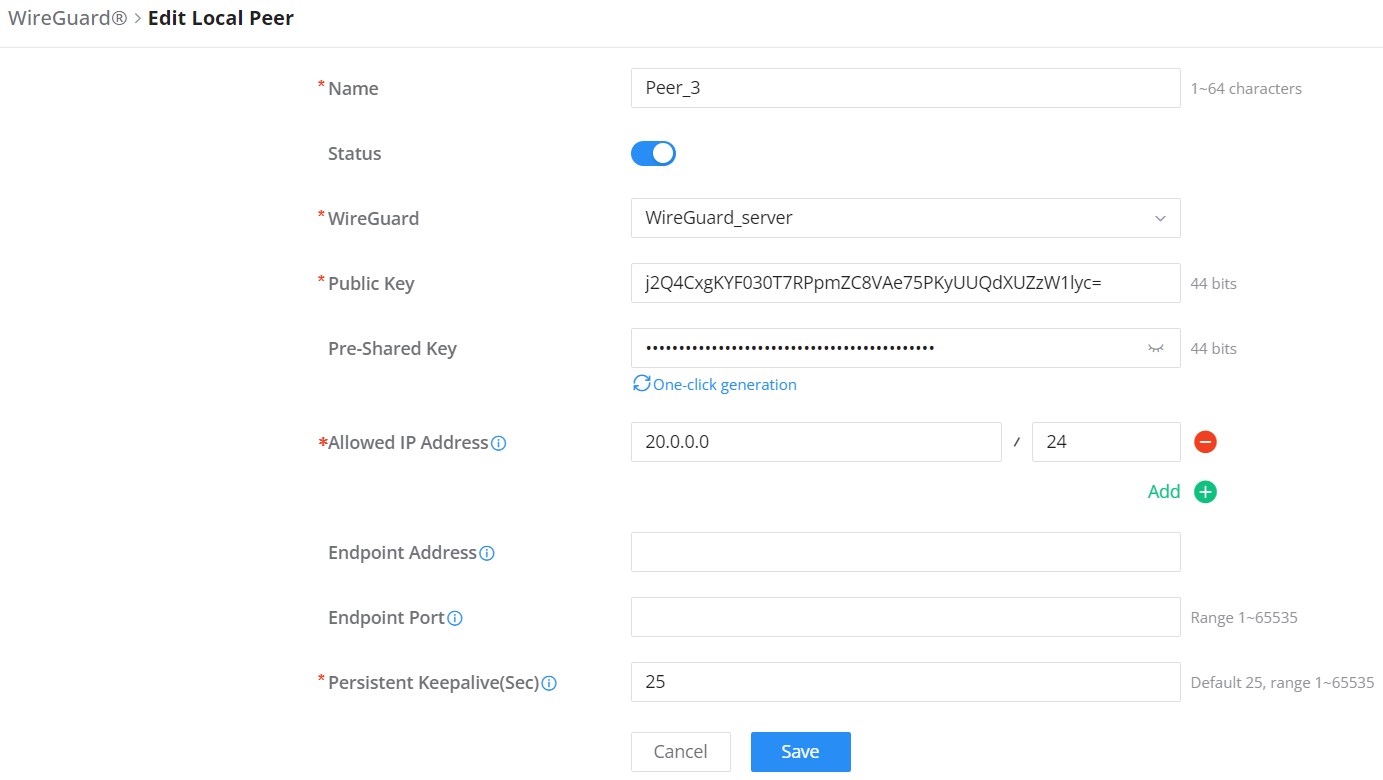
Name | Specify a name for the peer. |
Status | Toggle ON or OFF the peer. |
WireGuard | Select the WireGuard server from the list. |
Public key | Enter the public key of the WireGuard®. |
Pre-Shared key | Click on "One-click generation" text to generate the pre-shared key. |
Allowed IP Address | The source address range of VPN traffic allowed to enter the device. In general, you can fill in the Peer interface address and subnet address. Note: Click on Plus or Minus icons to add or delete the allowed IP Address. |
Endpoint Address | Configures the public IP address of the remote Peer to connect to. |
Endpoint Port | Configures the port of the public IP address of the remote Peer to connect to. |
Persistent Keepalive(Sec) | Configure the interval to send keep alive packets when the peer is behind the firewall |
WireGuard® – Add/Edit Peer
Client Configuration
The user can download the config file after adding the peer.
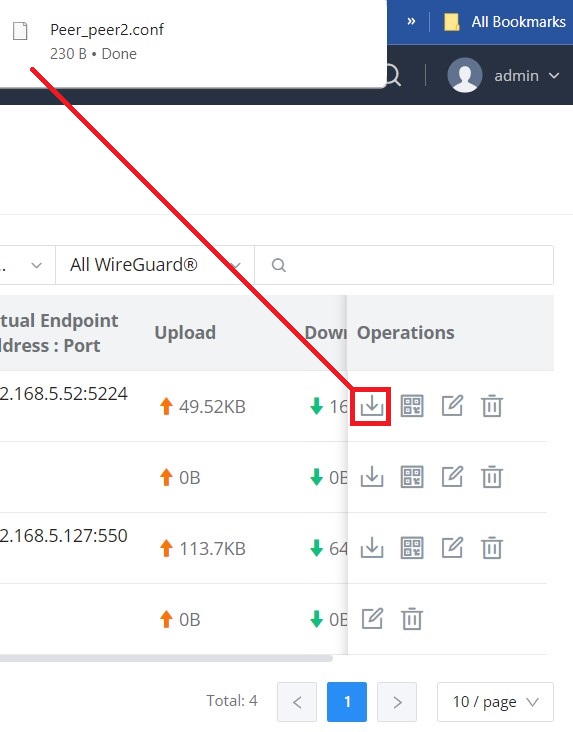
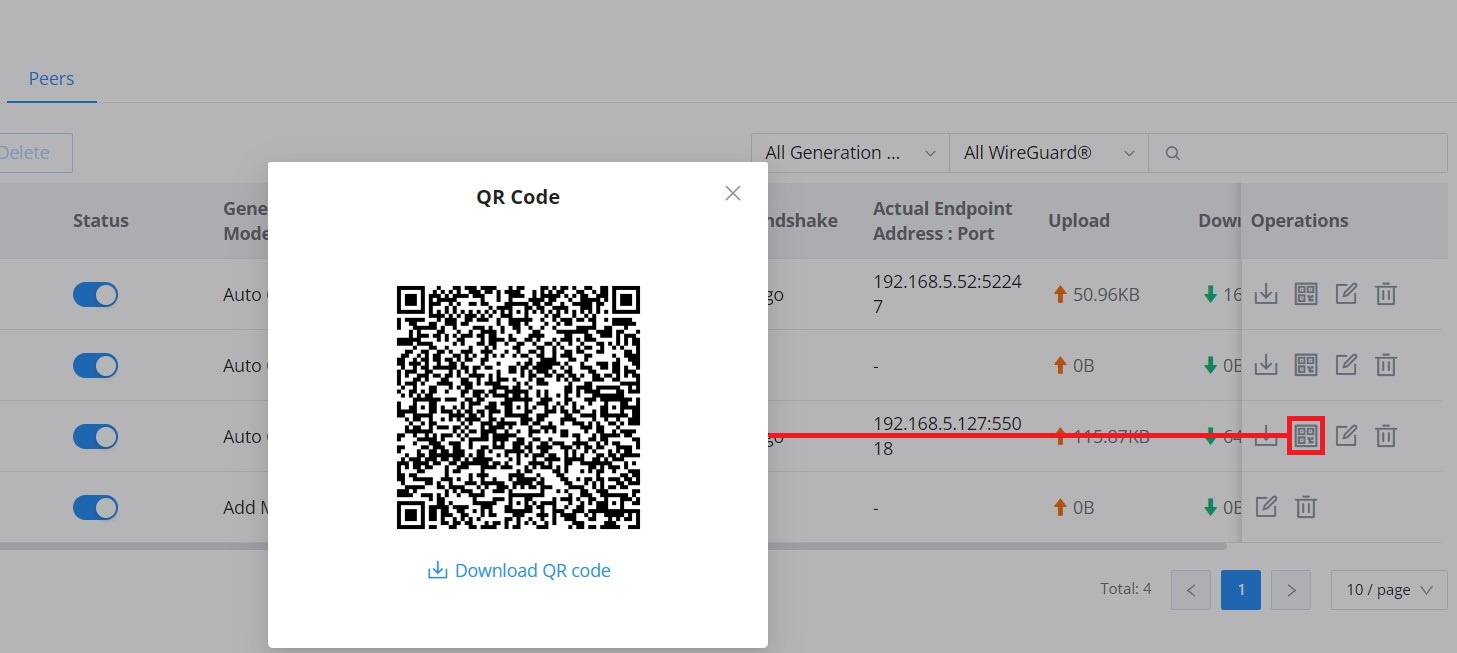
Or scanning the QR code for devices with camera support.
Using a WireGuard® client application, in our case it’s WireGuard® for Windows, the user can click on “Add Tunnel” to add the previously downloaded file.

SUPPORTED DEVICES
The following devices support the WireGuard® server.
Model | Supported | Firmware |
GWN700X | Yes | 1.0.5.6 or newer |
GWN7062/GWN7052(F) | Yes | 1.0.9.10/1.0.9.9 or newer |
WireGuard® supported GWN Routers
© Copyright 2015-2022 Jason A. Donenfeld. All Rights Reserved. “WireGuard” and the “WireGuard” logo are registered trademarks of Jason A. Donenfeld.