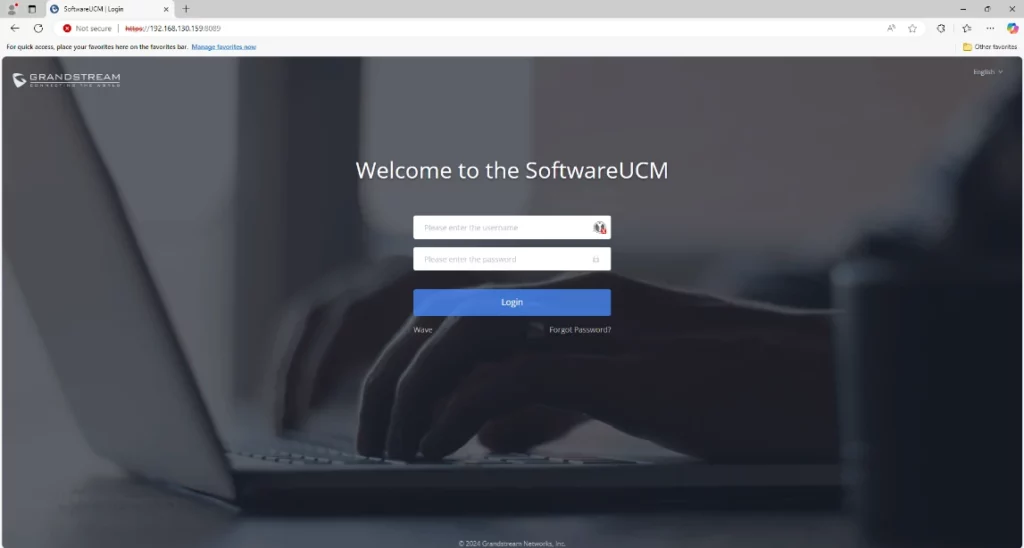
SoftwareUCM is an on-premises solution that provides businesses with complete control over their telephony systems, eliminating the need for cloud services. It offers many advantages, such as scalability by expanding storage capacity, flexibility in integrating with third-party applications, and security within the internal network.
Hyper-V is a hypervisor developed by Microsoft that allows users to create and manage virtual machines (VMs) on a physical server. It enables the allocation of resources and isolates different operating systems. Hyper-V is ideal for running SoftwareUCM in a secure and isolated virtualized environment, separate from the primary operating system.
This guide provides a step-by-step walkthrough for enabling Hyper-V, setting up a virtual machine, and installing and configuring SoftwareUCM.
Prerequisites
Before proceeding with the instructions in this guide, users should ensure the following criteria are met:
- System Compatibility: Ensure that your system meets the requirements to run Hyper-V.
- Hyper-V Enabled: Ensure that Hyper-V is enabled and the version is 10.0.19041.1 or later.
- SoftwareUCM Image File Downloaded: Ensure that you have the SoftwareUCM image file downloaded and ready for installation.
Enabling and Configuring Hyper-V
To enable Hyper-V on your Windows machine, please refer to the steps below:
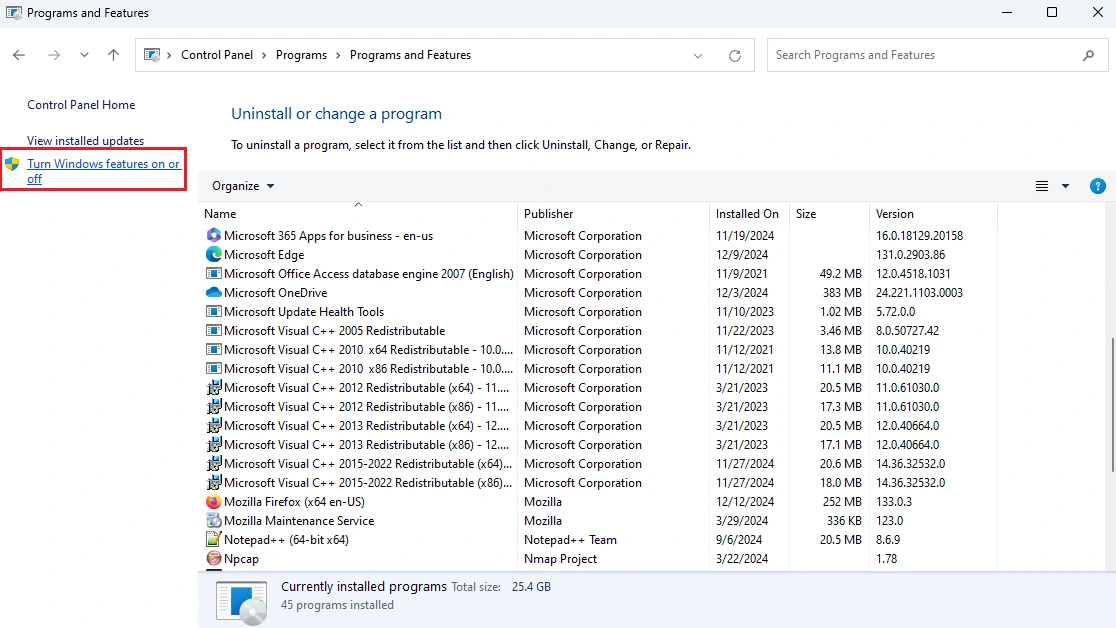
- Go to Control Panel→Programs→Programs and Features and click on Turn Windows features on or off.
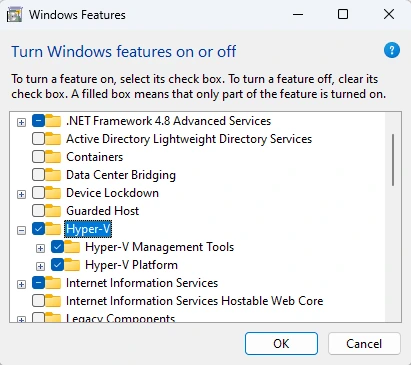
- In the Windows Features window, select Hyper-V and click on OK to enable it.
- Wait for the installation process to complete and click on Restart Now to restart your computer.
Now that Hyper-V has been enabled, users need to create a Virtual Switch to share the host machine’s network with the virtual machine running on it. Based on the machine’s network environment, users need to create one or two virtual switches.
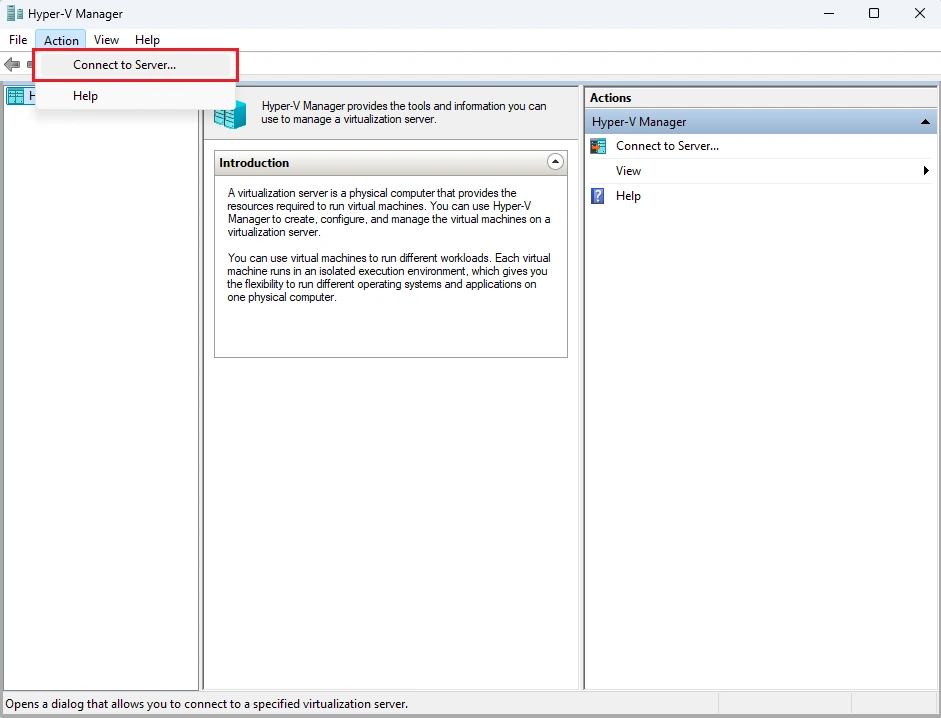
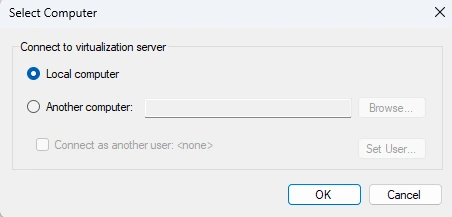
- Open Hyper-V Manager, select Action and click on Connect to Server.
- Select Local computer, then click on OK.
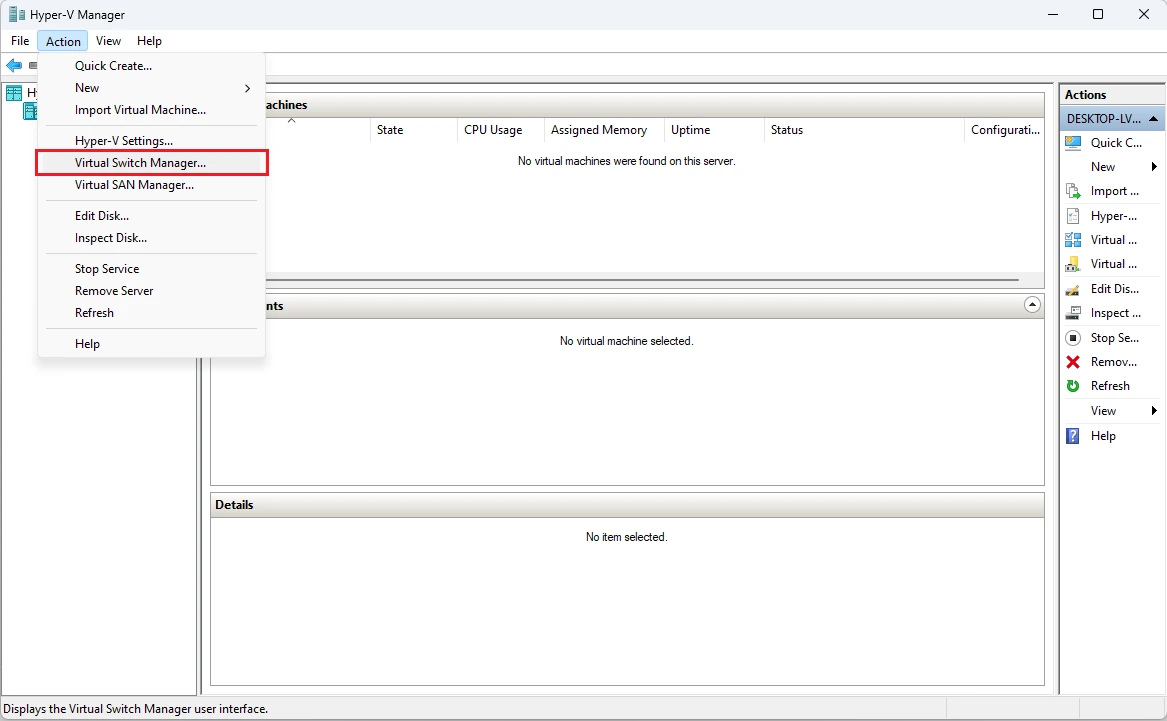
- Click Action→Virtual Switch Manager to create a virtual switch.
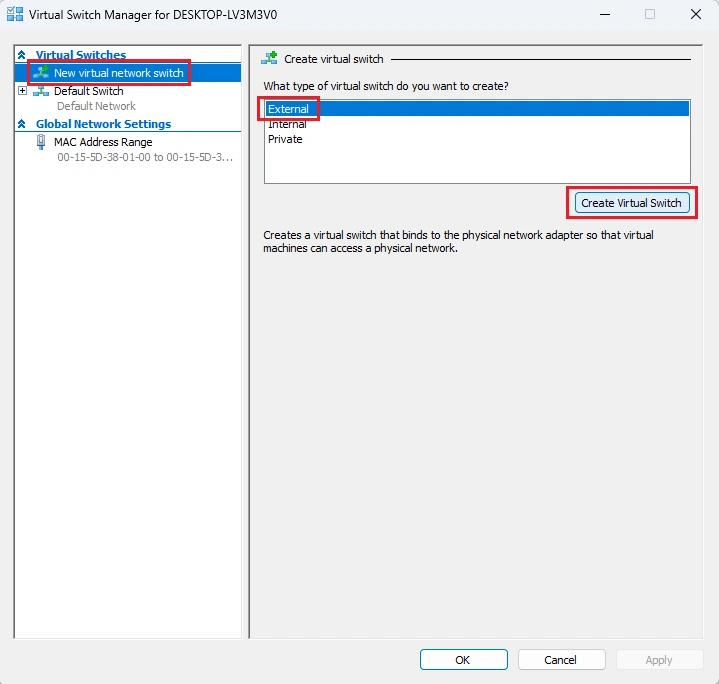
- Create a virtual switch by selecting New virtual network switch. In the type field of virtual switch select External, then click on Create Virtual Switch.
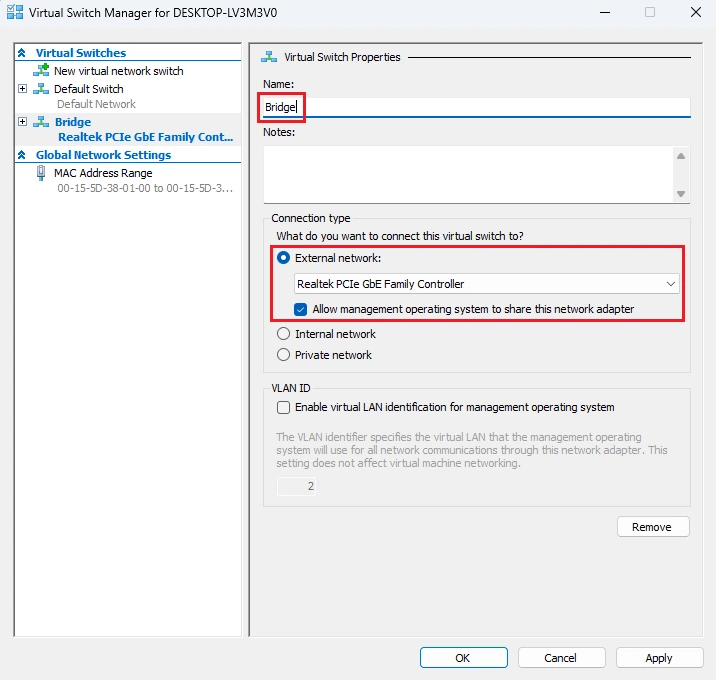
- In the Name field, enter a name for the virtual switch and select External network as Connection type. Choose the physical network card to be paired with the virtual switch, then click on OK.
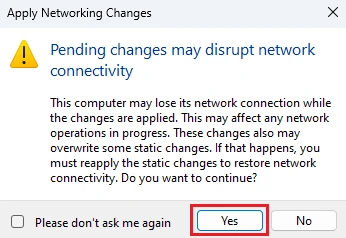
- Click on Yes to apply the previous changes.
Creating the Virtual Machine on Hyper-V
To create a virtual machine on Hyper-V, please follow the steps below:
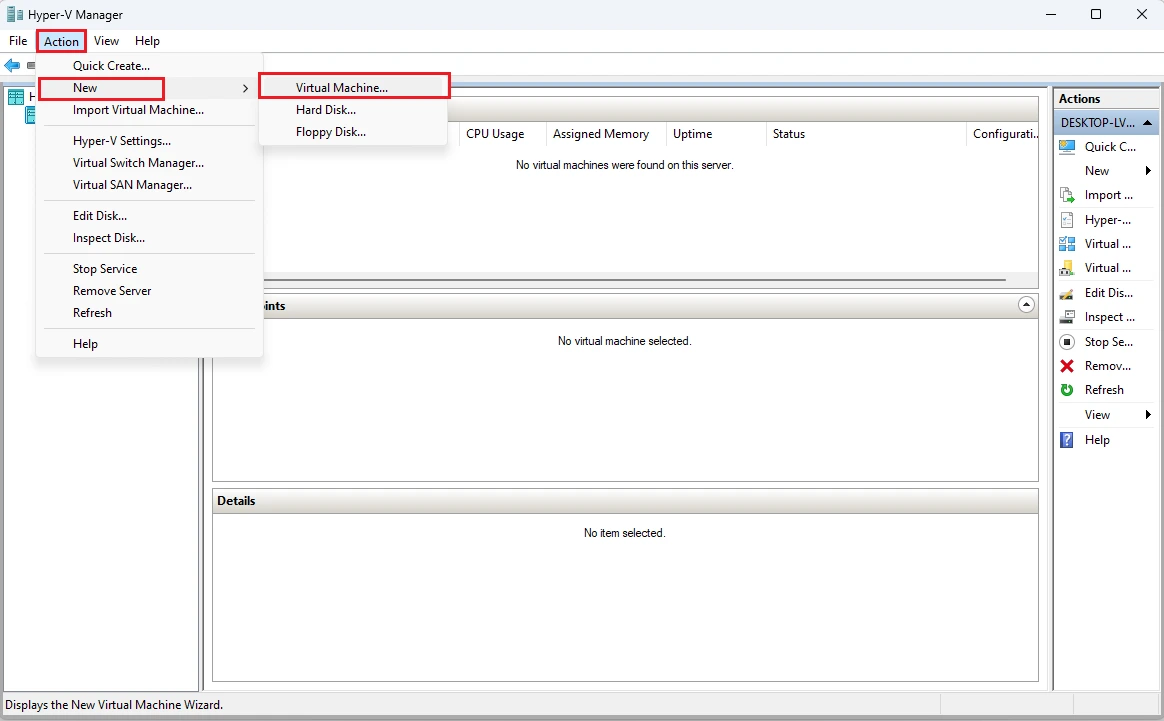
- On Hyper-V Manager, go to Action→New→Virtual Machine.
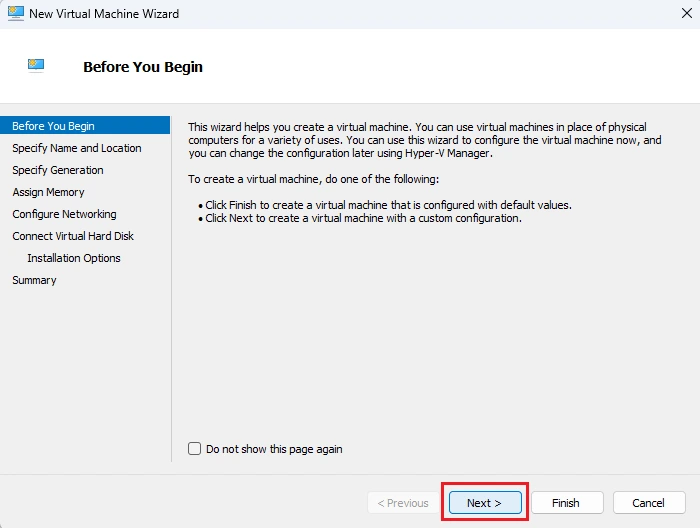
- Review the information on the “Before You Begin” page and click Next.
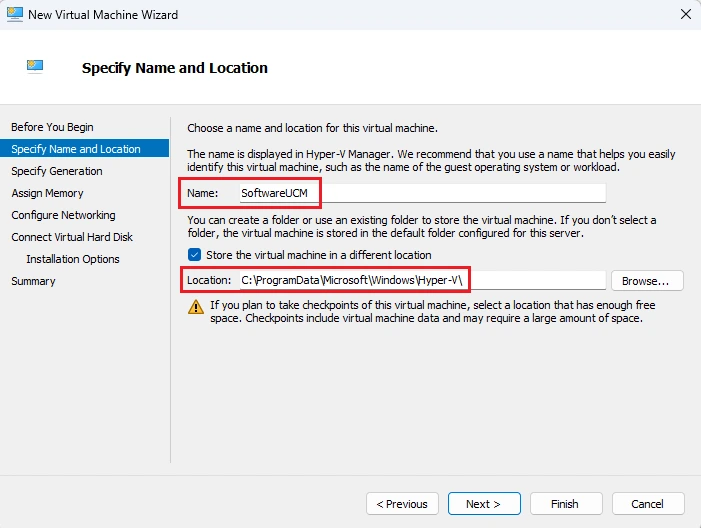
- Specify a Name to help you identify the virtual machine, choose a Location to store configuration files of the virtual machine, and click Next.
- Select a generation for the machine and click Next.
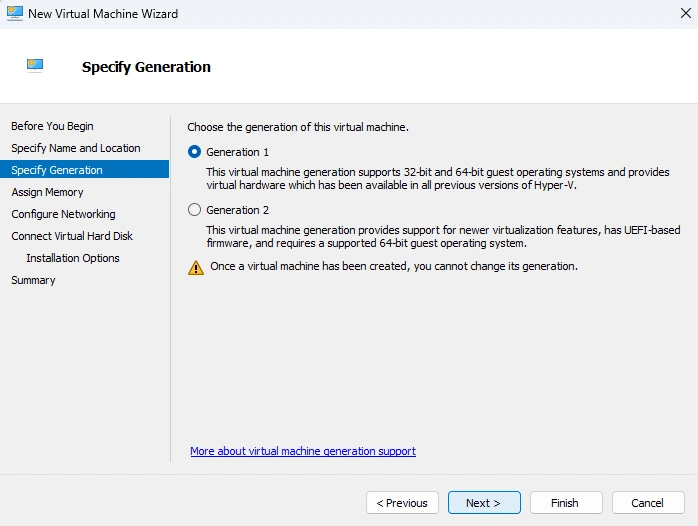
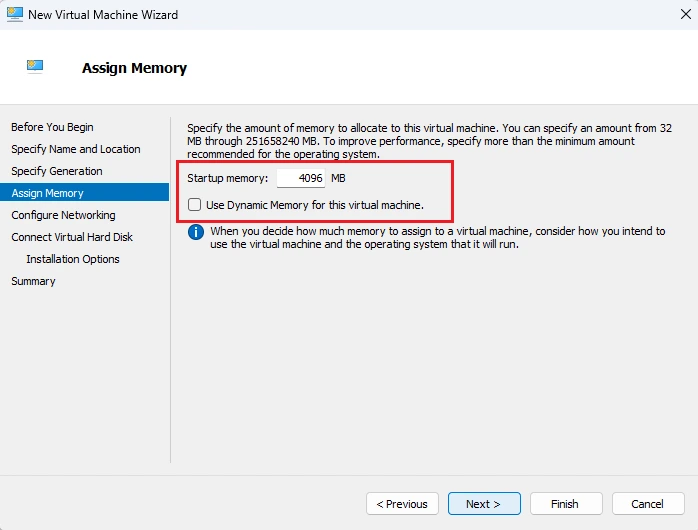
- Set the Startup Memory, uncheck the checkbox of Use Dynamic Memory for this virtual machine, and click Next.
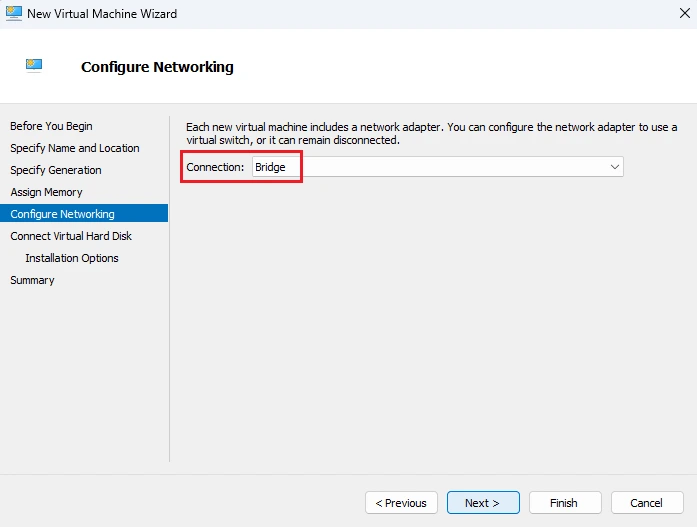
- In the Connection drop-down list, select the virtual switch created for the virtual machine, and click Next.
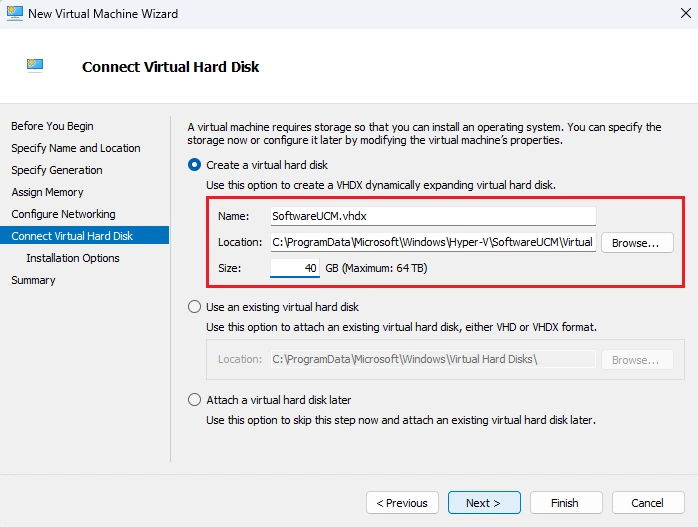
- Specify a name for the virtual hard disk, select a location, specify a size, and click Next.
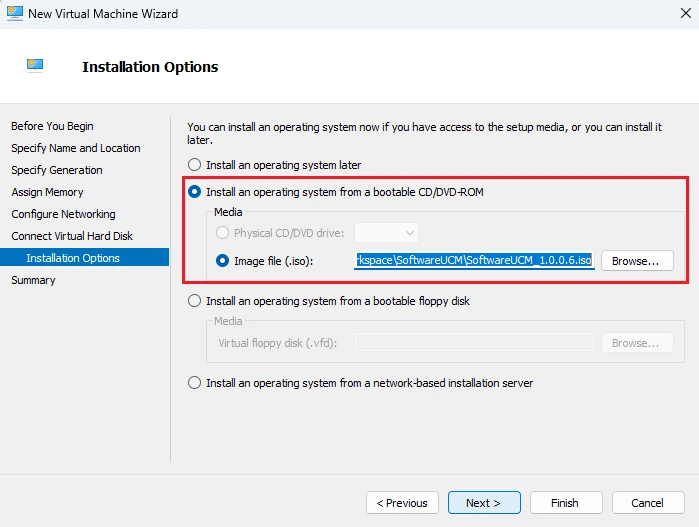
- Select Install an operating system from a bootable CD/DVD-ROM, select an .iso file, and then click Finish.
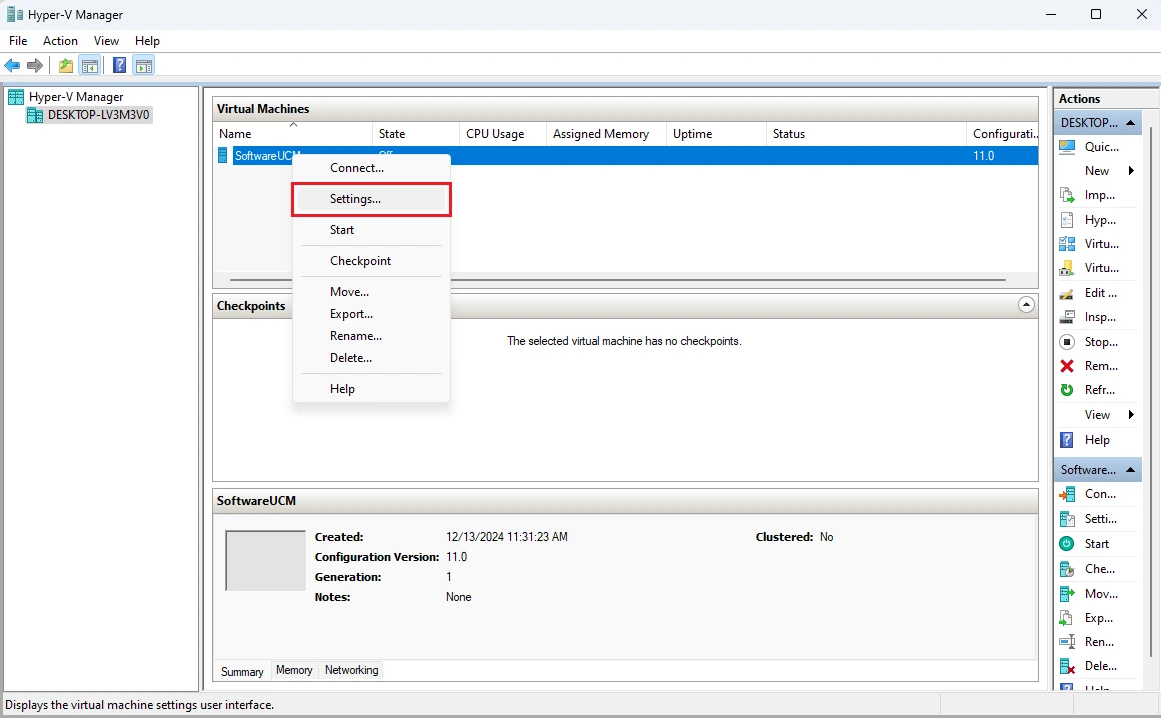
- Right click the virtual machine, click Settings to open the virtual machine settings page.
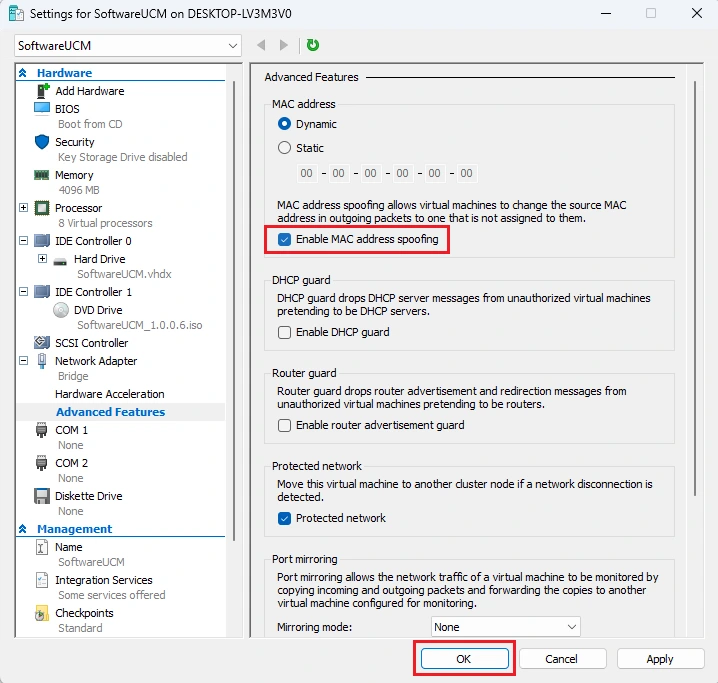
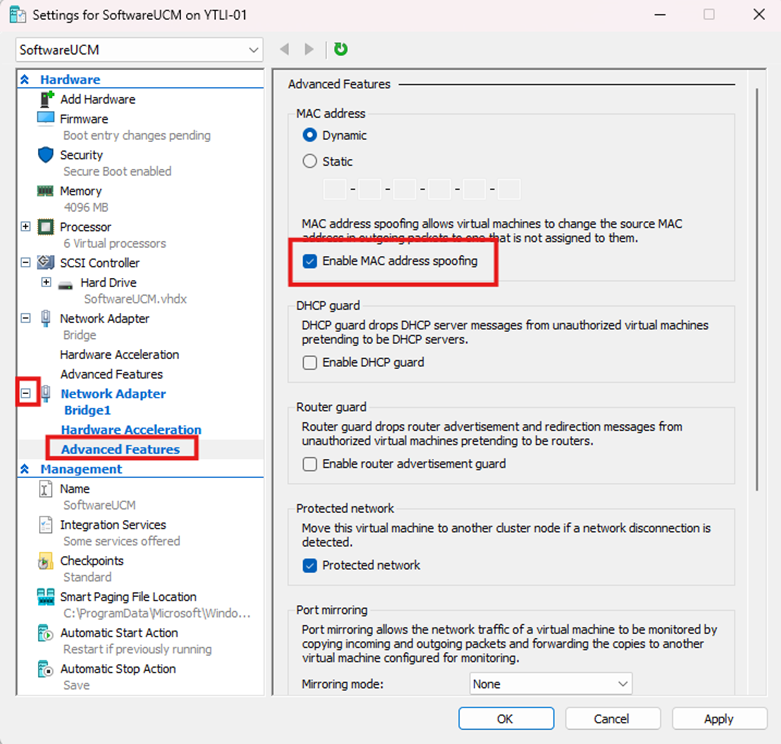
- Go to Network Adapter→Advanced Features, select Enable MAC Address spoofing, then click OK.
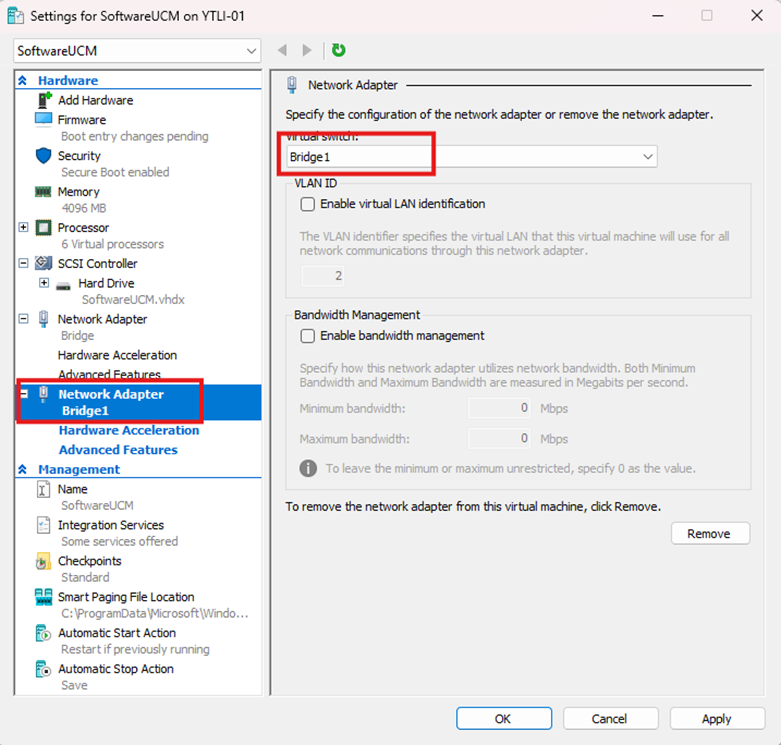
- Optional: Add a second network interface to the virtual machine.
- Add Network Adapter
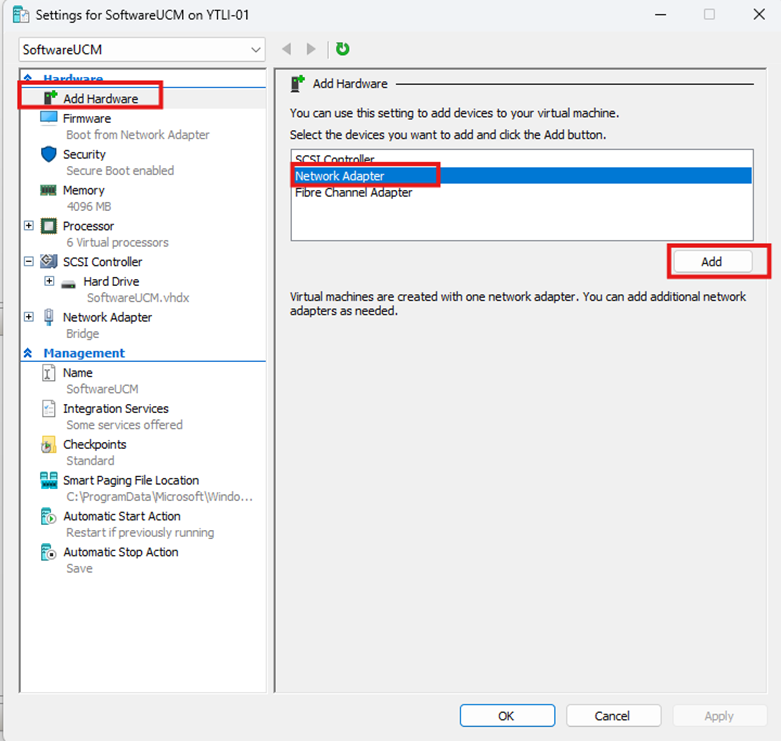
Select the virtual switch.
Click on Network Adapter > Advanced Features, the select Enable MAC Address Spoofing, then click “OK”.
Installing and Configuring SoftwareUCM
Once the virtual machine is successfully created, users can install SoftwareUCM by following the steps below:
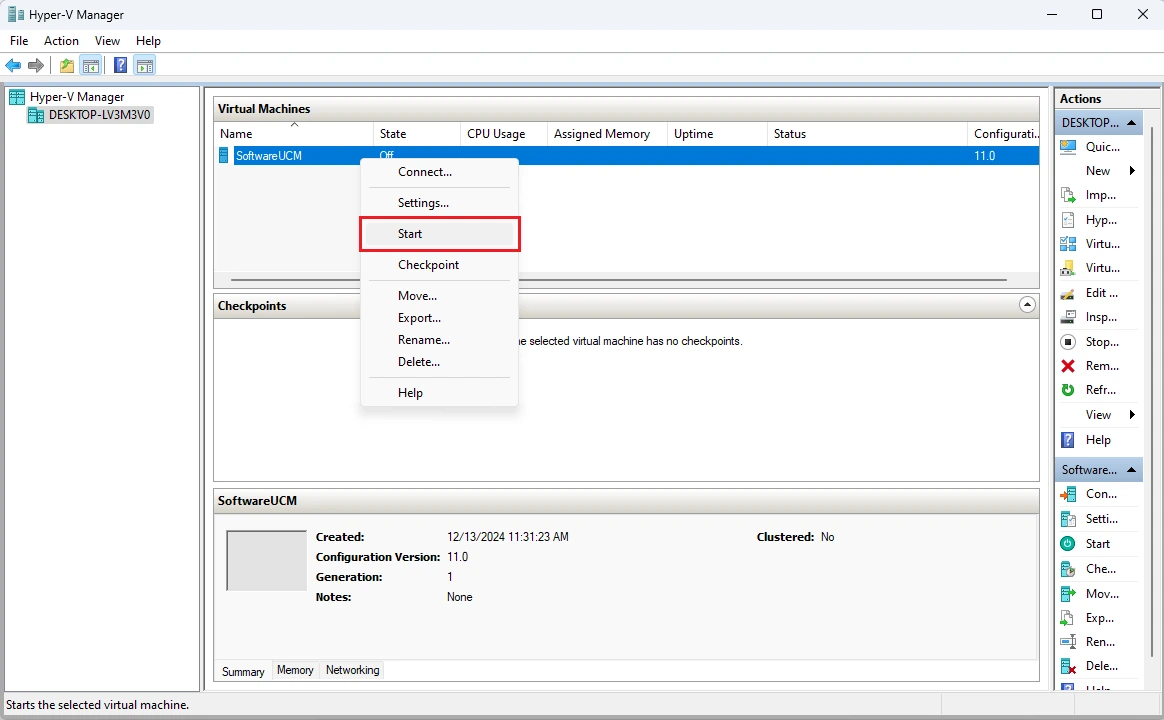
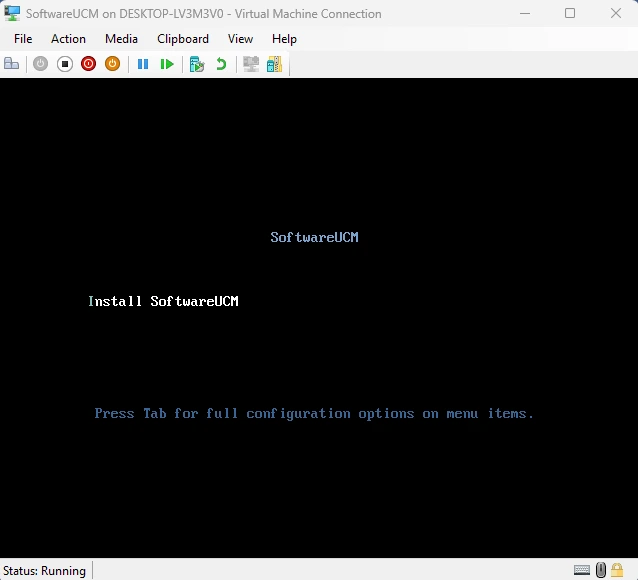
- Right-click the virtual machine, and click Start to start the virtual machine.
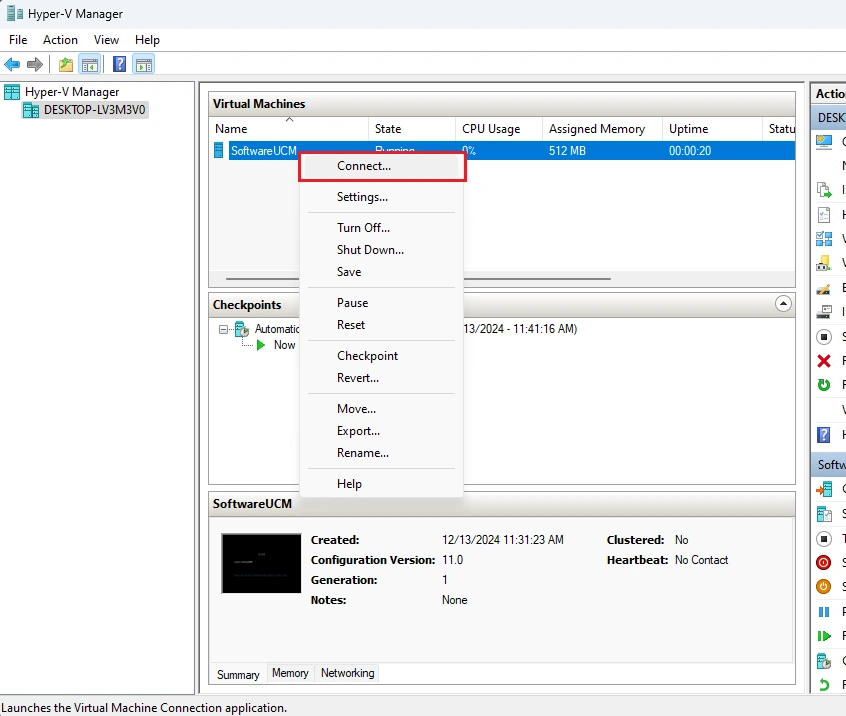
- Right-click the virtual machine, and click Connect to connect to the virtual machine.
- Press
Enterand wait until the installation process is not running.
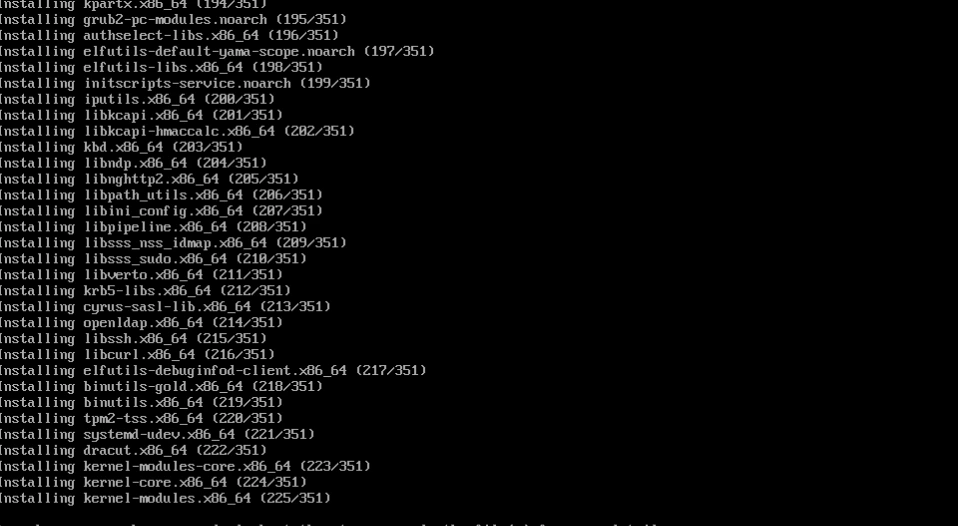
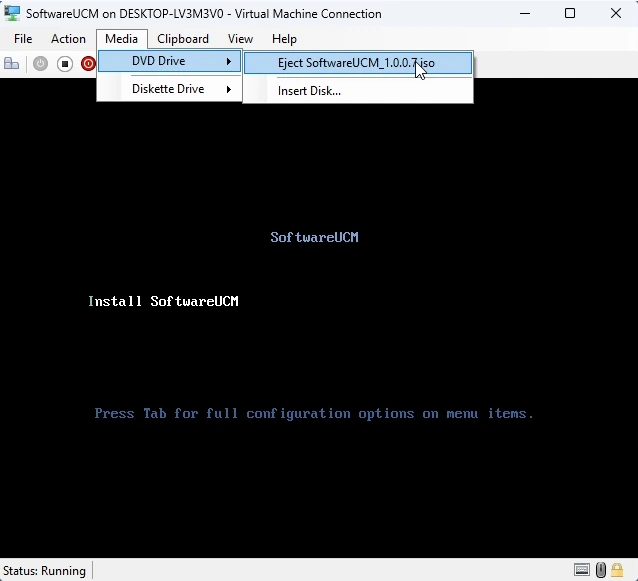
- After the installation is complete, click Media→DVD Driver→Eject to move out the iso.
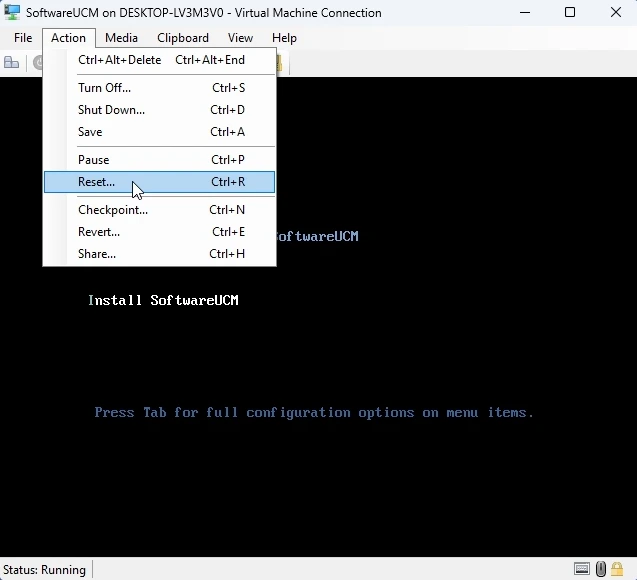
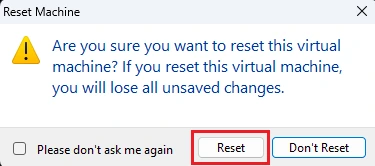
- Click Action→Reset to reboot the virtual machine.
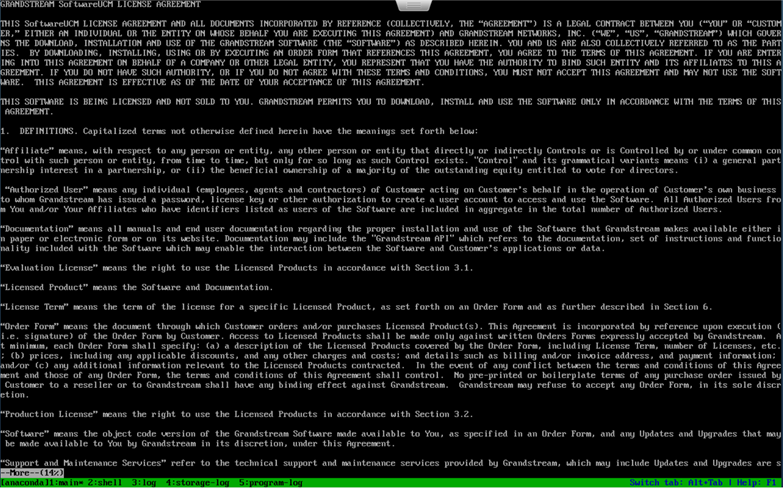
- Read and accept the license agreement to proceed. Press Enter or PageDown to scroll down.
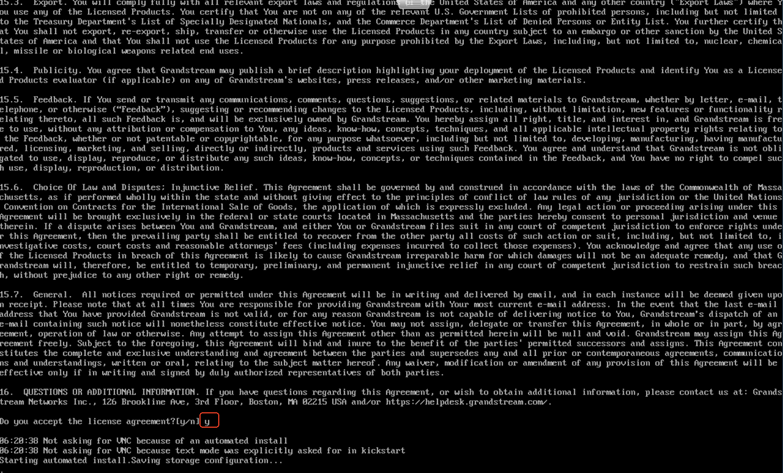
- Enter “y” and press Enter to accept the license agreement.
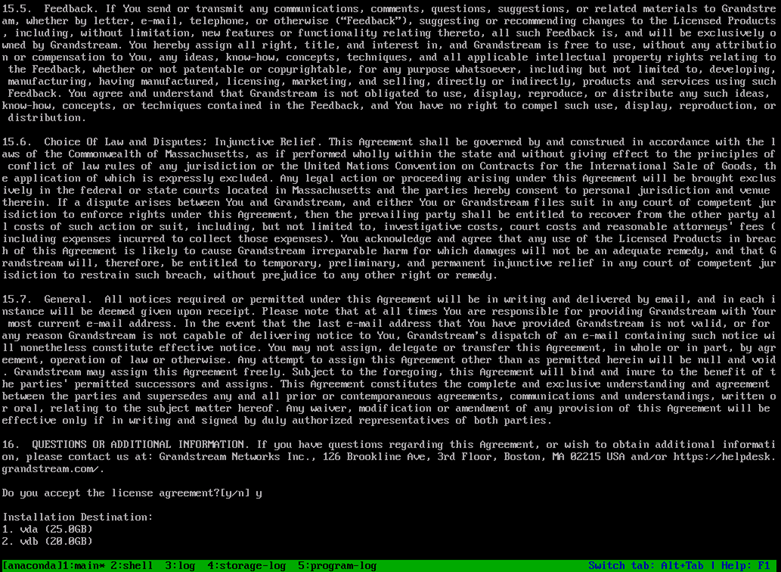
- If you have multiple disks, you can choose to install the system on one of them. However, you must set that disk as the first boot device. Tip: In the virtual machine, the displayed disk order represents the current disk boot order.
- Wait until the installation is completed before proceeding.
Configure a Static IP
SoftwareUCM is now installed with a DHCP-assigned IP address and an instance set up. If you prefer a static IP address or if your network does not support DHCP, you can easily change SoftwareUCM’s IP address by following these instructions:
SoftwareUCM is now installed with a DHCP-assigned IP address and an instance set up. If you prefer a static IP address or if your network does not support DHCP, you can easily change SoftwareUCM’s IP address by following these instructions:
- Login with user “support“, and set the password.
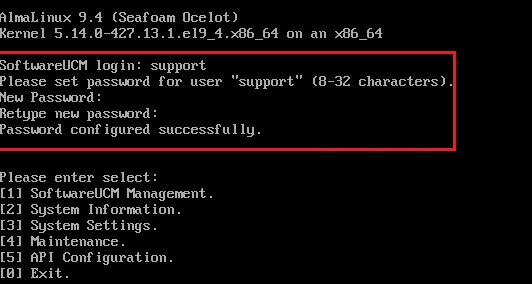
- Press “1” followed by
Enter, to access SoftwareUCM Management.
- Select Network Settings→Update network configuration to set up an IP address, netmask, gateway IP address, and a preferred DNS server.
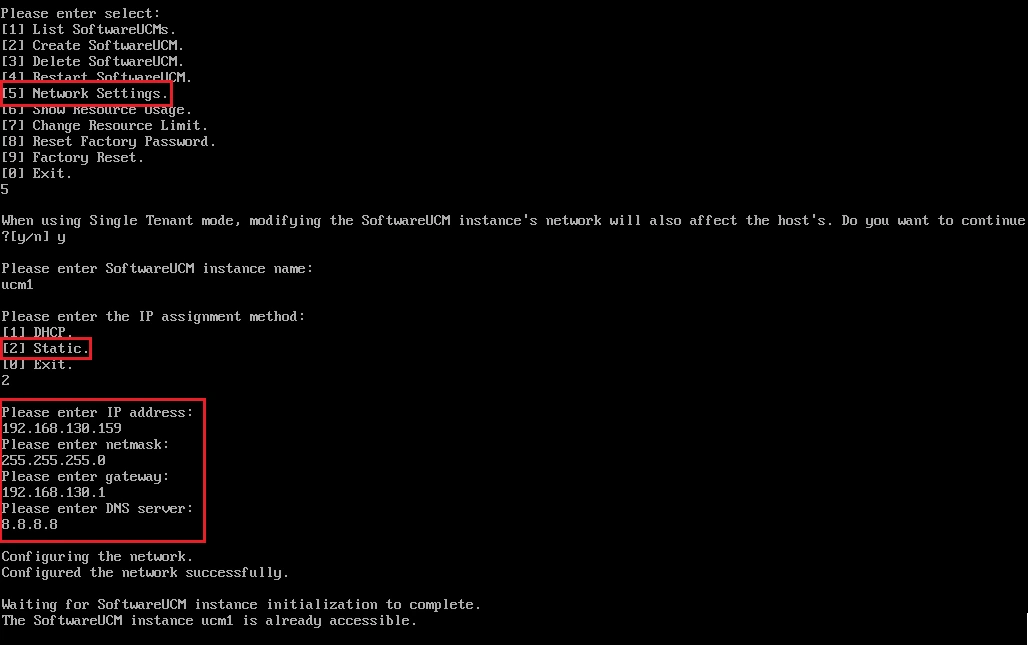
- Choose the Exit option “0” to return to the initial selection page, then go to SoftwareUCM Manage → List SoftwareUCM to view the access information of the instance. (Make sure the status is “Running”).
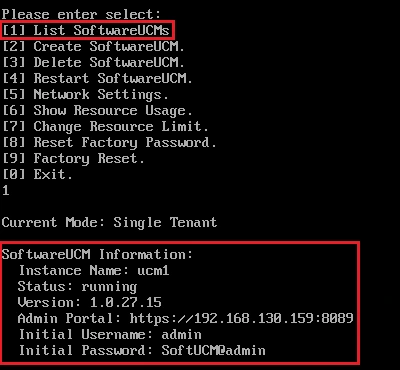
Accessing SoftwareUCM
To access SoftwareUCM, users need to enter the IP-based URL listed under Admin Portal and log in using the initial username and password.