
Customer relationship management (CRM) is a set of practices, strategies, and technologies that companies use to manage and analyze customer interactions and data throughout the customer lifecycle, with the goal of improving business relationships with customers.
The UCM6XXX series support integration with four CRM platforms, which are:
- SugarCRM
- Salesforce CRM
- ZOHO CRM
- Vtiger CRM
Allowing users to get full information about their contacts, customers, and leads, and save call information details to specific table history for further usage.
This guide contains a step-by-step configuration needed to set up Vtiger CRM with the UCM6XXX IP-PBX series.
Requirements
Following table shows Grandstream products and solutions that are required and have been used during this guide in order to have UCM and Vtiger Integration:
PBX | Firmware |
UCM61XX, UCM62XX, UCM6510 | 1.0.16.18 or higher |
UCM63xx | 1.0.2.25 or higher |
UCM630xA | 1.0.9.10 or higher |
IP Phones | Firmware |
GXP21XX | 1.0.9.26 or higher |
GXP17XX | 1.0.1.30 or higher |
GRP2614/2615/2616 | 1.0.0.16 or higher |
GRP2603/2604 | 1.0.1.18 or higher |
Vtiger CRM Architecture
During Our Deployment, we will try to achieve the following architecture:
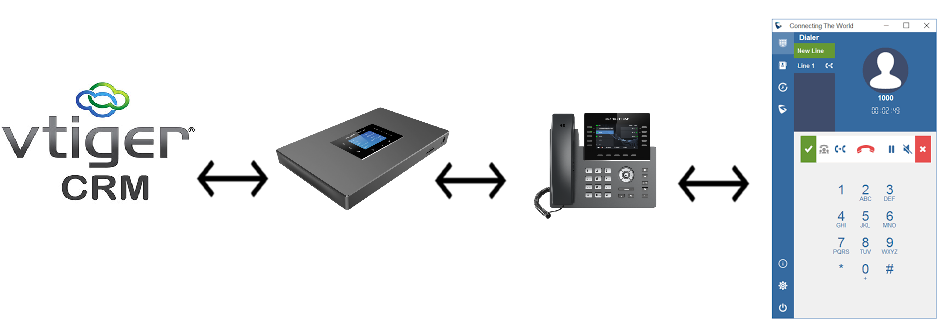
In this case, each of the architecture components will have its own role:
- Vtiger CRM: It will save the database of all contacts.
- UCM: It will send a HTTP requests to the Vtiger CRM once it receives an inbound call through the trunk, then add unknown numbers to contacts table in the CRM database as well as request the contact information if the contact exist on the database.
- IP Phone: Will receive the incoming call and display contact information as well as synchronization with desktop CTI application.
- Grandstream Affinity: It will display all the details of the contact who is calling and give CTI control over IP phone (Answer call, Hangup, transfer, hold/UnHold ….etc).
UCM6XXX Configuration
Two steps are required to configure UCM6xxx with Vtiger CRM:
- Admin Configuration.
- User Configuration.
Admin Configuration
This step is required to configure general settings regarding received calls, in order add unknown numbers to the contacts table, do Lookups…etc. These settings will apply to all UCM6XXX users that will be using Vtiger CRM.
Vtiger CRM configuration page can be accessed using admin login at “Web GUI🡪Value-Added Features🡪CRM”.
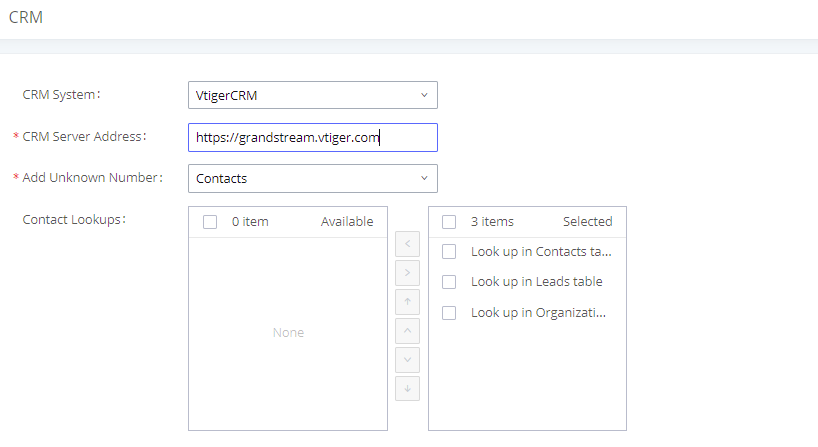
- Select VtigerCRM from the “CRM System” dropdown list to use the Vtiger CRM and make similar configuration to the above screenshot, below are the details:
CRM System | Allows users to select a CRM system from the drop-down list, choose VtigerCRM to use Vtiger CRM. |
CRM Server Address | Set the CRM Server address as the domain name or IP address of the Vtiger CRM. Example: https://grandstream.vtiger.com |
Add Unknown Number | Allows to automatically save received calls from numbers not previously logged in Vtiger CRM and add a contact phone number to a specific table (Contacts, Leads…). |
Contact Lookups | Selects CRM tables that will be used to lookup contact details when making/receiving calls. Press |
Once users finish configuring the above settings using admin access:
-
 Click on
 and
and
- Logout from admin access.
User Configuration
This configuration is per user, it will allow users to authenticate and sync up with the Vtiger CRM platform.
- Login to the UCM as user (using your user portal access account) and navigate to “Value-added Features🡪CRM User Settings”.
- Click on “Enable CRM”.
- Enter the username/access key associated with the CRM account.
-
Click on
and
The status will change from “Logged Out” to “Logged In” and users can start using Vtiger CRM.
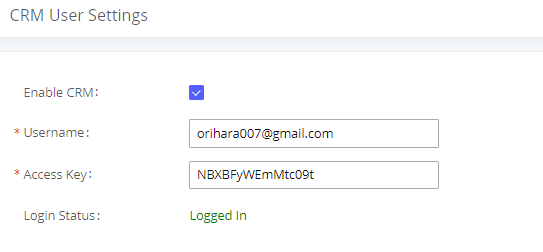
Enter Vtiger CRM username to login. | |
Access Key | Enter Vtiger CRM Access Key to login. |
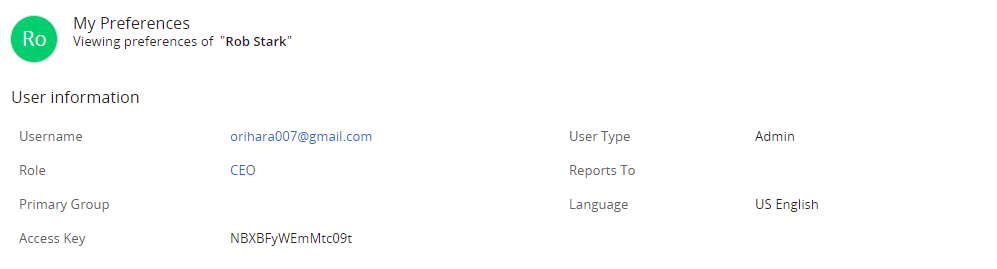
In order to get the “Username” and “Access Key”, access to Vtiger CRM server web UI 🡪 My Preferences.
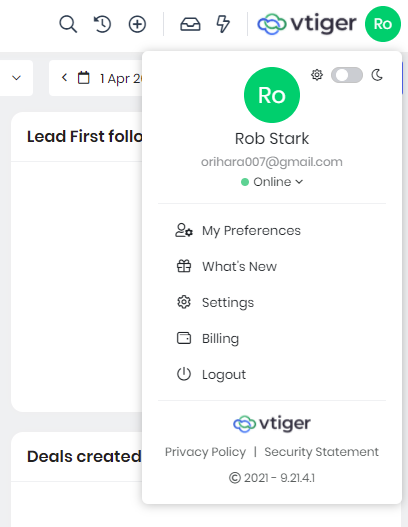
The User Name and Access Key are located under “User information” section:

Contacts Lookup
Using Grandstream Affinity software, users can receive incoming calls to their GXP21xx/GXP17xx/GRP261x/GRP260x IP Phones on their PC as well, the following link explains how to install and configure Grandstream Affinity software.
http://www.grandstream.com/sites/default/files/Resources/GS_Affinity_Guide.pdf
When receiving an incoming call from an existing contact on Vtiger CRM, the contact’s name will be displayed on the phone’s LCD and more data will be shown on the Grandstream Affinity application. The following figure shows an example of the result.
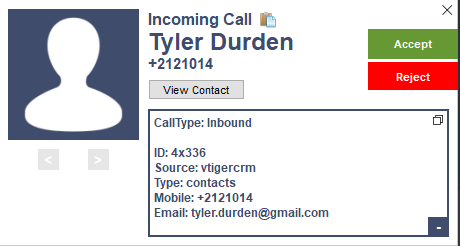
Users can click on the button “View Contact” to be redirected to contact’s page for more details about the calling contact or to edit specific data.
New contacts will be automatically added to the CRM and it’s up to the user to specify where to add them depending on the settings on the admin page as shown on Admin Configuration
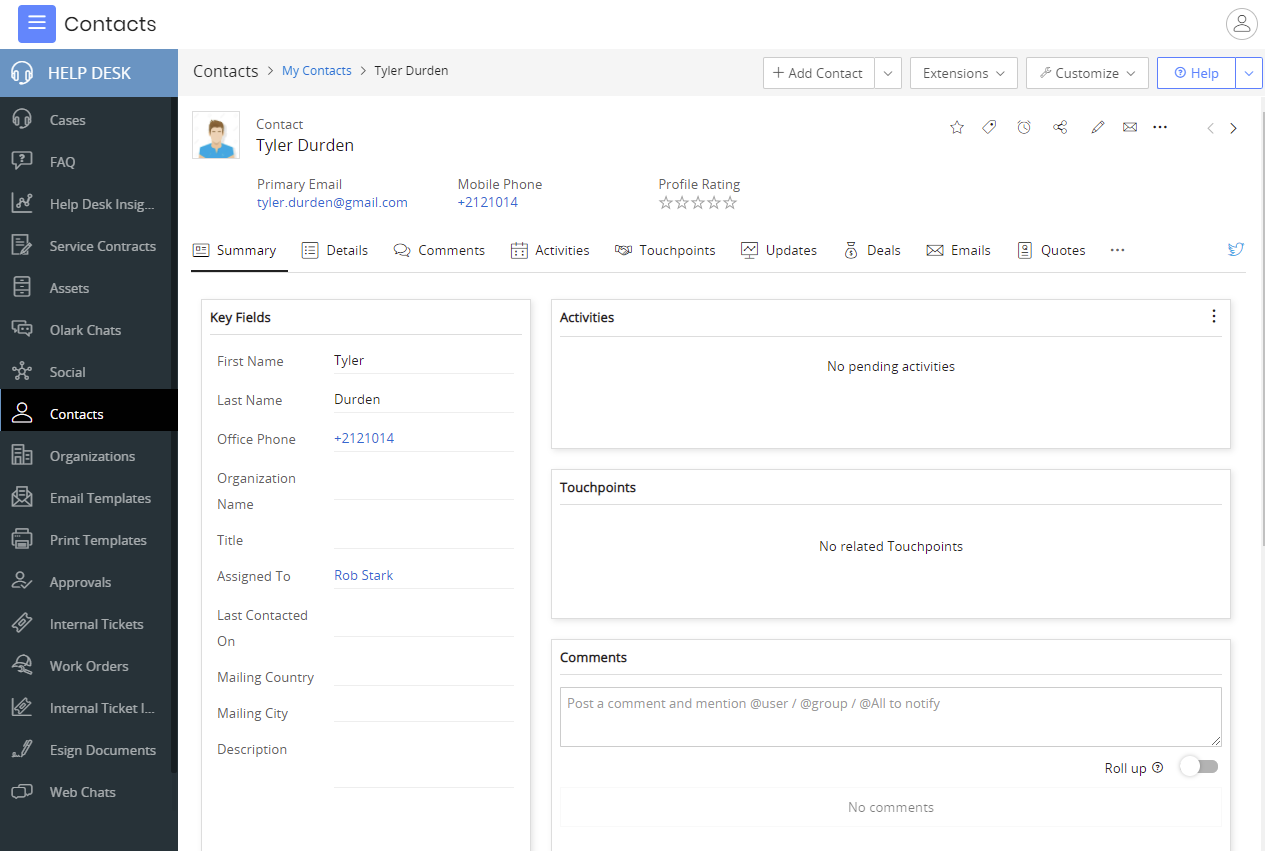
The following screenshot shows the contact details page after clicking on the view contact button.
Call Reporting
Finally, users can see reports of the calls on Vtiger CRM from All 🡪 PBX Manager 🡪 Records List:
