


Introduction
Bitrix24 CRM seamless integration allows the user to leverage the customer relationship management tools offered by Bitrix24. When a customer calls the agent, the agent can easily add the information and track the customer life-cycle within Bitrix24 CRM. When the contact information exists in the database, the customer’s full name will be displayed.
Bitrix24 CRM Administrator Webhook Configuration
Integration Requirements
Bitrix24
- Use Bitrix 24 Cloud Version and subscribe to any of the following plans:
- Basic
- Standard
- Professional
- Enterprise
PBX server
- Access to Internet.
- Compatible firmware minimum version. (See Supported Models)
Webhook Creation
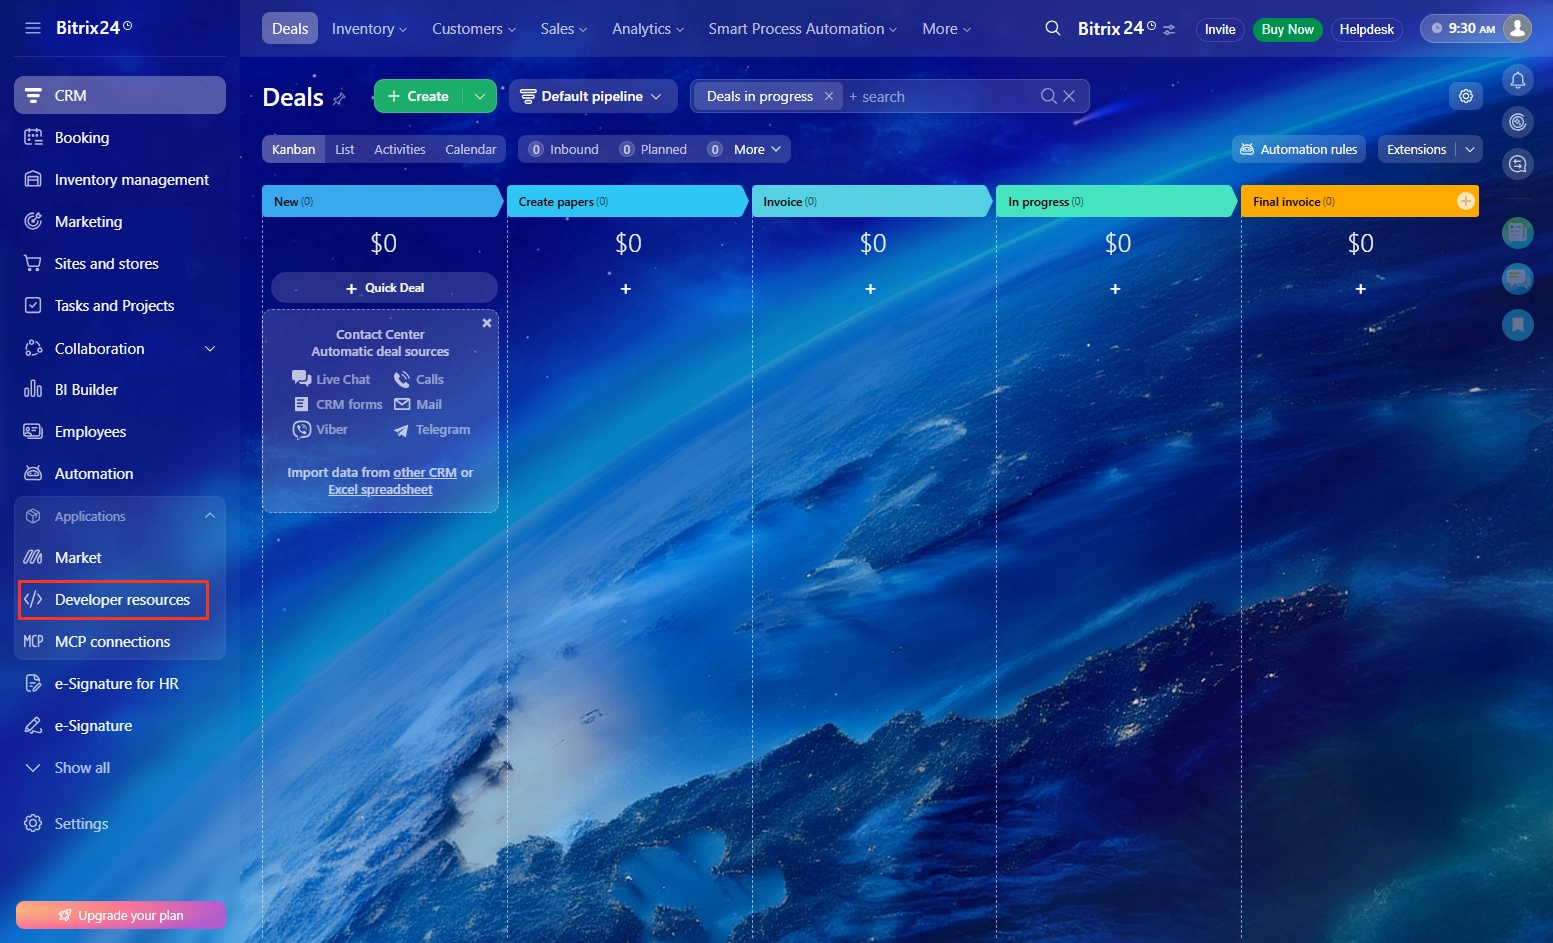
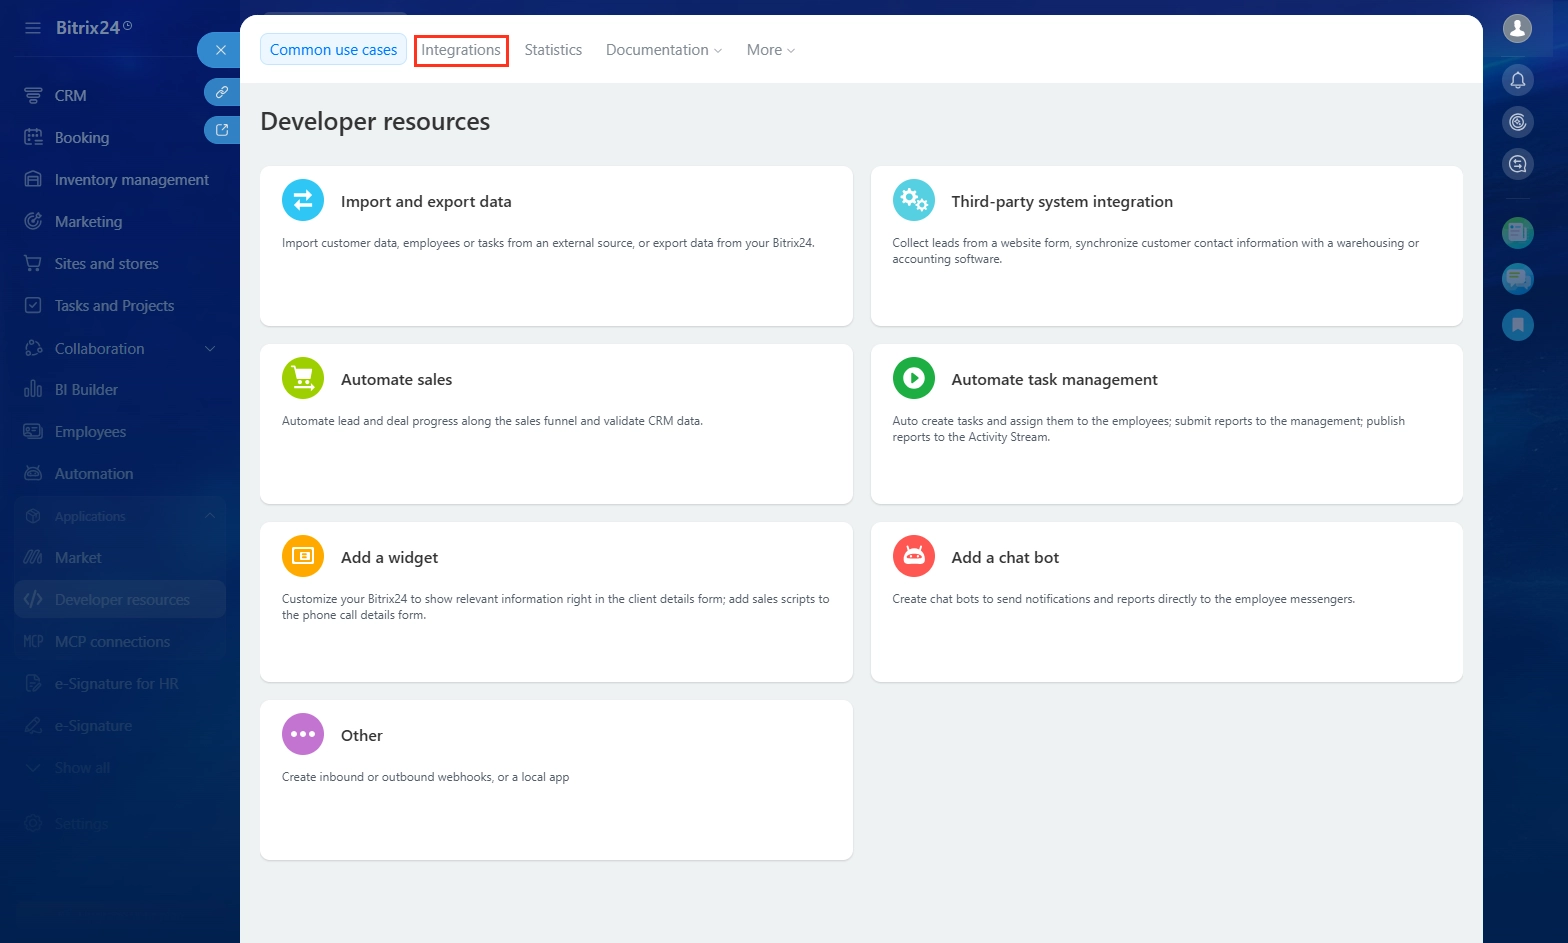
- Log in to Bitrix24 using an administrator account and click on Developer Resources.
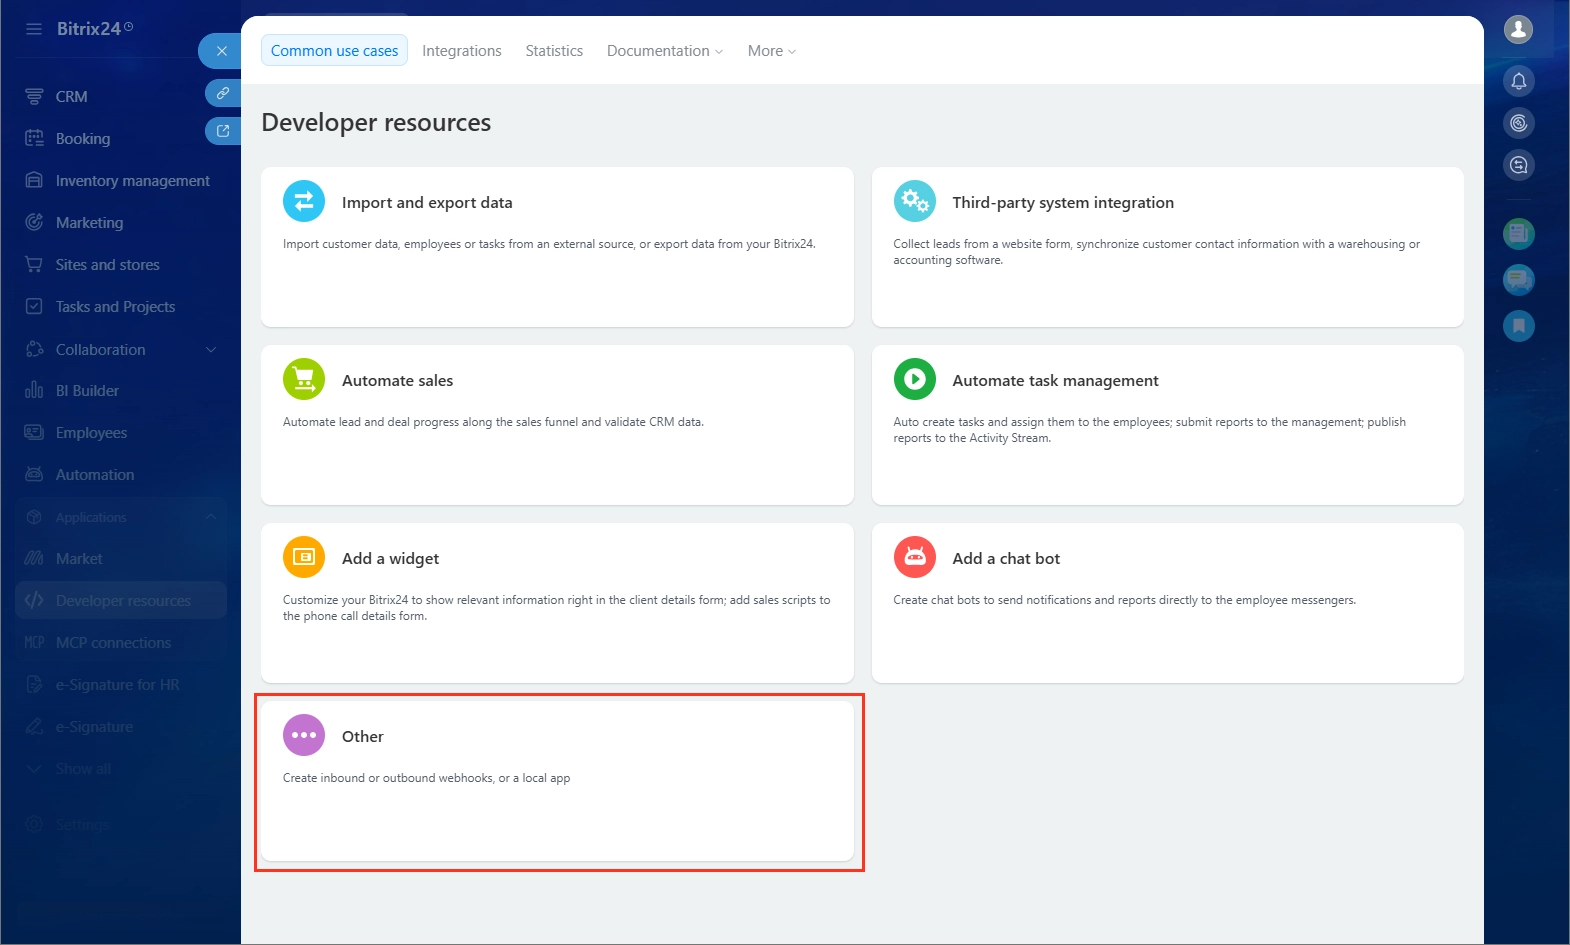
- Click “Other” to select and create the corresponding Webhook.
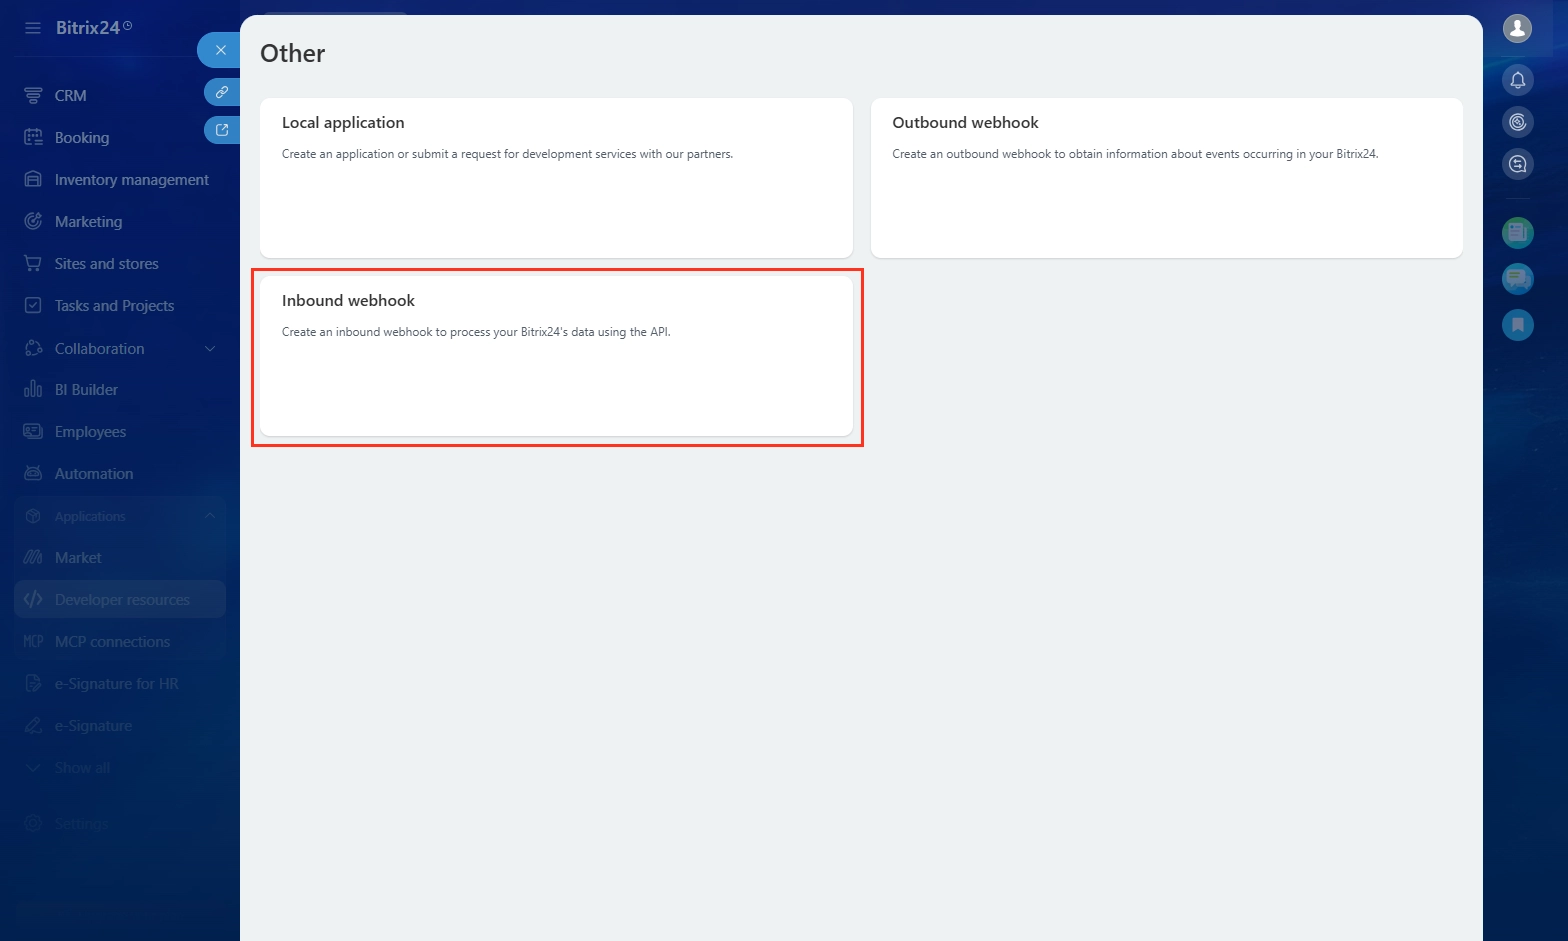
- Click “Create Inbound Webhook” to enter the inbound Webhook configuration interface.
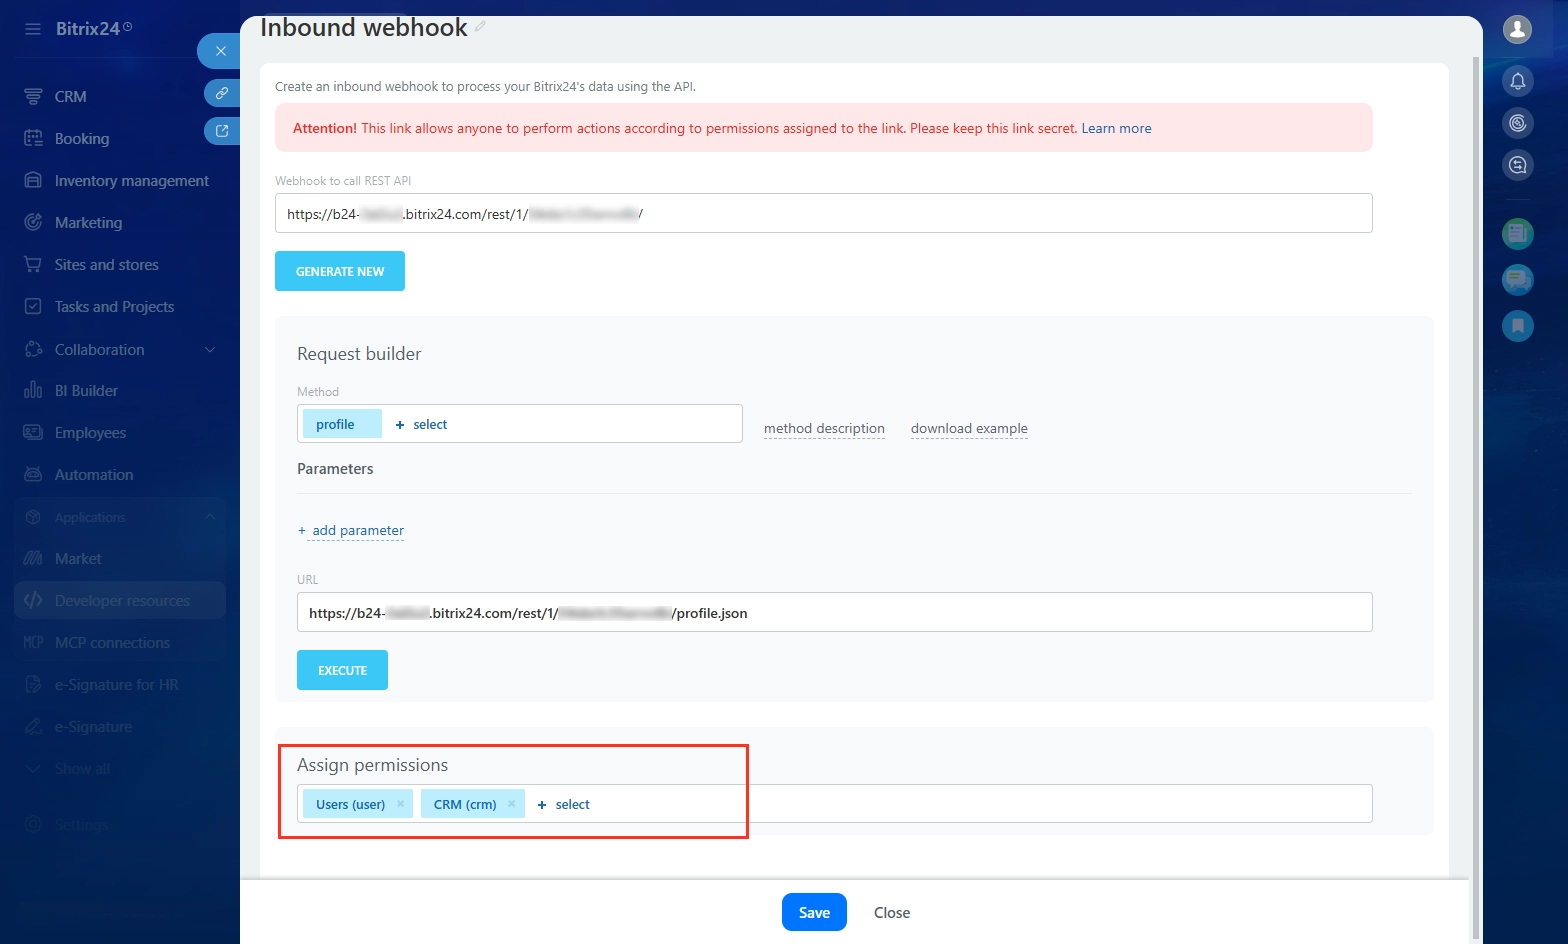
- Set Webhook permissions. When creating an inbound webhook, you only need to select user and CRM permissions. These can be configured later at the top of the developer resources page.
If you had created a webhook before, and you want to retrieve it. Please follow the steps below.
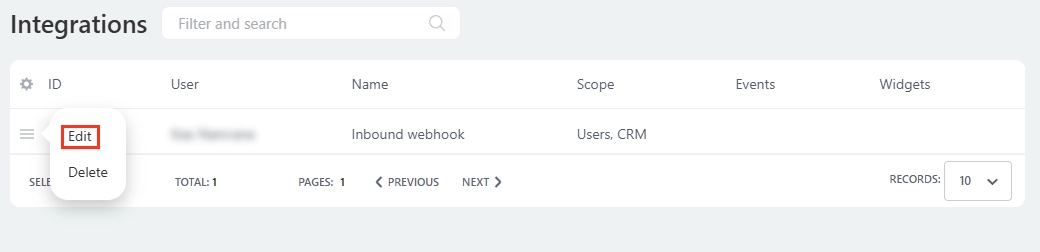
- Go to the Integrations tab
- Click on the menu icon, and click “Edit”. Then the webhook page will appear.
Bitrix24CRM PBX Configuration
1. PBX Administrator
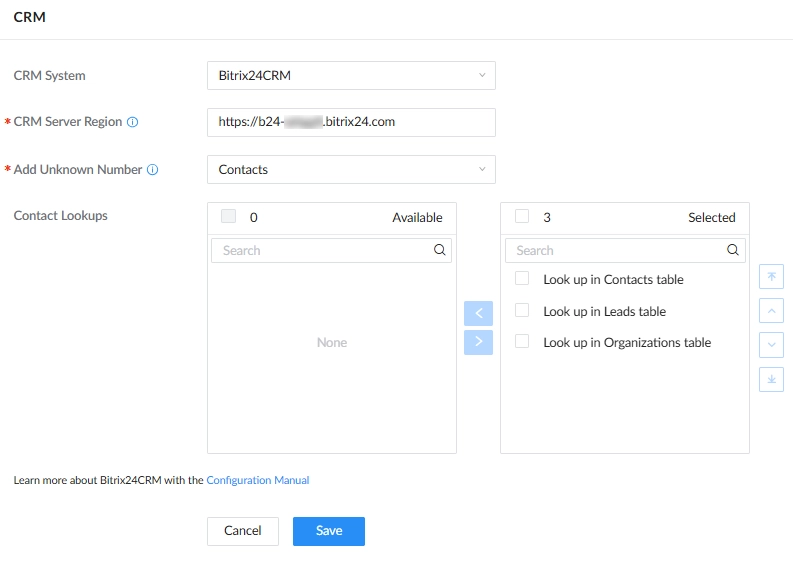
- Step 1: Log in as the administrator, then navigate to Integrations > CRM.
- Step 2: Select the “Bitrix24 CRM” from the list, and enter the server region address.
- Step 3: In Add Unknown Number, select “Contacts”.
- Step 4: In Contact Lookups, select the directory where to look up numbers when a call is received.
2. Extension configuration
To configure the individual extension accounts, the user may log into the IPPBX using their extension number and their password.
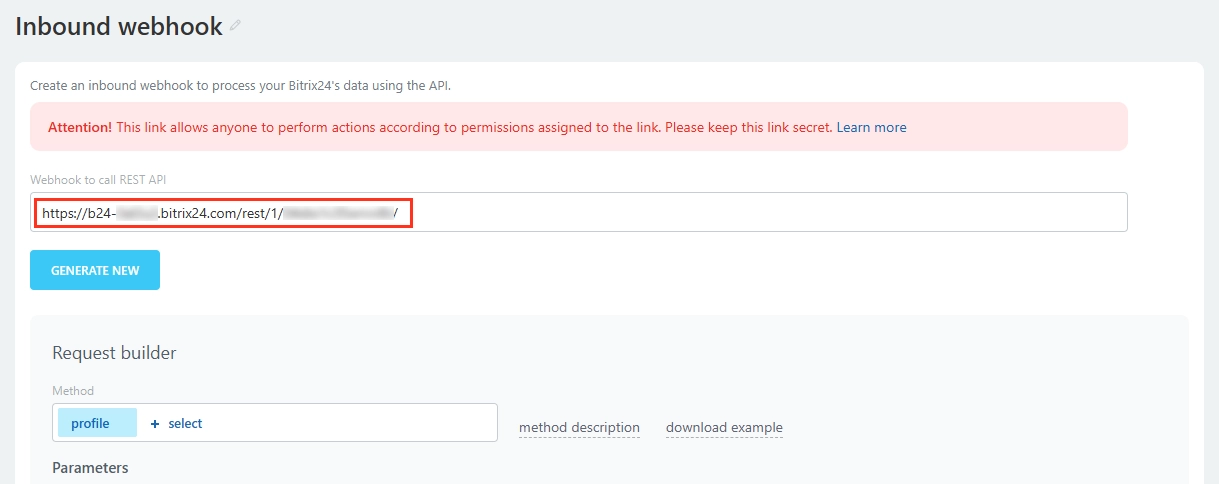
Access the webhook URL page, and copy the full webhook URL and paste it into the “Access Key” field.
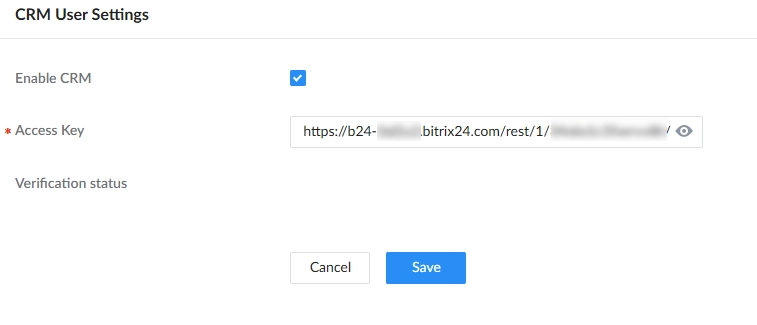
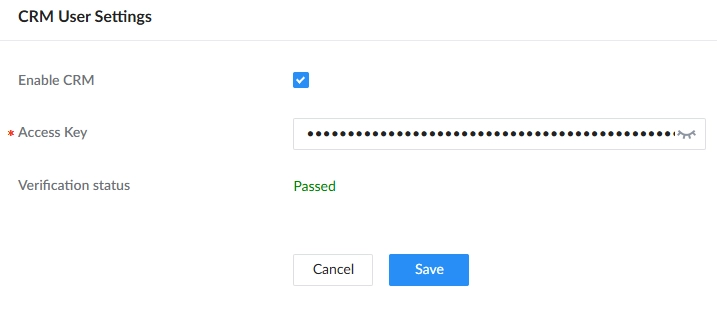
When the authentication is completed, the “Verification Status” will switch to “Passed”.
Capturing Leads and Adding Information
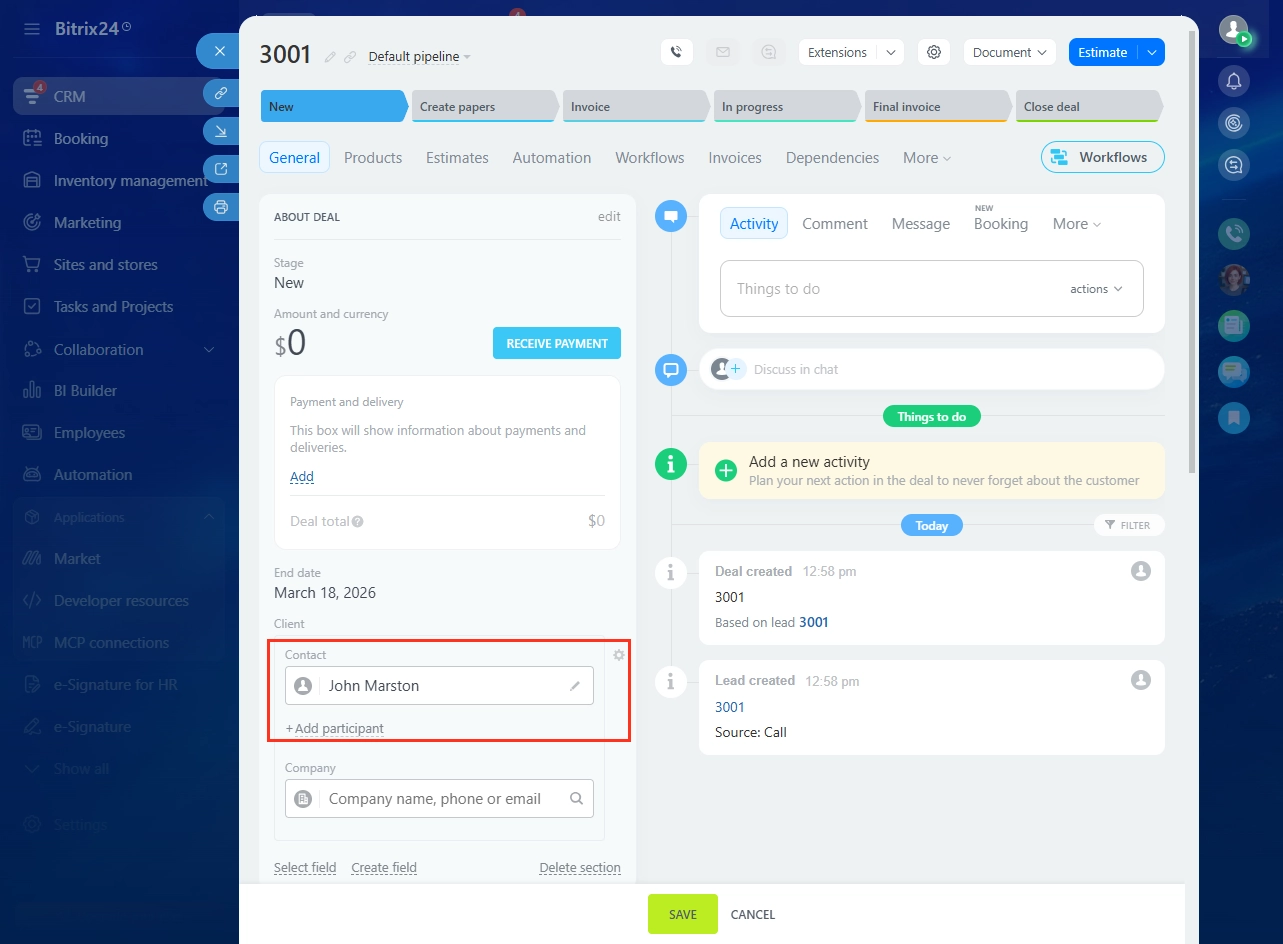
When a call is received, the CRM system will notify the user on the platform, as show in the screenshot below.
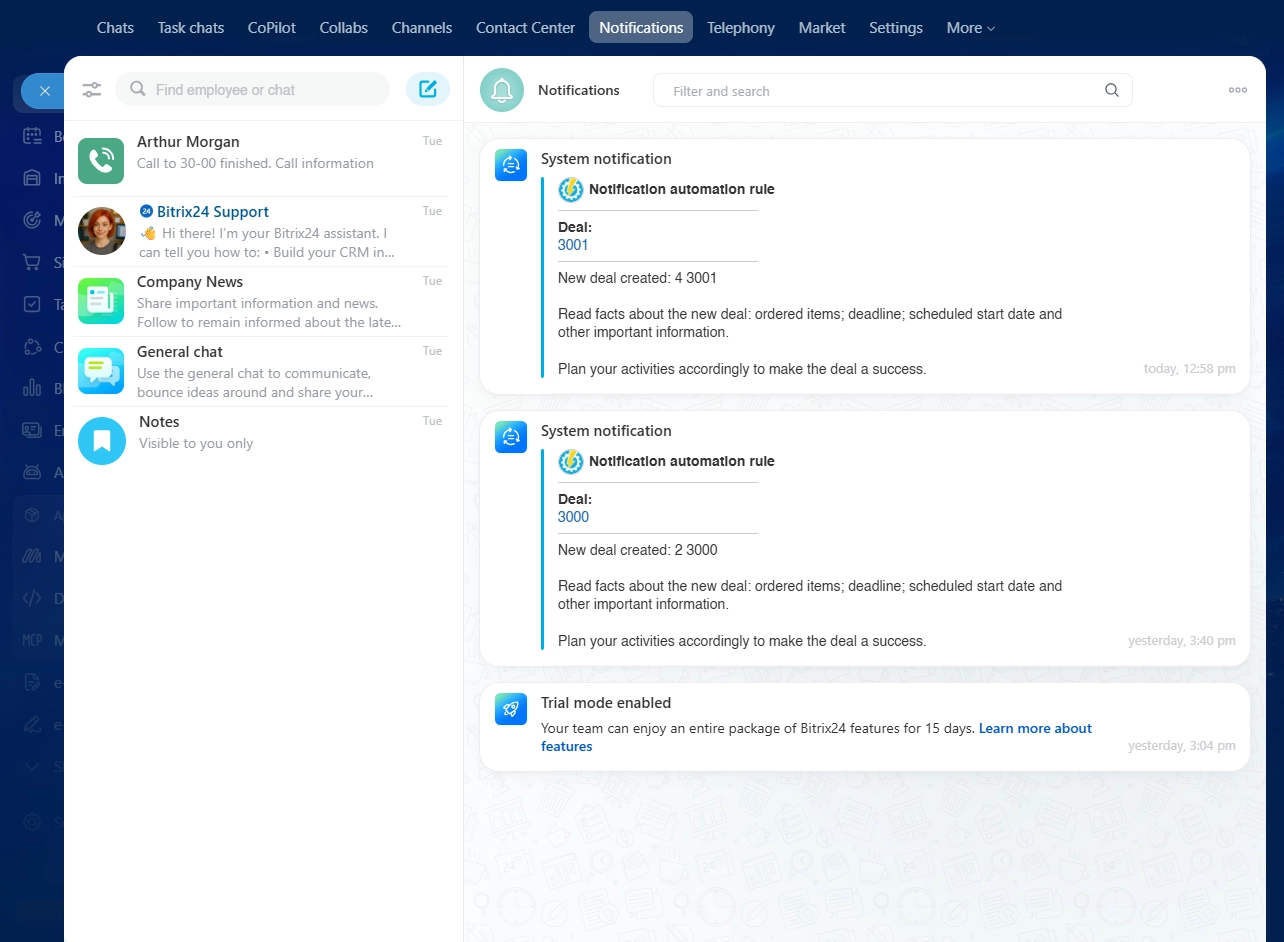
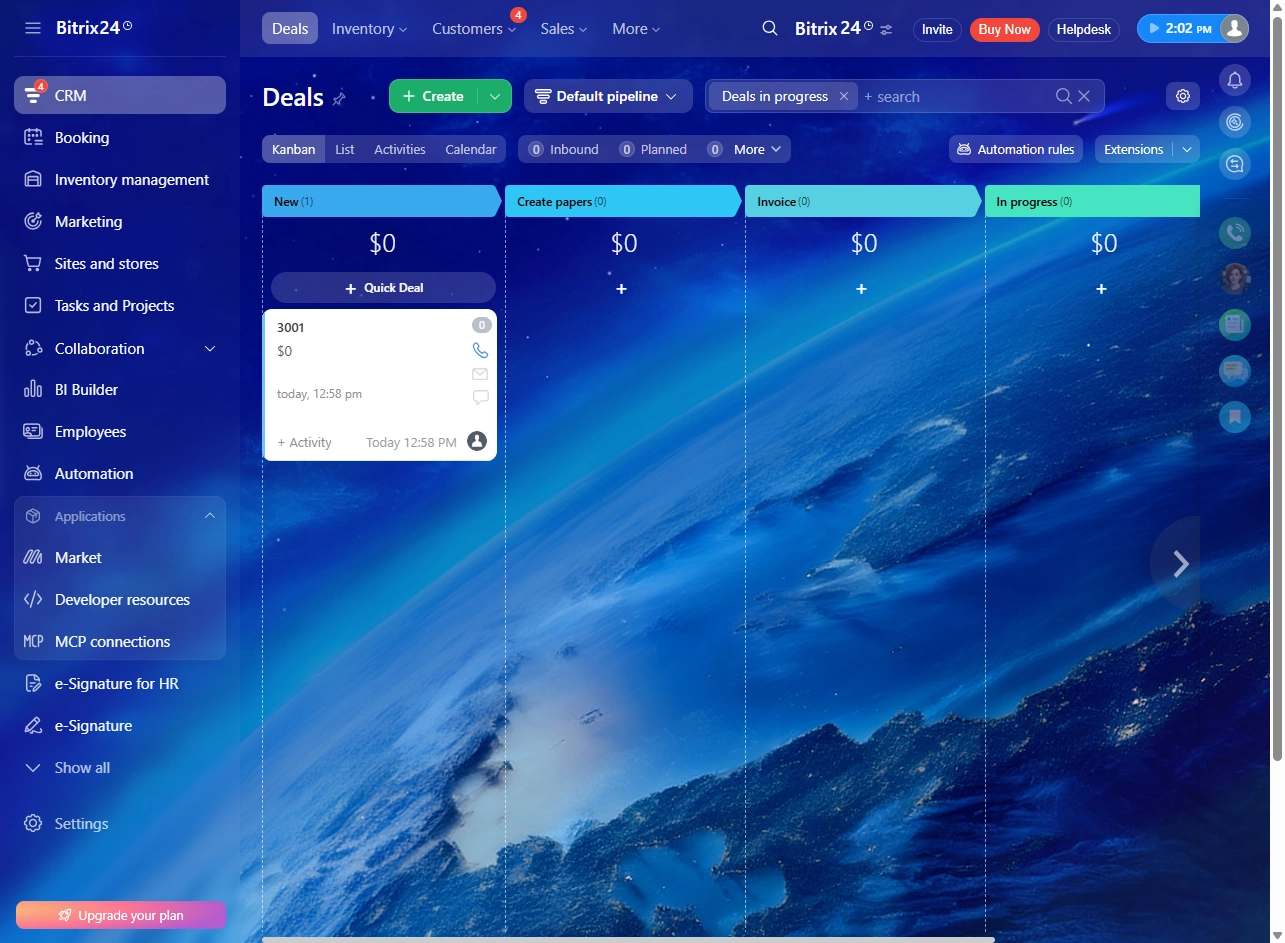
The user can click on the lead from the list and add information.
Supported Models
The following table shows the list of PBX models that support the Bitrix24 CRM integration.
Model | Minimum Firmware Version |
UCM63xx | 1.0.33.7+ |
UCM63xx/A | 1.0.33.7+ |
SoftwareUCM | 1.0.33.7+ |
CloudUCM | 1.0.33.10+ |