


The GDS37xx IP Video Smart Door Station provides a comprehensive access control and communication solution for residential and commercial environments. Combining high-definition video monitoring, SIP-based intercom functionality, and secure door relay control, the device enables real-time video calling and remote door unlocking over IP when integrated with Grandstream WP8xx handsets.
The door system can be integrated with Wi-Fi phones in two different ways:
- Peering mode (without a SIP server).
- Through a SIP server.
The prerequisites for configuring the scenarios include a GDS37xx door station, a WP8xx handset, a UCM6XXX SIP server, and a GWN70xx wireless router.
Peering Scenario
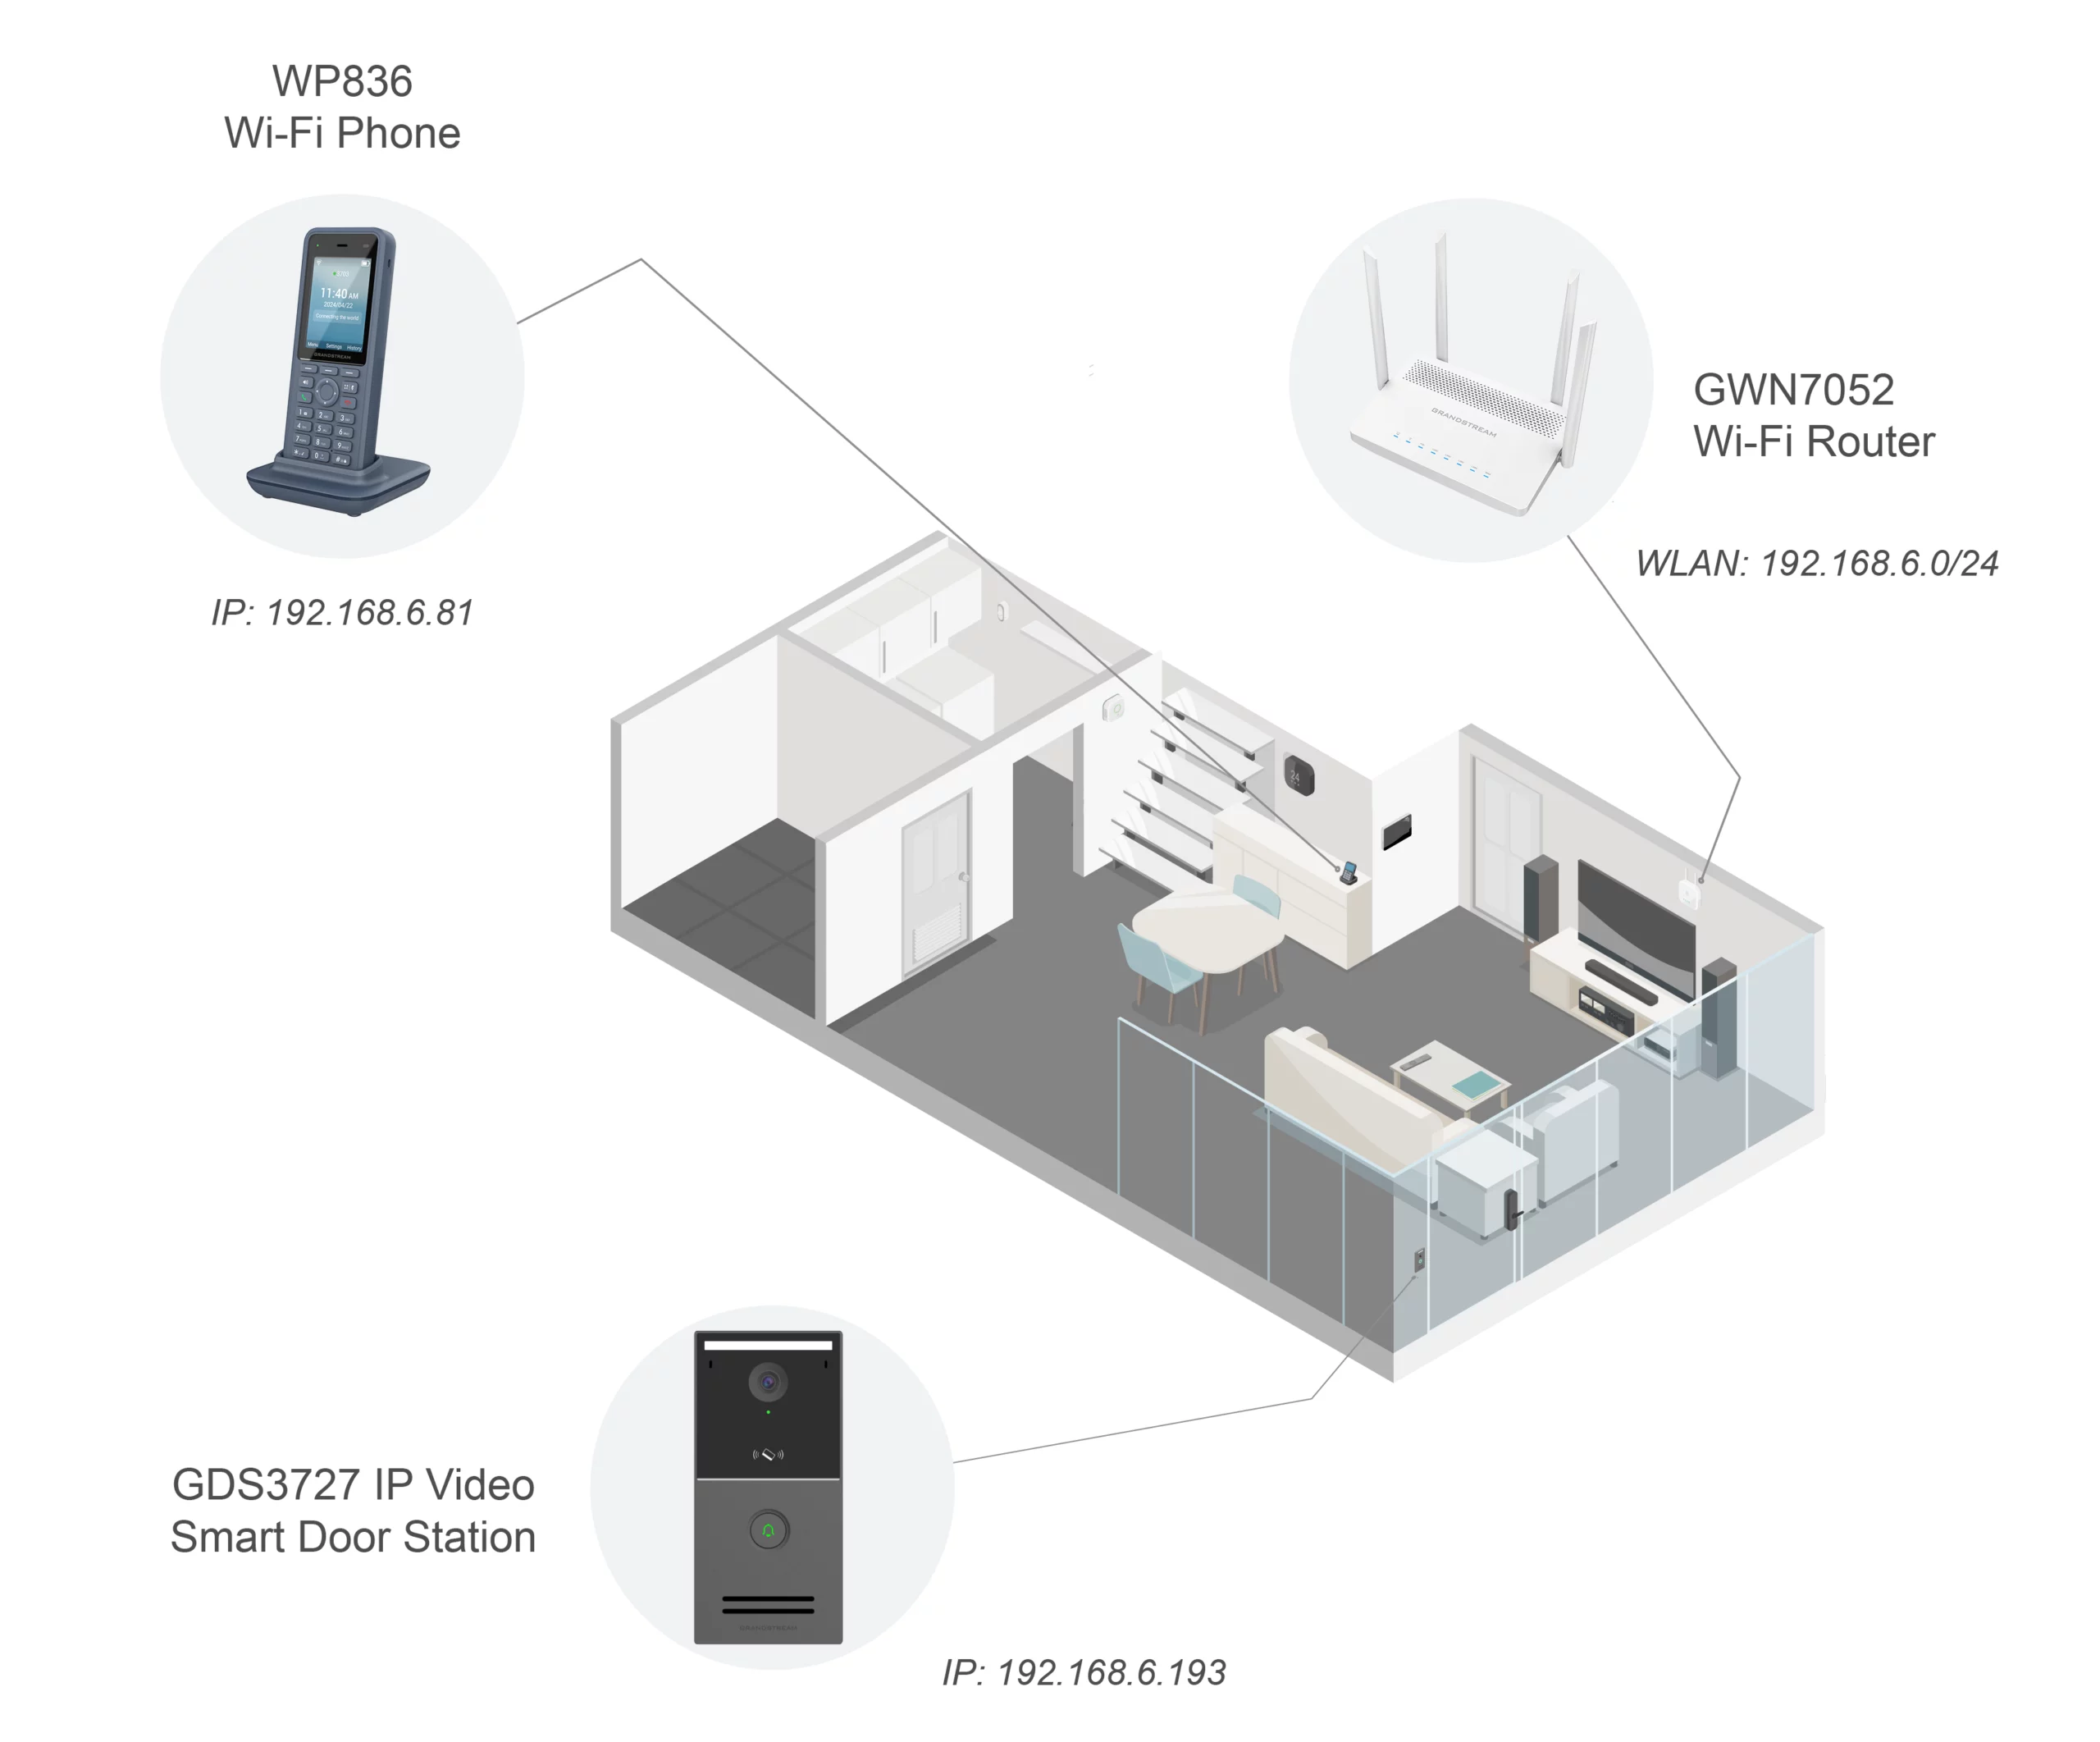
We assume that a GDS3727 is installed at the front door of an apartment, with a WP836 connected to the same network via Wi-Fi using a GWN7052 router. In this setup, residents can swipe their RFID cards to enter, while visitors can press the Doorbell to initiate a video call. The call is received on the WP836, and the resident can unlock the door remotely by tapping the “Open” softkey.
The devices used in this deployment and their assigned IP addresses are as follows:
- Door Station: GDS3727 — 192.168.6.193
- Wi-Fi Phone: WP836 — 192.168.6.81
- Wi-Fi Router: GWN7052 — 192.168.6.X
To allow direct IP calling, all devices are configured on the same local subnet. The network topology is depicted in the diagram below.
Configuring The GDS37xx for Peering
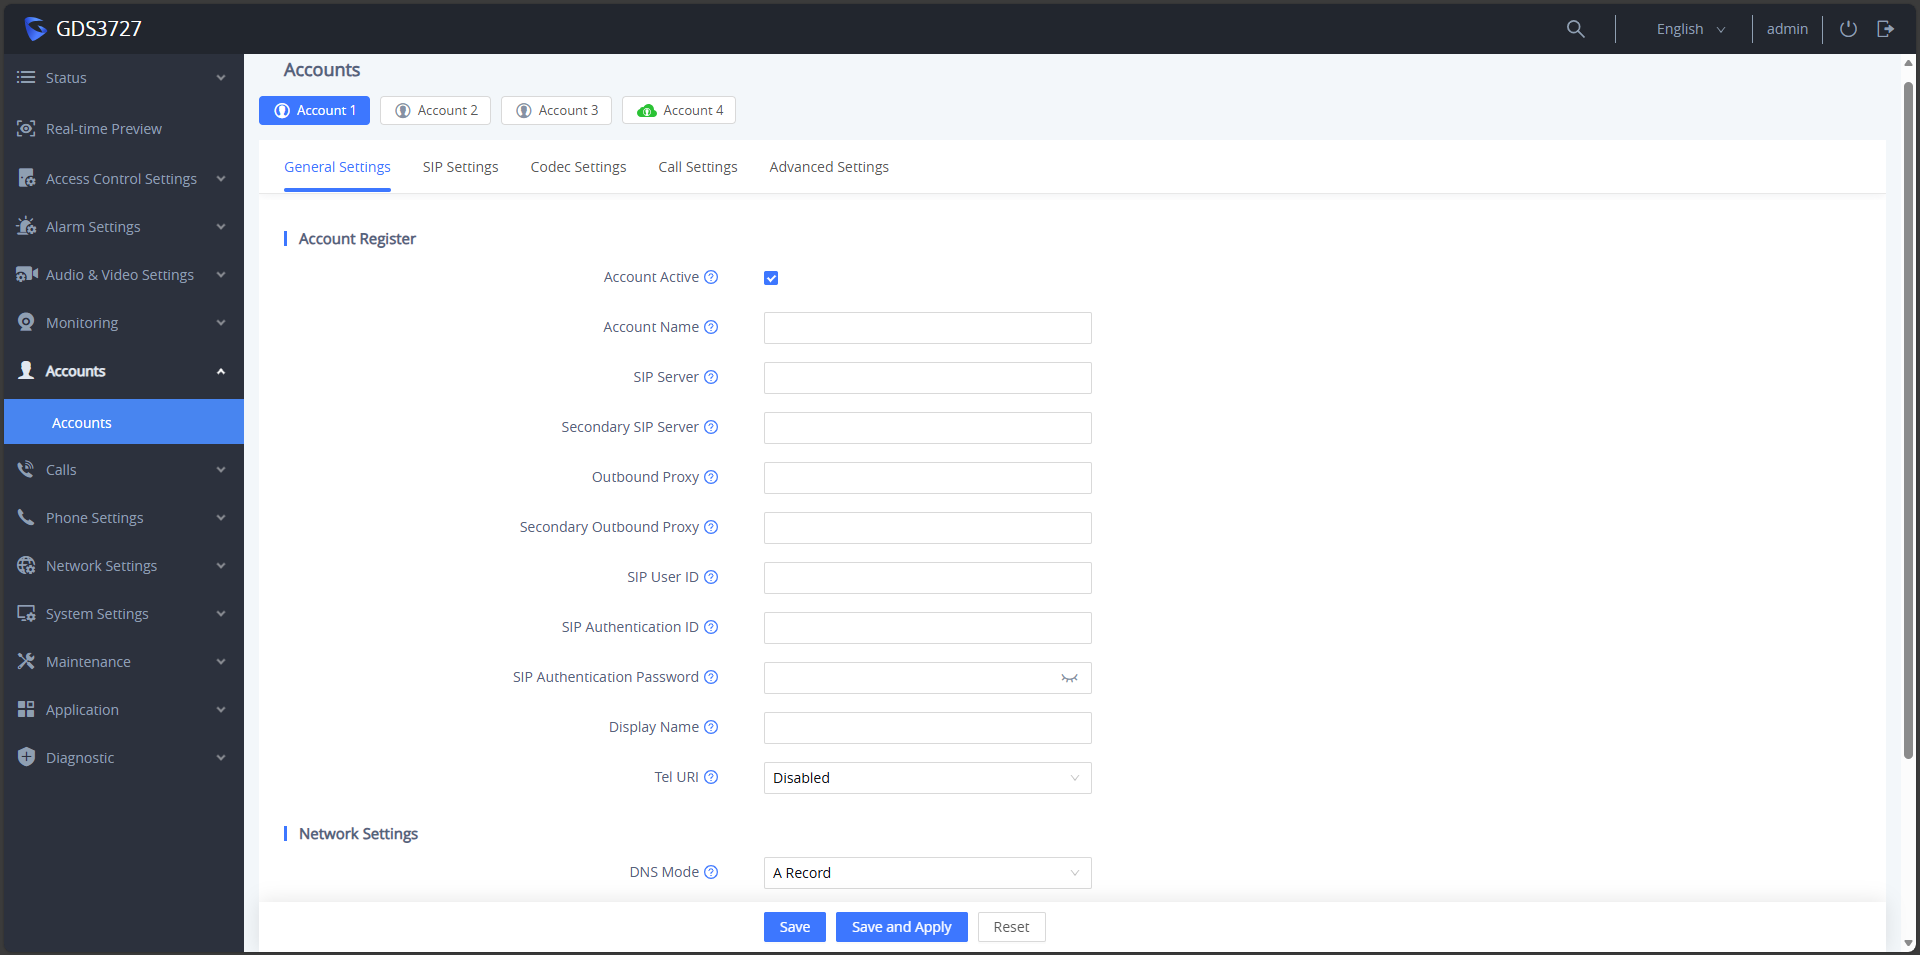
Access the GDS3727 web GUI and navigate through the configuration pages as outlined below:
- Activate the account under Accounts → General Settings and click Save and Apply.
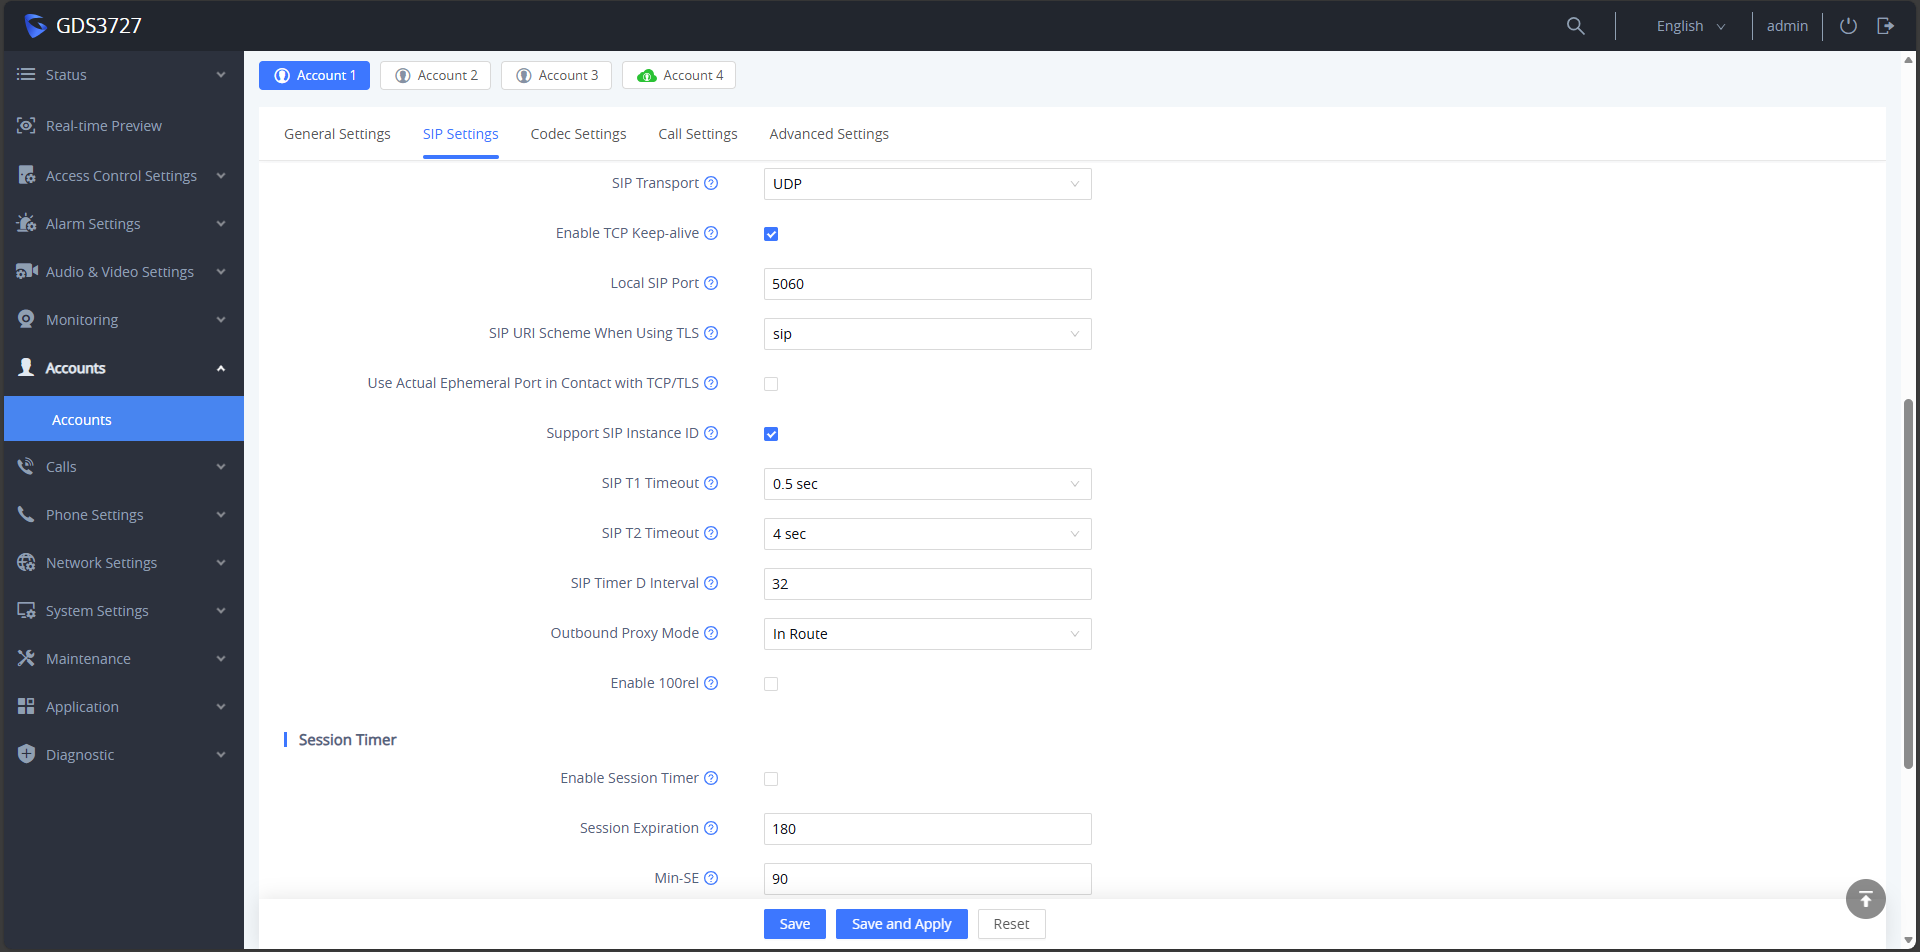
- Confirm that the SIP settings correspond with the following configuration under Accounts → SIP Settings and that the Local SIP Port is the same as the port configured on the WP836, and click Save and Apply.
- Under Access Control Settings → Basic Settings → Access Control Settings:
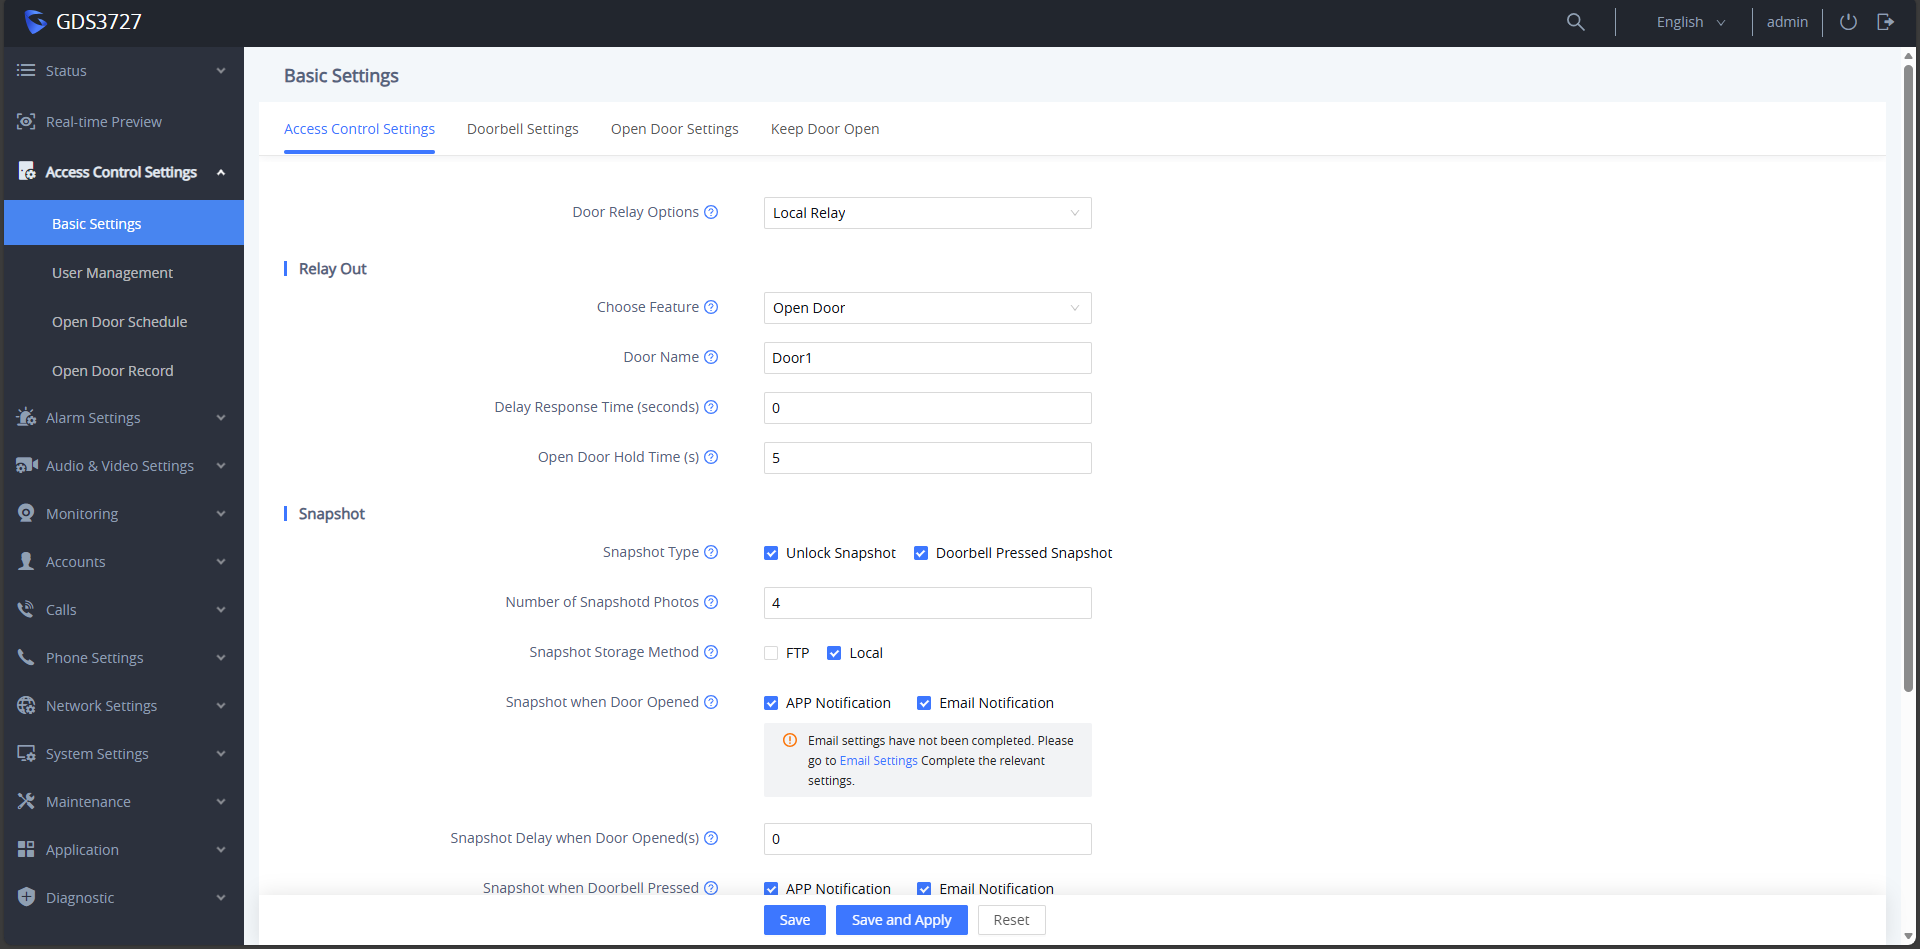
- Door Relay Options: Select Local Relay from the dropdown.
- Choose Feature: Set to Open Door.
- Door Name: Enter the desired door name.
- Delay Response Time: Specify the delay before the relay activates.
- Open Door Hold Time: Specify how the relay remains active.
- Click Save and Apply.
- On the Access Control Settings → Basic Settings → Doorbell Settings page:
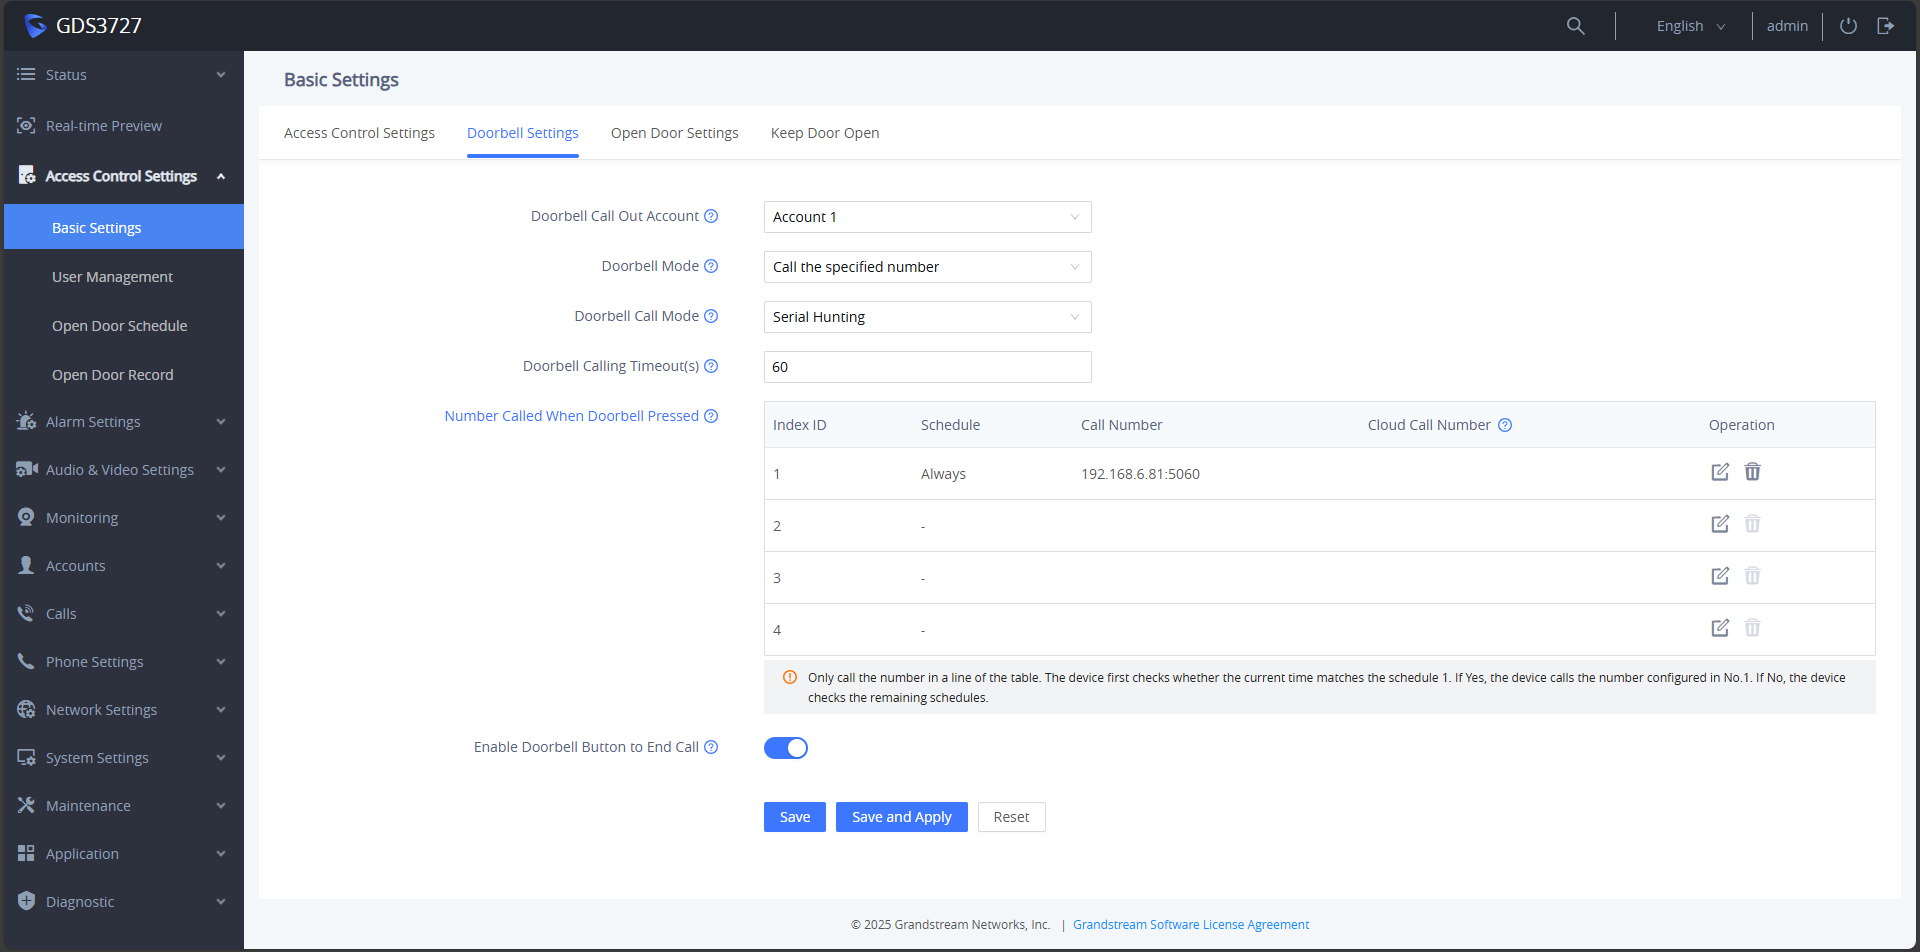
- Doorbell Call Out Account: Select the account configured earlier.
- Doorbell Mode: Set to Call the Specified Number to initiate direct IP calls.
- Doorbell Call Mode: Choose Serial Hunting or Parallel Hunting as required.
- Doorbell Calling Timeout: Specify how long the call rings before it automatically disconnects.
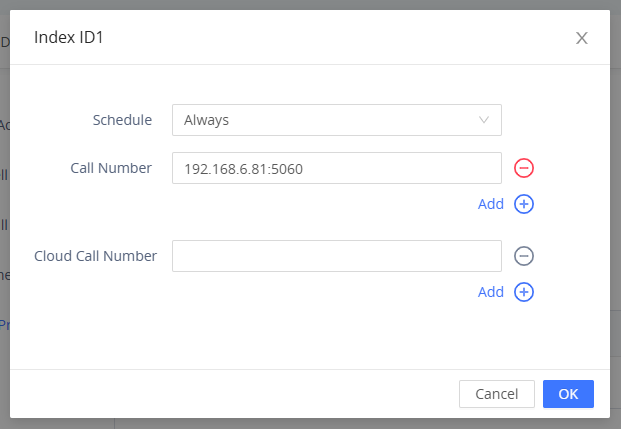
- Number Called When Doorbell Pressed: Click the Edit button, enter the IP address of the WP836, and set the schedule to Always.
- Enable Doorbell Button to End Call: Toggle this option to determine whether the doorbell button can end the call.
- Click Save and Apply.
- Navigate to Access Control Settings → Basic Settings → Open Door Settings:
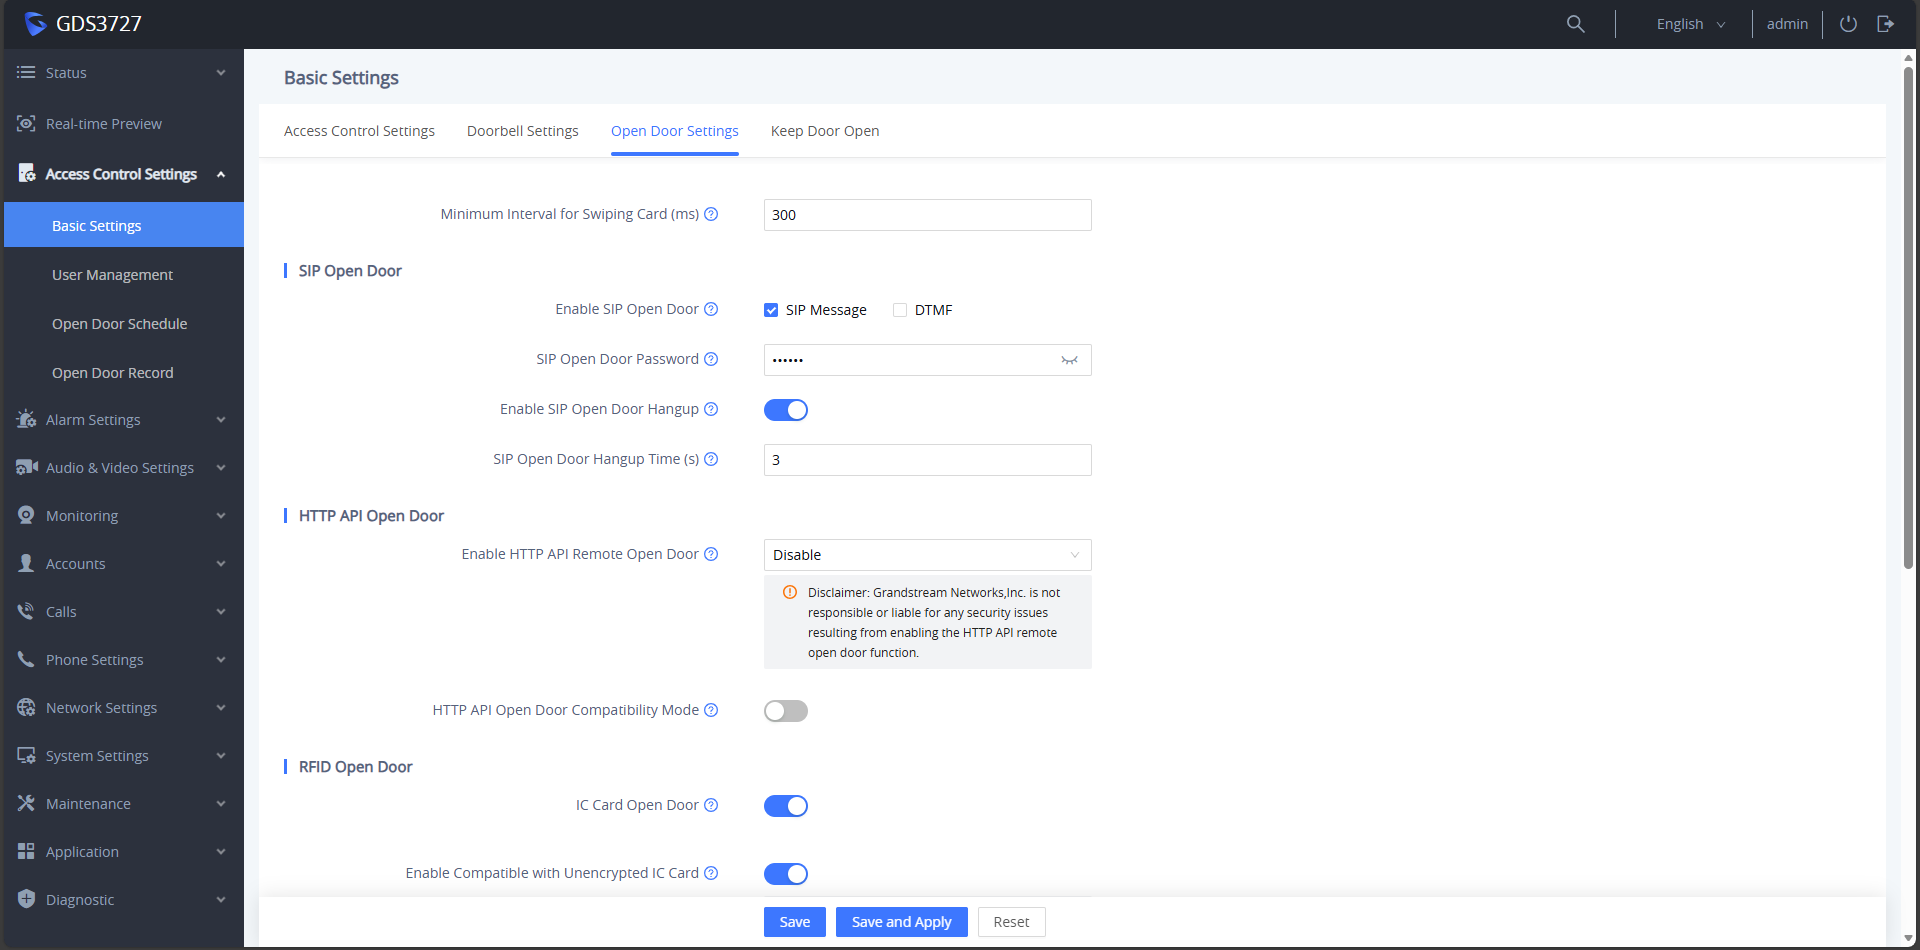
- Enable SIP Open Door: Check SIP Message to allow opening the door via SIP.
- SIP Open Door Password: Enter the door password.
- Enable SIP Door Hangup: Enable to automatically hang up the call after the door is remotely opened.
- SIP Open Door Hangup Time: Specify the time before the call is automatically disconnected.
- Click Save and Apply.
Configuring the WP8xx for Peering
Access the WP836 web GUI and navigate through the configuration pages as shown below:
- Activate the account under Accounts → General Settings and click Save and Apply.
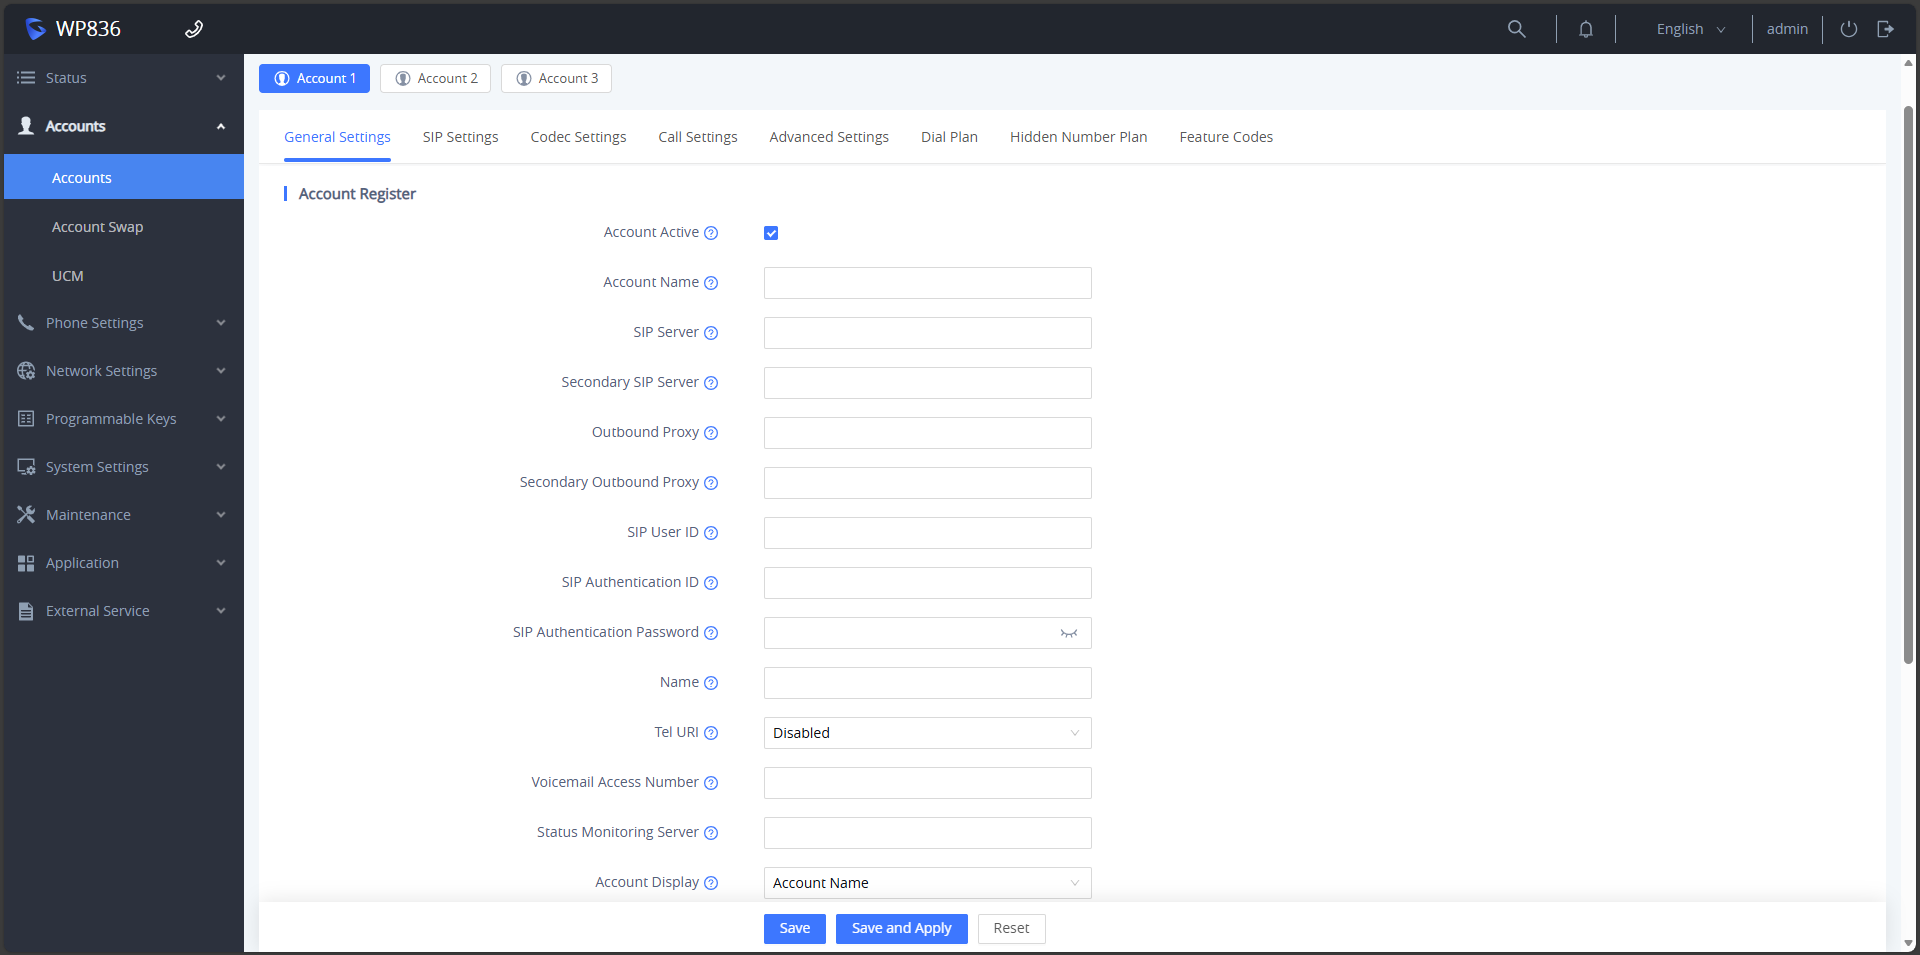
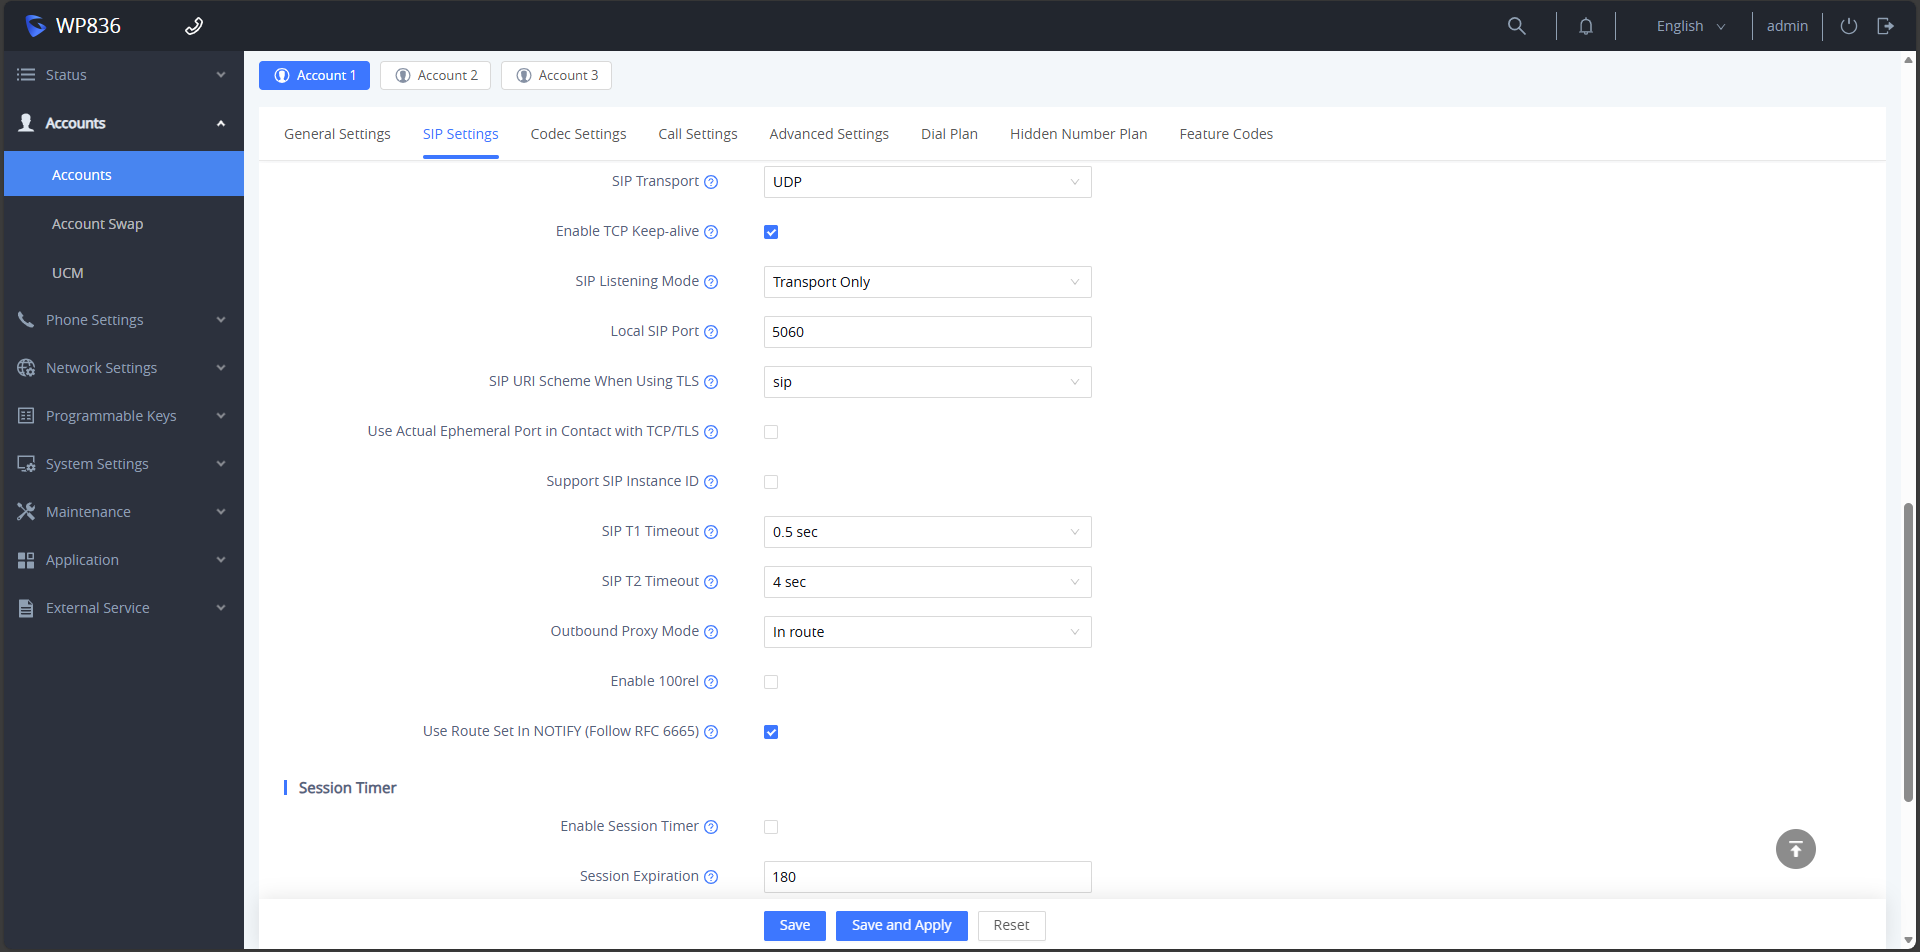
- Confirm that the SIP settings correspond with the following configuration under Accounts → SIP Settings and that the Local SIP Port is the same as the port configured on the GDS3727, and click Save and Apply.
- Navigate to External Services → Door System and click Add:
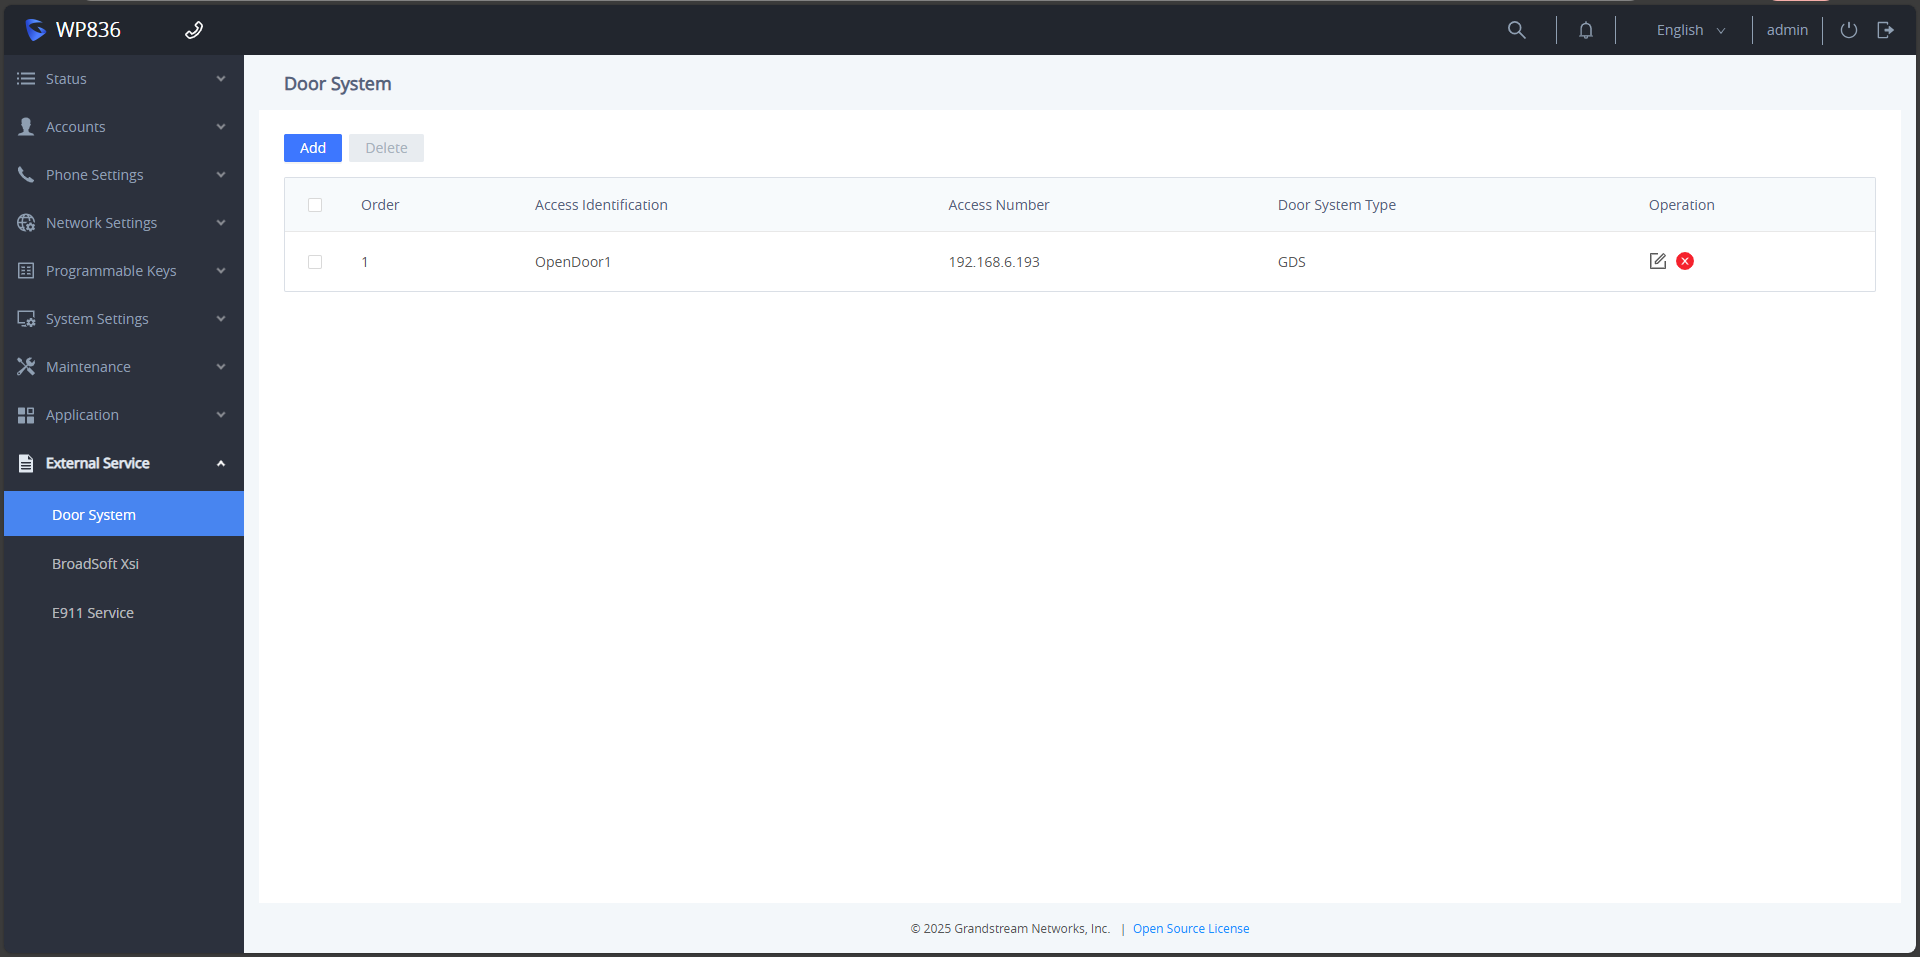
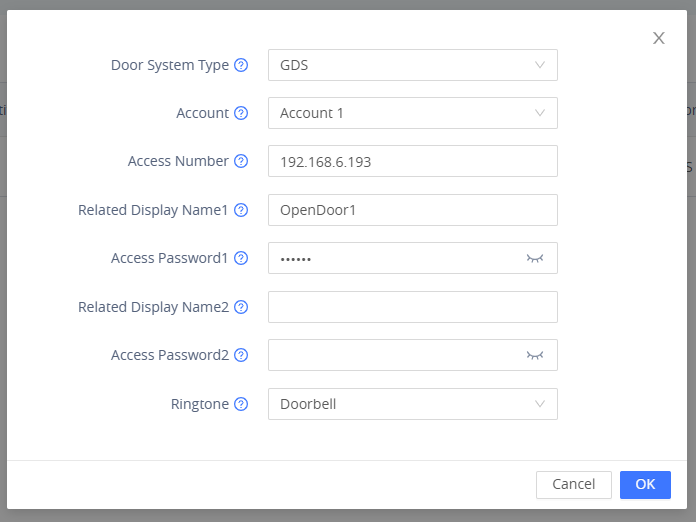
- Door System Type: Set to GDS.
- Account: Select the account activated earlier.
- Access Number: Enter the IP address of the GDS3727.
- Related Display Name1: Enter the name to be displayed on the phone when receiving a call.
- Access Password1: Enter the door password. Ensure it matches the password set in SIP Open Door Password under Access Control Settings → Basic Settings → Open Door Settings.
- Ringtone: Select the desired ringtone.
- Click OK.
SIP Server Scenario
For deployments involving multiple GDS37xx door stations and WP8xx handsets, a SIP server is essential to facilitate communication and interoperability between devices.
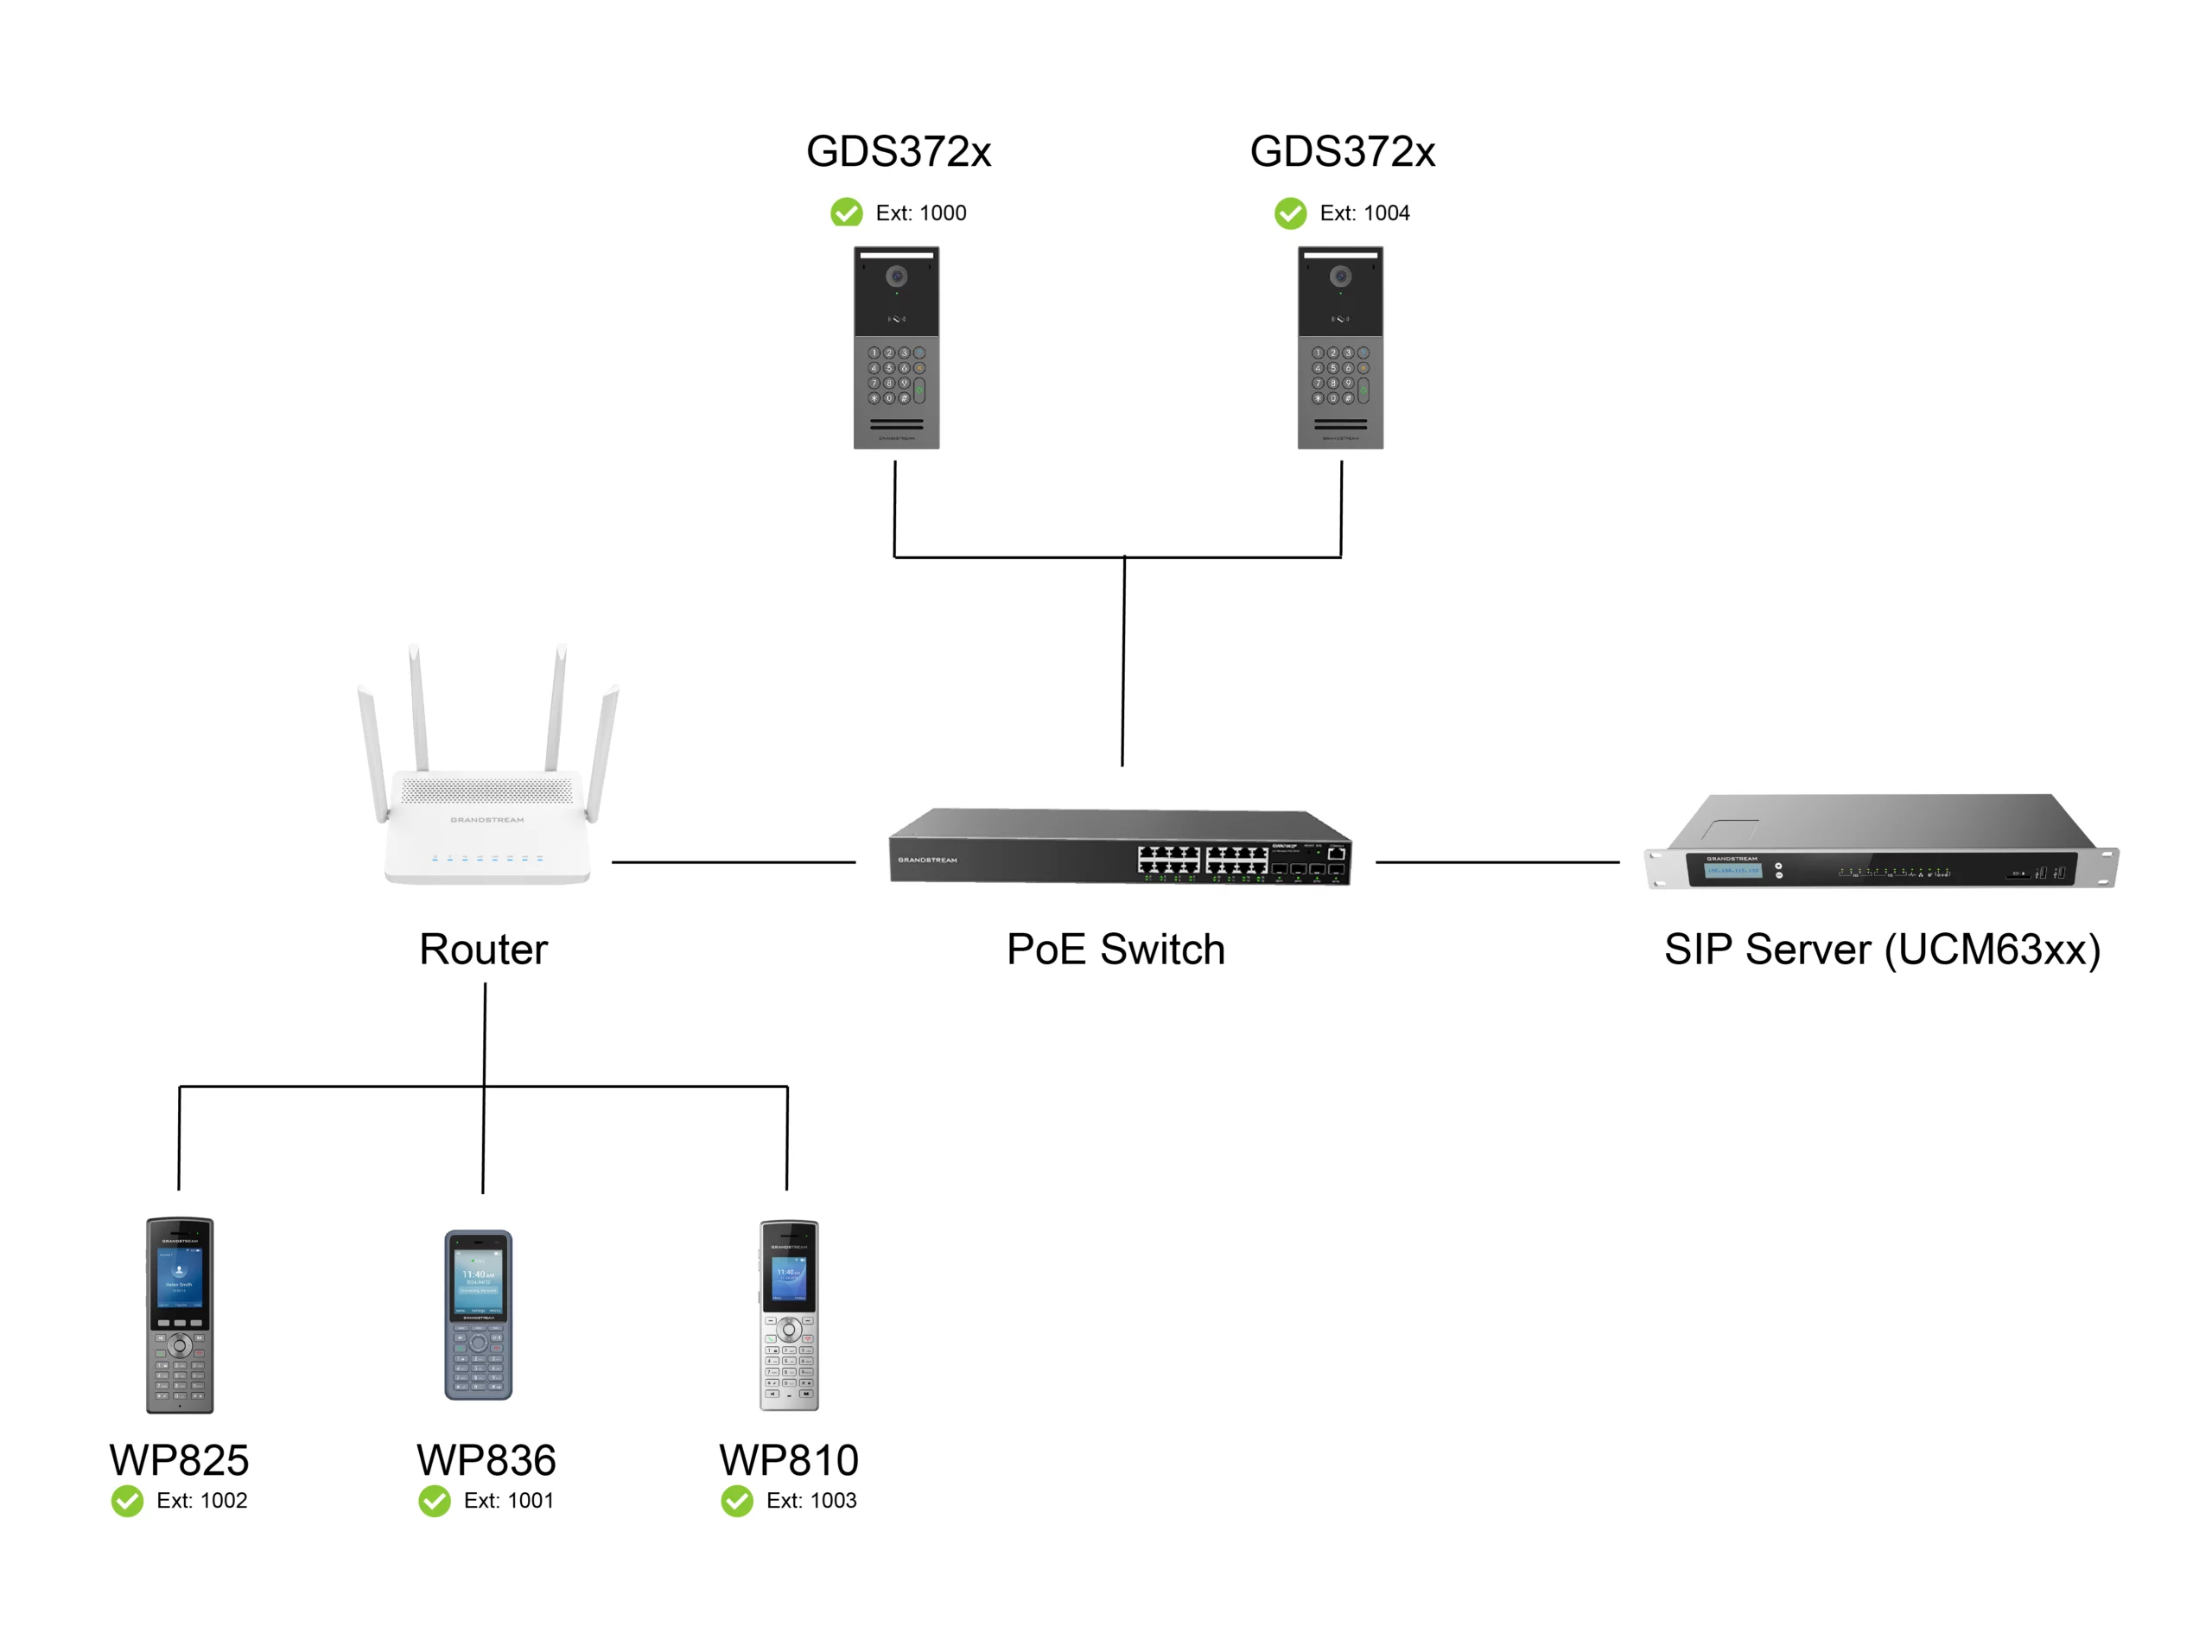
The devices used in this deployment and their assigned IP addresses are as follows:
- Door Station: GDS3727 — 192.168.6.193
- Wi-Fi Phone: WP836 — 192.168.6.81
- Wi-Fi Router: GWN7052 — 192.168.6.X
- SIP Server: UCM6XXX — IP: 192.168.6.62
The network topology is depicted in the diagram below.
Configuring the GDS37xx with a SIP Server
Access the GDS3727 web GUI and navigate through the configuration pages as outlined below:
- Configure the SIP account under Accounts → General Settings and click Save and Apply.
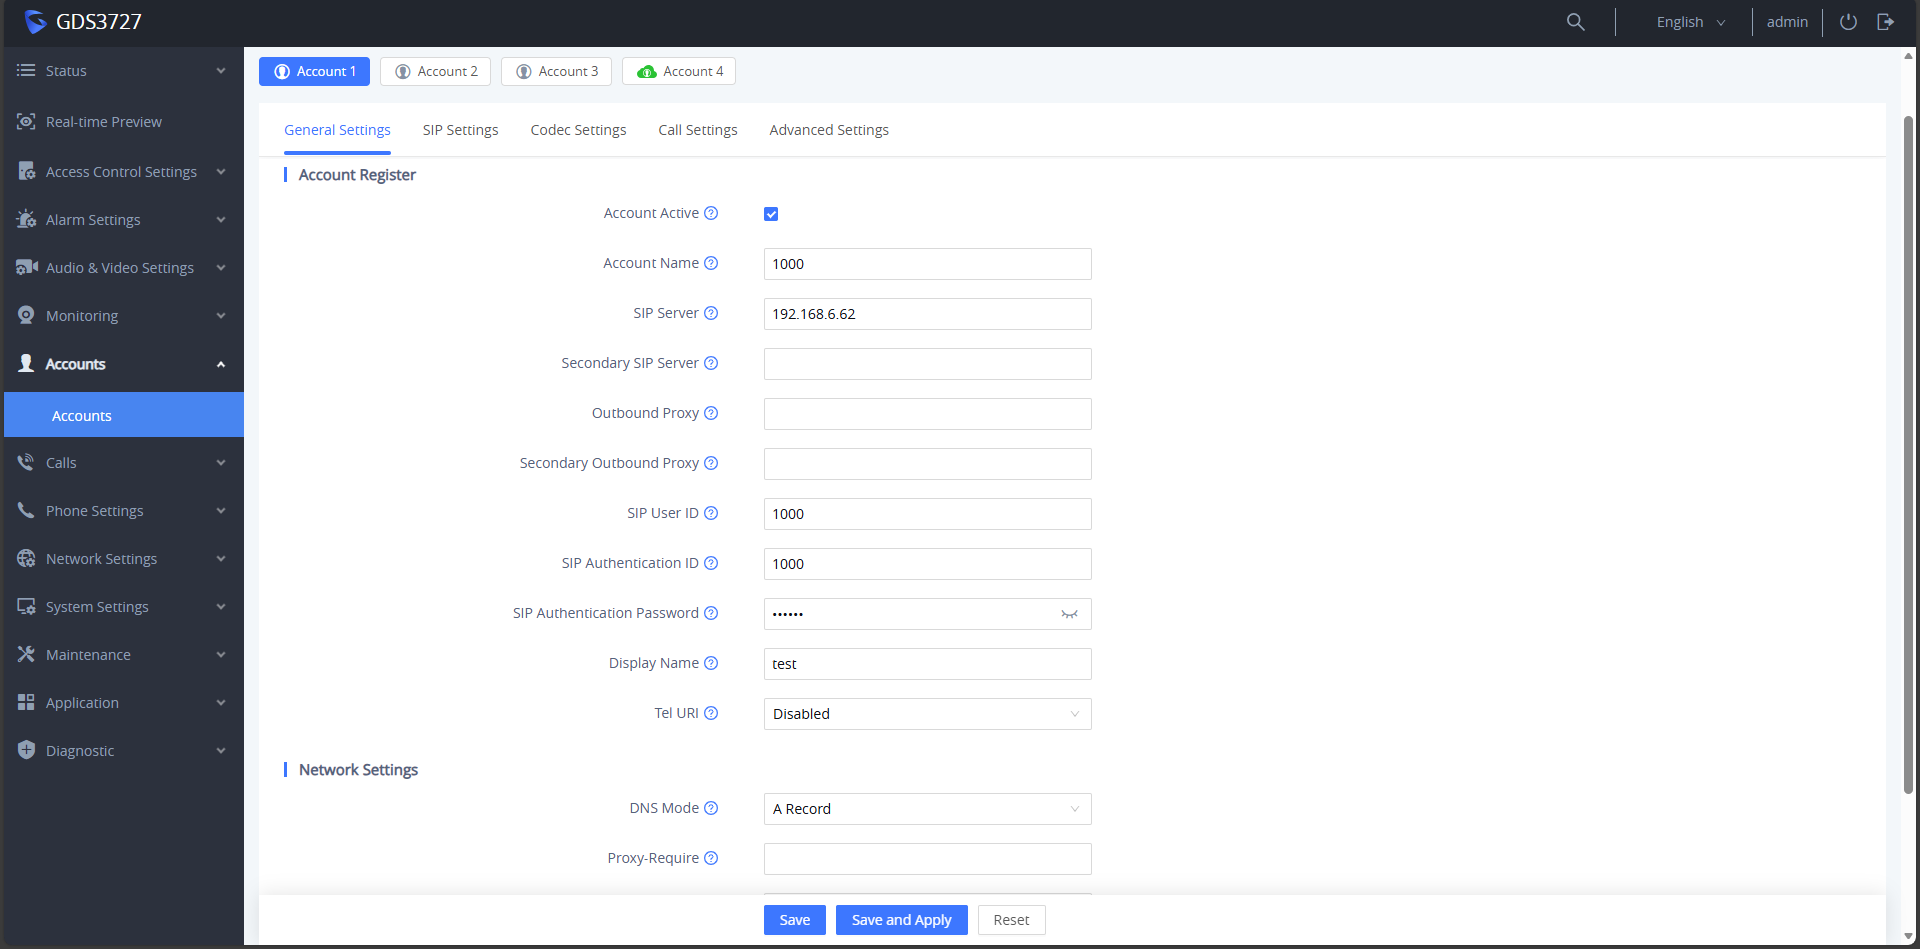
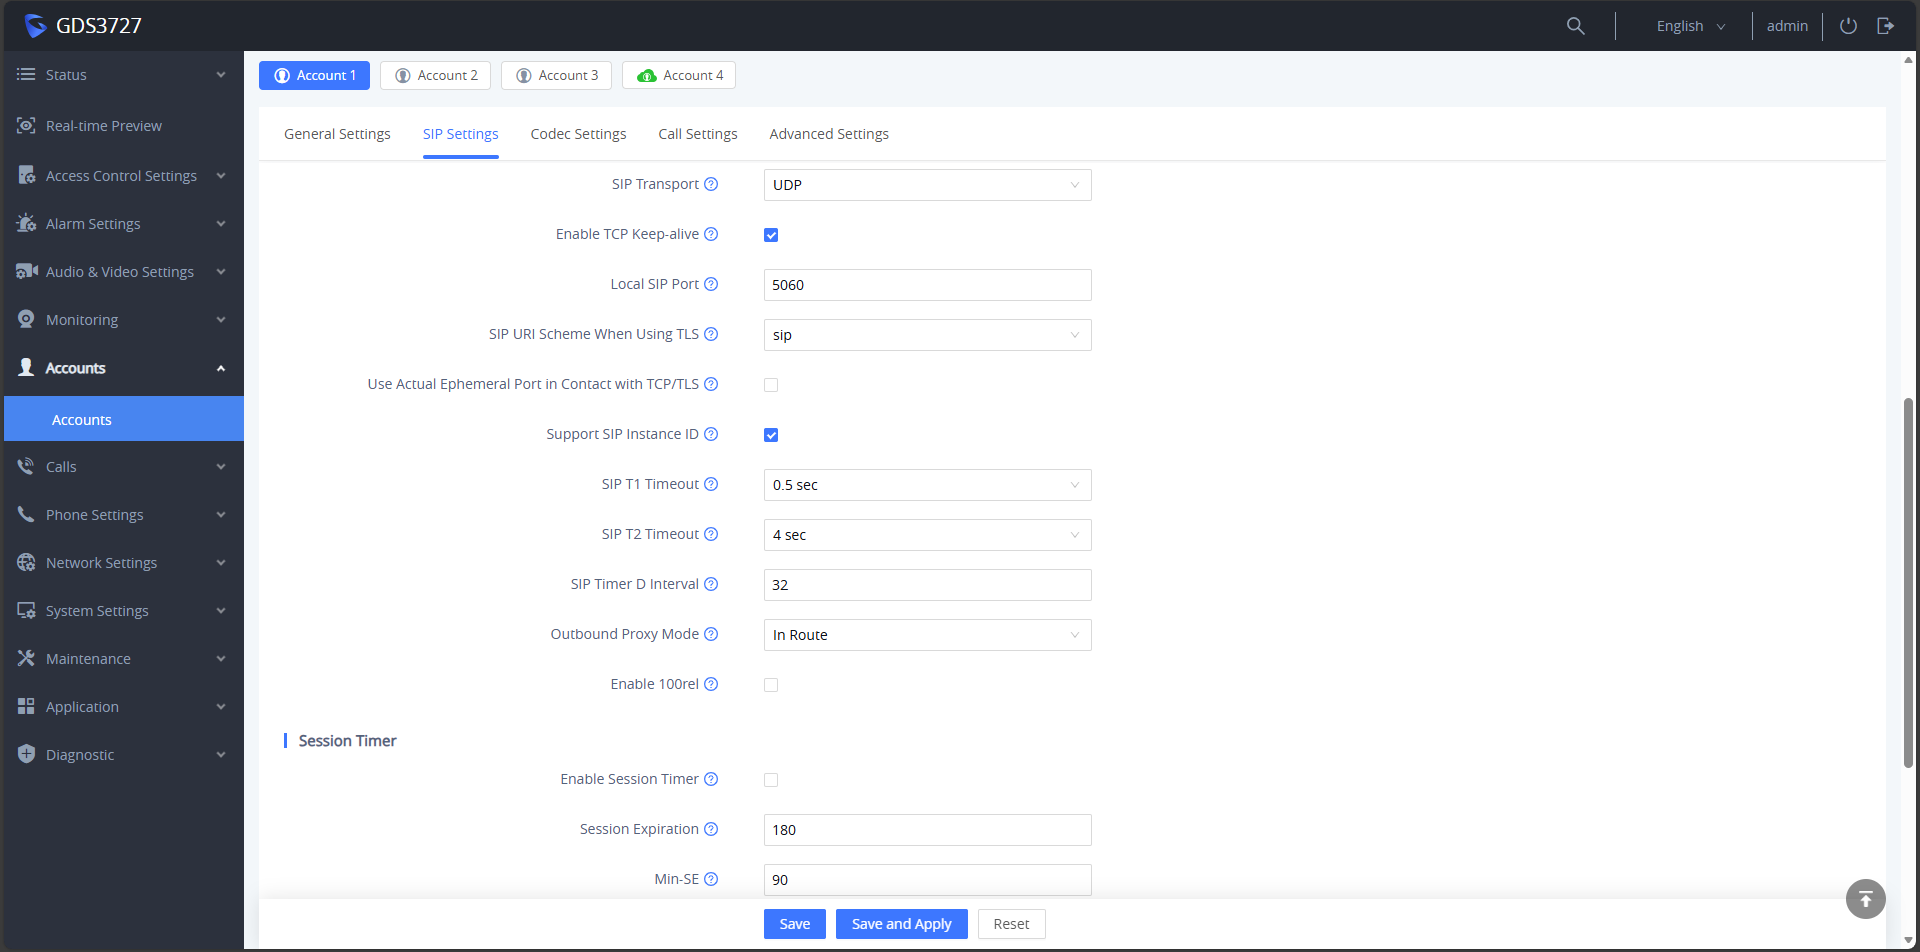
- Confirm that the SIP settings correspond with the following configuration under Accounts → SIP Settings and that the Local SIP Port is the same as the port configured on the WP836 and click Save and Apply.
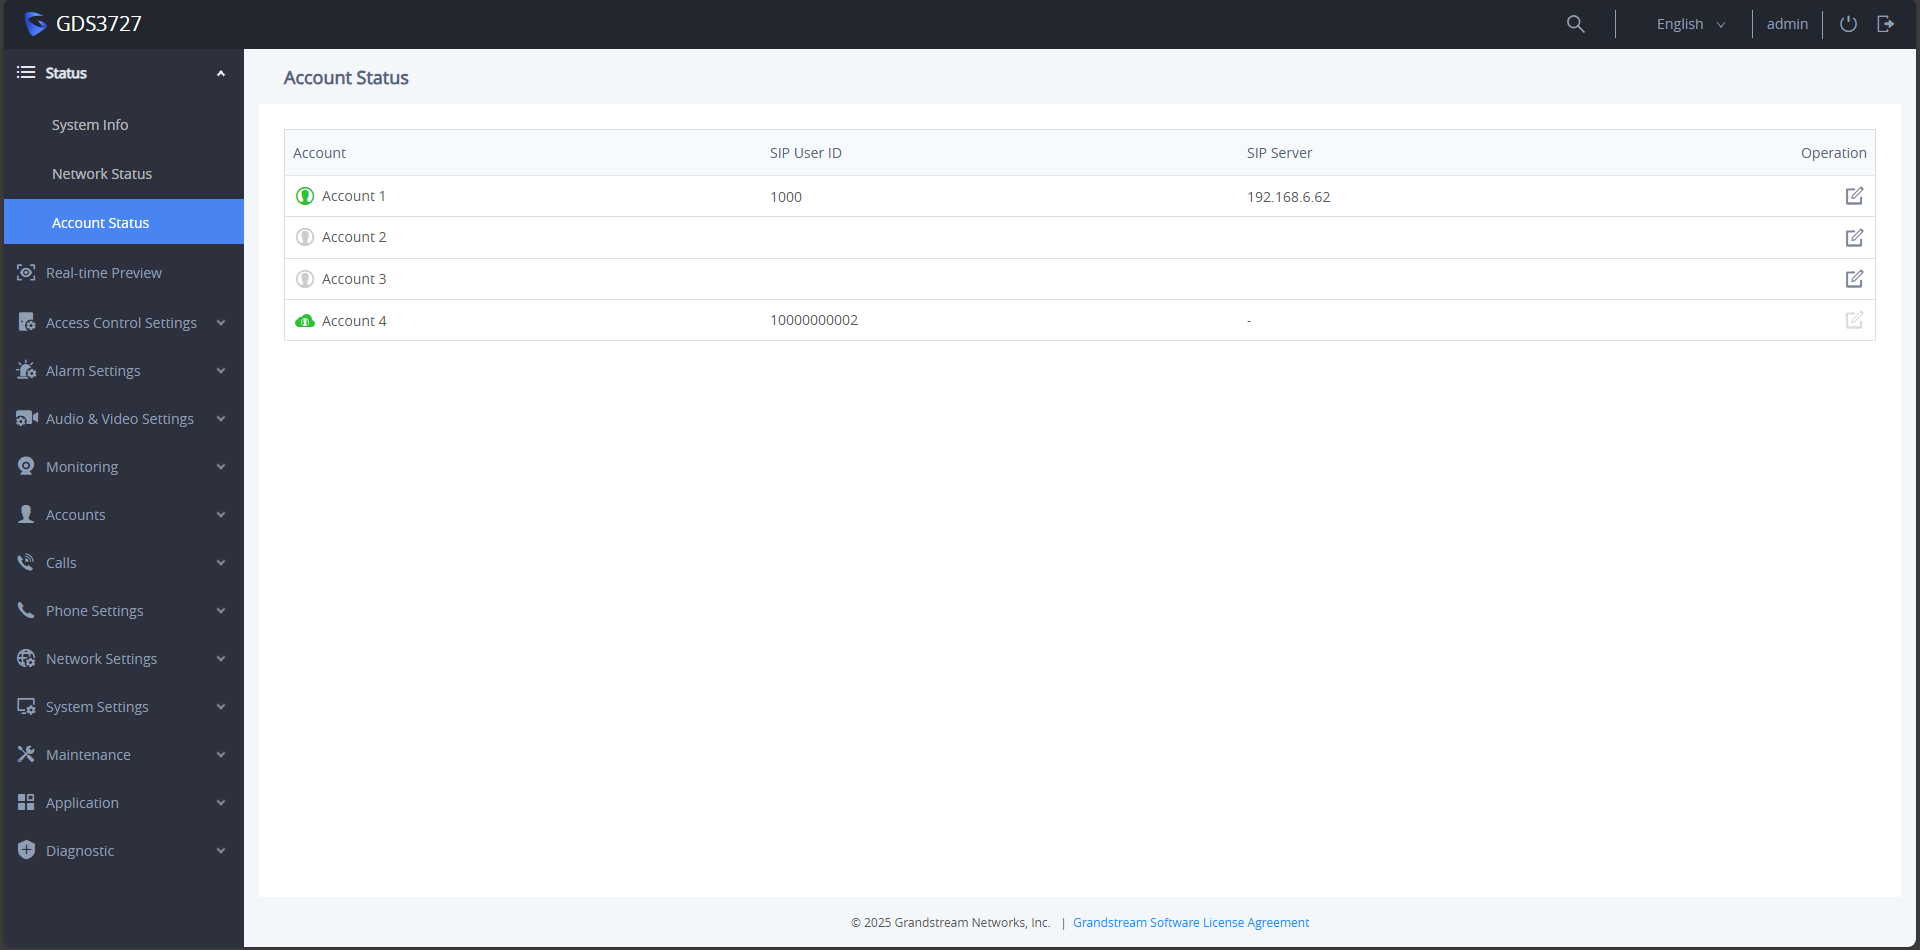
- Verify the account status under Status → Account Status.
- Under Access Control Settings → Basic Settings → Access Control Settings:
- Door Relay Options: Select Local Relay from the dropdown.
- Choose Feature: Set to Open Door.
- Door Name: Enter the desired door name.
- Delay Response Time: Specify the delay before the relay activates.
- Open Door Hold Time: Specify how the relay remains active.
- Click Save and Apply.
- On the Access Control Settings → Basic Settings → Doorbell Settings page:
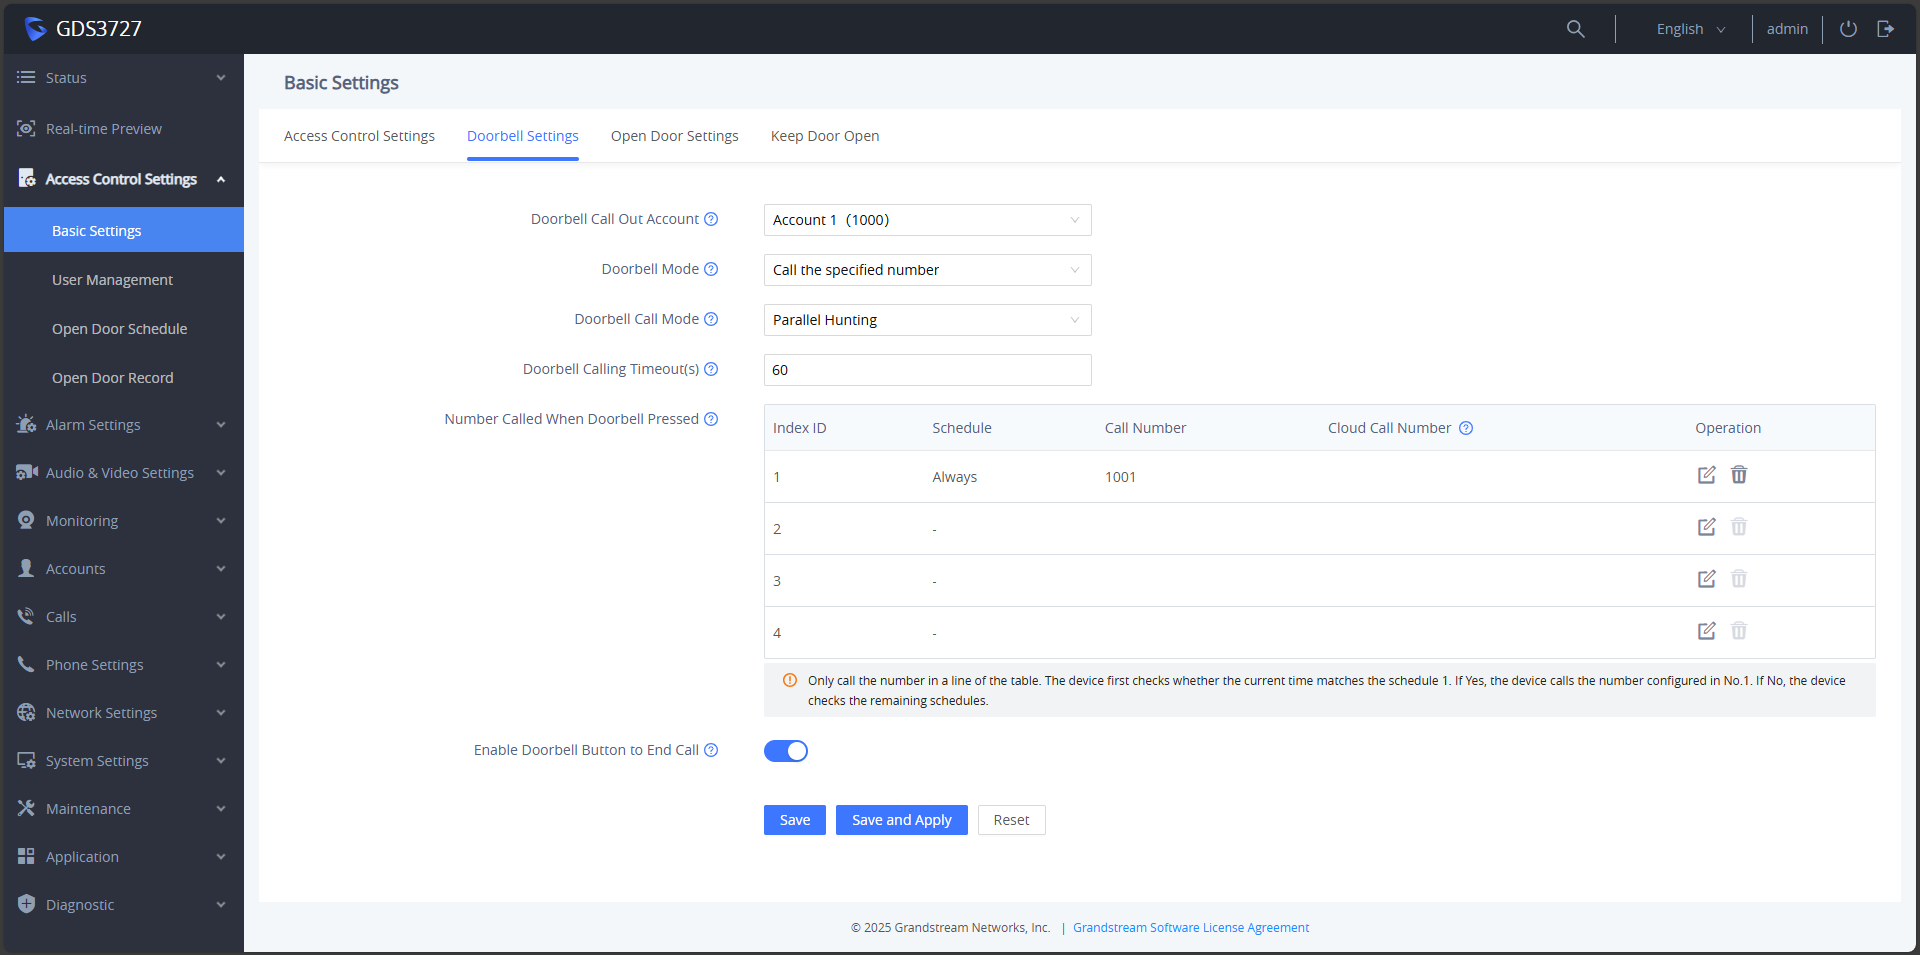
- Doorbell Call Out Account: Select the account configured earlier.
- Doorbell Mode: Set to Call the Specified Number to initiate direct IP calls.
- Doorbell Call Mode: Choose Serial Hunting or Parallel Hunting as required.
- Doorbell Calling Timeout: Specify how long the call rings before it automatically disconnects.
- Number Called When Doorbell Pressed: Click the Edit button, enter the SIP extension number of the WP836, and set the schedule to Always.
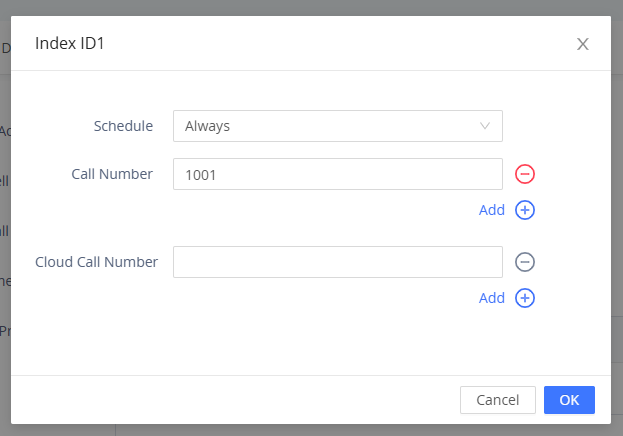
- Enable Doorbell Button to End Call: Toggle this option to determine whether the doorbell button can end the call.
- Click Save and Apply.
- Navigate to Access Control Settings → Basic Settings → Open Door Settings:
- Enable SIP Open Door: Check SIP Message to allow opening the door via SIP.
- SIP Open Door Password: Enter the door password.
- Enable SIP Door Hangup: Enable to automatically hang up the call after the door is remotely opened.
- SIP Open Door Hangup Time: Specify the time before the call is automatically disconnected.
- Click Save and Apply.
Configuring the WP8xx with a SIP Server
Access the WP836 web GUI and navigate through the configuration pages as shown below:
- Configure the SIP account under Accounts → General Settings and click Save and Apply.
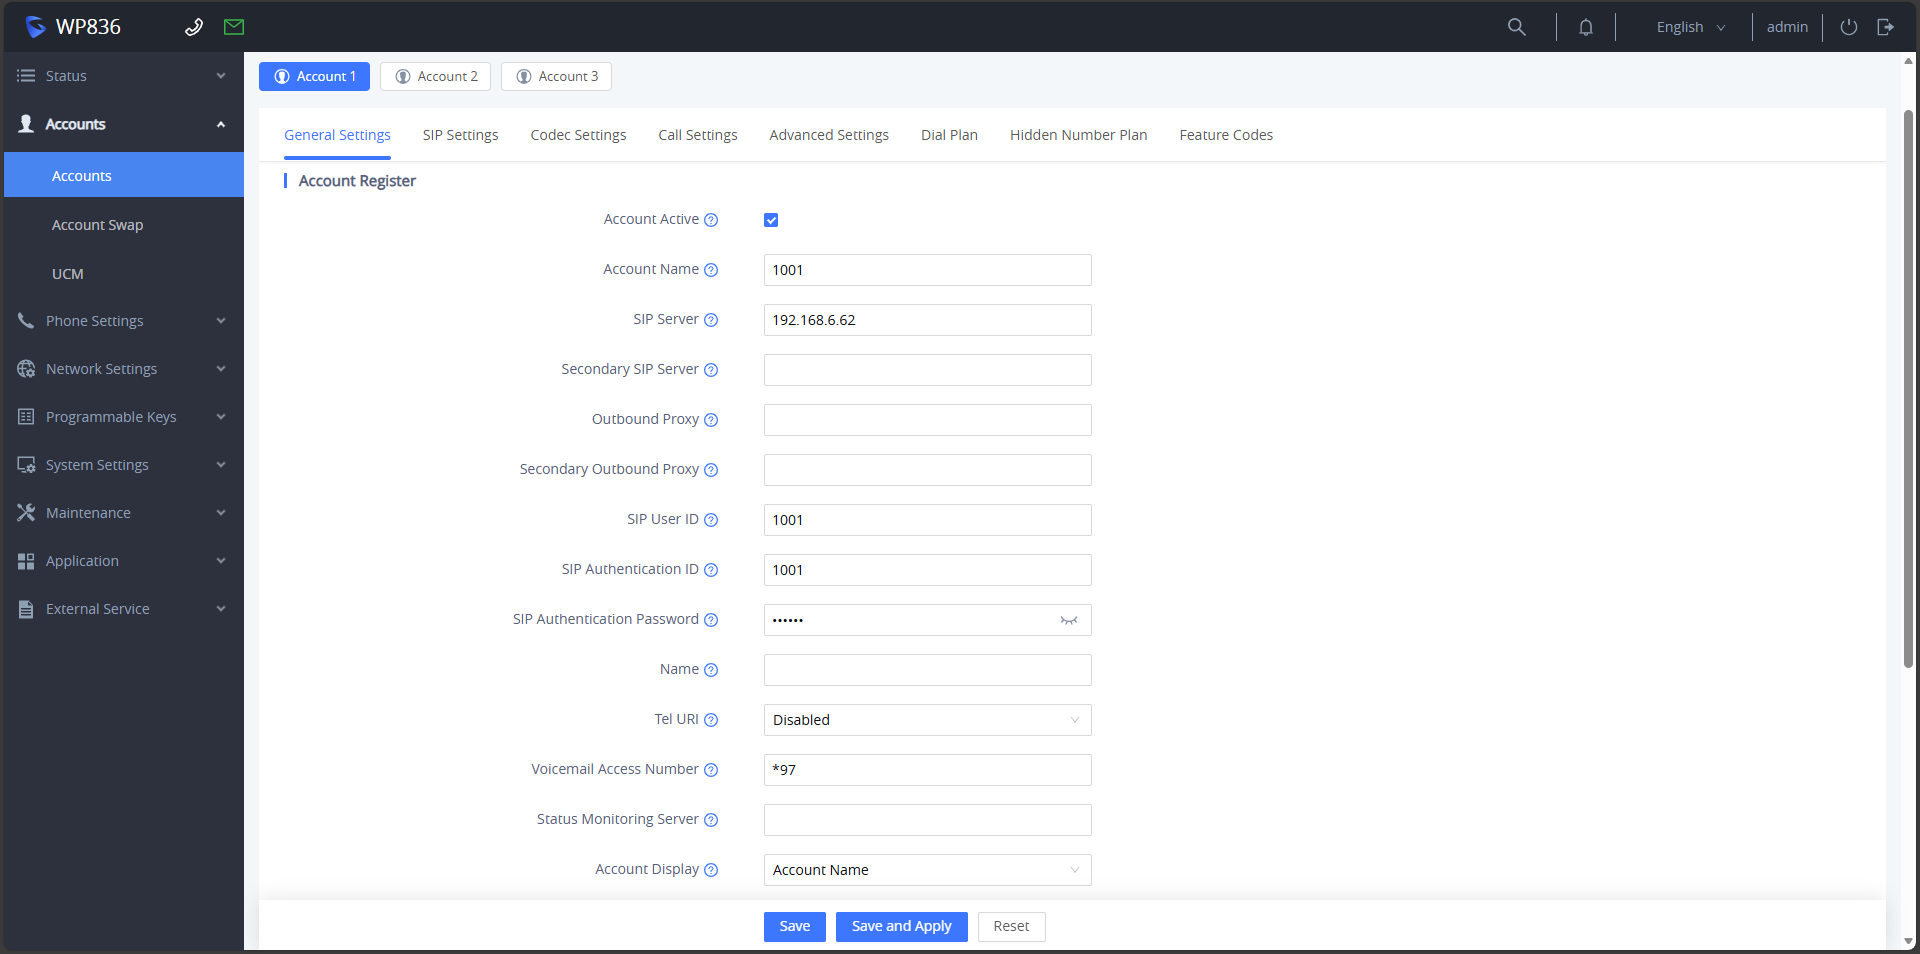
- Confirm that the SIP settings correspond with the following configuration under Accounts → SIP Settings and that the Local SIP Port is the same as the port configured on the GDS3727 and click Save and Apply.
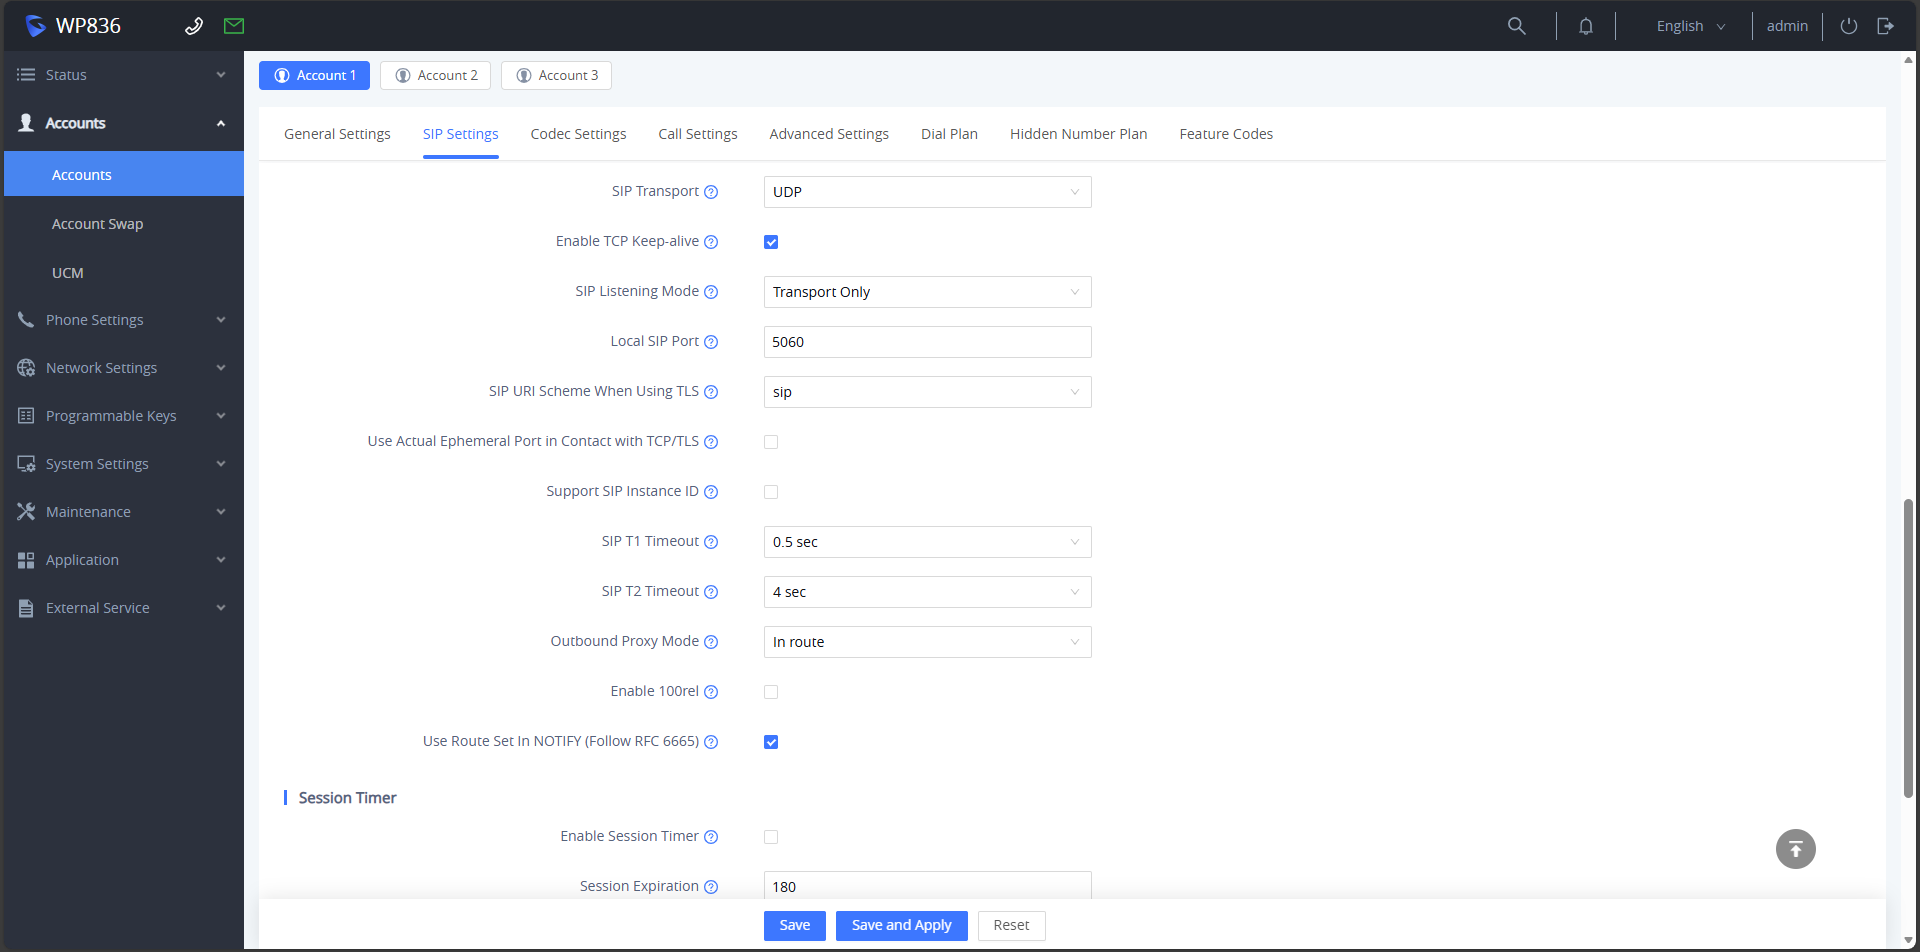
- Navigate to External Services → Door System and click Add:
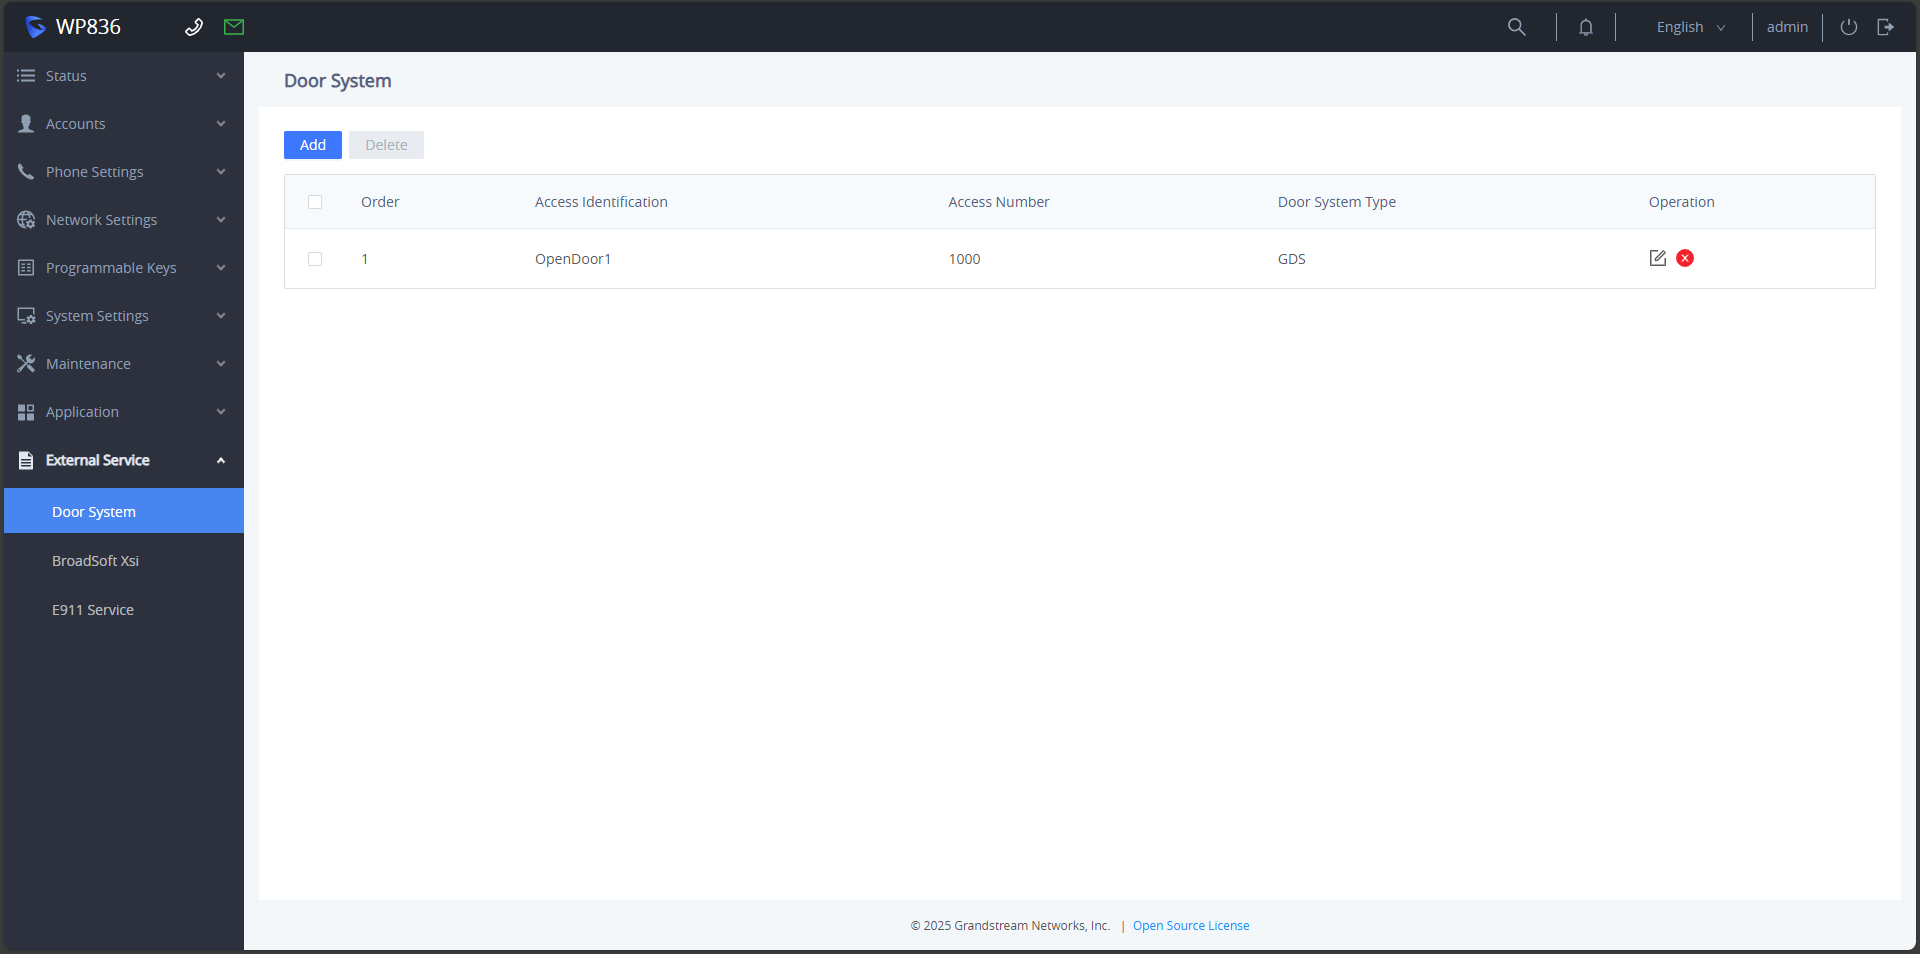
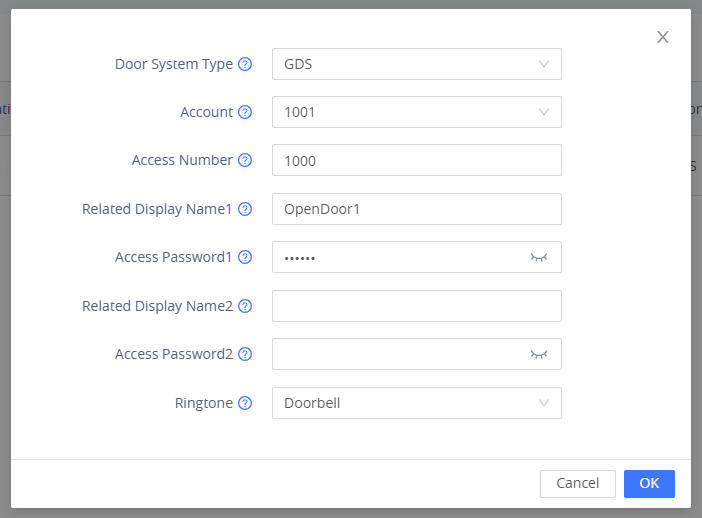
- Door System Type: Set to GDS.
- Account: Select the account activated earlier.
- Access Number: Enter the extension number of the GDS3727.
- Related Display Name1: Enter the name to be displayed on the phone when receiving a call.
- Access Password1: Enter the door password. Ensure it matches the password set in SIP Open Door Password under Access Control Settings → Basic Settings → Open Door Settings.
- Ringtone: Select the desired ringtone.
- Click OK.
Establishing The Call
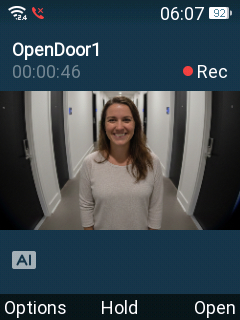
When the doorbell is pressed, the GDS3727 initiates a direct IP call to the WP836. The resident can open the door remotely by pressing the “Open” softkey on the handset.
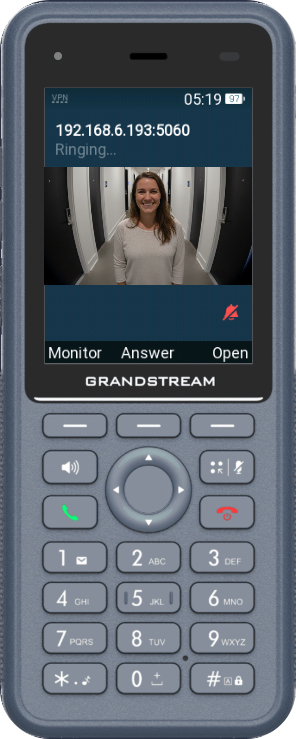
Direct IP Call
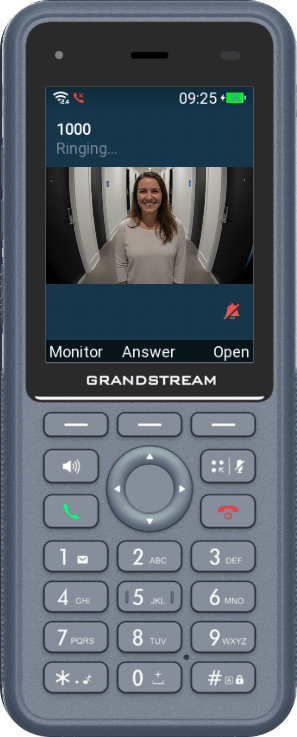
SIP call
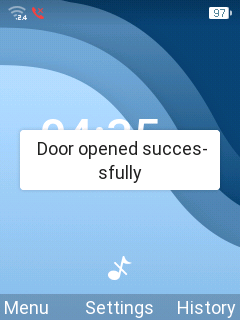
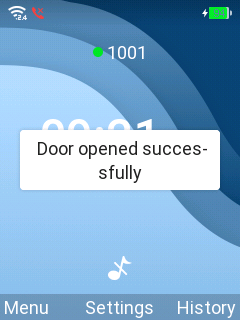
Once the “Open” softkey is pressed and the door is unlocked, a notification is displayed on the WP836 screen, as shown below.
Allowlist Settings
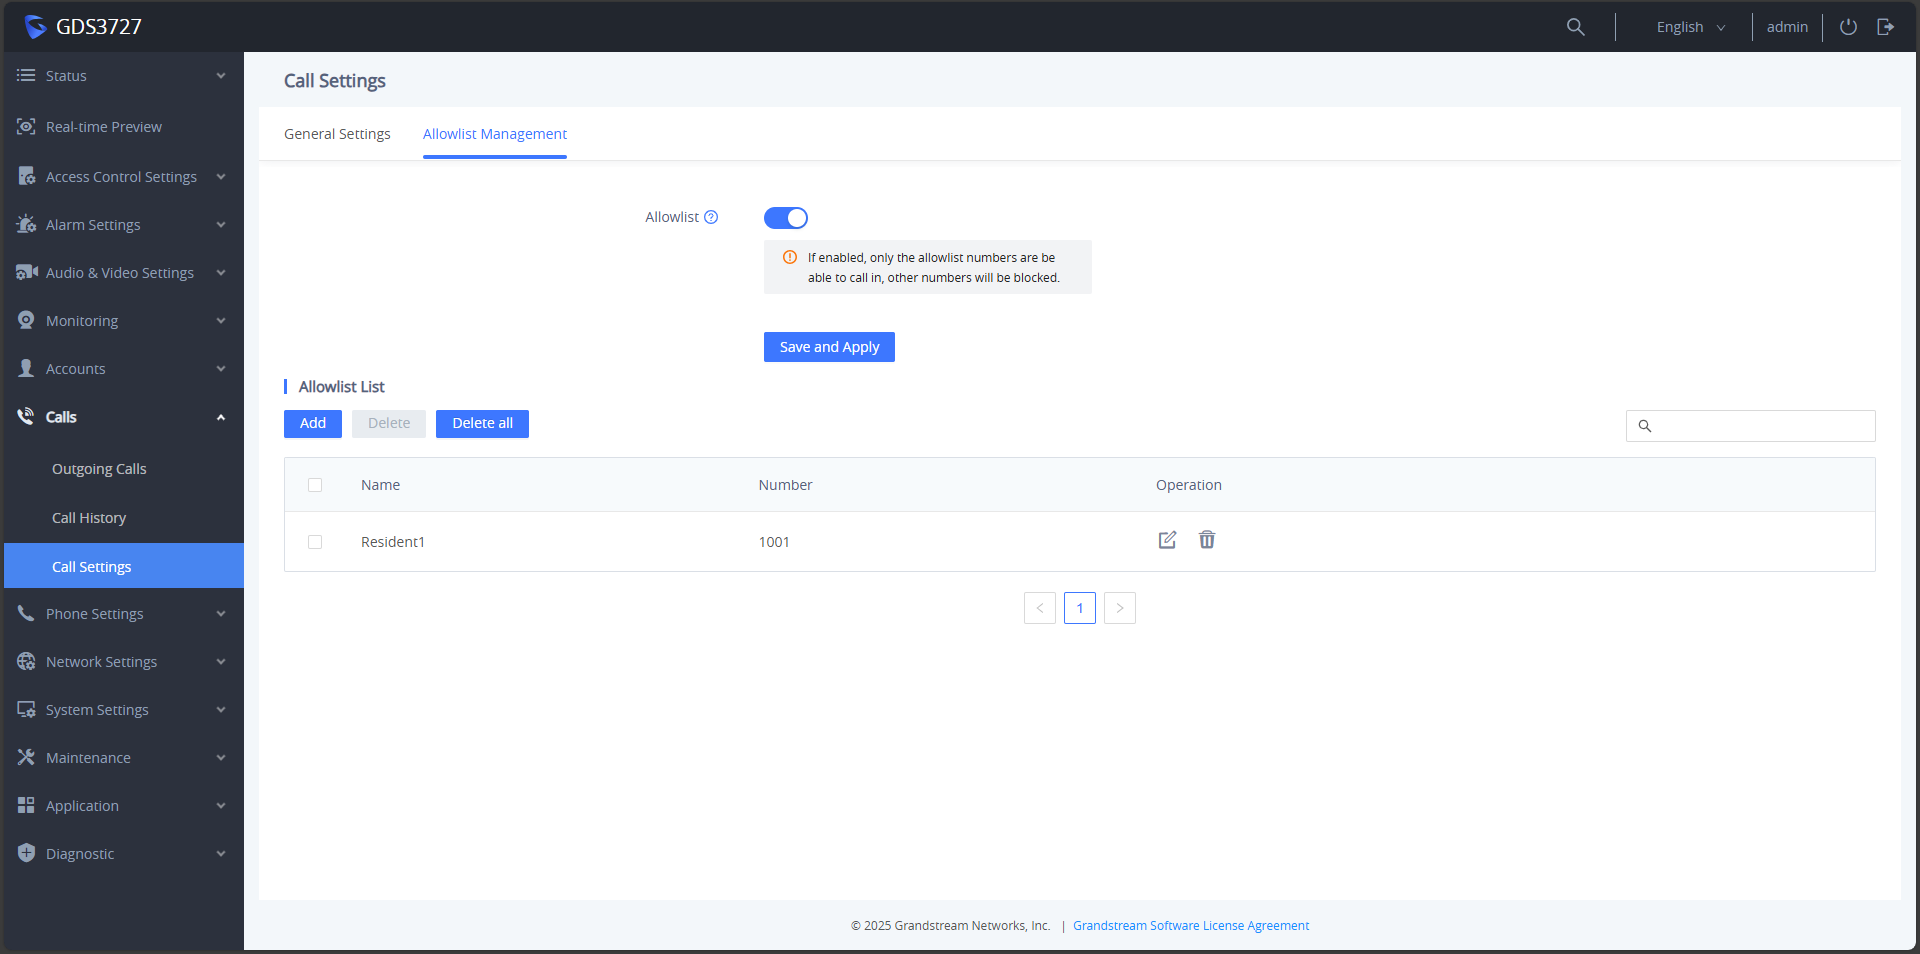
To control which devices can call the GDS3727, configure the allowlist by navigating to Calls → Call Settings → Allowlist Management. Enable Allowlist by pressing the toggle, then click Add under the Allowlist List section:
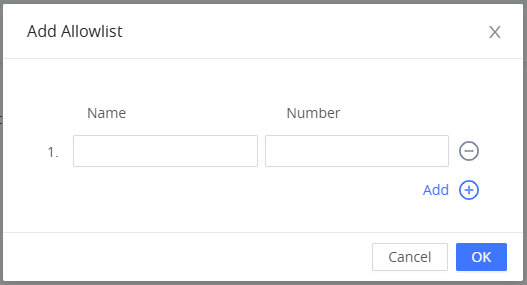
- Name: Enter the name of the allowed device.
- Number: Enter the IP address or extension number of the allowed device.
- Click OK.
Call Options
During a call, pressing the “Options” softkey on the WP836 provides the following options:
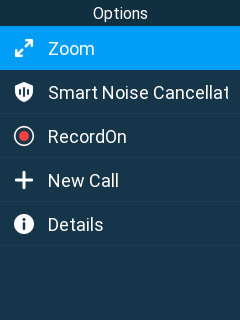
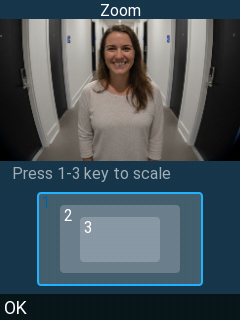
- Zoom: Zoom in and out using keys 1, 2, and 3 (3 being maximum zoom).
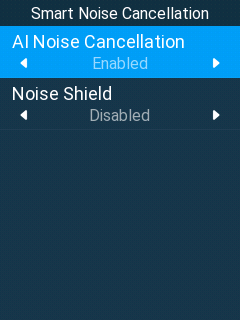
- Smart Noise Cancellation: Enable or disable AI Noise Cancellation and Noise Shield.
- RecordOn: Start recording the call. To pause the recording, press the “Options” softkey again and press Record Pause.
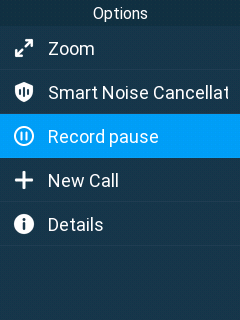
- New Call: Initiate a new call.
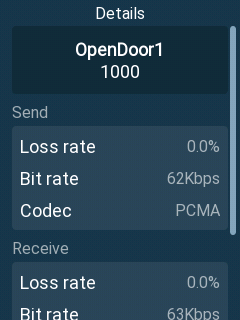
- Details: View information about the GDS device, including send and receive packet loss, bit rate, codec, frames per second (FPS), and video resolution.
Supported Devices
GDS37xx | Audio & Video | GDS3727, GDS3726, GDS3725, GDS3712, GDS3710 |
Audio Only | GDS3705, GDS3702 | |
WP8xx | WP856, WP836, WP826, WP816, WP825,WP822, WP810, WP820 | |
Supported GDS37xx and WP8xx Devices