
Grandstream SIP Devices can be configured via Web Interface as well as via Configuration File through provisioning…A new way has been added to monitor and mass configure the phones via GDMS platform to allow more flexibility for users and an intuitive interface to manage their Grandstream SIP devices.
This guide will serve on how to manage channels and track devices destined for ITSPs, agents and system integrators.
FUNCTION OVERVIEW
Users can manage devices through this function, including the following functions:
- Establish relationships with primary/secondary agents.
- Obtain devices from Grandstream ERP automatically without importing devices via MAC address and serial numbers manually.
- Assign devices to subordinate channels or agents.
- Help customers manage devices directly, including importing devices to customers’ account, and assigning SIP accounts/configuring parameters.
- Upgrade firmware for devices. Users can schedule tasks for upgrading devices purpose.
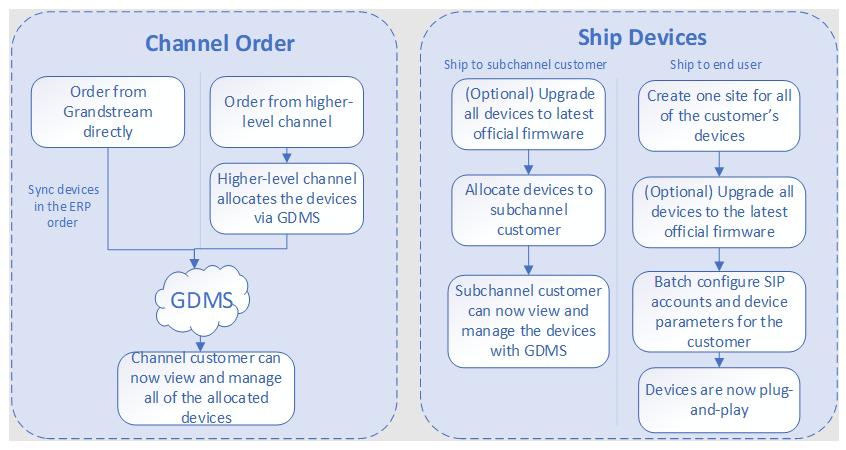
Typical Scenario Descriptions:
ASSOCIATED COMPANY MANAGEMENT
Superior Channel Binding Address
If a superior channel wants to assign devices to the user, the superior channel needs to add the user’s GDMS account as subordinate channel.
The user needs to copy and send the binding address to the superior channel.
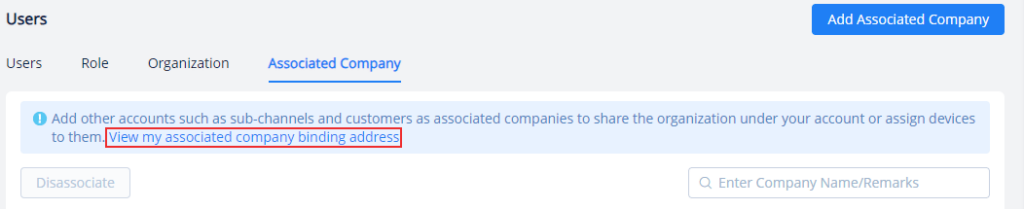
- Click on the link at the top of the Channel page “View my associated company binding address”, as the figure shows below:
- View my superior channel binding address, users could reset/copy the binding address.
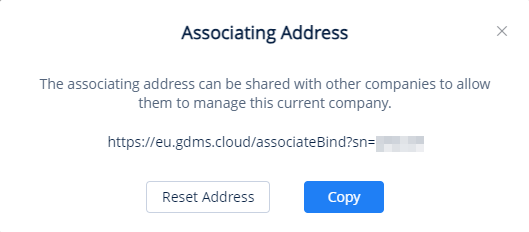
- Copy: Click to copy the link address to the clipboard
- Reset Address: Generate another address. The previous link will be invalid.
TRACK DEVICE
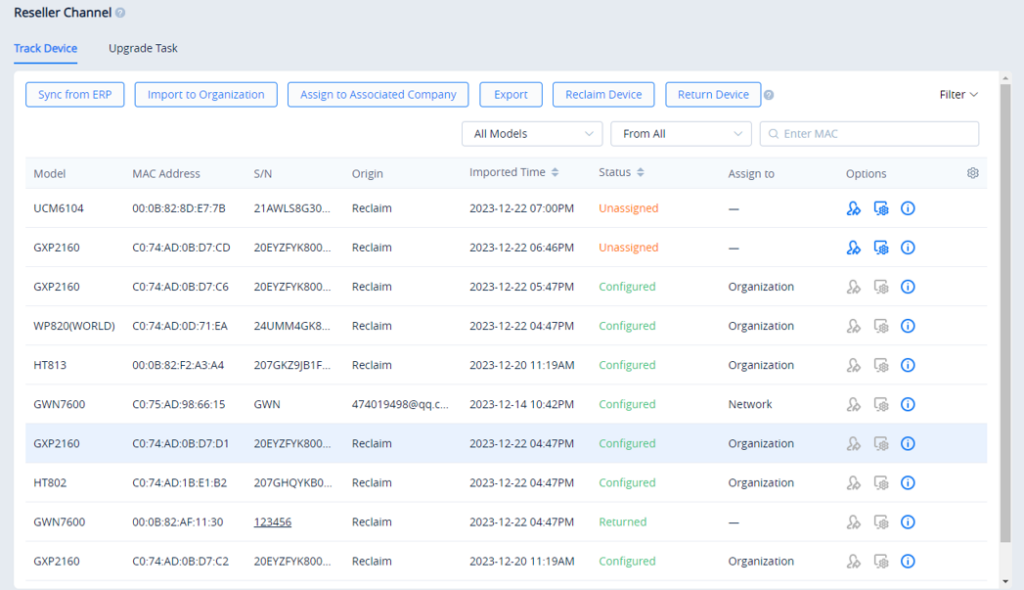
When users click “Track Device” option on “Channel” page, the devices will be displayed on the page:
- Once the user places an order from Grandstream, the Grandstream ERP system will synchronize the devices in the order to the user’s GDMS account.
- Once the user places an order from the user’s superior channel, the superior channel can assign the devices the user in “Channel” module, and the assigned devices will be displayed on the user’s “Track Device” menu.
View Device
To view all devices assigned to the account, click on the Track Device tab.
Model | The MAC address of the device. |
MAC Address | The model of the device. |
S/N | Where the device originated from. Currently there are two values:
|
Origin | The date/time the device was assigned to the account. |
Imported Time |
|
Status | The date/time the device was assigned to a sub-channel. The company name of the sub-channel will also be displayed. |
Assign to | The associated company that the devices is assigned to. |
Users can search for specific devices by using the filter and search options in the top-right of the Channel Management page.
Device Assignment Notification
When devices are assigned to an account, the ![]() icon will show a notification. Clicking on the notification will show the list of assigned devices.
icon will show a notification. Clicking on the notification will show the list of assigned devices.
Device Assignment
For the devices which have been sold to the associated company customer, the user could allocate the devices to them.
The associated company customer could log in the GDMS platform to view and manage the devices.
The user could allocate a single device or allocate a batch of devices:
Assign a Single Device:
- Click on the
 button for the desired device. The following window will appear:

- Select the associated company to assign the device to.
Assign Multiple Devices:
- Click on the Device Operation button at the top-right of the Channel Management page.
- Click on Assign to Subordinate Channel on Track Device page. The user will be redirected to the batch device assignment page.

- The user will be directed to the batch devices allocating page:
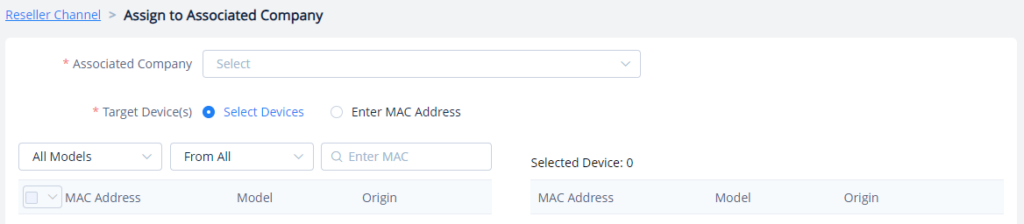
Associated Company | Select the associated company. |
Target Device |
|
- Click the Save button to finalize changes and the assignment. The associated company will then be notified of the device assignment.
Configure Device
To manage devices from the Channel Management device list, users must first import the devices to GDMS Device Management.
Import Single Device
- Click on the
 button for the desired device. The following window will appear:

- Click on the “OK” button to finalize the import.
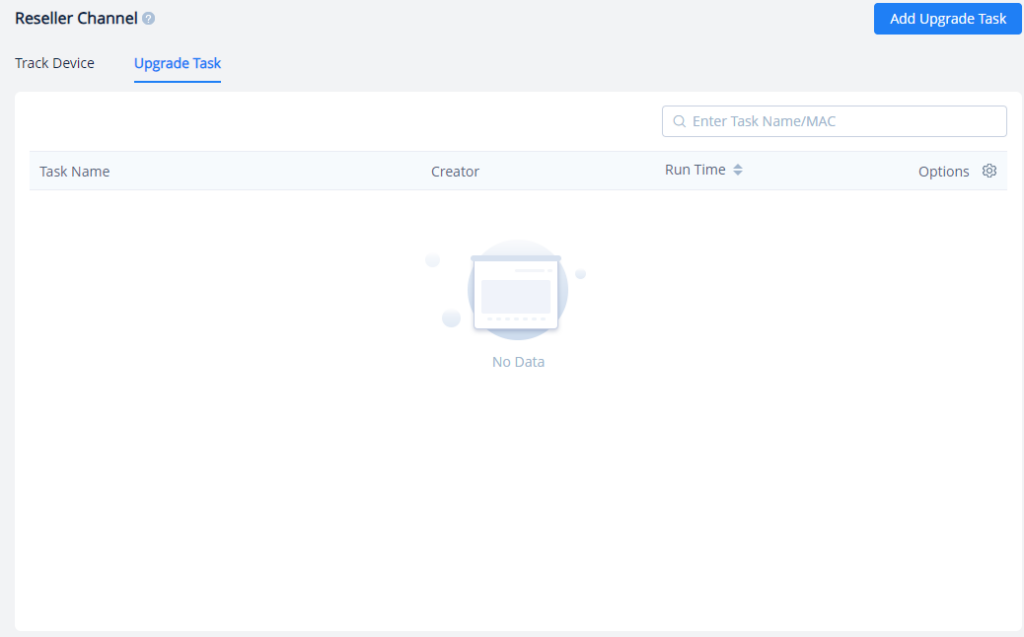
UPGRADE TASK
The user of the GDMS can trigger the firmware upgrade of the devices under a channel at once by configuring an upgrade task. To configure an upgrade task, please navigate to System → Reseller Channel → Upgrade Task, click on “Add Upgrade Task”.
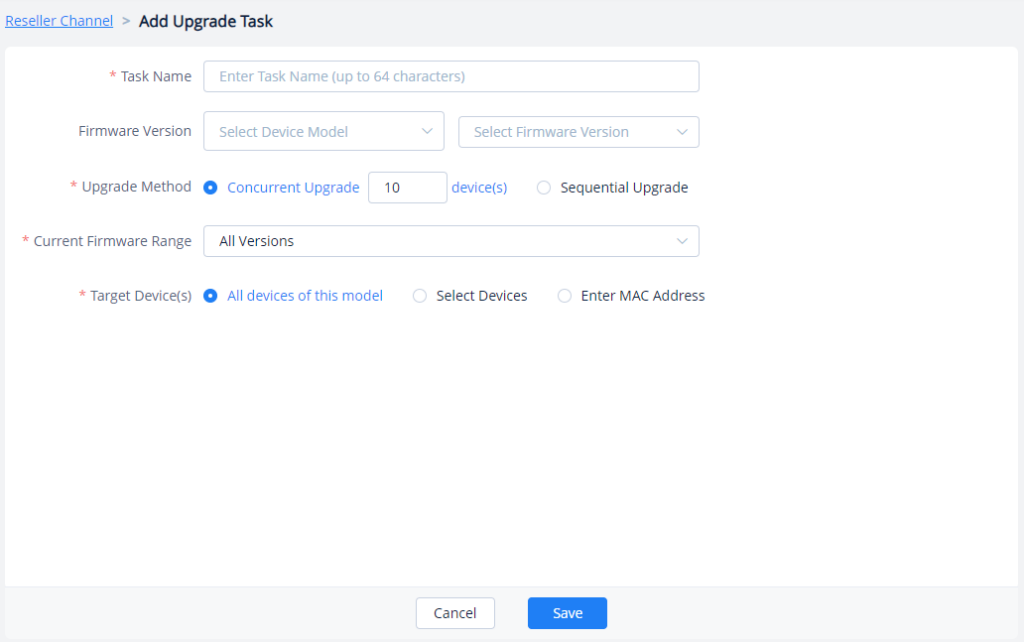
Task Name | Enter the name of the task. |
Firmware Version | Select the device model, then select the firmware version to upgrade to. |
Upgrade Method | Select the upgrade method.
|
Current Firmware Range | Specify the current firmware range which will be upgraded from.
|
Target Device(s) | Select the specific devices which will be upgraded.
|