GDMS Multi-Factor Authentication (MFA) is a security practice that adds an extra layer of protection to the account username and password. When MFA is enabled, the user will be required to enter the login username and password (the first security method) and an authentication code (the second security method) when logging on to the GDMS platform.
Users can use supported physical devices, virtual MFA devices, or email-based authentication, depending on the authentication method configured by the administrator.
- Email MFA
Email Authentication delivers a one-time code to the user’s registered email address. When logging into the GDMS platform, the user must enter the code received in their email to complete authentication. Each code is valid for a single login session and expires after a short period.
- Authentication App
Virtual MFA Device is an application that runs and simulates a physical device on mobile phones or other devices. The virtual MFA device will generate a six-digit code based on a one-time, time-synchronized cryptographic algorithm.
When logging into the GDMS platform, the user must type in a valid code from the specific device. Each virtual MFA device assigned to the user must be unique. The user cannot type in the code with another user’s virtual MFA device code for authentication. Since the virtual MFA device may be executed on an unsafe mobile device, it may not provide the same level of security as a physical MFA device.
- TOTP Hardware Token
Physical MFA Device is a device that can generate a six-digit code based on a one-time, time-synchronized cryptographic algorithm.
When logging into the GDMS platform, the user must type in a valid code from the specific device. Each physical MFA device assigned to the user must be unique. The user cannot type in the code with another user’s physical MFA device code for authentication.
- FIDO Security Key
Hardware-based MFA using FIDO-compliant security keys (e.g., YubiKey). Users authenticate by physically connecting the key to their device (USB/NFC) and verifying via PIN or touch. FIDO keys provide phishing-resistant, strong authentication without relying on codes.
Multi-factor Authentication Device
MFA Device Standards
The table below describes the standards based on MFA type:
Email Authentication | Authentication App | TOTP Hardware Token | FIDO Security Key | |
MFA Device | No device required | Refer to table below | Purchase physical MFA device | Purchase FIDO MFA device |
Cost | Free | Free | Price by supplier | Price by supplier |
Physical Device Standard | Any device with access to the registered email account | Smartphone/tablet/PC supporting TOTP-compatible apps | Physical device supporting open TOTP standards | FIDO-compliant hardware key (USB/NFC) |
Function | One-time code delivered to the user’s registered email address per login | Supports multiple tokens on a single device | Used by financial and IT enterprises | Phishing-resistant hardware authentication |
Download Virtual MFA Application
Install the virtual MFA application for your smartphone/tablet/PC from your device’s app store. The following table lists some applications that are suitable for multiple kinds of smartphones.
Android | |
iPhone | |
Windows Phone |
Enable MFA Device
Multi-factor authentication is mandatory for all GDMS accounts. On first login, users will be automatically prompted to configure MFA. If the administrator has set a specific authentication method, that method will be enforced. Otherwise, the user may select their preferred method during the setup prompt.
Enable Email MFA
GDMS allows setting email multi-factor authentication to reinforce the security of account access in case the password of the user has been compromised in some way. After having enabled multi-factor authentication using the email, the user is required to enter a code sent to the user’s email to be able to log in to the account.
Follow the steps below to enable multi-factor authentication using email.
- Log in to the GDMS platform. On first login, you will be automatically prompted to configure MFA.
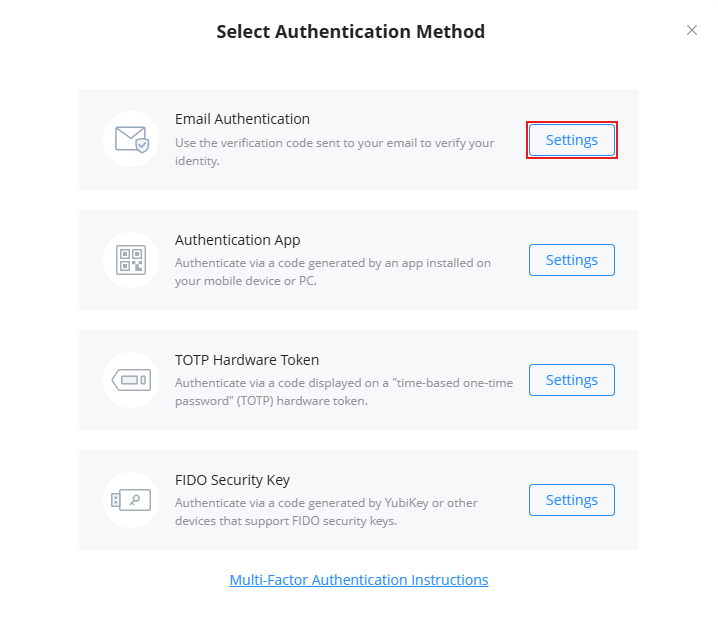
- If the administrator has enforced a specific method, the setup will proceed with that method. Otherwise, select “Email Authentication” and click “Next” to continue.
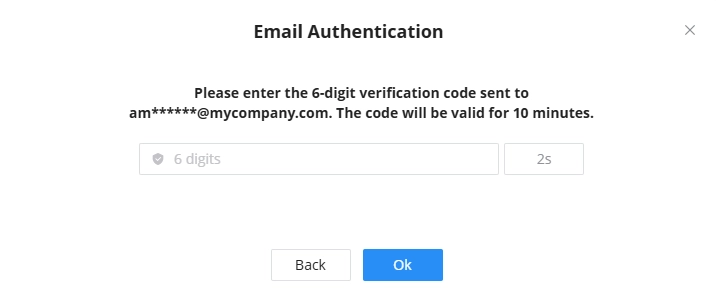
- Enter the code sent to you at your email address to enable email multi-factor authentication.
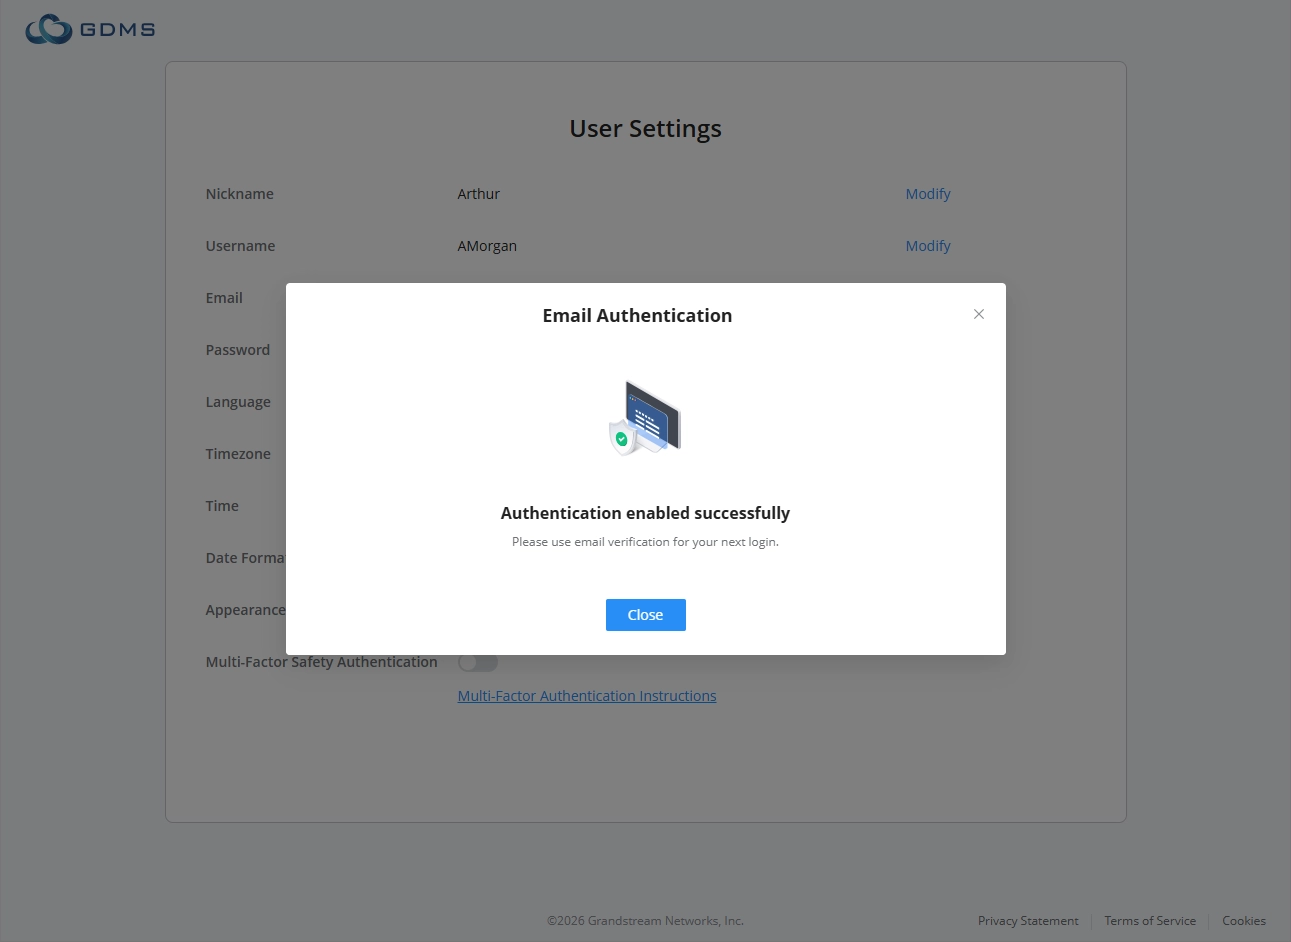
- Once email multi-factor authentication is completed successfully, the following message will appear. All subsequent logins will require that the user provide the one-time code sent to the user on their email address.
Enable Authentication App
Prerequisite: Users need to install a virtual MFA application on their smartphone/tablet/PC before configuring the virtual MFA device.
- Log in to the GDMS platform. On first login, you will be automatically prompted to configure MFA.
- If the administrator has enforced a specific method, the setup will proceed with that method. Otherwise, select “Virtual MFA Device” and click “Next” to continue.
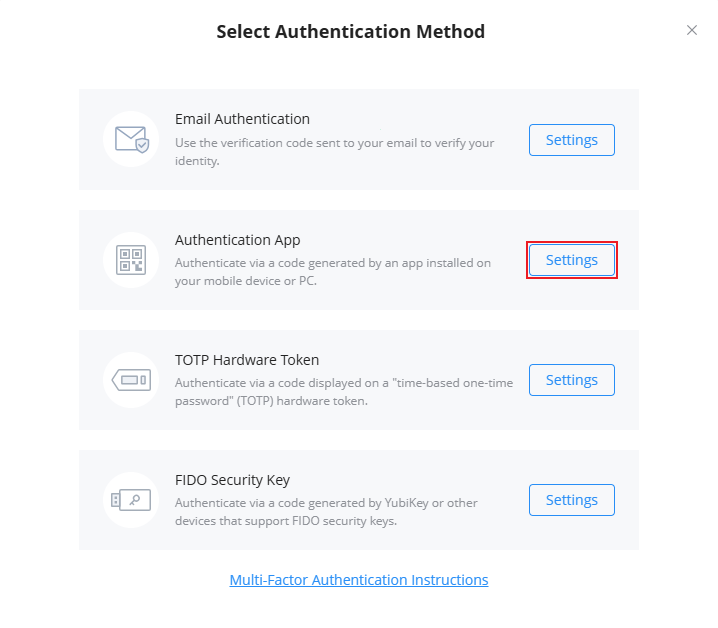
- Then, it will generate and display the configuration information of the virtual MFA device, including QR code graphics. This figure represents the configuration of the virtual MFA device as a secret key. Users can scan the QR code to finish setting up the virtual MFA device.
- Users can also input the secret key manually into the smartphone/tablet/PC to finish setting up the virtual MFA device if their smartphone/tablet/PC does not support scanning a QR code.
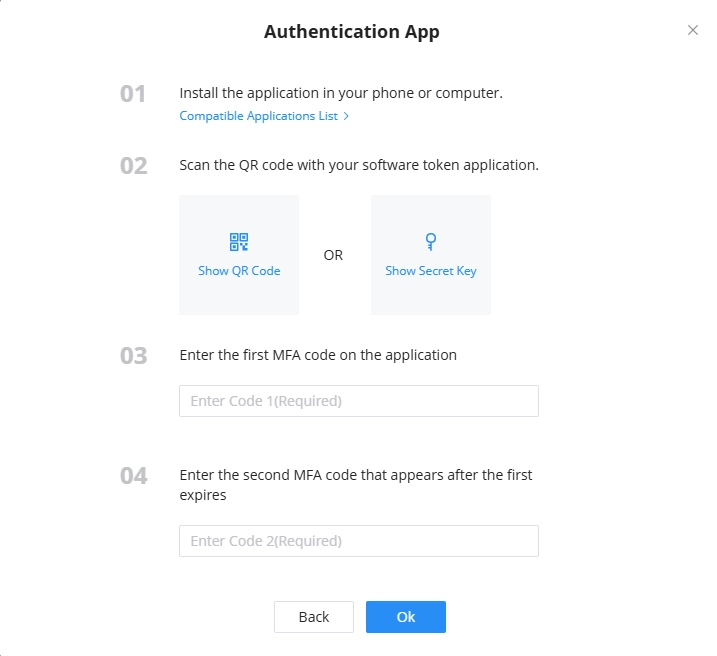
- Open the virtual MFA application on your smartphone/tablet/PC, ensure that the application in your smartphone/tablet/PC supports scanning QR codes, and then perform one of the following actions:
- If the MFA application supports QR code scanning, use the application to scan the QR code to finish setting up the virtual MFA device. For example, select the camera icon or QR code scanning option to use the device’s camera to scan the code.
- If the smartphone/tablet/PC does not support QR code scanning, click “Show Secret Key” and input the secret key manually into the MFA application.
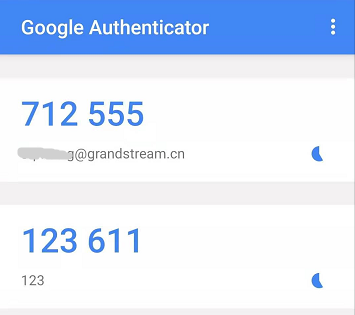
- When the operations above are completed, users can use the virtual MFA device to generate one-time passwords.
In the MFA secret code box, Code 1, the user enters the one-time password, which is displayed in the virtual MFA device. Then, wait for 30 seconds so that the virtual MFA device will generate a new one-time password. The user enters the second one-time password in the MFA secret code box, Code 2.
- Click on the “Start Verification” option to start verifying the password. When the verification is passed, the GDMS account and the virtual MFA device have been bound successfully. When the user tries to log in to the GDMS platform, the user must input the MFA device code.
Enable TOTP Hardware Token
Prerequisite: The user needs to purchase the physical MFA device before using this verification function.
- Log in to the GDMS platform. On first login, you will be automatically prompted to configure MFA.
- If the administrator has enforced a specific method, the setup will proceed with that method. Otherwise, select “TOTP Hardware Token” and click “Next” to continue.
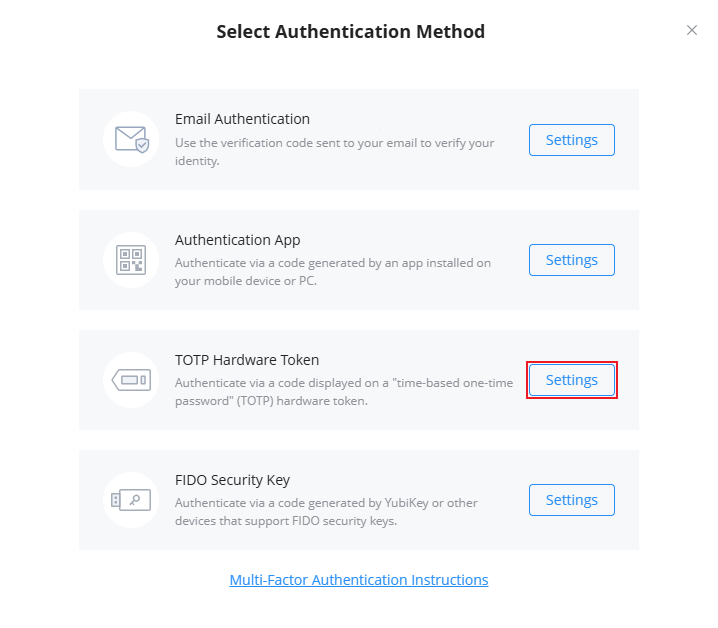
- Enter the interface to bind the physical MFA device with the GDMS account.
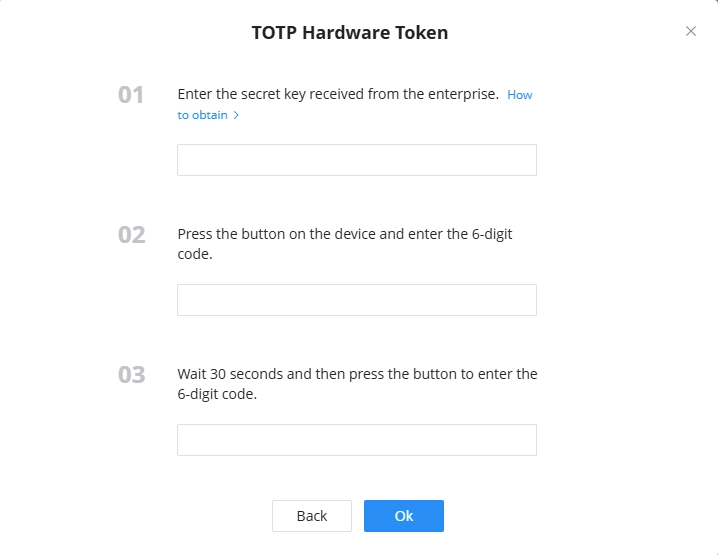
- Input the secret key of the device. Please contact the manufacturer for the secret key.
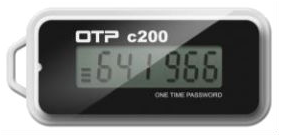
- In the MFA secret code box Code1, the user enters the six-digit one-time password, which is displayed in the physical MFA device. The user needs to press the button on the front of the physical MFA device to display the secret code.
- Wait for 30 seconds and press the display button on the front of the physical MFA device again, so that the MFA device will generate the second six-digit one-time password. The user needs to enter the second one-time password in the MFA secret code box, Code 2.
- Click on the “Start Verification” option to start verifying the password. When the verification is passed, the GDMS account and the physical MFA device have been bound successfully. When the user tries to log in to the GDMS platform, the user must input the MFA device code.
Enable FIDO Security Key
Prerequisite: User must have a FIDO-compliant security key to enable this method.
- Log in to the GDMS platform. On first login, you will be automatically prompted to configure MFA.
- If the administrator has enforced a specific method, the setup will proceed with that method. Otherwise, select “FIDO Security Key” and click “Next” to continue.
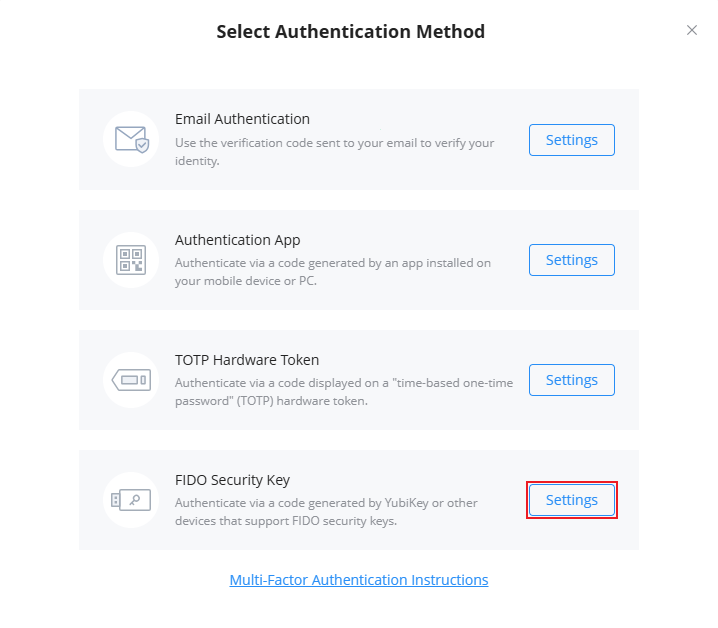
- Select where to store your passkey: on your iPhone, iPad, Android device, or a physical security key.

- If an iPhone, iPad, or Android device is selected, a QR code will be displayed on the next screen to be scanned using the device’s camera. If a security key is chosen, the key will need to be inserted into the computer’s USB port.


- Follow the instructions based on the selected method. Once completed, a confirmation window will appear to verify that FIDO authentication has been successfully enabled.

Set Global MFA Method
Administrators can enforce a single Multi-Factor Authentication (MFA) method across all sub-accounts to meet security and compliance requirements. This setting is configured under Users→Account Security Settings→Multi-Factor Authentication.
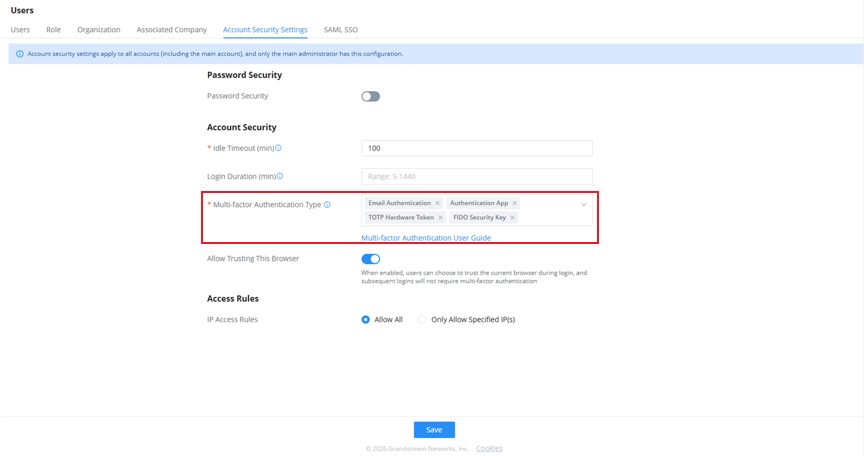
Based on the available options shown in the interface, administrators can select one of the following global MFA methods:
- Email Authentication: MFA codes are delivered via email.
- Authentication App: Time-based one-time passwords (TOTP) via authenticator apps (e.g., Google Authenticator).
- TOTP Hardware Token: Physical token-based OTP generation.
- FIDO Security Key: Hardware-based authentication using FIDO-compliant keys.
Change MFA Method
Users and administrators can modify their Multi-Factor Authentication (MFA) method directly from their account settings in GDMS.
- Log in to the GDMS platform using your account credentials.
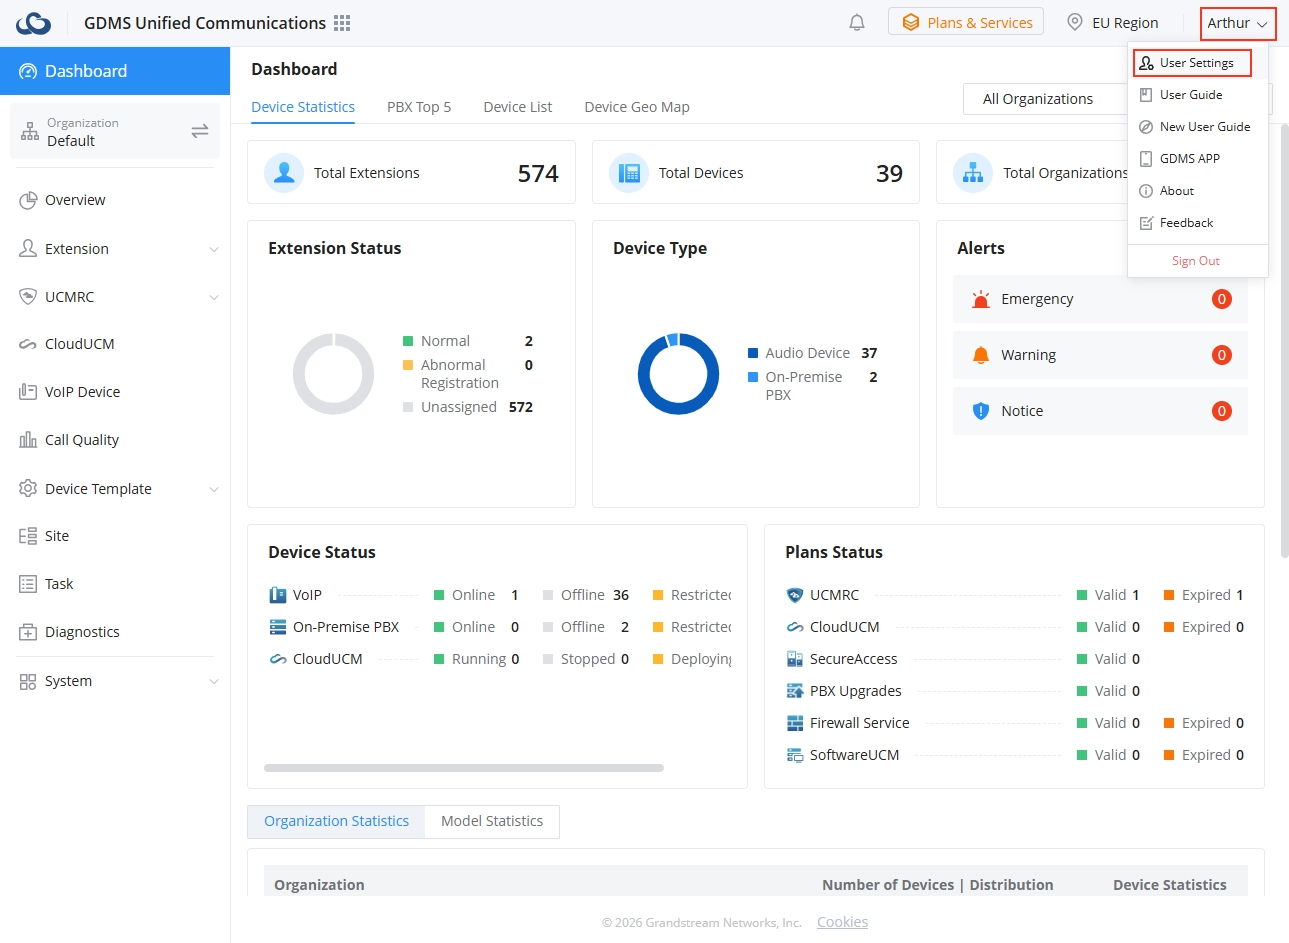
- Click on your username in the upper-right corner of the interface, and select User Settings.
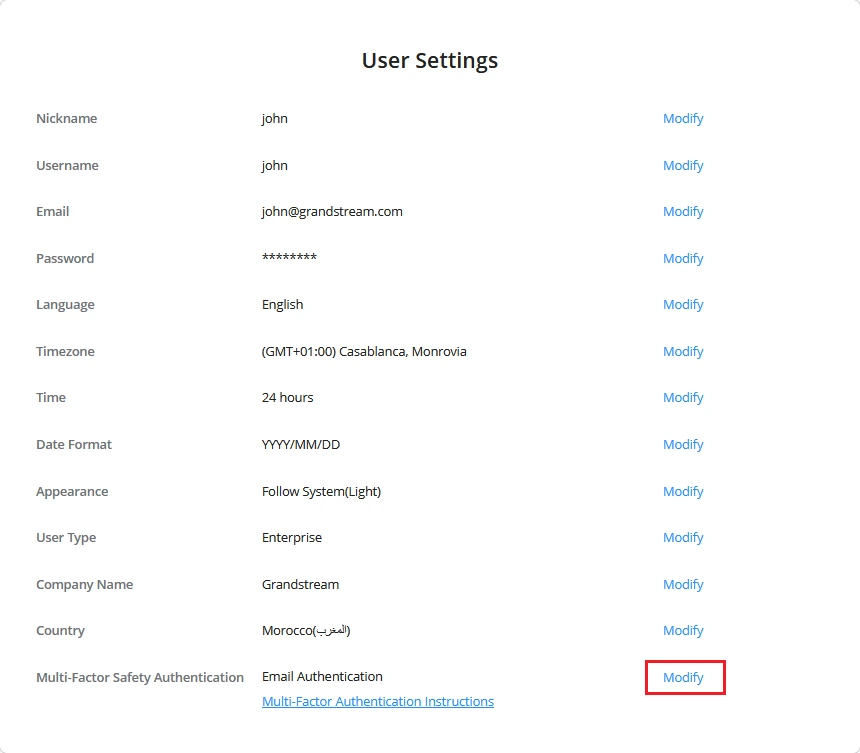
- Under Multi-Factor Safety Authentication, click Modify.
- Select and configure the desired MFA method.
- The system evaluates whether a Global MFA Method is enforced:
- If global MFA limitation: The user can freely select and apply any available MFA method.
- If a global MFA method is configured: The setting is locked, and the user cannot proceed with a different method.
Remove MFA Method
Users cannot remove MFA independently, as MFA is mandatory for all accounts. MFA removal is handled as follows:
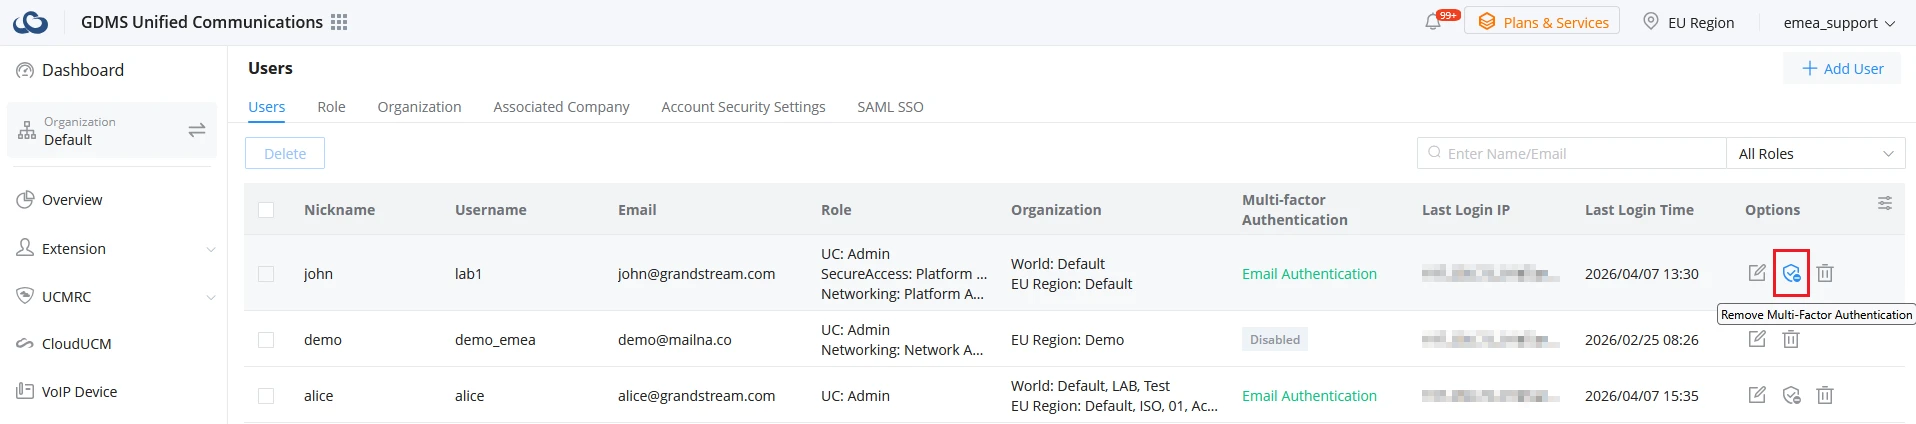
- Sub-accounts: The administrator can remove MFA for a sub-account from the User Management page. This is intended for cases such as a lost or malfunctioning MFA device. After removal, the sub-account user can log in with their password and reconfigure their MFA device.
- Administrator account: If the administrator account cannot access the GDMS platform due to an MFA issue, the account owner must contact Grandstream Technical Support. Technical Support will send a removal confirmation email to the user, who must then verify their account password to complete the removal.