
In today’s enterprise network, wireless technology and especially Wi-Fi is gaining more and more ground for its scalability and easy deployment along with the continually enhanced throughput which is competing with wired ethernet technology.
One of the major drawbacks of Ethernet is the complexity of deploying cables over all enterprise locations, and sometimes technicians cannot even run cables to some areas or this can be done but in the expense of losing signal quality. In this situation, the client bridge feature can be a suitable solution where the Wi-Fi access point configured on client bridge mode can bridge a full Ethernet segment over Wi-Fi connection.
Grandstream GWN76XX access point series offer along high-performance networking and Wi-Fi coverage range, the possibility to operate either in access point mode or client bridge mode.
Scenario Overview
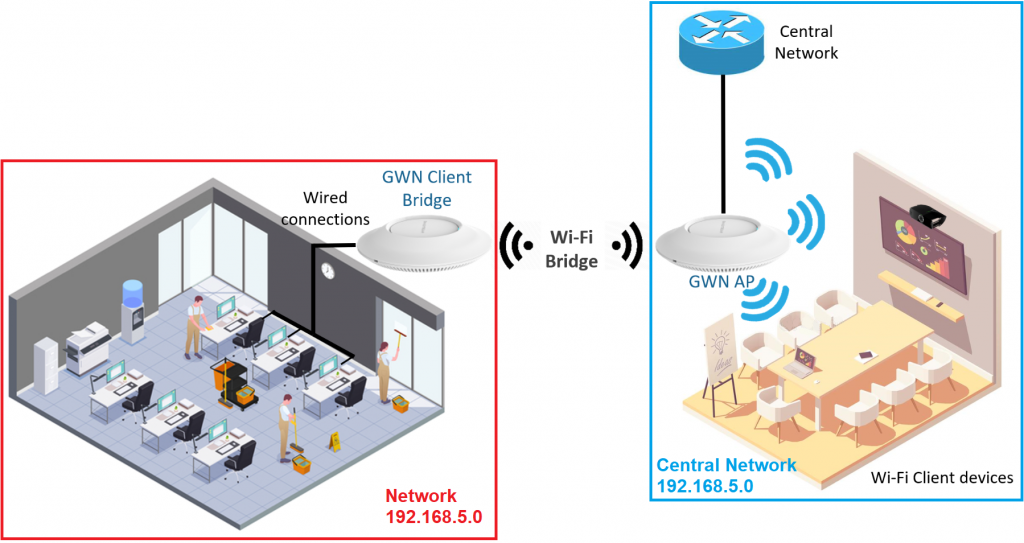
We consider the following scenario where the company has on the campus a set of users working on desktop computers with no wireless adapters, and after studying the feasibility to run an Ethernet cable into the remote location the network technicians decided that is better to bridge those users over the Wi-Fi using GWN76xx on client bridge mode.
The diagram below shows the architecture:
Pairing the Access Points
In this section, we will provide the necessary steps to pair the Access Points with GWN Local Master, GWN.Cloud and GWN Manager:
Using the GWN Local Master
The first step is to discover the access points to pair them with the embedded controller (Master AP) and assign them to the SSID:
- Make sure to connect both access points to the same network as the controller.
- Access to the Master AP web GUI under Access Points and click on Discover button.
- Once on the list of discovered APs, click on link button
 to pair them to the GWN.
After this step, the paired access points will be provisioned by the embedded controller and displayed as shown on the following figure:

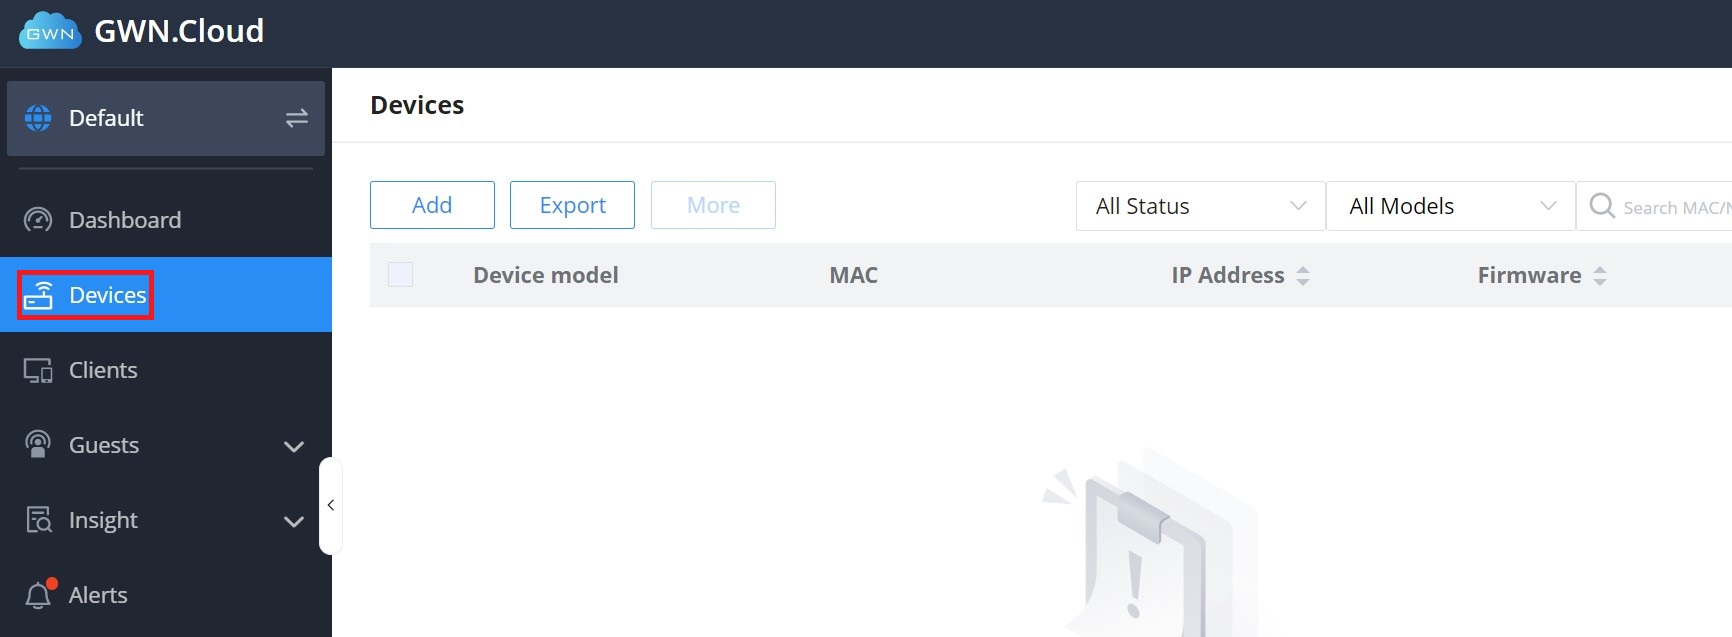
Using GWN Cloud
To pair the access points to the GWN Cloud:
First log in to your account, under Devices
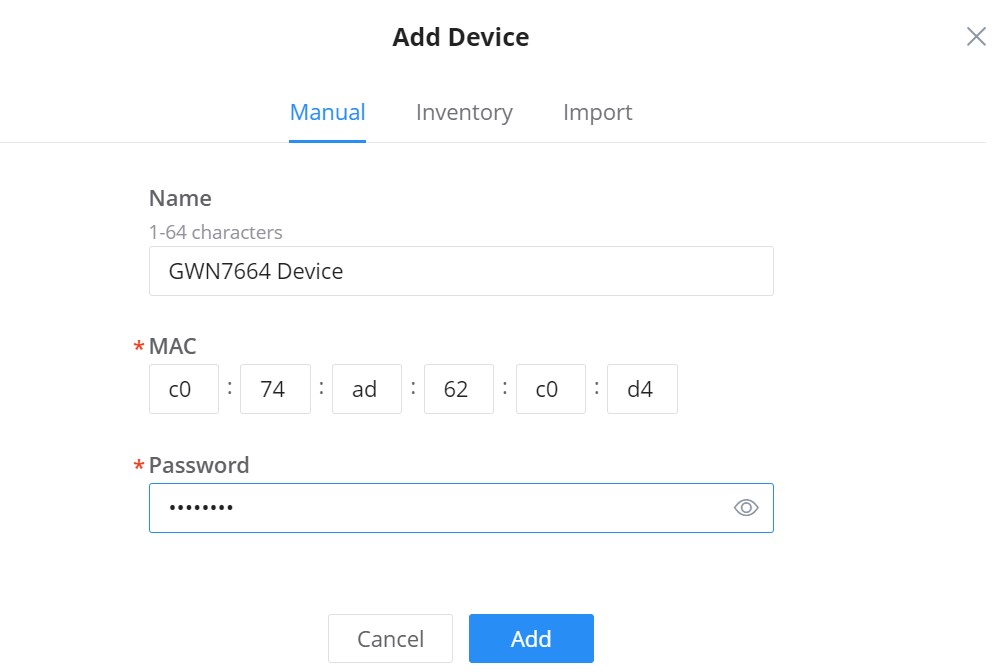
Then Add a GWN device (AP) by clicking on the “Add” button, then enter the MAC address and Password information of the GWN device.
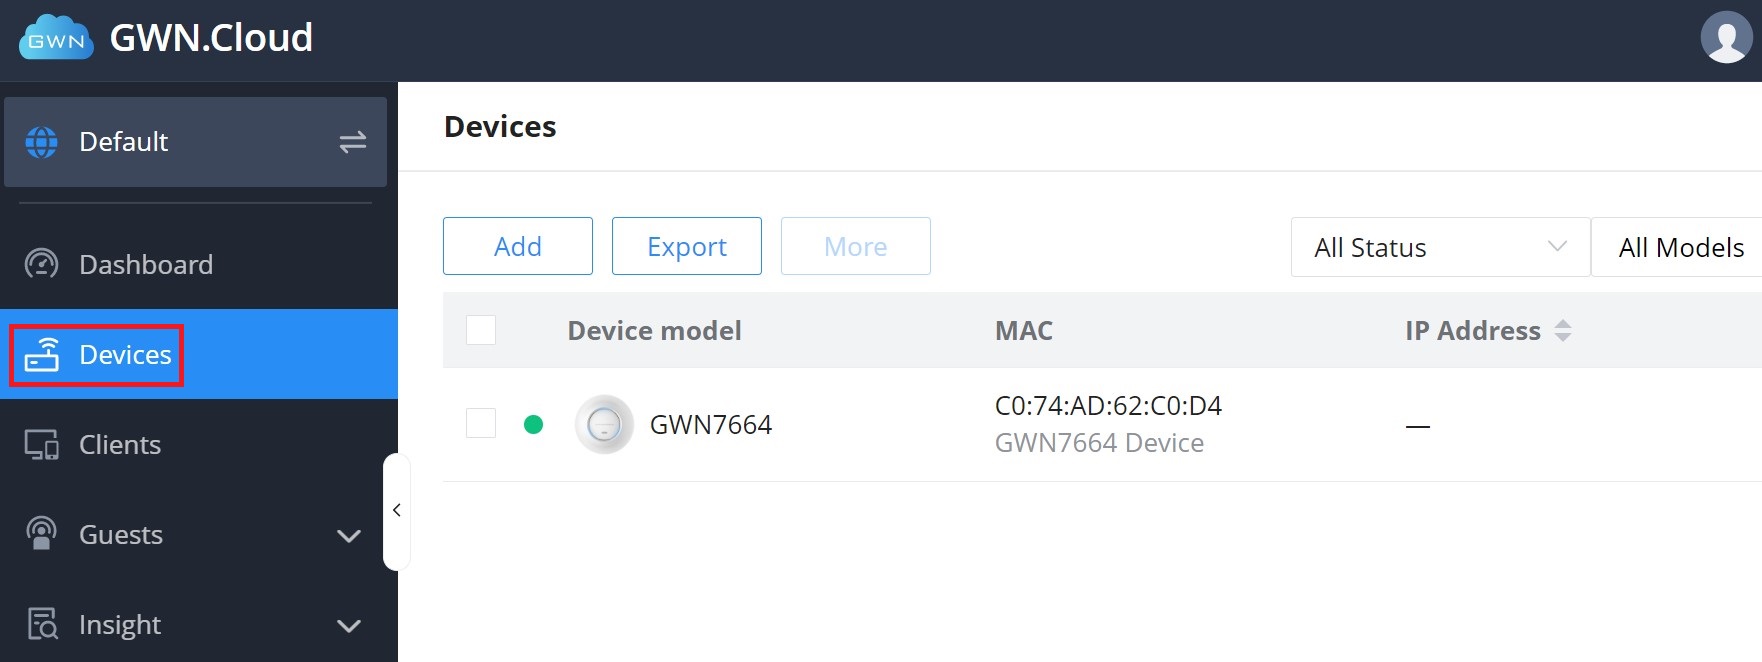
After this step, the paired GWN device (AP) will be provisioned by the GWN.Cloud and displayed as shown on the following figure:
Using GWN Manager
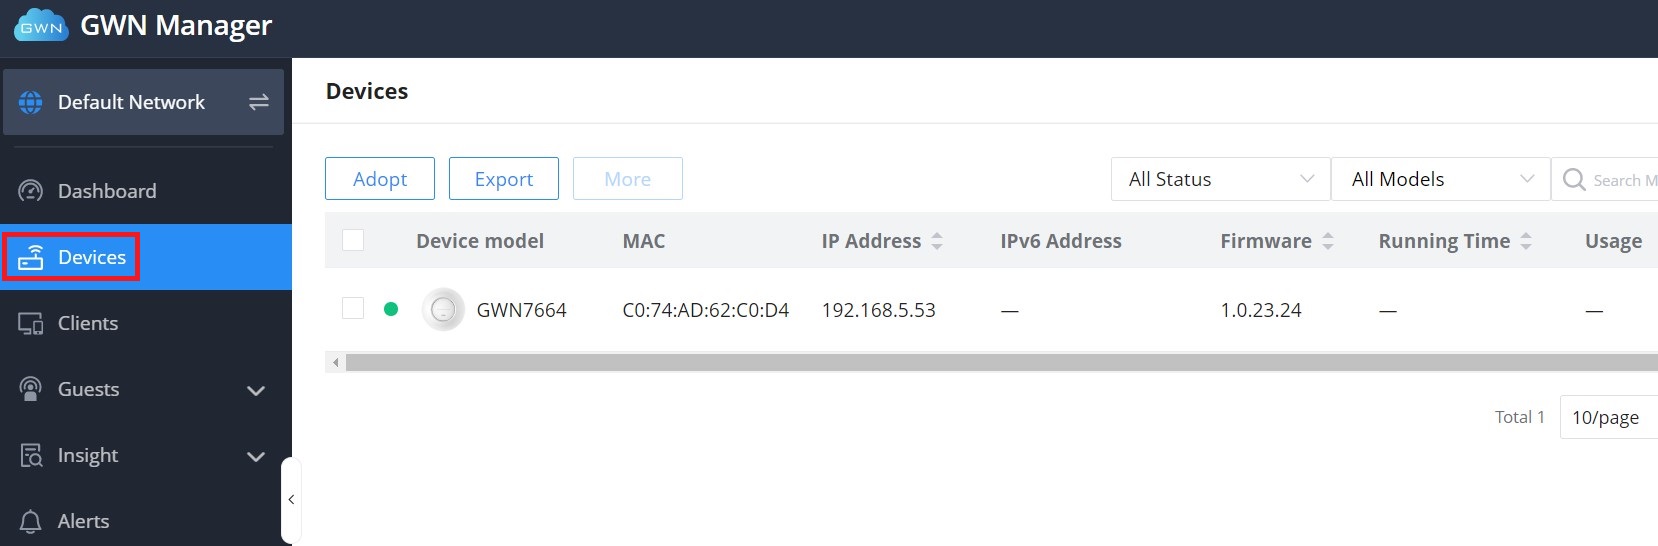
To pair the GWN Access point device to the GWN Manager:
First log in to your account, under Devices.

Then Add GWN devices by clicking on the “Adopt” button.
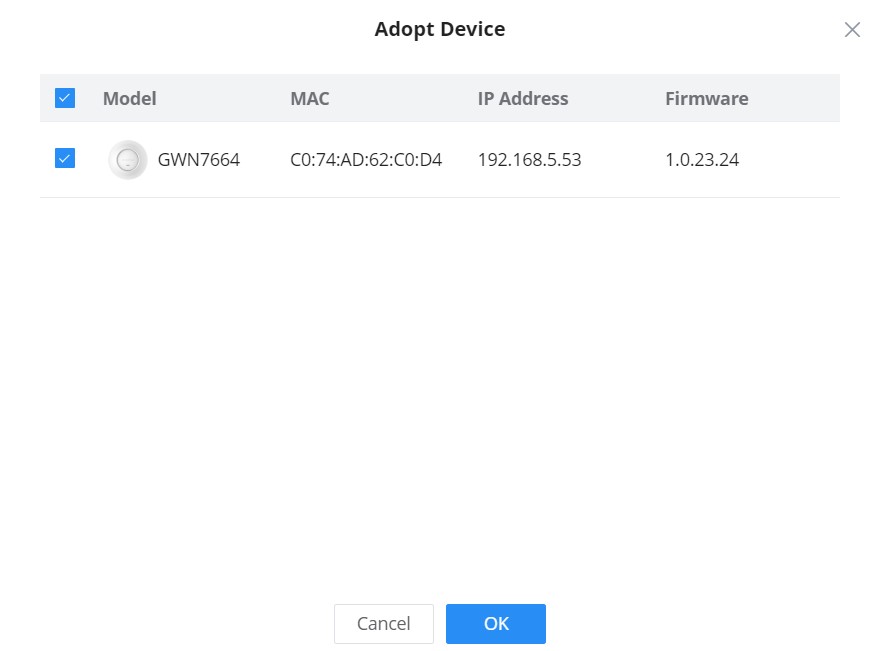
After this step, the paired GWN access point device will be provisioned by the GWN Manager and displayed as shown on the following figure:
Add Access Points to the SSID
The next step would be to assign the access points to the SSID, please follow below steps to achieve this:
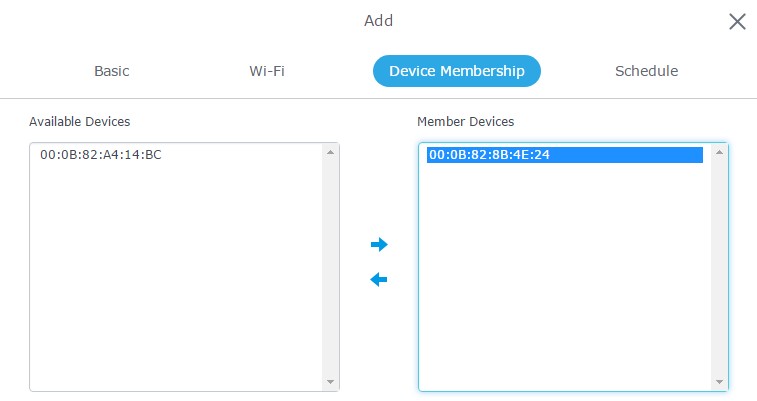
- Go under SSID -> Device Membership (local Master) or Settings → Wi-Fi → Wireless LAN (GWN Cloud or Manager)
- Select from the list of available devices the access points that would be participating members of this network “SSID”, the following figure serves as an example:
Enabling Client Bridge Feature
At this stage, we need to enable the client bridge feature and assign which access point will be operating on bridge mode before it’s taken to its final destination. Please follow the next steps:
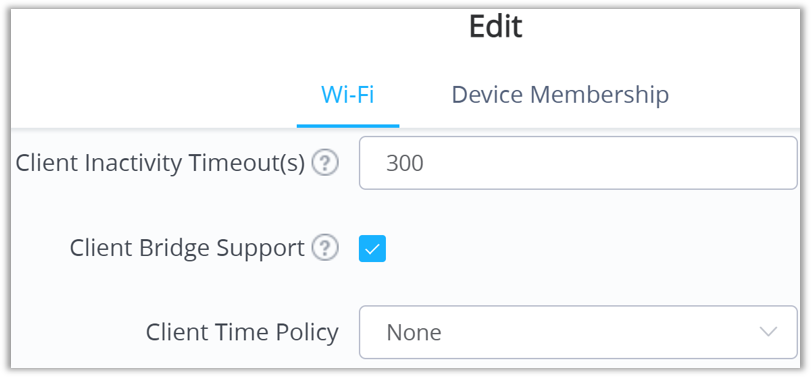
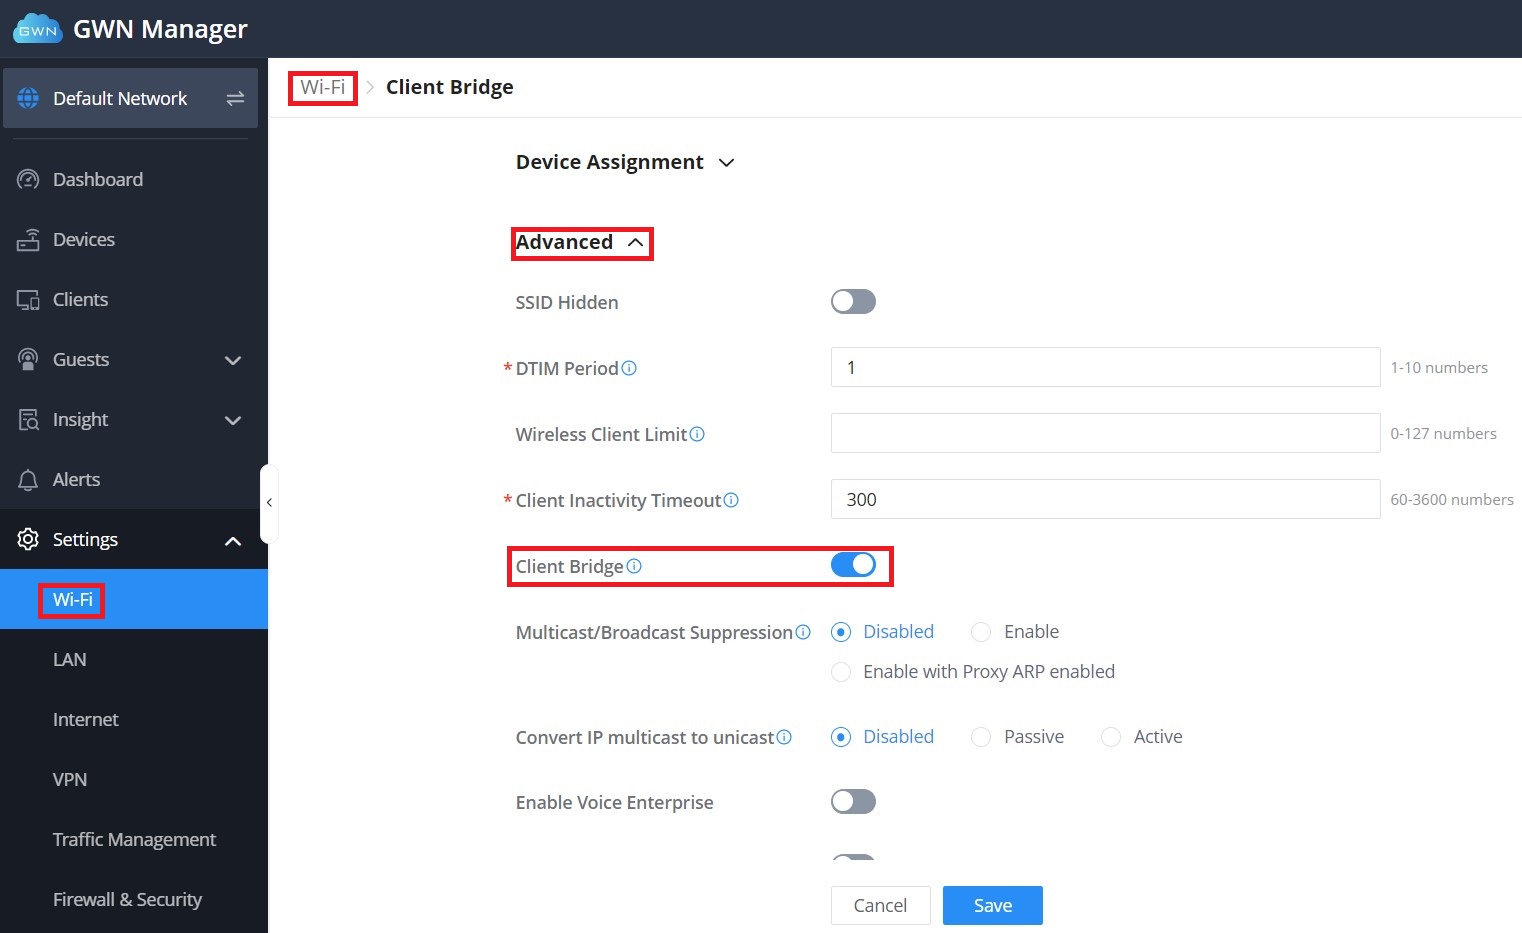
Enabling Client Bridge on SSID
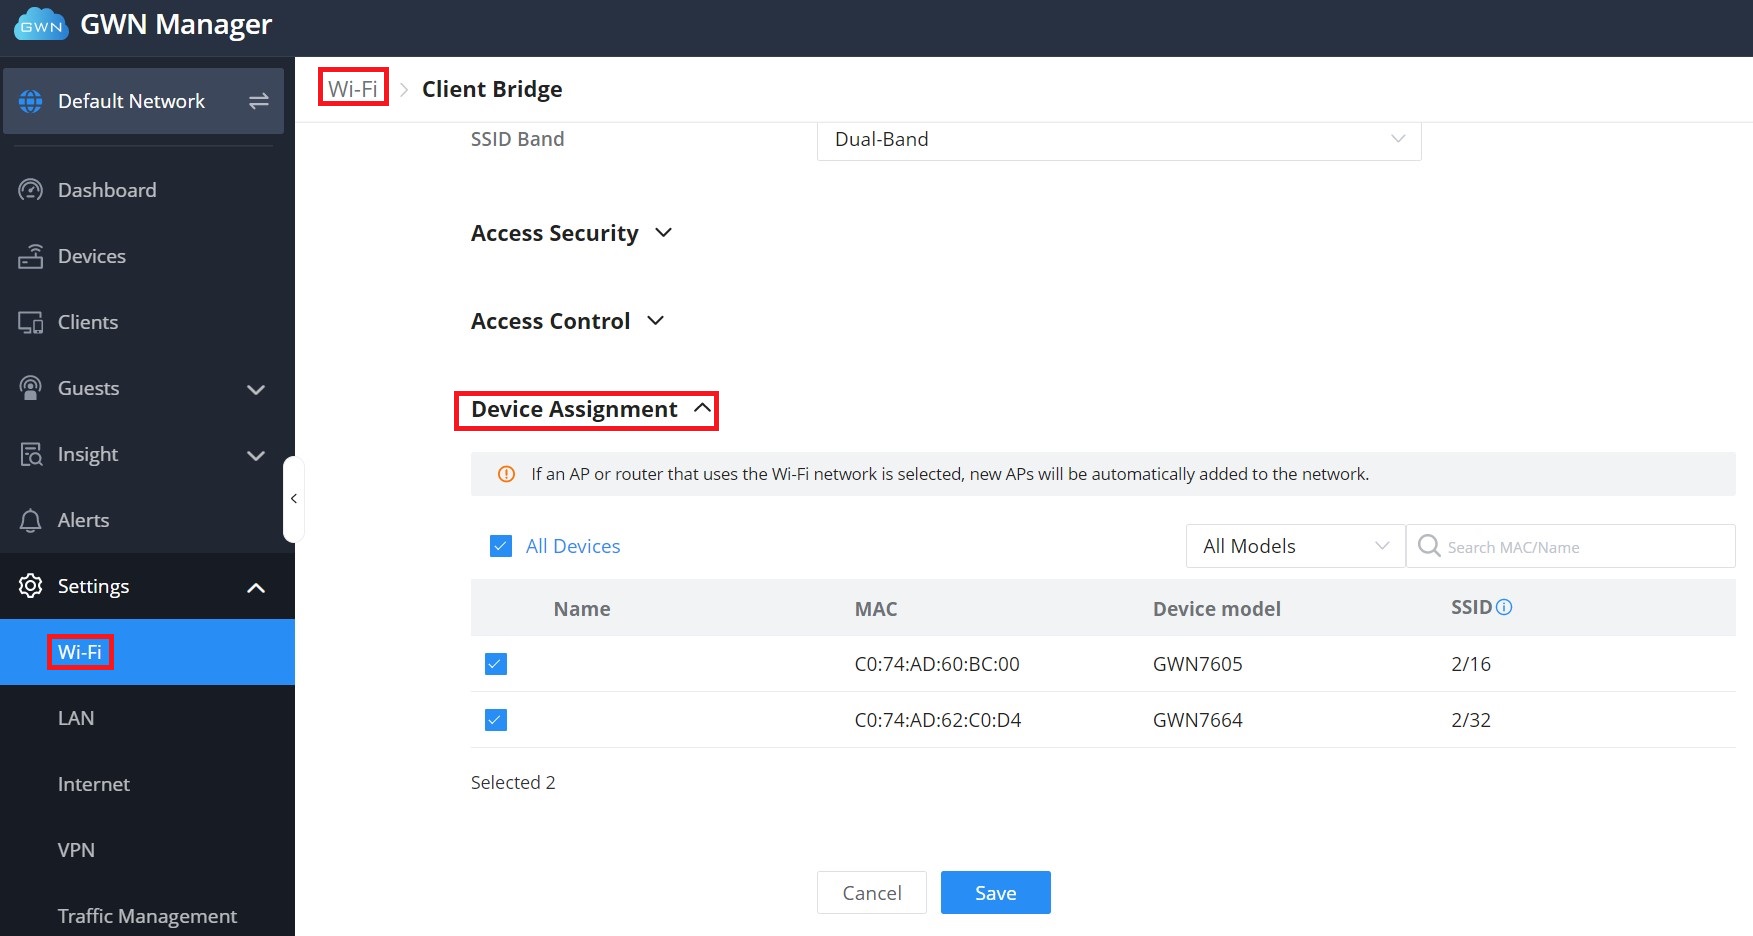
Go under the web GUI of the controller SSIDs -> Wi-Fi (Local Master) or Settings → Wi-Fi → Wireless LAN (GWN Cloud or Manager) and enable the option “Client Bridge Support”.
Please check the figures below:
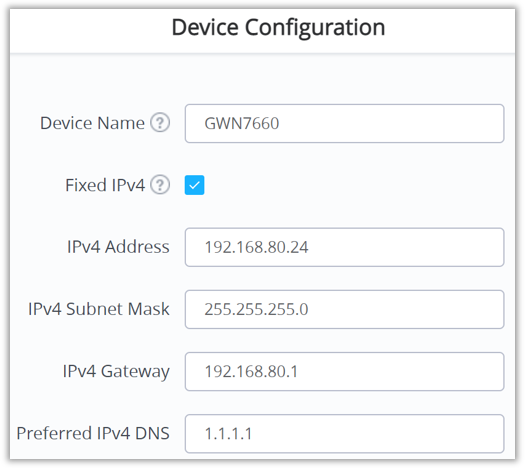
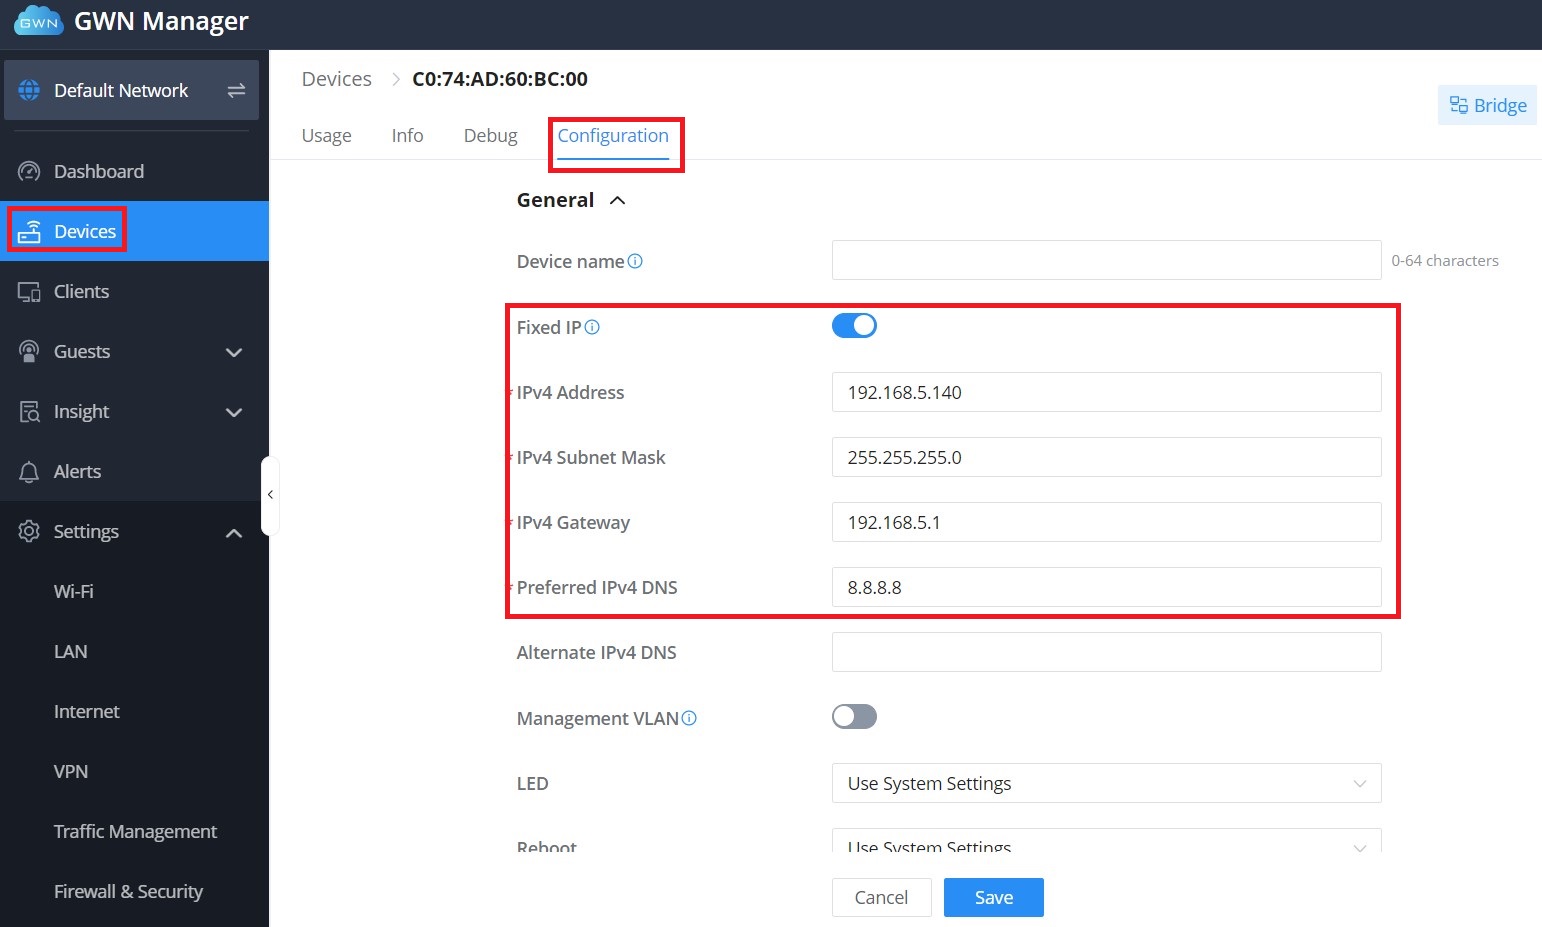
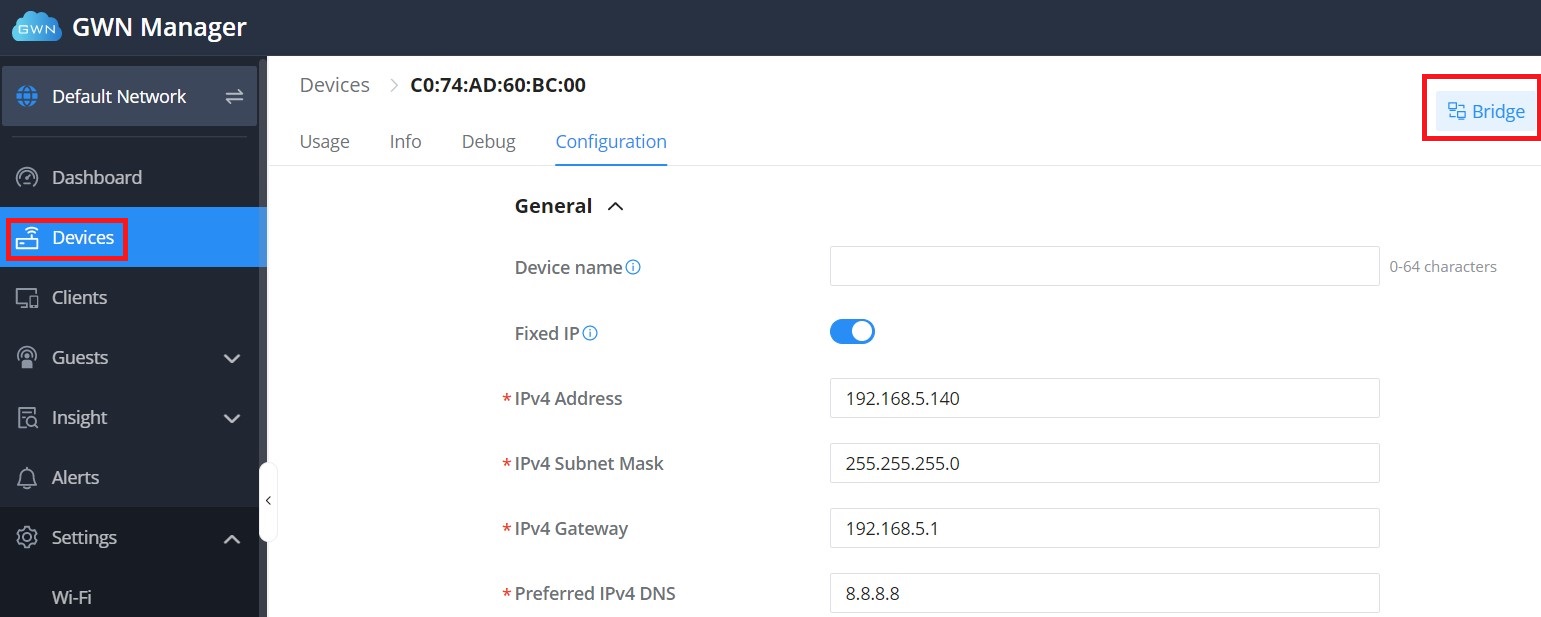
Set Fixed IP for AP
The access point that will be operating on bridge mode must be set with a fixed static IP, to do this go under Access Points (Local Master) or Devices (GWN Cloud/Manager) list then edit the desired access point and under the configuration tab, enable fixed IP and enter the subnet mask, and gateway information as shown on the below figure.
Please check the figures below:
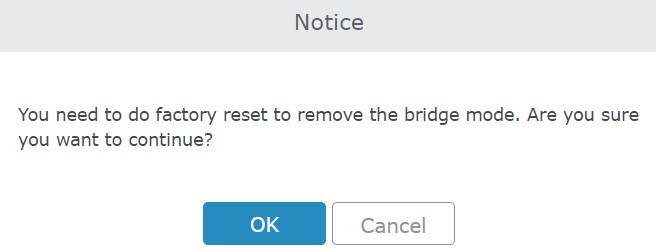
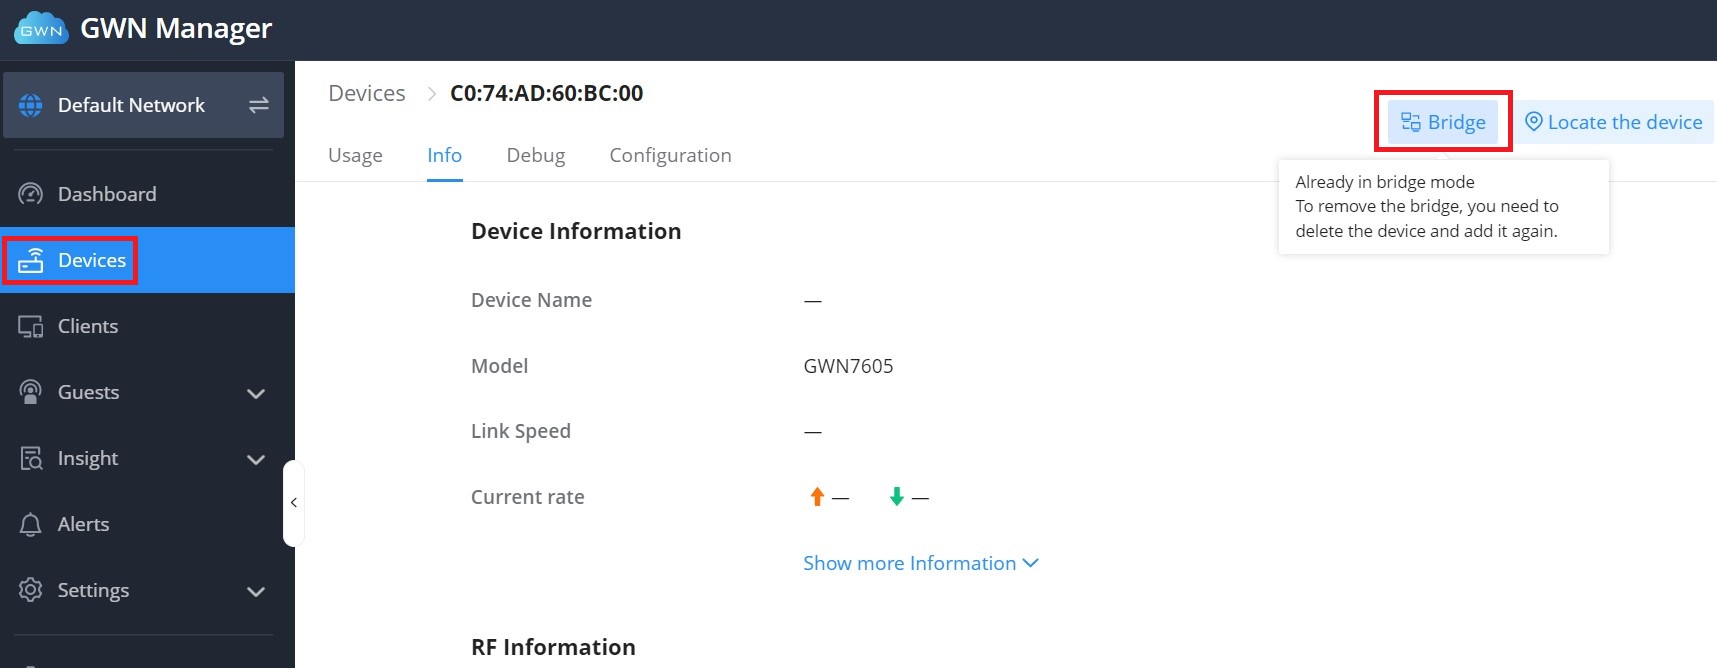
Set Access Point to Bridge Mode
- Go to Access Points and locate the slave access point to use as bridge.
- Press the icon
 next to it as shown in below screenshot.

- The following notice will be displayed as shown in next figure. Click OK to confirm.
Now that GWN access point has been set with bridge mode and is provisioned with all necessary Wi-Fi settings, we unplug it from the central network and install it on the remote location to bridge the Ethernet segment over Wi-Fi back to the central network 192.168.1.0/24.
Verification
For verification purposes, users could go under Devices (GWN Cloud/Manager) or Access Points → Status (Local Master) and check the status or info of the bridged AP(s), see the below screenshots.
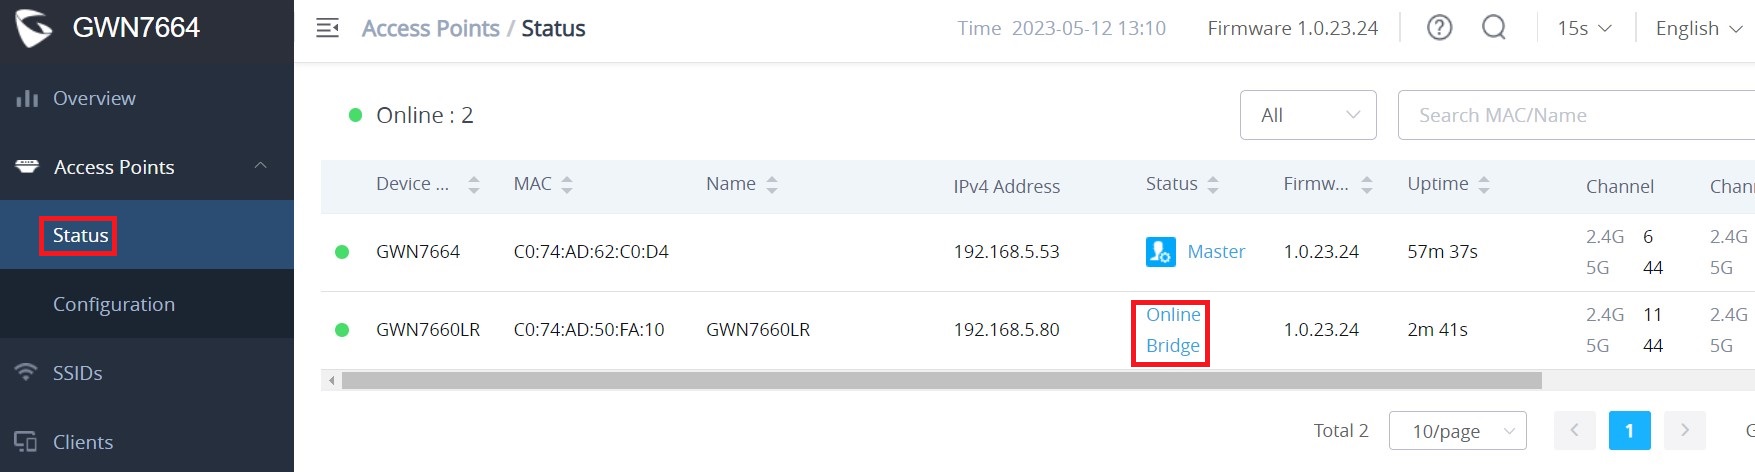
Also, once the access point has fully booted and online (steady green) it will be joining the Wi-Fi and bridge the remote wired device to the central network, which will operate as if they were connected directly to the central network resources (DHCP, DNS, MAIL, Gateway ….).