In this guide we will cover the Firewall rules for inbound and outbound traffic with which we can configure a set of rules that will either deny or allow it. With the firewall rule. This provides a centralized management for the entire network flow by selecting which SSID to have a rule or a set of rules applied on one or multiple SSIDs
This guide will also include the Network Address Translation (NAT) configuration on GWN Access points, so in NAT mode, clients will get the IP addresses from the specified NAT pool, while the communication and clients connecting to different APs are isolated from each other.
FIREWALL
A firewall is a set of security measures designed to prevent unauthorized access to a networked computer system. It is like walls in a building construction, because in both cases their purpose is to isolate one “network” or “compartment” from another.
To protect private networks and individual machines from the dangers of Internet, a firewall can be employed to filter incoming or outgoing traffic based on a predefined set of rules called firewall policies.
Traffic Rules: Used to control incoming/outgoing traffic and taking actions for specified rules such as Permit and Deny.
Outbound Rules
This section allows user to control the outgoing traffic from clients connected to certain SSIDs or all SSIDs by manually setting up the policies to either deny or permit the traffic based on protocol type and by specifying destinations.
To create a new outbound rule:
-
Click on
 to add a new rule.
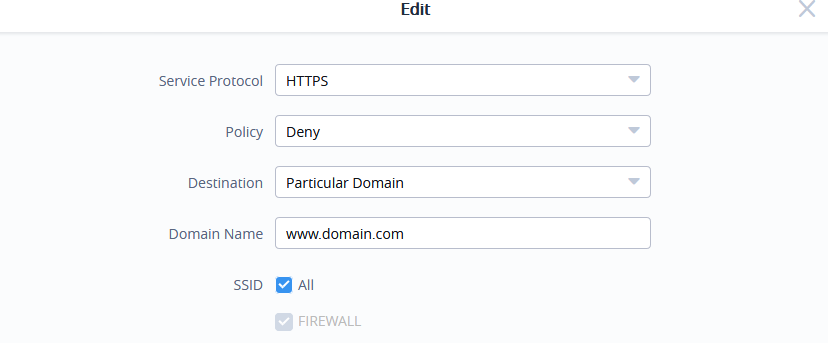
- Select the Service Protocol to apply the rule on like ICMP, HTTP… Any or Custom.
- Set Policy to either Permit or Deny.
- Select Destination type whether Particular Domain, IP Address , Particular Network or All.
- Select the SSID(s) to have the rule applied on.
The following table lists and describes the available options:
Field | Description |
Service Protocol | Select type of traffic to be affected by the outbound rule like ICMP, HTTP, HTTPS, DNS, DHCP or Any as well as Custom. When set to Custom, user could enter the following: Protocol: TCP or UDP Port: define the port used by this protocol. |
Policy | Either select to Permit or Deny outbound traffic. |
Destination | Select either:
|
SSID | Select one or multiple SSIDs to apply the rule on. |
The Outbound Rules will be displayed as the figure below:

- To edit the Outbound rule, click on
 to change Service protocol, Policy etc.
 - To change the priority of rules, user needs to click on to
 change the position then click Apply.
 - To delete a rule user needs to click on
 .
.
Inbound Rules
User can define inbound rules by setting up actions to either block or accept incoming from specific and/or to a specific destination.
To create a new inbound rule:
-
Click on
to add a new rule.
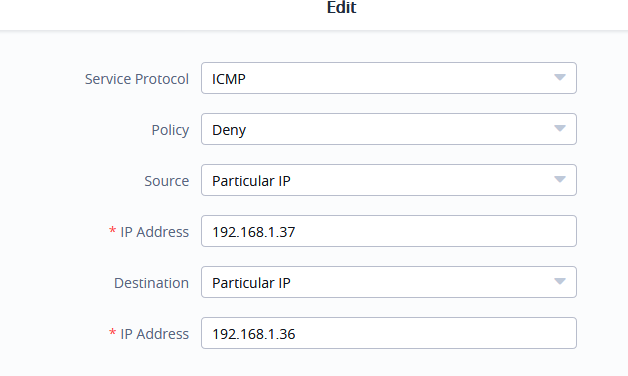
- Select the Service Protocol to be apply the rule on like ICMP, HTTP, Any, Custom...
- Set Policy to Permit or Deny.
- Select Source to either All, Particular IP, or Particular Network. (IP field must be enter if selecting Particular IP, additionally Netmask field must be entered if selecting Particular Network).
- Select Destination to either All, Particular IP, Particular Domain or Particular Network. (IP field must be enter if selecting Particular IP, additionally Netmask field must be entered if selecting Particular Network, while Domain Name must be entered if selecting Particular Domain).
The following table lists and describes the available options:
Field | Description |
Service Protocol | Select type of traffic to be affected by the inbound rule like ICMP, HTTP, HTTPS, DNS, DHCP or Any as well as Custom.
|
Policy | Either select to Permit or Deny inbound traffic. |
Source | Specify the source type for the rule. Select either:
|
IP | Enter the source IP address. This field is required when Source is set to Particular IP or Particular Network. |
Netmask | Enter the source network mask. This field is required when Source is set to Particular Network. |
Destination | Specify the destination type for the rule. Select either:
|
IP | Enter the destination IP address. This field is required when Destination is set to Particular IP or Particular Network. |
Domain Name | Enter the destination domain name. This field is required when Destination is set to Particular Domain. |
Netmask | Enter the destination network mask. This field is required when Destination is set to Particular Network |

- Click on to add a new rule.
- To edit an Inbound Rule, click on to change Service protocol, Policy etc.
- To change the priority of rules, user needs to click on to change the position then click Apply.
- To delete a rule user needs to click on .
NAT
GWN76xx NAT feature defines an address pool from which the Wi-Fi clients will acquire their IP address so that the access point acts as a lightweight home router.
Notes:
- This option cannot be enabled when Client Assignment IP is set to Bridge mode.
- This option is not supported in GWN7610.
In order to use the lightweight NAT service of the GWN76XX AP, please proceed as follow:
-
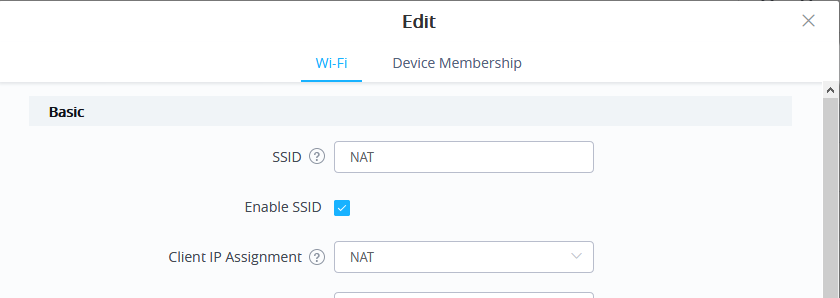
Access SSID page and click on
to create a new SSID.
- In the Client IP Assignment select NAT option and configure the rest of the parameter like password and Access points involved.
- Then proceed from Service → DHCP Server → NAT Pool, in order to configure the Gateway, with which the client will communicate with along with DHCP Server Subnet Mask, DHCP Lease Time and DHCP Preferred/Alternate DNS:
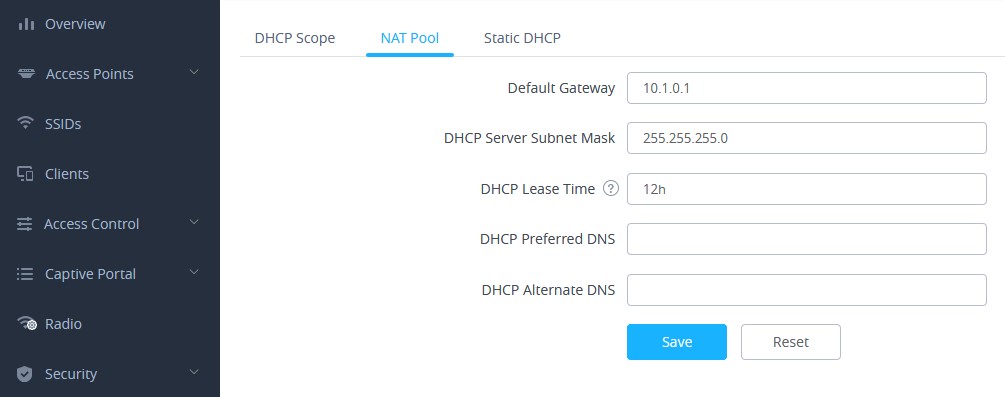
Field | Description |
Default Gateway | Set the gateway IP address. Note: The client’s IP range will be on the same segment as the gateway’s. |
DHCP Server Subnet Mask | Set the gateway mask. |
DHCP Lease Time | Set the DHCP Lease time. |
DHCP Preferred DNS | Set the preferred DNS for DHCP |
DHCP Alternated DNS | Set the alternated DNS for DHCP |
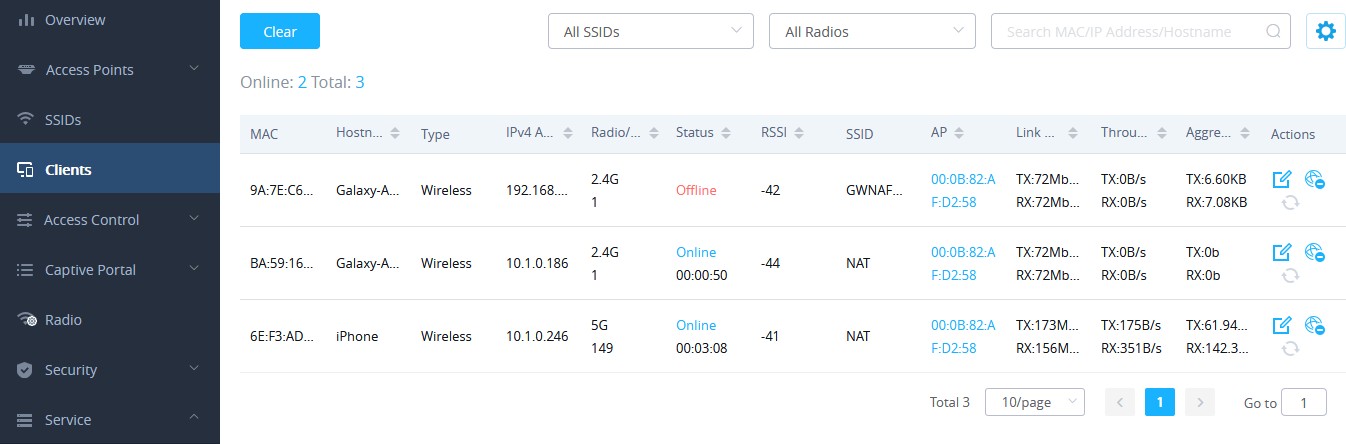
- Proceed from Clients page to be informed on the IP the clients have acquired.