Grandstream GWN76xx Access points series support WiFi & LED schedulers which are two features that can help arrange on a flexible way the usage of the device based on customer’s need. Hence when it is not needed the wireless signal can be disabled based on a schedule (ex: during out of office hours, weekends …etc.).
The same goes for the LEDs scheduler feature where you have the choice between permanently disabling (turn off) LEDs of the AP or schedule specific time when they will be turned on. This can be helpful for example when the LED lights are disturbing during some period of times or not needed at all.
LED or WiFi Scheduling configuration can be done from either GWN7000 acting as controller for GWN76xx access points or on Master GWN76xx access points directly. In both cases, the configuration will be reflected on paired access points.
This guide covers basic overview and usage of these features and steps needed to configure and activate the schedule on either GWN76XX access points or GWN7000 router.
GWN DEPLOYMENT AND CONFIGURATION
Easy Provisioning for Mass Deployment
The GWN comes with a built-in controller in order to use it either on a standalone deployment or in mass deployment environment where the configuration can be done either from one GWN76XX acting as a controller for the rest of the APs or you can configure all your AP from the GWN7000 router which then will push the configuration to all the Access points via the LAN connection.
For instance, when we use the WiFi or LED schedule features, then the configuration should be done only from the master Access point or the GWN7000 router and it will be reflected on all the rest of the access points automatically via provisioning process.
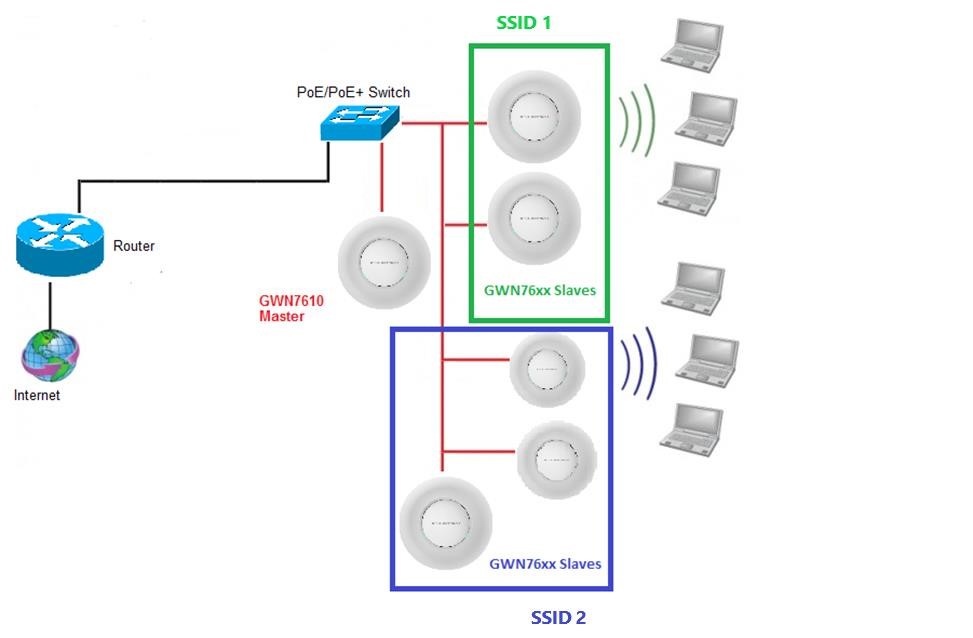
For the rest of this guide we assume that you are familiar with Master/Slave configuration and deployment scenario, and for any further details please refer to the following guide:
GWN76XX master Slave architecture guide
Accessing the Web GUI
The GWN7XXX has embedded Web server which responds to HTTPS GET/POST, this is mainly used to provide an easy and organized web GUI configuration interface for admins & users. Note that access to GWN76XX web GUI is not possible if it has been paired with another GWN76XX AP acting as master or a paired with a GWN7000 router.
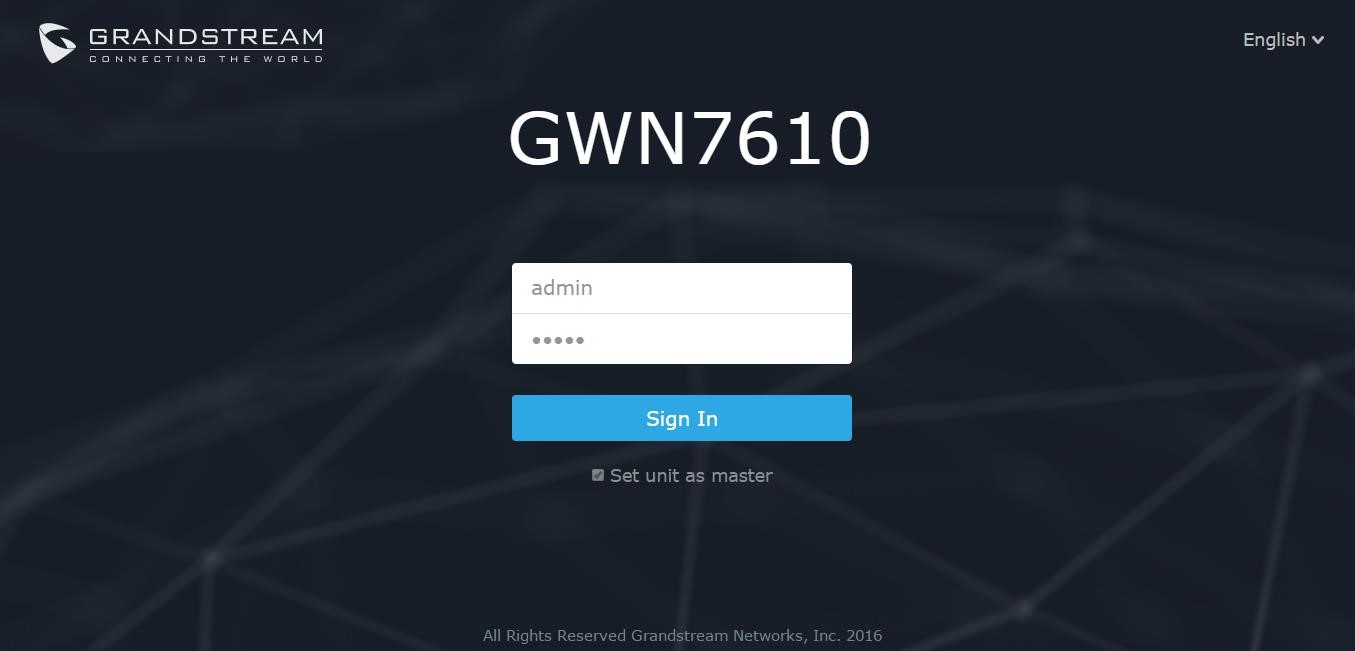
To access the Web GUI:
- Make sure to use a computer connected to the same local network as the GWN7610.
- Ensure the device is properly powered up.
- Open a Web browser on the computer and type in the URL using the IP address which you can get from your DHCP bindings, or use a scanner with the following format: https://IP_Address
- Enter the administrator’s login and password to access the Web Configuration Menu. The default administrator’s username is “admin” and password the default Wi-Fi Password.
On the next parts we will go through an overview of the WiFi & LED schedule features as well as the configuration/activation steps.
WIFI SCHEDULE
Overview & Usage
The main usage of WiFi scheduler is obviously to schedule the times when the WiFi is ON or OFF, this will give the user a flexible way to control his AP. For example, in most cases the WiFi signal is no needed in out of office hours and instead of turning off the access point, the user can set a schedule based on office hours and the AP will shut down the wireless signal during out of office hours.
Another usage is to have the possibility to schedule the broadcasting of a specific SSID at one interval or time and schedule another SSID to be broadcasted on another interval time, for example: you may want to have free SSID for guest during specific periods of time and turn it off when it is not needed. This is possible with GWN since it allows the scheduling based on SSID.
Configuration Steps
WiFi schedule is based on SSID providing more configuration flexibility. If using default SSID, WiFi schedule can be configured from SSID -> WiFi settings.
The configuration can be done from either GWN7000 acting as controller for GWN76xx access points or on Master GWN76xx access points directly. In both cases, the configuration will be reflected on paired access points.
Default SSID
To configure WiFi Schedule for default SSID, follow below steps:
- Access GWN web interface.
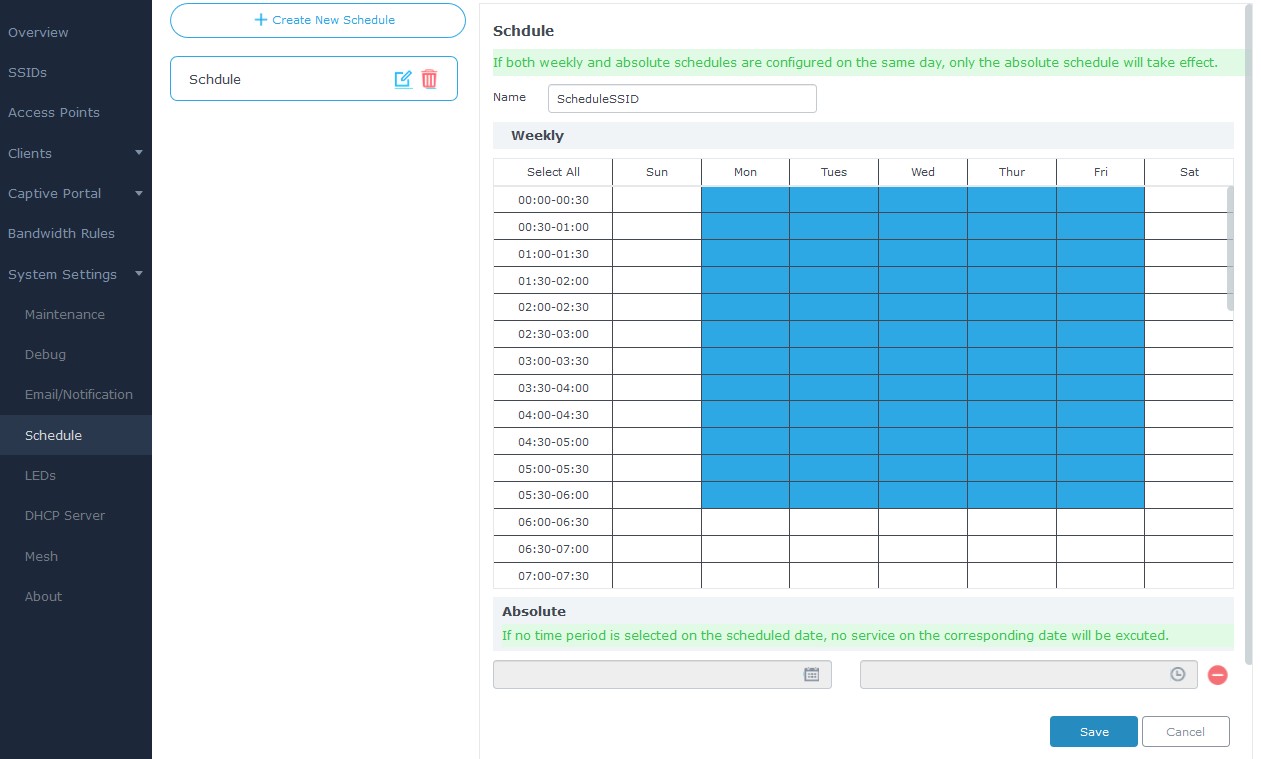
- Go to “System Settings Schedule”.
- Set the days of the week and the time frames to be applied on, as well as the date and time on which this schedule will be taking effect.
- Save and apply the settings to activate the feature.
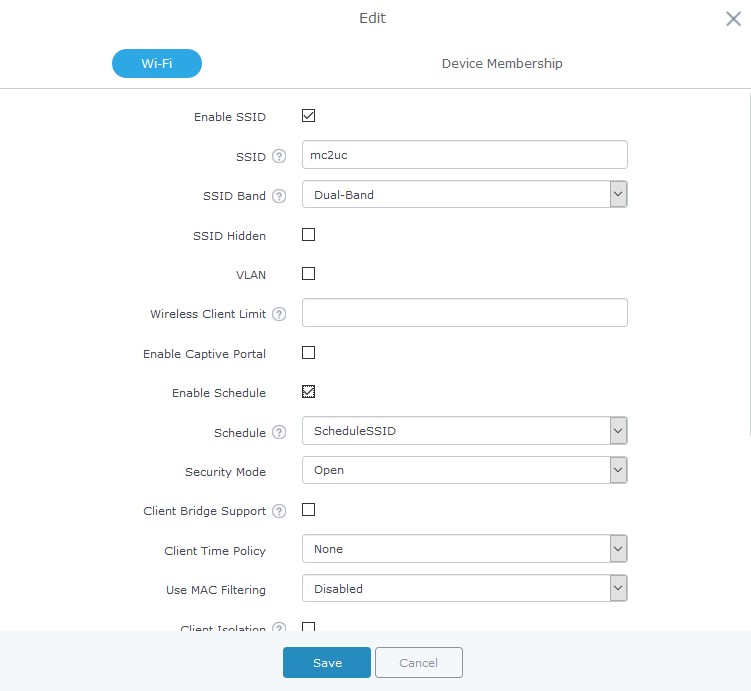
- After this access “SSIDs” page -> “SSID” -> “WiFi“
- Check option “Enable Schedule” and select the schedule you have created.
- Save and apply the settings to activate the feature.
LED SCHEDULE
Overview & Usage
Besides the WiFi scheduler, GWN76XX Access Points series support also the LED schedule feature. This feature is used to set the timing when the LEDs are ON and when they will go OFF at customer’s convenience.
This can be useful for example when the LEDs become disturbing during some periods of the day, and an illustration example would be hotel rooms where the LED lights can be annoying to clients at night but you still don’t want to shut down completely the WiFi Access point, this way the LED scheduler feature comes in handy on such scenario where you can set the timing so that the LEDs are off at night after specific hours and maintain the WiFi service for other clients without shutting down the AP.
Configuration Steps
The configuration can be done from either GWN7000 acting as controller for GWN76xx access points or on Master GWN76xx access points directly. In both cases, the configuration will be reflected on paired access points.
To configure LED schedule, follow below steps:
- Access GWN7000 router acting as controller or Master GWN76xx web interface.
- Create a new Schedule ( System Settings -> Schedule)
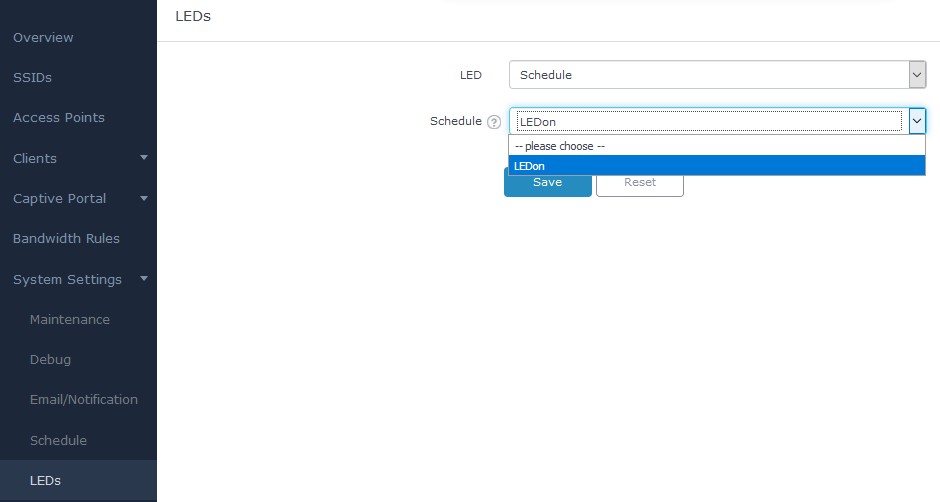
- Go to “System Settings -> LEDs”.
- Following options are available:
| Field | Description |
| LED | Configure whether to always disable/Enable the AP LED dictator or to apply a schedule. |
| Schedule | Please choose a schedule to assign to LEDs, users can configure schedules under the menu Schedule. |
- Set LED to “Schedule”.
- Select the schedule you created to be applied for the LEDs.
- Save and apply the settings to activate the feature.