
Overview
Voice Prompt Multi-Language Support
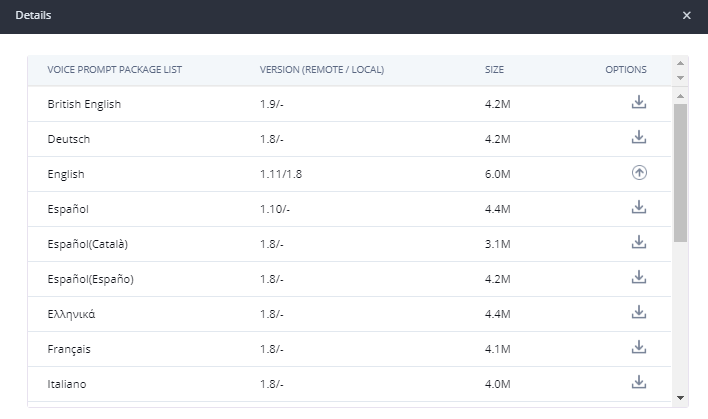
The UCM6xxx series IP PBX appliance supports system voice prompt in multiple languages. There are 17 languages currently provided and maintained by the UCM6xxx series.
- English and Chinese are built in with the firmware.
- The other languages can be downloaded and directly installed to the PBX.
- All the languages can be upgraded on the PBX.
The supported languages are:
- British English
- Deutsch
- English
- Español
- Español(Català)
- Español(Españo)
- Eλληνικά
- Français
- Italiano
- Nederlands
- Polski
- Português
- Pу́сский
- Svenska
- Türkçe
- עברית
- العربية
- 中文
Customize Voice Prompt
Besides the multi-language voice prompt support built-in with the firmware, the voice prompt can also be customized into other languages or modified to replace the current ones. In order to do this, users will need to record the voice prompt in the correct format, properly package the audio files and then upload it to the PBX web GUI. Once the language package is uploaded successfully, users will be able to select the language to be used for the voice prompt.
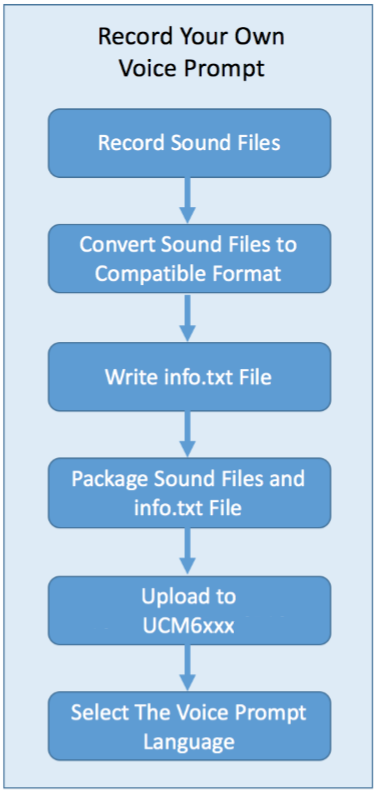
The following figure shows the process to customize voice prompts using recorded sound files.
Package Content
The UCM6xxx series Voice Prompt Customization Package is available at “Download Voice Prompt Customization“, and contains the following items:
- ucm_voice_prompt_customization_guide.pdf
This document describes the process to customize the voice prompts for the UCM6xxx series from preparing a recorded audio file to uploading the package.
- ucm_voice_prompt_list.xlsx
This Excel file lists all the English voice prompt file names and voice prompt text for self-recording or translating purposes.
- ucm_voice_prompt_file_list_readme.txt
This is a readme file for the ucm_voice_prompt_list.xlsx.
- info.txt
This is a sample info.txt file in the correct format for package uploading. It is recommended to directly use this file with your modified text. Please keep the format and the number of lines in this sample as it is when modifying the txt file.
Record Your Own Voice Prompt
This section describes how to prepare your own voice prompt file, convert it to a compatible format, package the language files and then upload it to the UCM6xxx series.
Record Sound File
- In the provided voice prompt package, find the Excel file ucm_voice_prompt_list.xlsx. It contains the voice prompt text for all the English sound files used on the UCM6xxx series. Please refer to the ucm_voice_prompt_file_list_readme.txt for more information about the list.
- Record the voice prompt according to the voice prompt text information. Users could choose their own recording software or tools as preferred. Please follow the instructions below regarding the correct file name and format to make sure the recorded file can be accepted and played by the UCM6xxx series.
- The recorded file name must be consistent with the name defined for the voice prompt text in ucm_voice_prompt_list.xlsx.
- It is recommended to record the sound file in .wav format (16bit 48,000Hz) or any other down sampled codec (such as 16bit/8,000Hz wav, u/a law, vox, MP3, G-711, and etc).
Convert Sound File
Usually, the recorded sound file cannot be directly used by the UCM6xxx series. Users would need to convert the sound file to make it compatible with the PBX system before uploading, using audio processing software tools. The recommended format for the compatible sound file format is 8KHz Wav, GSM, Signed Linear, G.729, or uncompressed alaw/ulaw. For example, the following online converter provided by Digium, Inc can be used to convert the sound file: https://my.digium.com/en/products/ivr/audio-converter-iframe/index.php
Note: Scroll down to the bottom of the page to see the converter options.
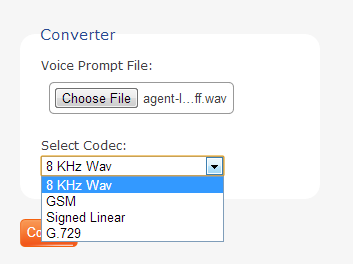
Once the file is converted successfully, download and save it to your PC. Then rename it to be consistent with the name defined in ucm_voice_prompt_list.xlsx. Once done, put it into the sound file folder.
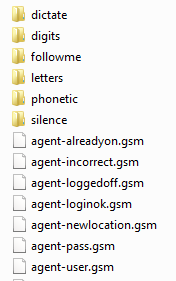
Package Sound Files and info.txt
- All the converted sound files and folders should be put together under the same directory. For example, all the following files and folders are put into a folder called “es_new“.
The sound file folder needs to be named with a specific prefix for each supported language. Please see those languages listed in the following table.
Language | Prefix |
British English | en_GB |
Deutsch | de |
English | en |
Español | es |
Español(España) | es_es |
Eλληνικά | gr |
Français | fr |
Italiano | it |
Nederlands | nl |
Polski | pl |
Português | pt |
Pу́сский | ru |
Svenska | se |
Türkçe | tr |
עברית | he_HE |
العربية | ar |
中文 | zh |
This is to ensure the pre-defined grammar/syntax in the software side for each language can be applied. Otherwise, some of the voice prompts (usually related to date, number and etc) might not be played with correct syntax.
The prefix naming rule works this way:
- If you would like to customize only a few prompts for a specific language, please name the folder starting with the prefix. For example, a new Spanish voice prompt folder should be named as “es_xxx” where “es” is the prefix and “xxx” is any string if you would like to use for identification purpose. In this case, the customized prompt will be played as the file you uploaded, and the rest of the prompts will be played in that language as defined in prefix, i.e., Spanish in this example.
- If the folder is named as “es” only, the original complete Spanish voice prompt package will be replaced. The system would expect the uploaded package to have complete voice prompt files. For any missing files that this Spanish package doesn’t have, it will be played in English instead.
- Customized language prompt folder will be played first. For example, if “welcome.gsm” file is upload in the new prompt folder, UCM6xxx will firstly search in the “es_xxx” folder. If the file cannot be found, it will search original “es” folder. If none of the folders have the “welcome.gsm” file, the English prompt will be played.
- If the file name is not using the pre-defined prefix/string or the language you would like to use is not listed in the table, the voice prompt can still be played and it will be played with the English grammar/syntax.
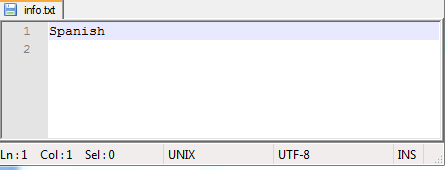
- Open the sample info.txt file and put your language name in there with correct format (2 lines, Encode UTF-8, UNIX). The purpose of the info.txt is to provide the displayed name for the language selection on the UCM6xxx series web GUI.
- The content of the txt file is the language name to be displayed on the web GUI for users to select once the language package is uploaded to the UCM6xxx. Please do not include any extra text information except the display name. The following picture shows the content of the sample info.txt file using Notepad++. Link for Notepad++: http://notepad-plus-plus.org/
- Put the info.txt file and the voice prompt folder (folder “es_new” in the example) into the same directory. Then compress them together into one single package.

- Please make sure info.txt and folder “es_new” are directly under es_new.zip.
The package structure should be as below. Otherwise, the UCM6xxx will consider the package invalid.
[Compressed Package]
– [Voice Prompt folder] which contains all the sound files and folders
– [info.txt]
- The supported package format are tar.bz2, tar.gz, tar.Z, tgz, tar, bz2, zip, and gz.
- The supported package size is under 20M after compressing.
Upload Voice Prompt Package to UCM6xxx Web GUI
- From your PC’s web browser, log into the UCM6xxx web GUI as admin and go to PBX Settings 🡪 Voice Prompt.
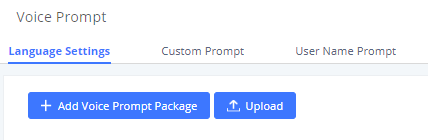
- Click on “Upload” and select the compressed language package from your local PC.
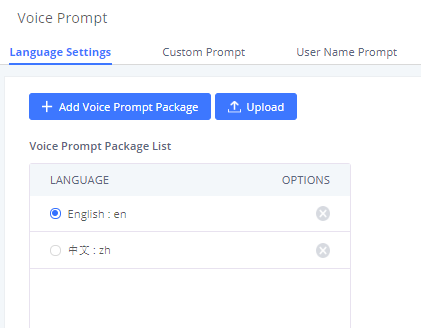
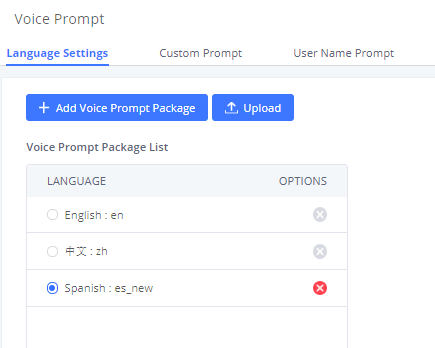
- Once successfully uploaded, the new uploaded language will be added to the Voice Prompt Package List.
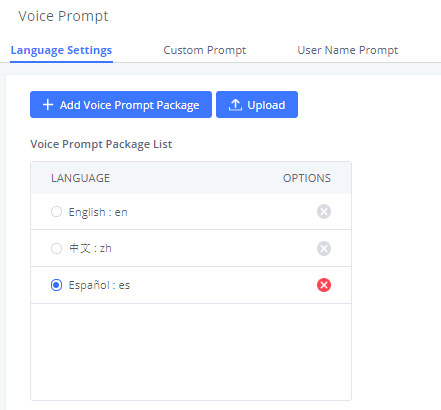
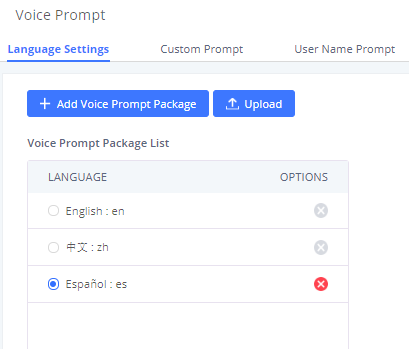
- Please click “Add Voice Prompt Package” to download the original Spanish Language in pop-out window. By doing this you can use default Spanish voice prompt files which are not included in your uploaded package.
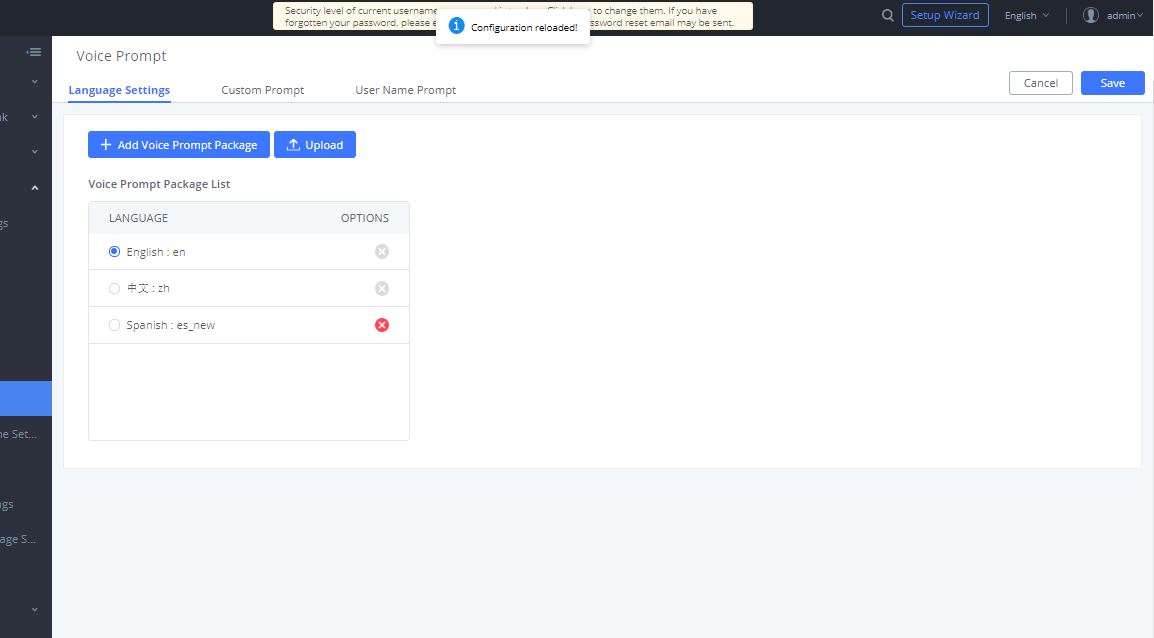
- Select your customized language in the Voice Prompt Package List. See figure below. Then click on “Save”.
- Click on “Apply Changes” on the upper right of the web page to take effect.
The customized voice prompt package is now ready to be used on the UCM6xxx.
* Asterisk is a Registered Trademark of Digium, Inc.