OVERVIEW
This guide provides detailed instructions for using the AI Meeting Transcription and Summary feature on the Grandstream IP PBX. This feature processes meeting audio to generate a real-time transcript visible to all participants in the Wave client. After the meeting ends, the AI automatically creates a concise summary, highlighting key discussion points and action items. Both the full transcript and the summary are saved and associated with the meeting record for future reference.
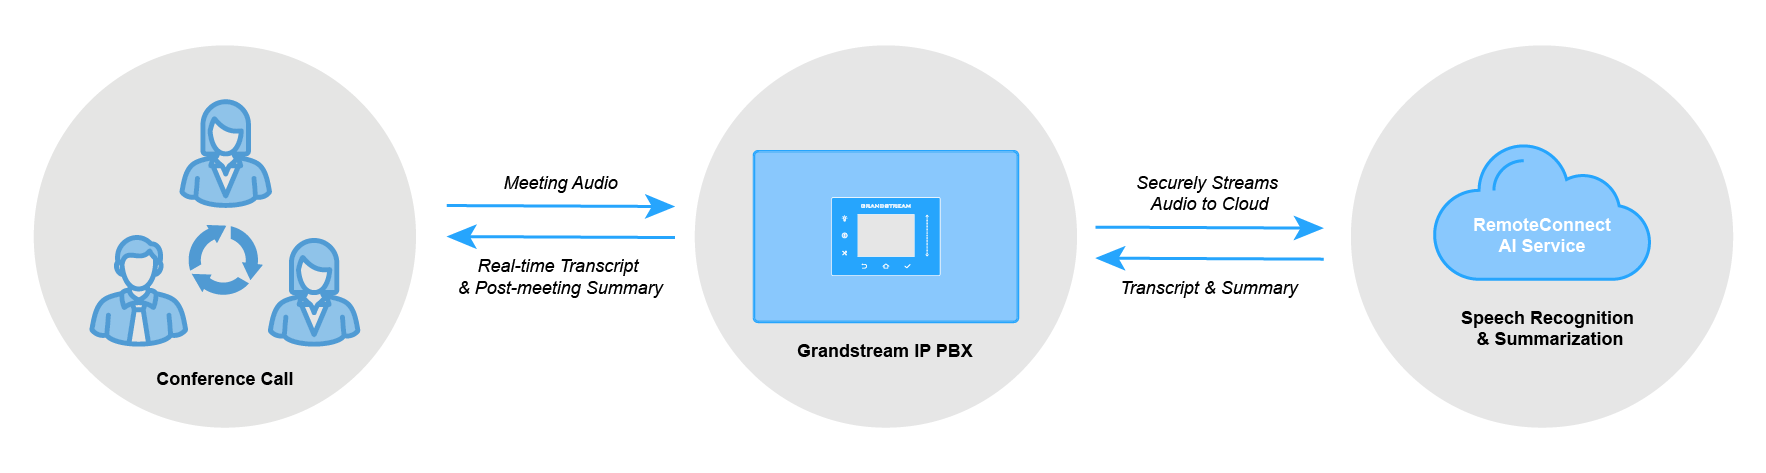
This feature is available for the following meeting types:
- Public Meeting Rooms: Permanent rooms that participants dial into.
- Instant Meetings: Meetings started immediately from the Wave client.
- Scheduled Meetings: Meetings scheduled from the PBX Web Portal or Wave Desktop.
PBX CONFIGURATION
This section covers the administrative steps required to configure the AI Meeting Transcription and Summary feature on the PBX.
The feature must first be enabled at the system level and assigned to the desired extensions:
- Log in to the PBX web portal as an administrator.
- Navigate to Integrations→AI Settings.
- Enable the AI Meeting Transcription and Summary feature.
- In the Extension Range parameter, select whether this feature applies to:
- All: The feature is available to every extension on the system.
- Selected: The feature is only available to extensions specifically selected from the list.
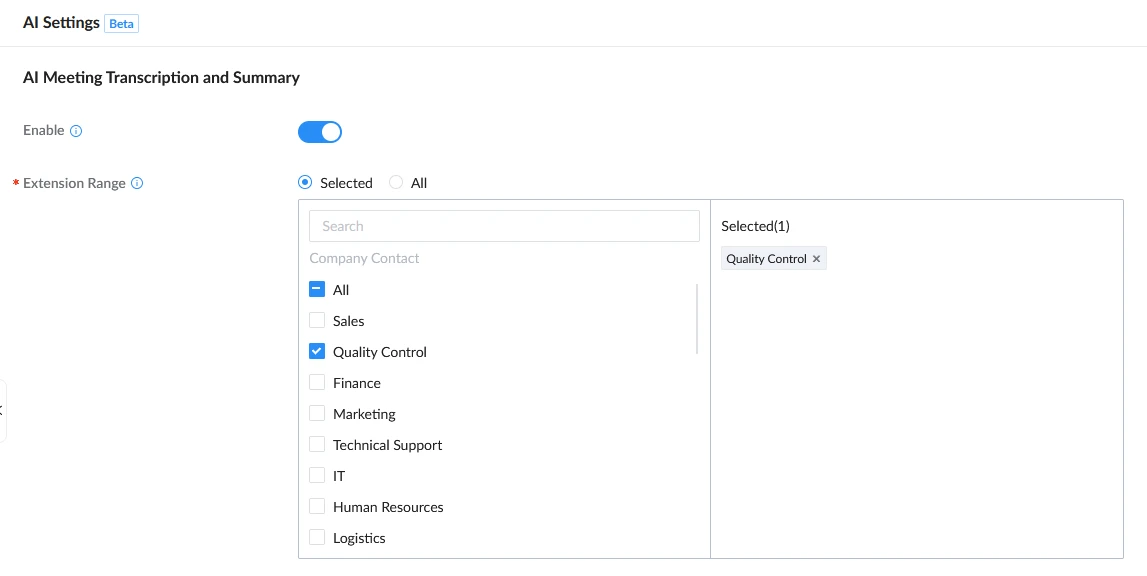
- Click Save and Apply to confirm the changes.
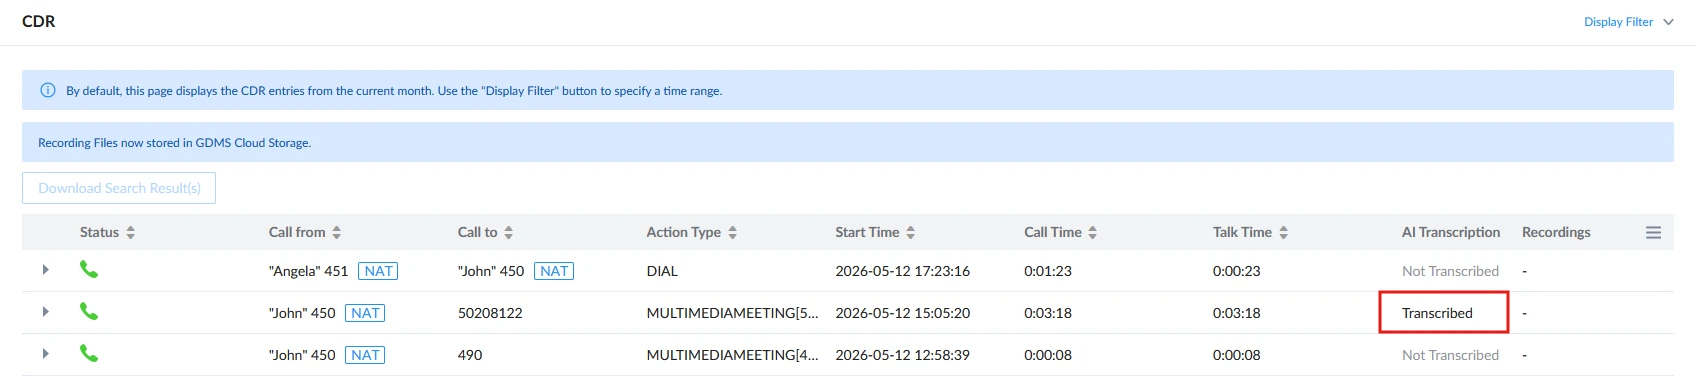
Administrators can identify transcribed meetings from the PBX CDR page as shown below:
USER CONFIGURATION
Users with the appropriate permissions can enable transcription for meetings in the following ways.
Enable Transcription When Scheduling a Meeting
When scheduling a meeting from either the PBX Web Portal or Wave Desktop, transcription can be enabled at the time of scheduling so that it starts automatically when the meeting begins.
From the PBX Web Portal
- Log in to the PBX web portal as an administrator.
- Navigate to Basic Call Features→Multimedia Meeting→Meeting Schedule.
- Click Schedule Meeting, or click the Edit icon on an existing scheduled meeting.

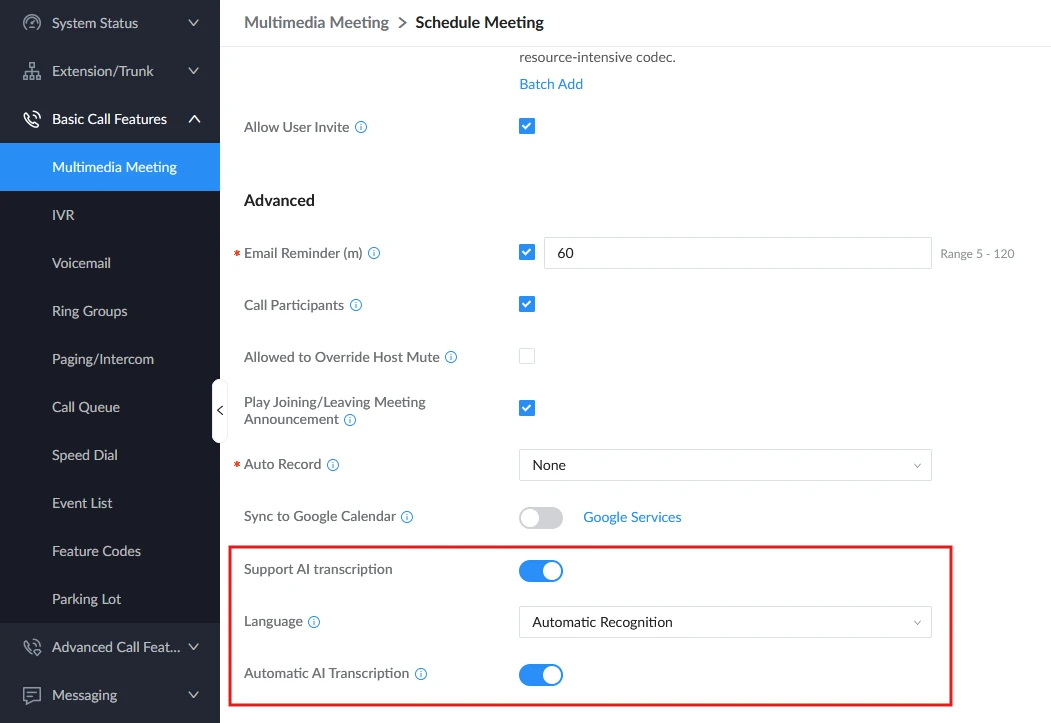
- In the meeting settings, locate the Support AI Transcription option and enable it.
- Under the Advanced section, configure the following AI transcription fields:
- Support AI Transcription: Enable this toggle to allow transcription for this meeting.
- Language: Select the language recognition behavior for this specific meeting.
- Automatic AI Transcription: Enable this toggle if you want transcription to start automatically when the meeting begins. If left disabled, transcription can still be started manually during the meeting.
- Complete the remaining meeting details and click Save to confirm.
From Wave Desktop
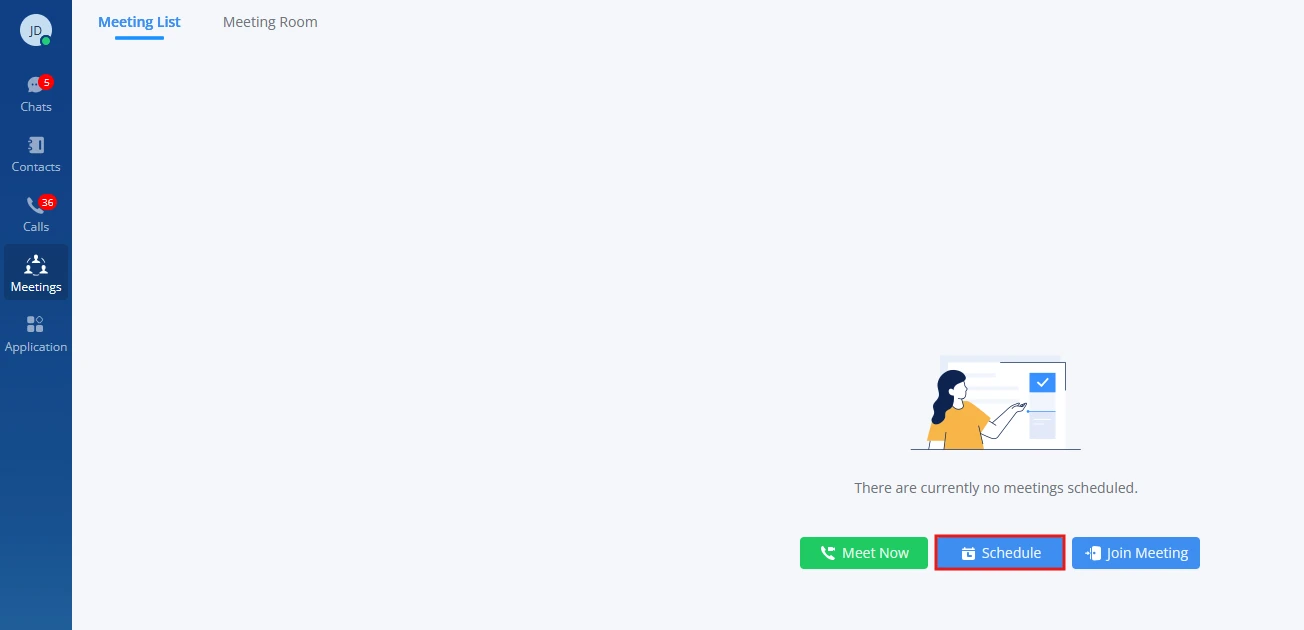
- Open the Wave Desktop application and navigate to the Meetings section.
- Click Schedule Meeting to create a new meeting.
- In the meeting creation dialog, locate the Automatic Voice Transcription checkbox and enable it.
- Select the desired language from the language drop-down.
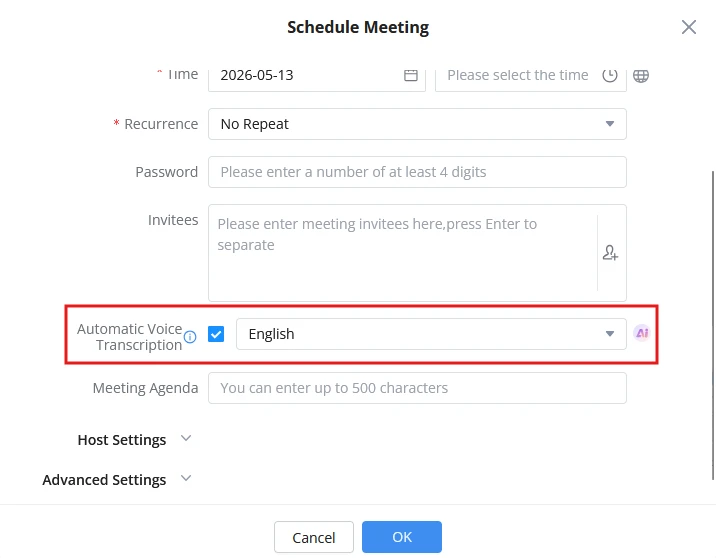
- Fill in the remaining meeting details and click OK to confirm.
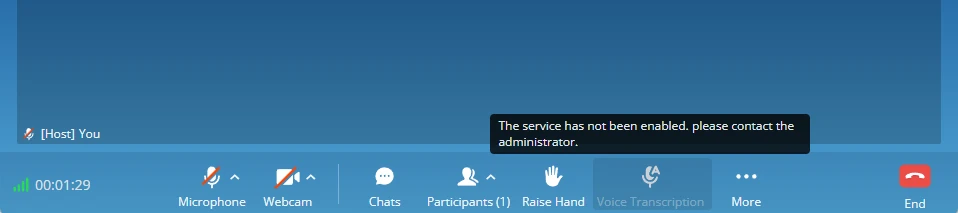
Enable Transcription During a Live Meeting
For public meeting rooms and instant meetings, or if transcription was not enabled at scheduling time, users can manually start transcription during an ongoing meeting from the Wave Desktop client:
- During an active meeting on Wave, locate the meeting control toolbar at the bottom of the meeting window.
- Click the Voice Transcription button, represented by a microphone icon.
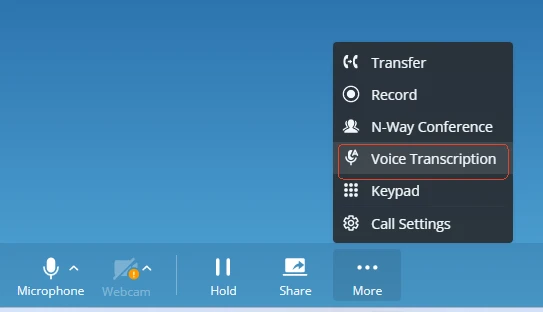
- A pop-up window will appear prompting you to select the transcription language for this specific meeting.
- Choose the desired language option. Click the Enable Voice Transcription button to begin transcription.
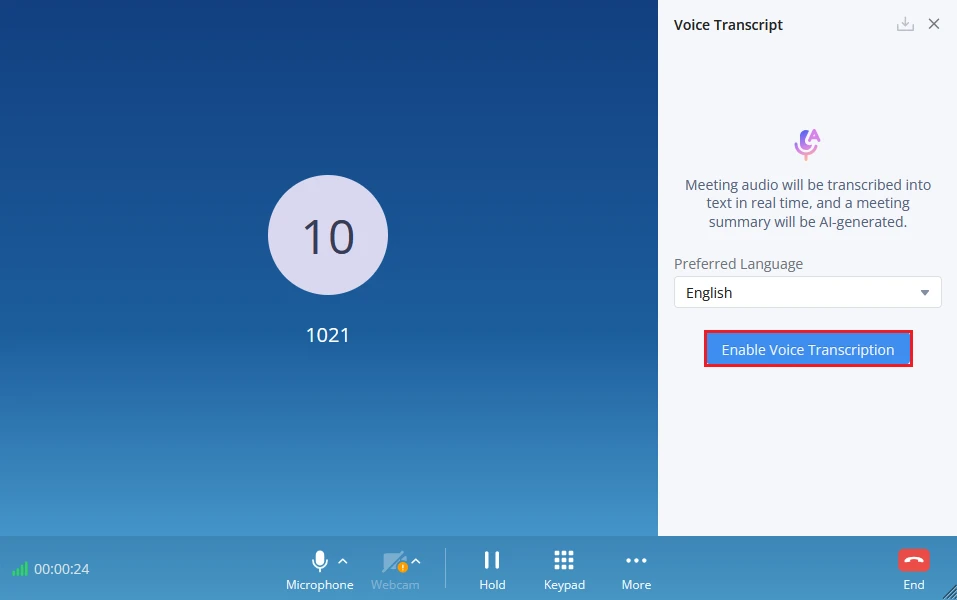
- Once enabled, a real-time transcript will appear on your screen. All participants on the call will be able to view the live transcription.
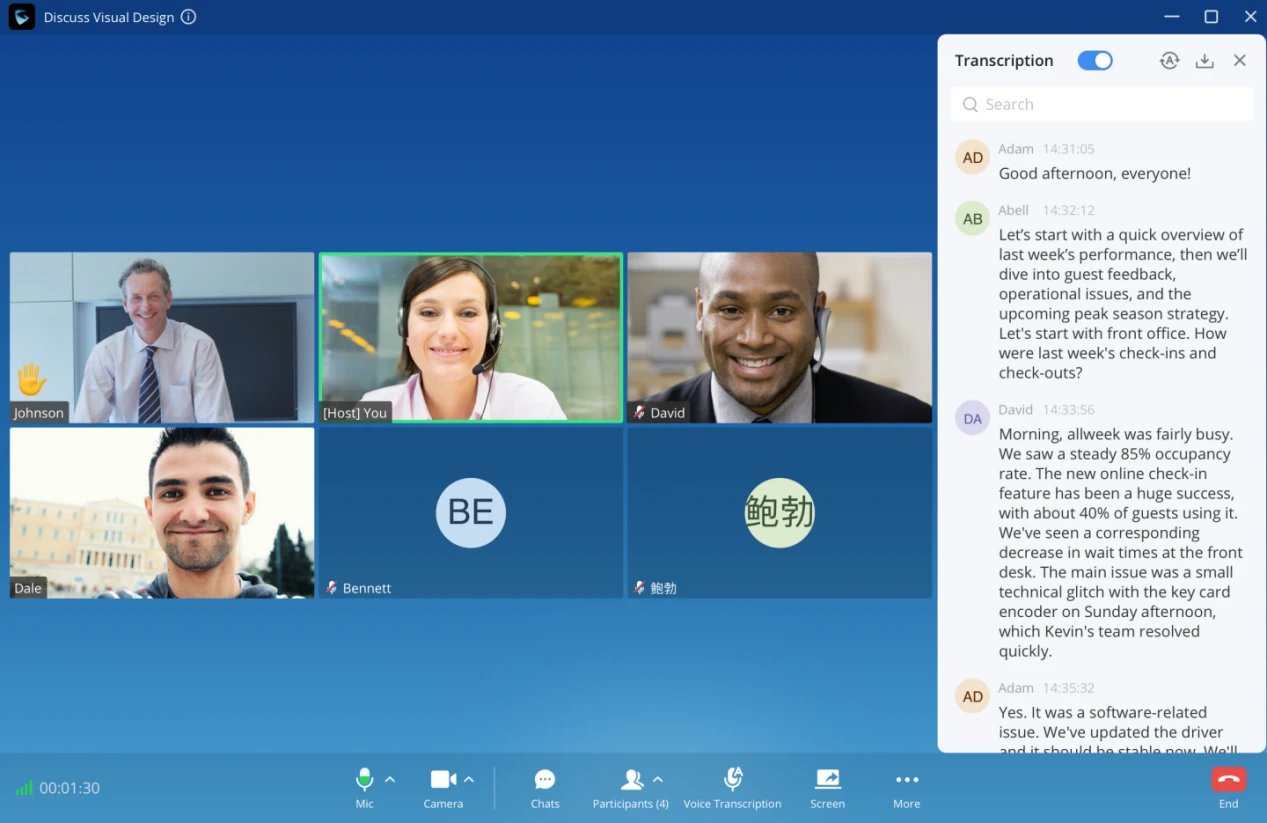
Stop Transcription During a Meeting
If you wish to stop transcription before the call ends, please refer to the steps below:
- During the active meeting, return to the Voice Transcription window.
- Use the Voice Transcript toggle to stop the real-time transcription.
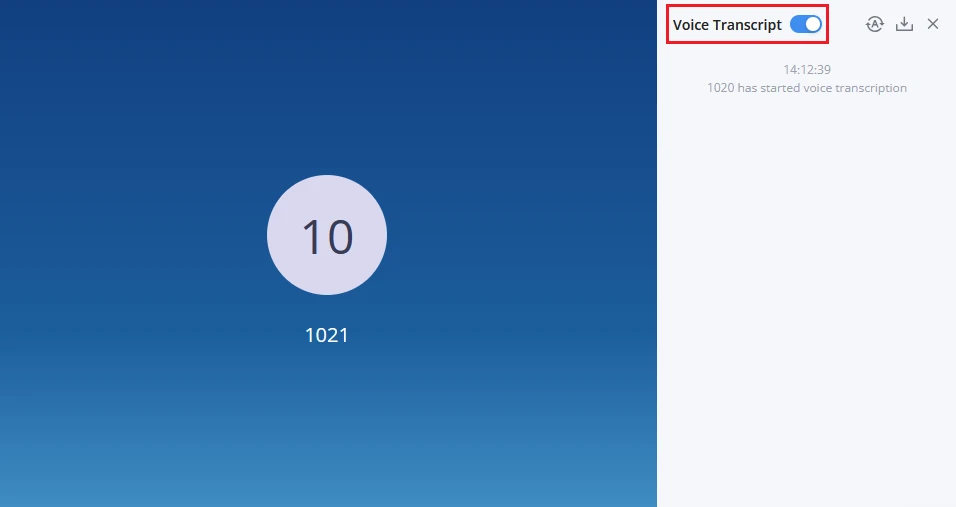
- A confirmation message will appear, and no further speech will be transcribed for the remainder of the meeting.
ACCESSING MEETING TRANSCRIPT AND SUMMARY
After a meeting ends, users can access the full transcription and AI-generated summary through the Wave Desktop application or the Wave mobile app. This section explains how to view, edit, download, and share these records.
On Wave Web/Desktop
- Sign in to the Wave Desktop application.
- Navigate to Meetings located in the left sidebar.
- Browse or search for the desired meeting entry. Meetings with available transcripts and summaries will have a View Meeting Summary icon next to them.
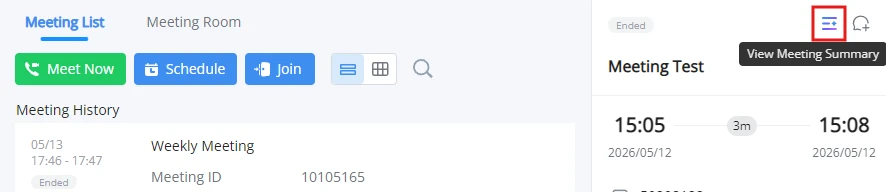
- Click the icon to open the detailed view.
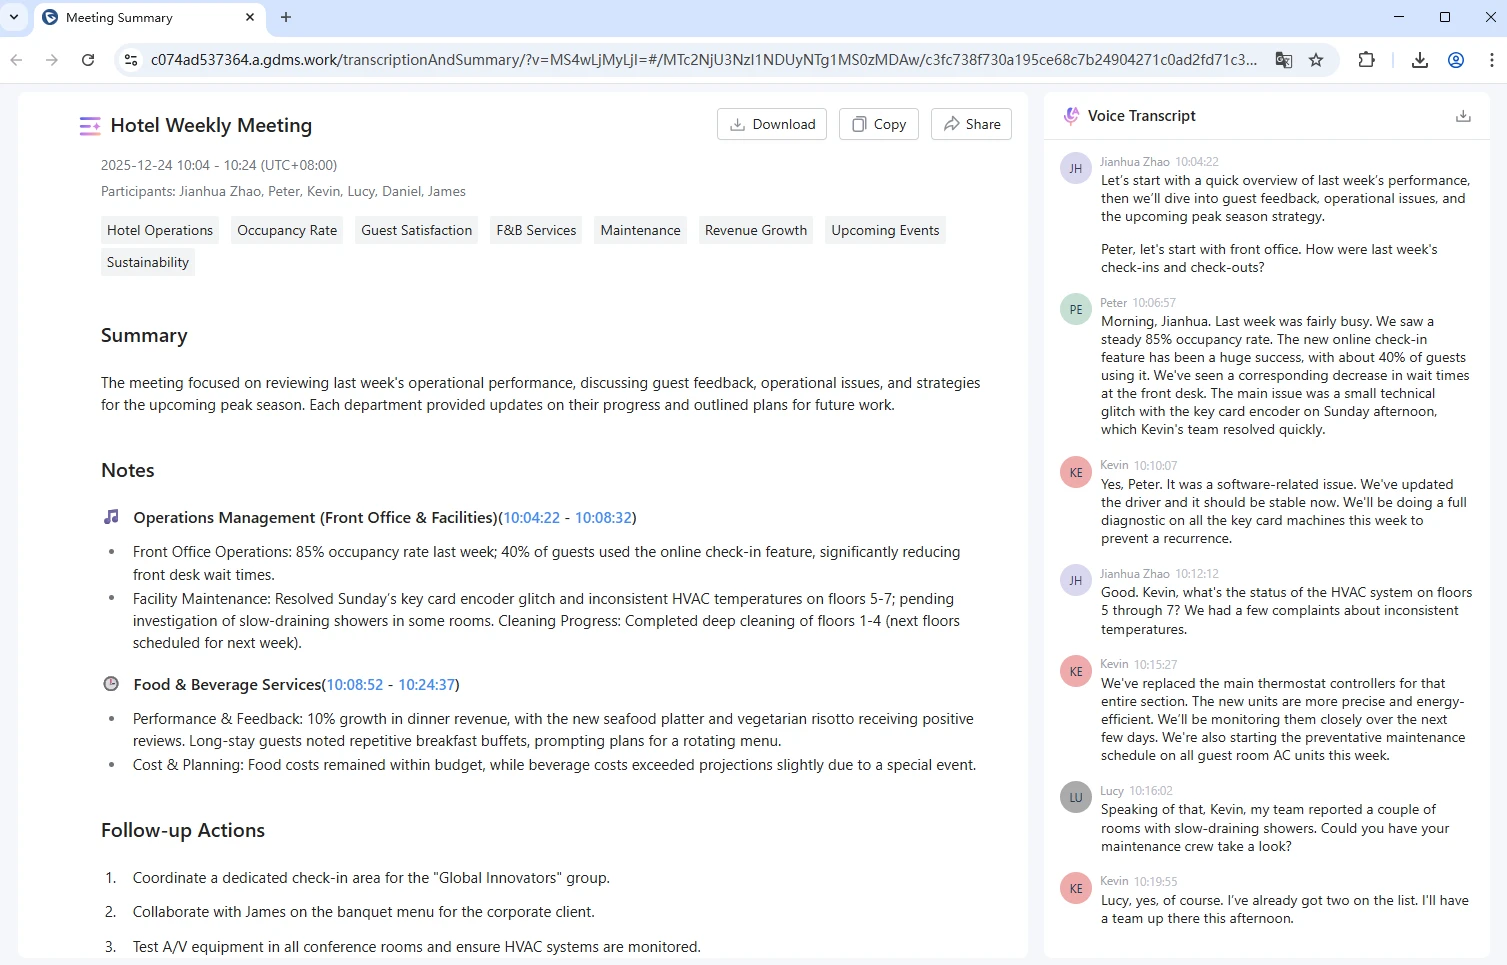
In the detailed view, you can perform the following actions:
- View Full Transcript: View the complete, time-stamped transcription of the meeting. Speakers are labeled for clarity.
- Read the Summary: Review the AI-generated summary, which highlights key discussion points, decisions, and action items.
- Edit Summary: Click the edit option to modify the AI-generated summary content as needed.
- Download: Click the Download icon to export the transcript and summary. You can choose from Word Document (.docx) or Plain Text (.txt).
- Copy Summary: Click the Copy icon to copy the summary text to your clipboard for easy pasting into emails, reports, or messages.
- Share Summary Link: Click the Share icon to generate a shareable link. This link provides access to the summary and is valid for 7 days.
On Wave Mobile
- Sign in to the Wave mobile application on your smartphone or tablet.
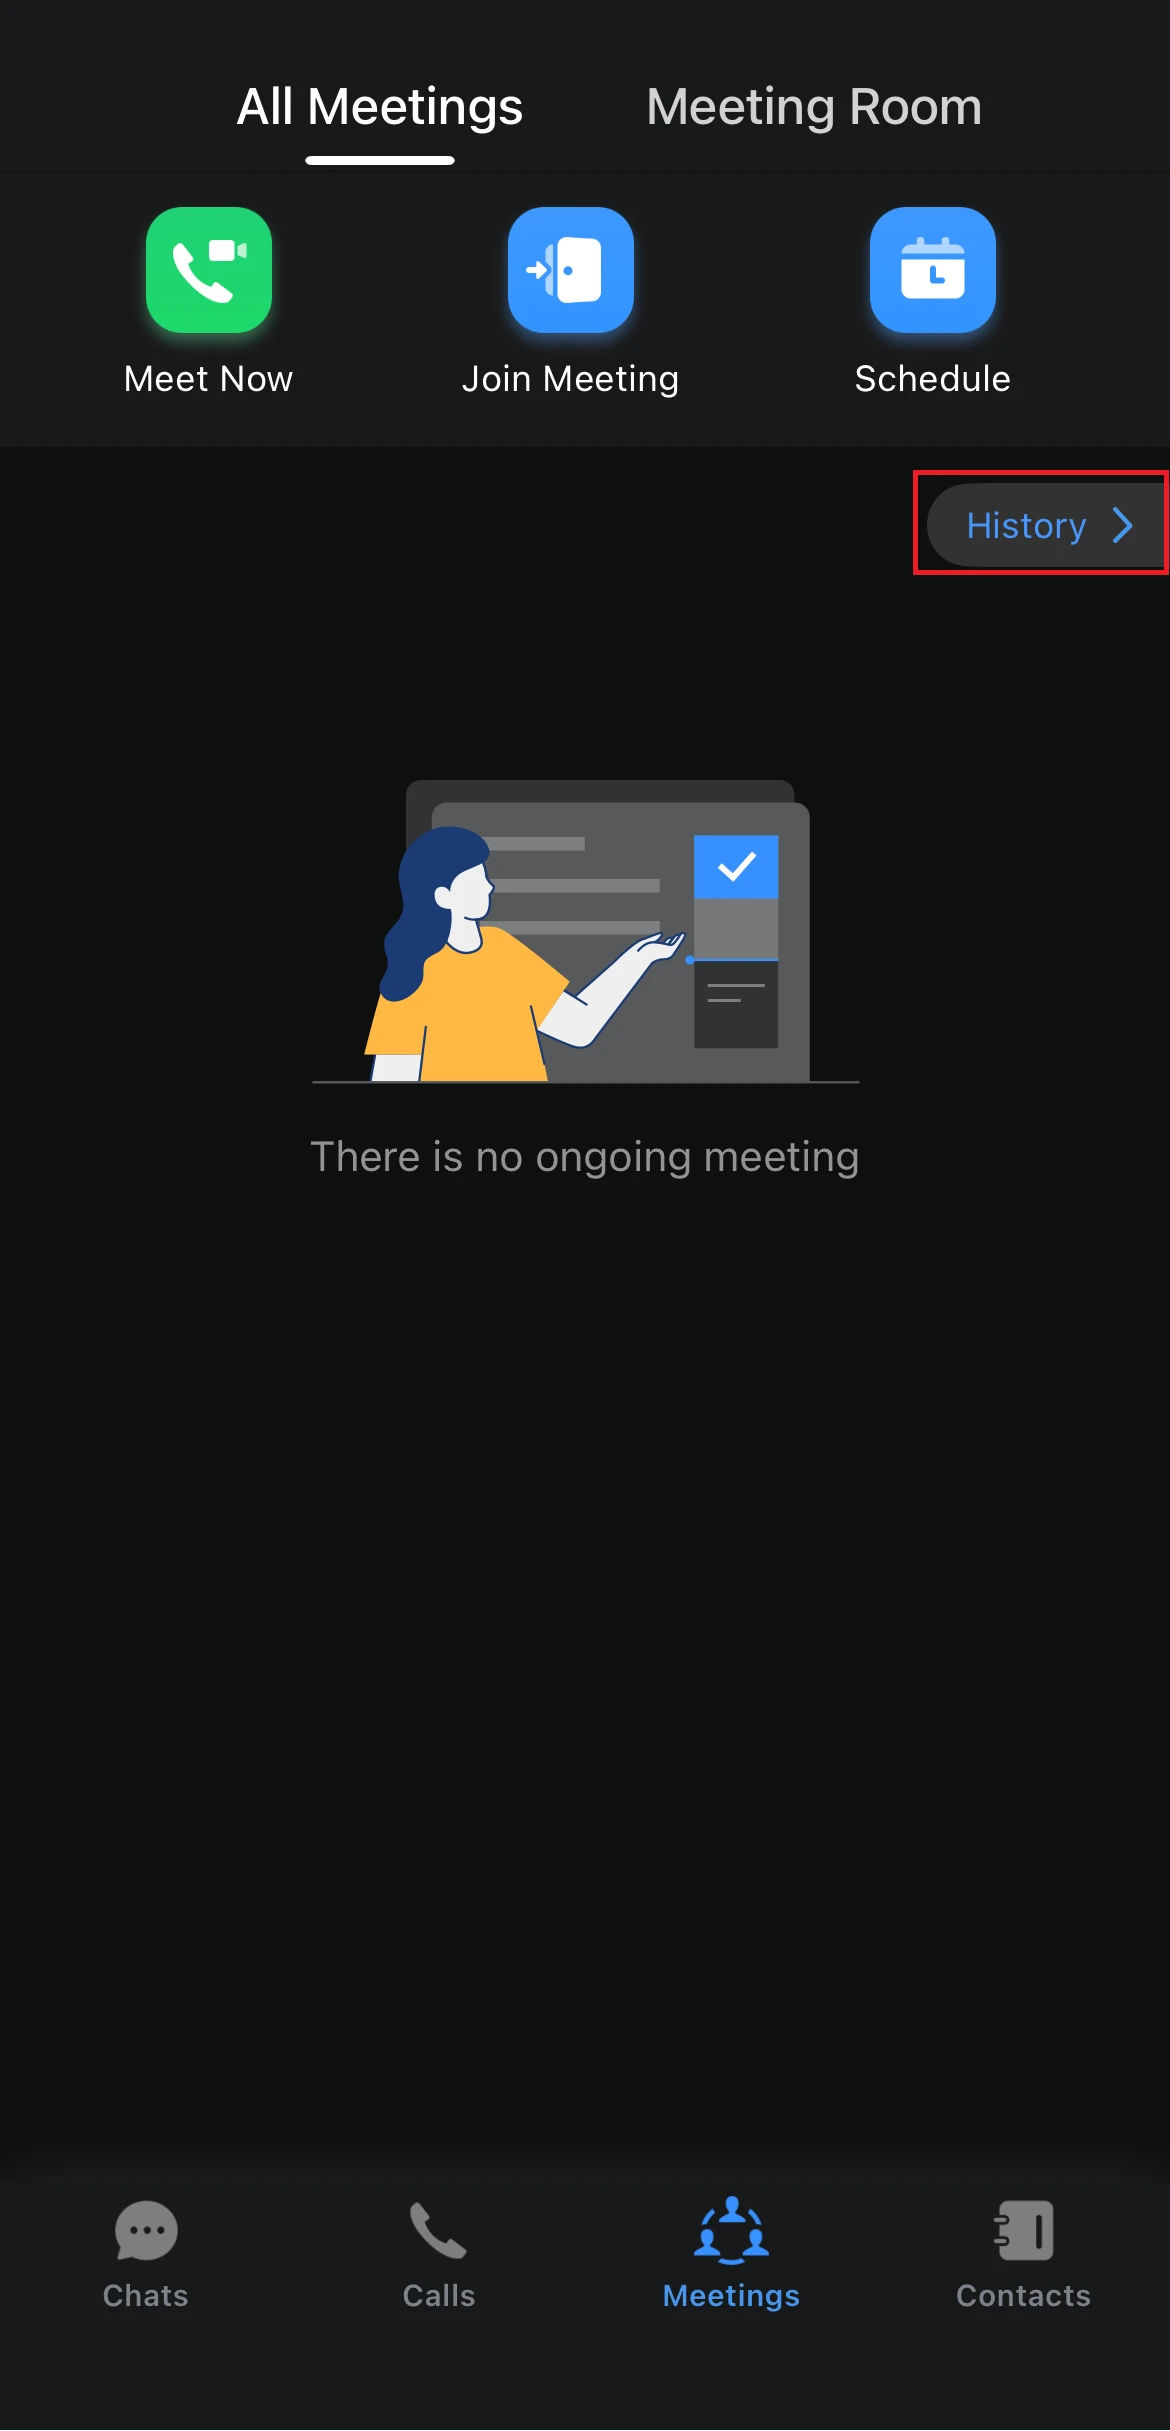
- Navigate to the Meetings tab, and select History.
- Tap on the specific meeting record you wish to review. If a transcript and summary are available, they will be accessible from the meeting detail view.
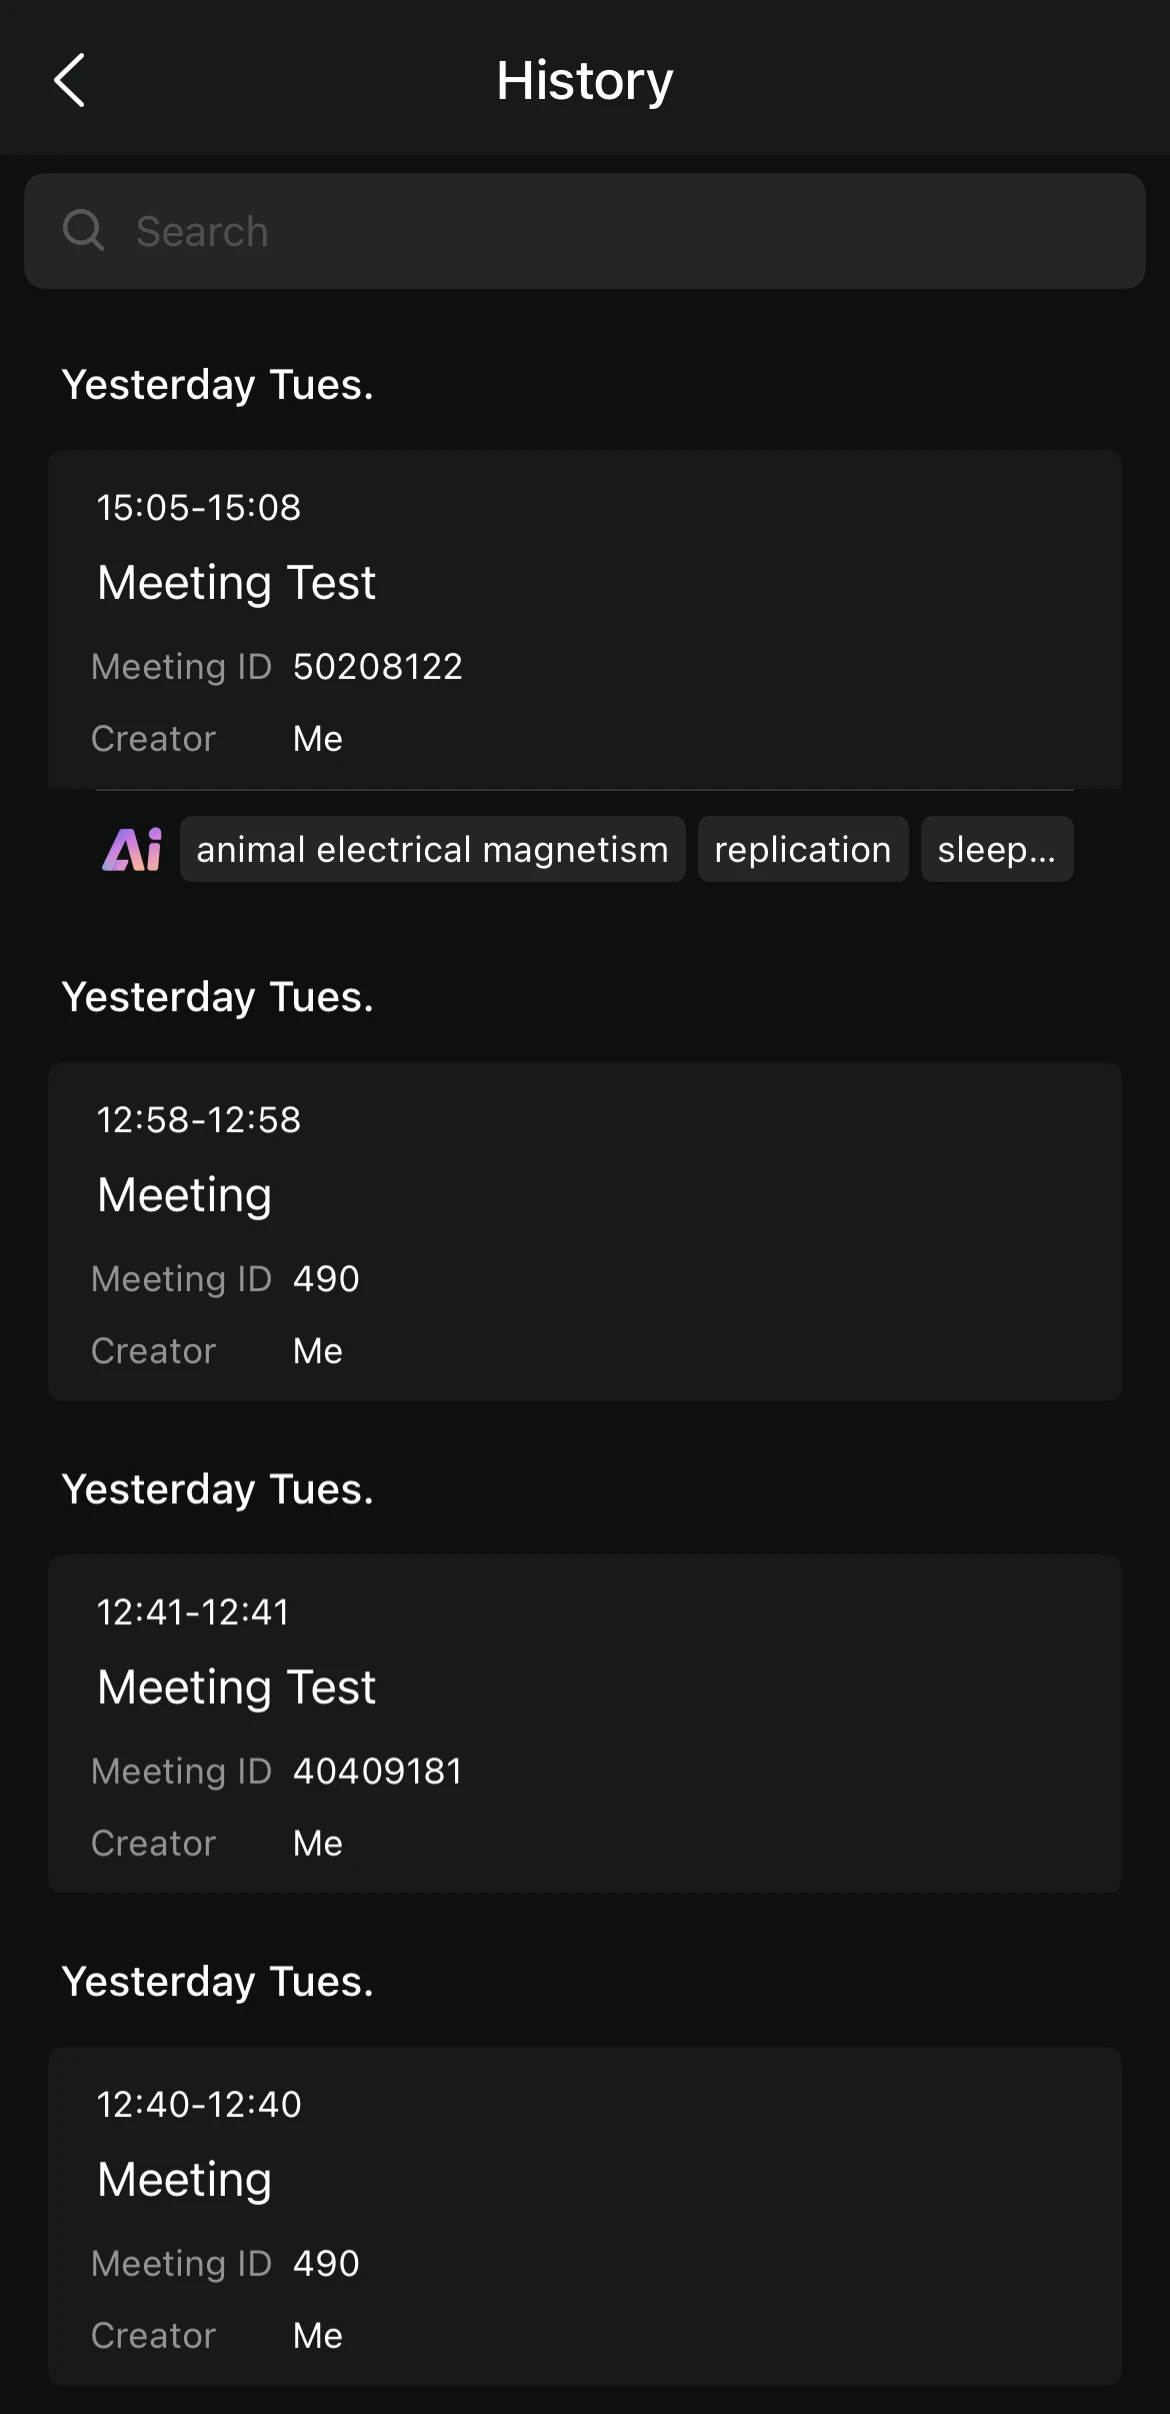
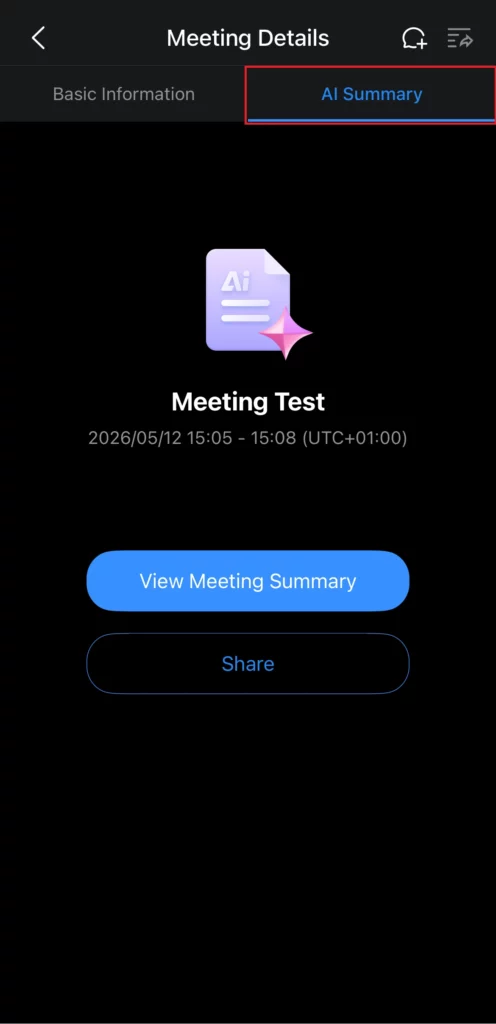
- In the Meeting Details, access the AI Summary tab and click on the View Meeting Summary option to open it.