Overview
The UCM63xx Series supports a variety of AI functionalities enabled by the RemoteConnect AI Service for Wave softphone app extensions. AI services are available as a purchasable add-on and are subject to usage limits defined by your active RemoteConnect plan.
This guide provides detailed instructions for configuring and using the AI Voice Assistant feature on the Grandstream IP PBX.
The AI Voice Assistant provides voice-based assistance through Wave extensions, allowing users to interact with the AI assistant using voice commands to perform supported operations and access information from configured contacts.
Pre-requisites
Before configuring and using the AI Voice Assistant, ensure that the required firmware and Wave software versions are installed.
Firmware and Software Requirements:
- UCM63xx firmware version 1.0.35.8 or later
- Wave Desktop version 1.0.35.6 or later
Configuring the AI Voice Assistant
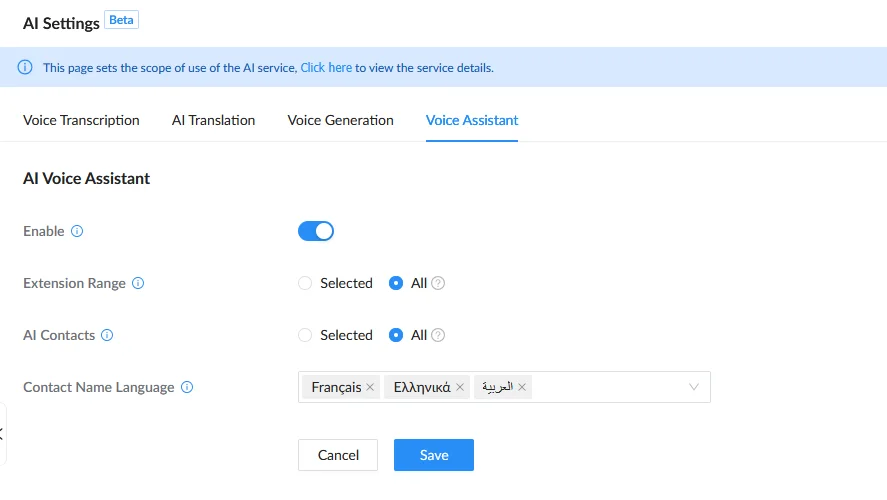
To enable the AI Voice Assistant feature, navigate to Integrations → AI Settings (Beta) → AI Voice Assistant and follow the steps below:
- Enable AI Voice Assistant.
- In Extension Range, specify the extensions that can use the AI Voice Assistant. The available options are:
- Selected: Selects the Extension Groups, Not Synced Contacts, Departments or individual extension.
- All: Selects all existing extensions and automatically includes any extensions added subsequently.
- In AI Contacts, specify the extensions that the AI Voice Assistant can access. The available options are:
- Selected: Selects the Extension Groups, Not Synced Contacts, Departments or individual extension.
- All: Selects all existing extensions and automatically includes any extensions added subsequently.
- In Contact Name Language, select the languages in which contact names are written. The AI Voice Assistant uses them to build voice prints of the names in AI Contacts, so they can be recognized in voice commands. (Up to 3 languages can be selected)
AI Voice Assistant
This section describes the operations supported by the AI Voice Assistant:
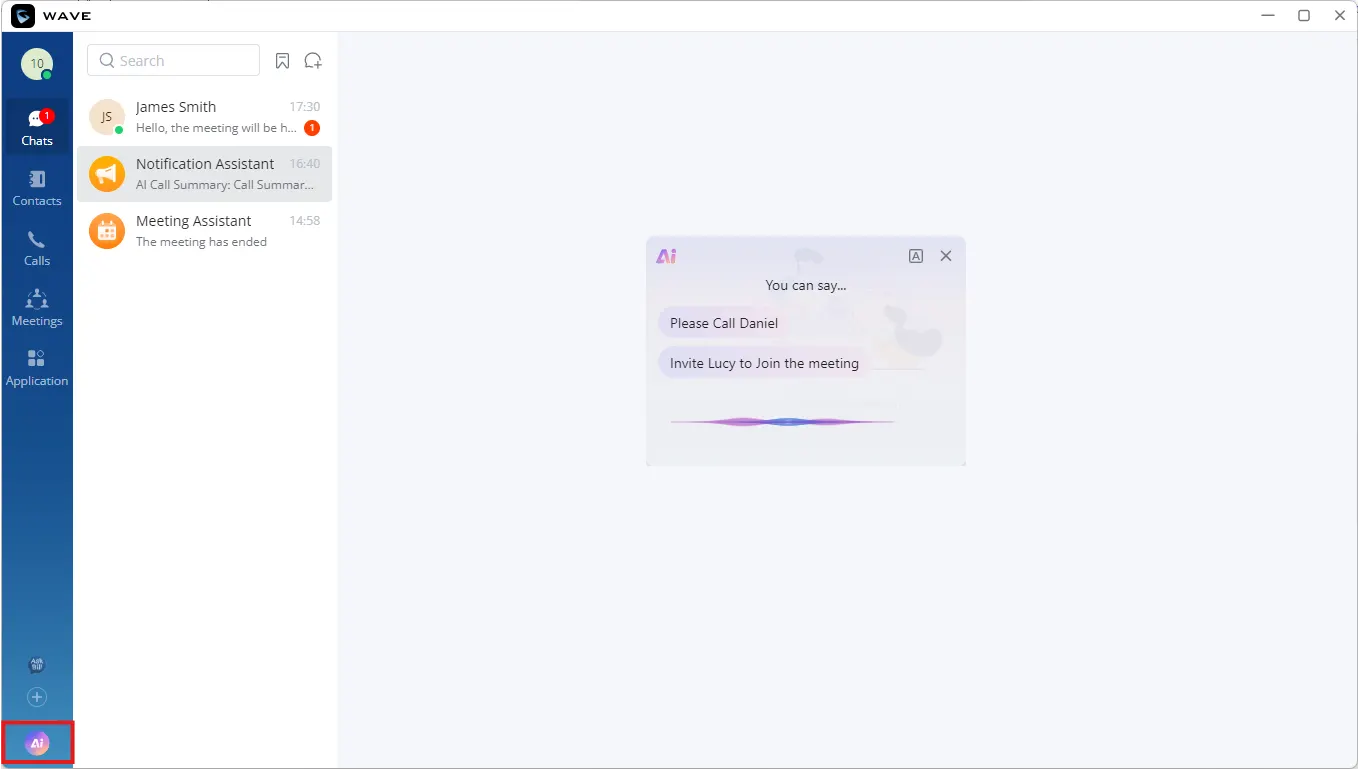
- When the AI Voice Assistant feature is enabled for an extension, the AI Voice Assistant icon is added to the Wave side navigation bar.
- Click the AI Voice Assistant icon to open the AI Voice Assistant window.
- The assistant starts listening for voice commands automatically when the window is opened.
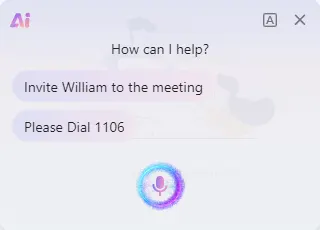
- When the assistant is not listening, click the microphone button to start listening.
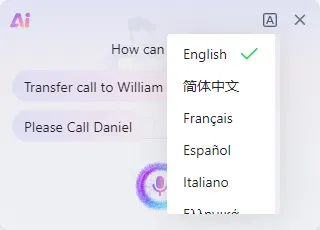
- The language used by the AI Voice Assistant can be changed by clicking the Language icon and selecting a language from the list of supported languages.
Call
To initiate a call using the AI Voice Assistant:
- Click the AI Voice Assistant icon and say a call command into the microphone using an extension number, a contact’s first name, last name, or full name. For example:
- “Dial 1006.”
- “Call James.”
- “Ring James Smith.”
- When an extension number is provided, the call is initiated immediately by clicking the Call button or automatically after the countdown expires.
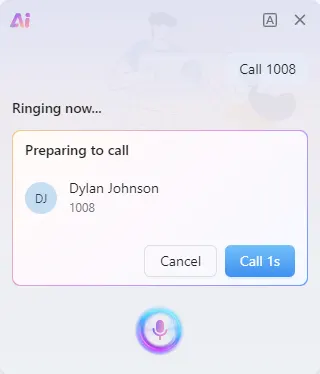
- When a contact name is provided, the AI Voice Assistant searches for matching contacts and returns the results.
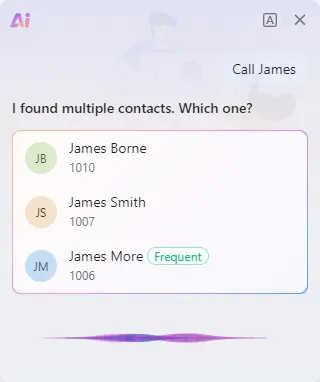
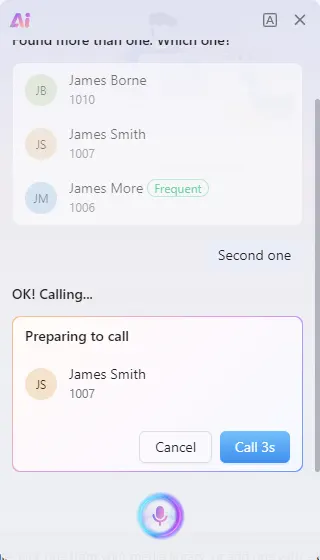
- If multiple contacts match the specified name, select the intended contact by:
- Clicking the contact. The call is initiated immediately.
- Saying the contact’s full name. The call is initiated by clicking the Call button or automatically after the countdown expires.
- Saying the contact’s position in the results, for example, “Second one.” The call is initiated by clicking the Call button or automatically after the countdown expires.
Transfer
To transfer a call using the AI Voice Assistant:
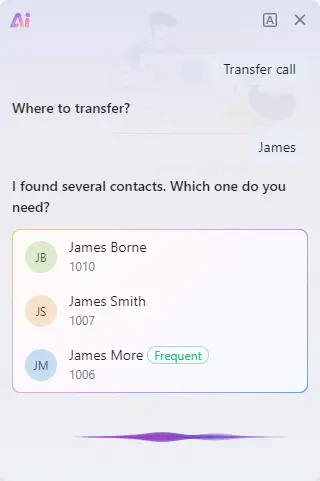
- While on a call, click the AI Voice Assistant icon and say a transfer command using an extension number, a contact’s first name, last name, or full name. For example:
- “Transfer to 1006.”
- “Transfer to James.”
- “Transfer to James Smith.”
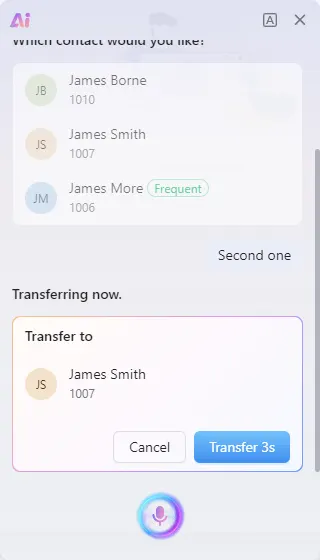
- When an extension number is provided, the transfer is initiated immediately by clicking the Transfer button or automatically after the countdown expires.
- When a contact name is provided, the AI Voice Assistant searches for matching contacts and returns the results.
- If multiple contacts match the specified name, select the intended contact by:
- Clicking the contact. The transfer is initiated immediately.
- Saying the contact’s name. The transfer is initiated by clicking the Transfer button or automatically after the countdown expires.
- Saying the contact’s position in the results, for example, “Second one.” The transfer is initiated by clicking the Transfer button or automatically after the countdown expires.
Conference
The AI Voice Assistant supports starting a new conference, adding participants to an ongoing conference, and turning an ongoing call into a conference.
Start a Conference
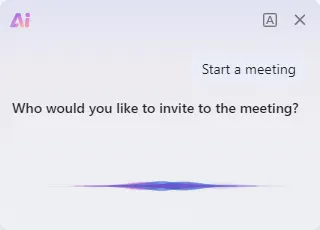
- Click the AI Voice Assistant icon and say a conference command. For example:
- “Start a meeting.” → The AI Voice Assistant prompts you to specify the invitee by extension number or contact name.
- “Invite Dylan to a meeting.” → The AI Voice Assistant searches for Dylan and returns the matching contact(s).
- “Invite 1000 to a meeting.” → The AI Voice Assistant identifies extension 1000 as the invitee.
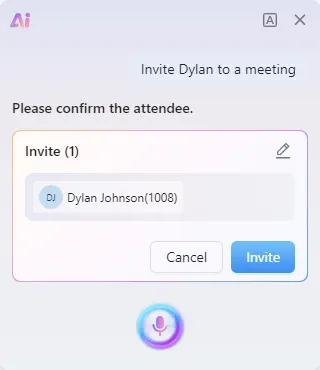
- Click Invite to start the meeting. If a contact name is provided in the command and multiple matching contacts are returned, clicking Invite adds all contacts in the list to the conference. Edit the list as needed before clicking Invite.
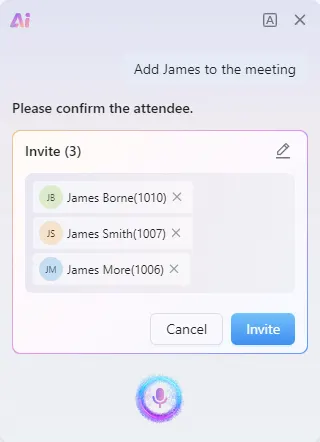
- Repeat the process to invite additional participants to the ongoing meeting.
Start a Conference while on an Ongoing
- While on a call, click the AI Voice Assistant icon and say a command to invite an additional participant. For example:
- “Add Dylan to the call.”
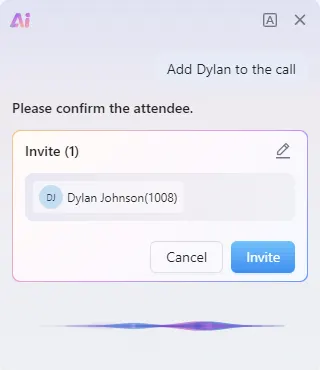
- Follow the same contact search, selection, and confirmation process described above.
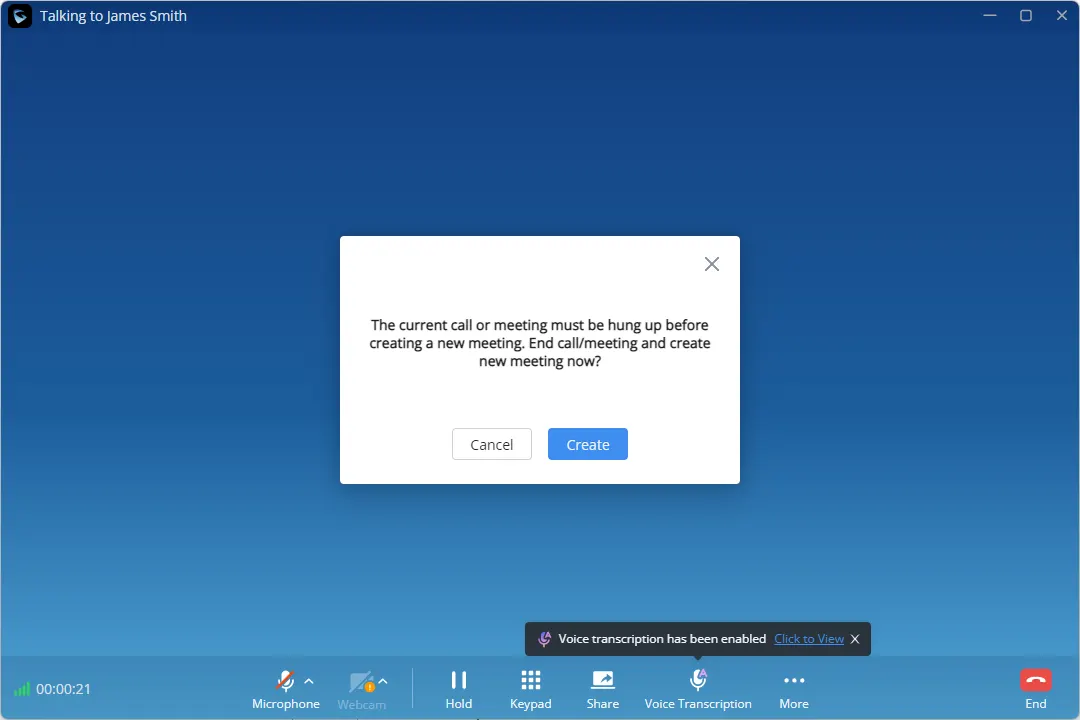
- A message appears in the call window indicating that the current call must be ended before creating a new meeting. Click Create to confirm. The current call is ended, and a new meeting is created with the participants from the original call and the additional participant.
Send Message
To send a message using the AI Voice Assistant:
- Click the AI Voice Assistant icon and say a message command.
- When prompted, say the name or extension number of the recipient.
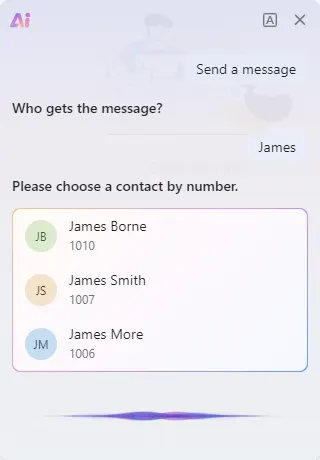
- Follow the same contact search and selection process described above.
- When prompted, say the content of the message.
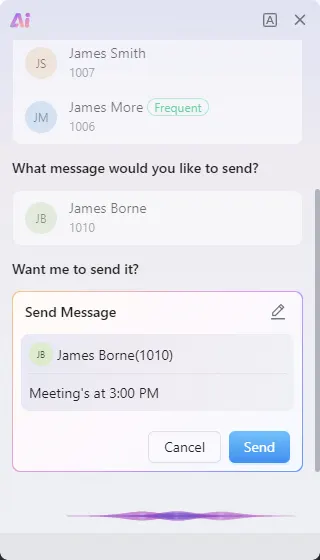
- Confirm sending the message by clicking Send or by saying an affirmative command.