

Overview
The GWN7670ELR is a long-range outdoor BE3600 Wi-Fi 7 access point for medium-to-large deployments. It combines 2.4 GHz 2×2:2 and 5 GHz 3×3:2 MU-MIMO radios, Xtra Range 2.0, an IP67-rated enclosure, a 2.5 GbE PoE+ port, and an SFP interface. The access point can be managed through its local web interface, an embedded GWN controller, GWN Manager, or GDMS Networking.
Package Contents
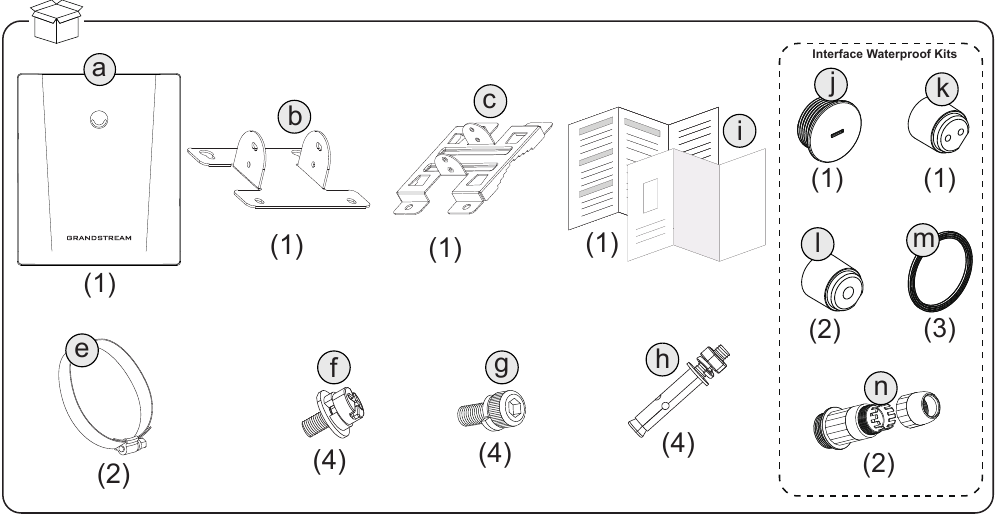
| Label | Quantity | Included Item |
|---|---|---|
| a | 1 | GWN7670ELR access point |
| b | 1 | Base bracket |
| c | 1 | Mounting bracket |
| e | 2 | Metal straps |
| f | 4 | Pan-head machine screws, M4 × 10 mm |
| g | 4 | Socket screws with spring washers, M5 × 12 mm |
| h | 4 | Plastic expansion bolts |
| i | 1 each | Quick Installation Guide and regulatory paper |
| j | 1 | Nut plug |
| k | 1 | SFP sealing plug |
| l | 2 | RJ45 sealing plugs |
| m | 3 | O-rings |
| n | 2 | Clamp nuts |
GWN7670ELR Ports and Grounding
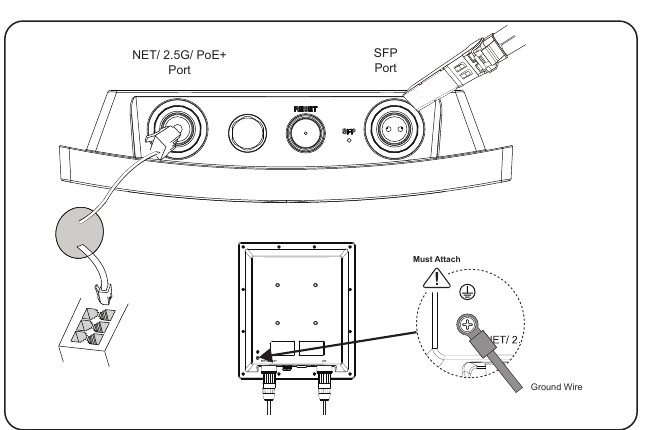
| Interface | Description |
|---|---|
| NET/2.5G/PoE+ | 2.5 GbE RJ45 network port and IEEE 802.3at PoE+ power input. |
| SFP | SFP network uplink port. |
| RESET | Reset pinhole used to restore the access point to its factory settings. |
| Ground terminal | Attach a grounding wire before outdoor operation. Reliable grounding and lightning protection are required. |
| Waterproof breather vent | Pressure-equalization vent. Do not cover or remove it. |
Powering and Connecting the GWN7670ELR
- Attach the grounding wire to the ground terminal.
- Connect an Ethernet cable to the NET/2.5G/PoE+ port.
- Connect the other end to an IEEE 802.3at PoE+ switch or injector. The maximum power consumption is 16 W.
- If the SFP port carries network traffic, the RJ45 port must still be connected to a PoE+ source to power the access point.
- Install and tighten the correct waterproof components before outdoor operation.
Hardware Installation
The GWN7670ELR supports wall or pole mounting. Complete the cable connections, waterproofing, grounding, and lightning-protection work before putting the access point into service.
Preventing Water Ingress
- Create a drip loop: Before connecting the cable to the AP, form a downward loop below the connection point. This allows water to drain away instead of traveling along the cable into the AP connection.
- Seal cable-entry points: Properly seal any opening where the cable passes through a wall or enters a building or enclosure to prevent water ingress.
Waterproof Kit Installation
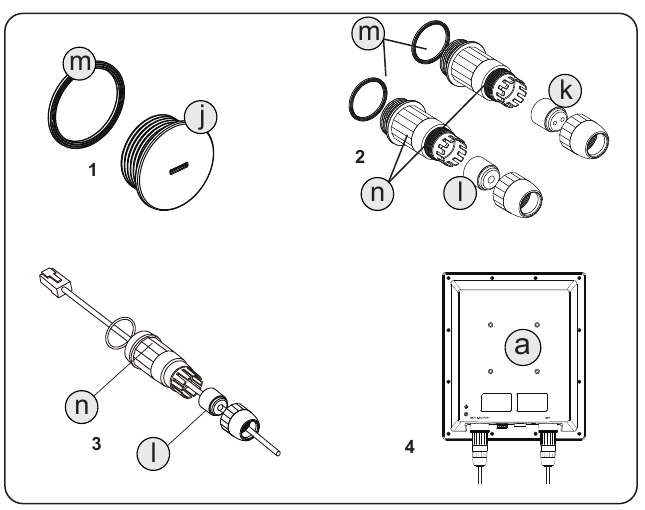
- Install the O-ring and nut plug on an unused interface.
- For an active RJ45 or SFP connection, pass the cable through the clamp nut and the matching sealing plug, then install the O-ring.
- Connect the cable to the correct interface.
- Tighten the sealing components against the access point so the assembly is secure and weather-resistant.
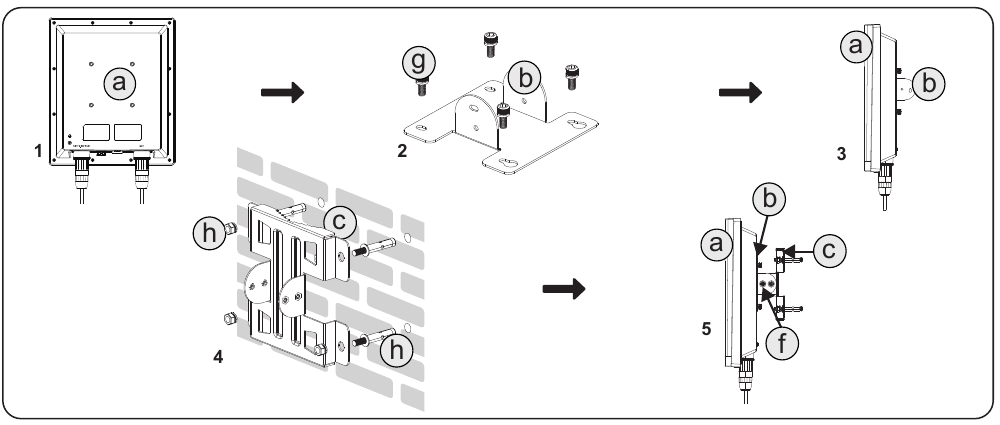
Wall Mount
- Connect the required Ethernet or SFP cable and complete the waterproof assembly.
- Secure the base bracket to the back of the access point with the supplied screws.
- Use the mounting bracket as a template, drill the wall holes, and install the supplied expansion bolts.
- Secure the mounting bracket to the wall.
- Fasten the access point and base bracket to the wall-mounted bracket, then verify that all hardware is tight.
Pole Mount
- Connect the required Ethernet or SFP cable and complete the waterproof assembly.
- Secure the base bracket to the back of the access point with the supplied screws.
- Fasten the mounting bracket to the base bracket.
- Route the two metal straps through the mounting bracket and tighten them around the pole.
- Confirm that the access point, cables, waterproof assemblies, and ground wire are secure.

Connect to the GWN7670ELR Default Wi-Fi Network
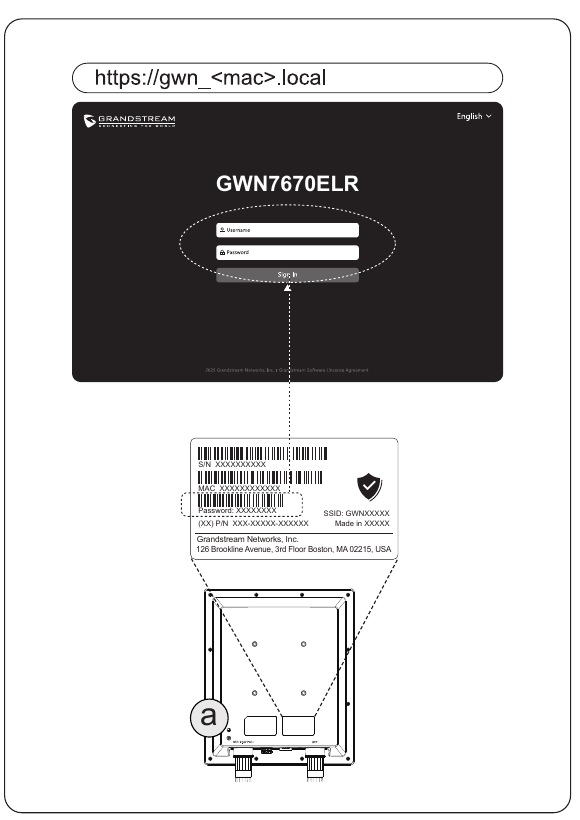
After a factory reset, the GWN7670ELR can operate as a standalone access point with Wi-Fi enabled by default. It broadcasts the SSID GWN[MAC address last six digits]. The default random Wi-Fi password is printed on the product label.
Accessing the Configuration Interface
Method 1: Use the GWN7670ELR MAC Address
- Connect a computer to the GWN7670ELR default SSID or to the same network.
- Locate the MAC address on the product label.
- In a browser, open https://gwn_<mac>.local, replacing <mac> with the device MAC address without separators.
- Sign in with username admin and the random administrator password printed on the product label.
Method 2: Use GWN Discovery Tool
- Download and install GWN Discovery Tool.
- Connect the computer and GWN7670ELR to the same network, then open the tool and select Scan.
- Select the GWN7670ELR and click Manage Device, or enter the displayed IP address in a browser.
- Sign in with username admin and the random administrator password printed on the product label.
Cloud Management with GDMS Networking
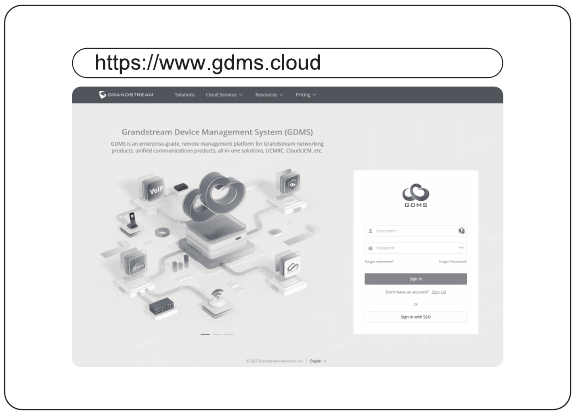
To manage the access point through the cloud, open https://www.gdms.cloud and add the device to GDMS Networking.
Refer to the Grandstream product pages for current product documents and FAQs.
For certification, warranty, and RMA information, visit www.grandstream.com.