

Overview
The GWN7671 is a wall-mounted dual-band Wi-Fi 7 access point designed for small-to-medium businesses, offices, hotels, apartments, and other commercial spaces. It combines wireless coverage with wired connectivity and PoE output for nearby endpoints. The GWN7671 can be managed through its local Web UI, GDMS Networking for cloud management, or GWN Manager for on-premises management.
Precautions
- Do not attempt to open, disassemble, or modify the device.
- Use the device within 0 °C to 40 °C during operation and -10 °C to 60 °C during storage.
- Use the device within 10% to 90% relative humidity, non-condensing.
- Do not power cycle the device during system boot-up or firmware upgrade. This may corrupt firmware images and cause the unit to malfunction.
- Ensure compliance with local regulations for frequency bands, transmit power, and other applicable requirements.
Package Contents
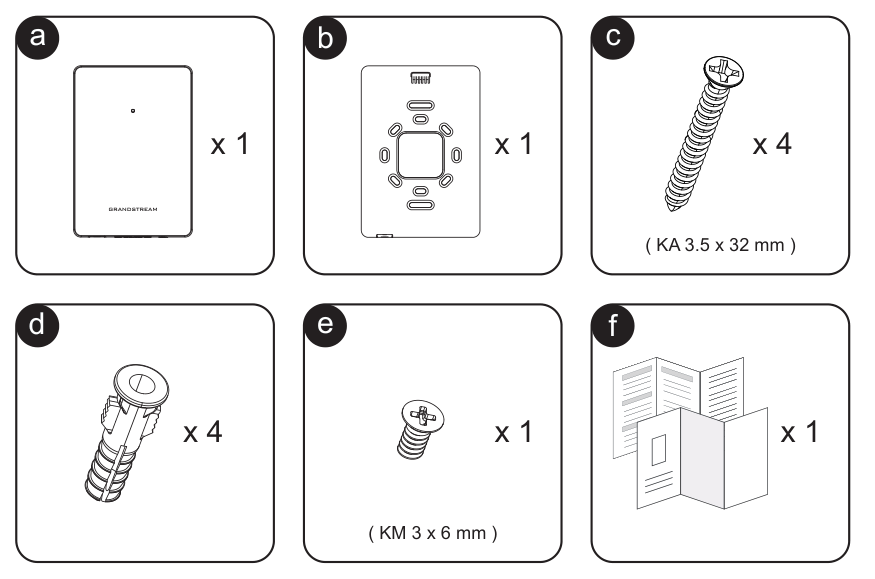
| Item | Quantity |
|---|---|
| GWN7671 access point | 1 |
| Mounting bracket | 1 |
| Mounting screws (KA 3.5 × 32 mm) | 4 |
| Plastic expansion bolts | 4 |
| Securing screw (KM 3 × 6 mm) | 1 |
| Quick Installation Guide | 1 |
| Certification Regulatory Information | 1 |
GWN7671 Ports
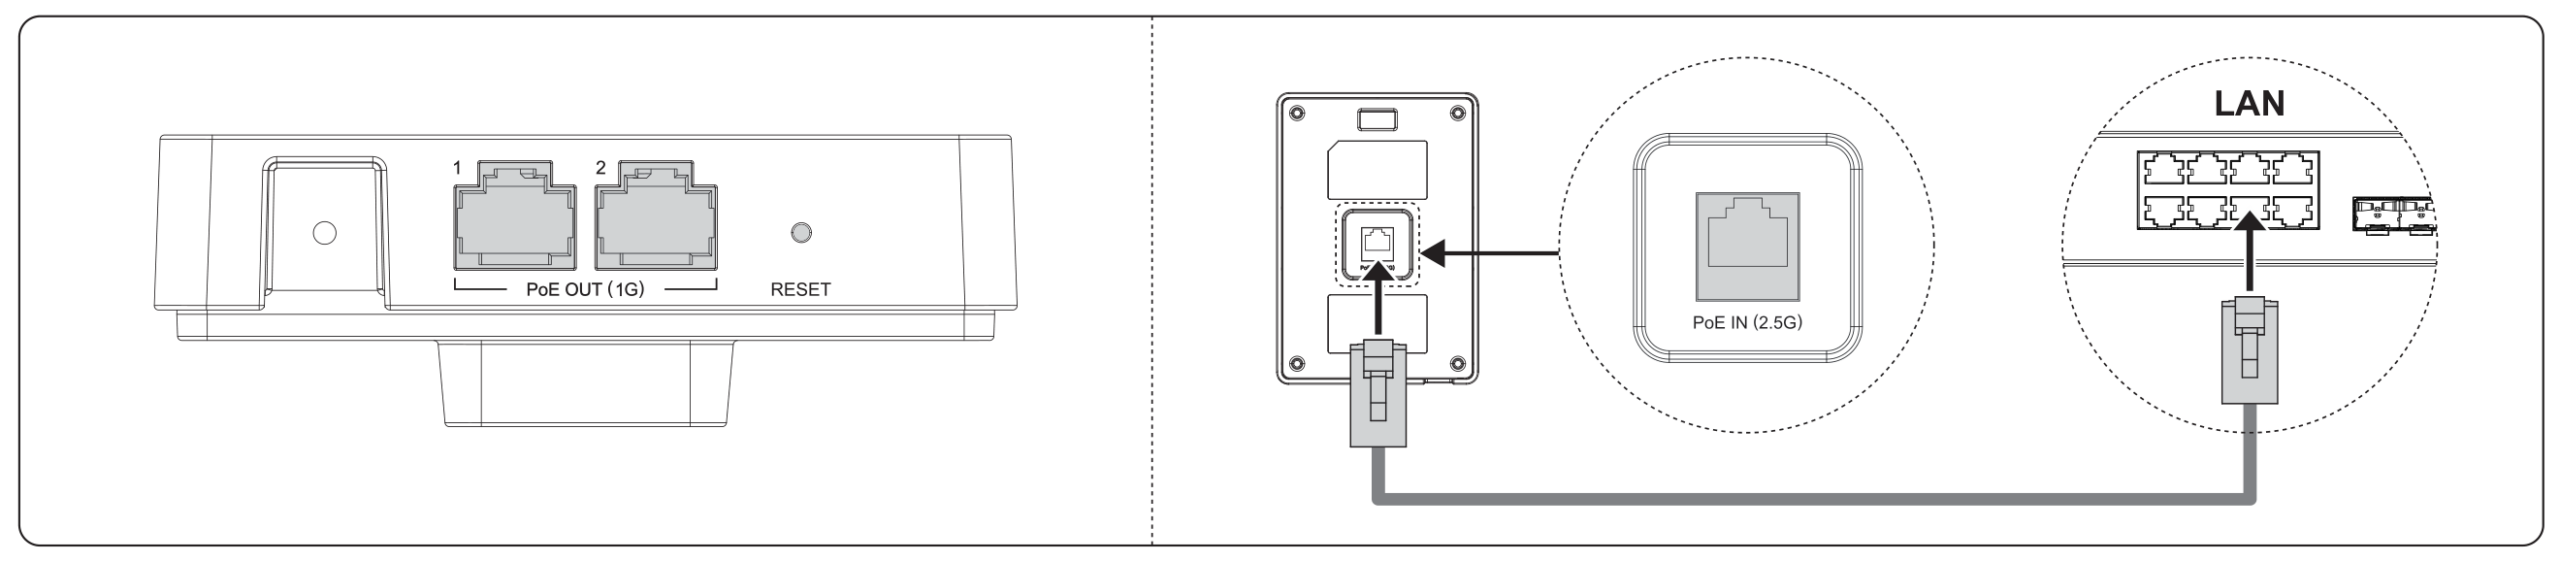
| Port | Description |
|---|---|
| PoE IN (2.5G) | One 10/100/1000/2500 Mbps Ethernet RJ45 uplink port supporting IEEE 802.3at PoE+ input. |
| PoE OUT 1 and PoE OUT 2 (1G) | Two 10/100/1000 Mbps Ethernet RJ45 ports supporting PoE output. The total PSE output budget across both ports is 12 W. |
| RESET | Factory reset pinhole. Press and hold for 7 seconds to restore factory default settings. |
Powering and Connecting the GWN7671
Power the GWN7671 through its rear PoE IN (2.5G) port using an IEEE 802.3at PoE+ switch or injector.
- Connect an Ethernet cable to the PoE IN (2.5G) port on the rear of the GWN7671.
- Connect the other end to a PoE+ port on the switch, or to the PoE output of an injector connected to the network.
- Connect wired endpoints to the two 1 GbE PoE OUT ports as needed. Keep the combined PoE output load within the 12 W total budget.
Hardware Installation
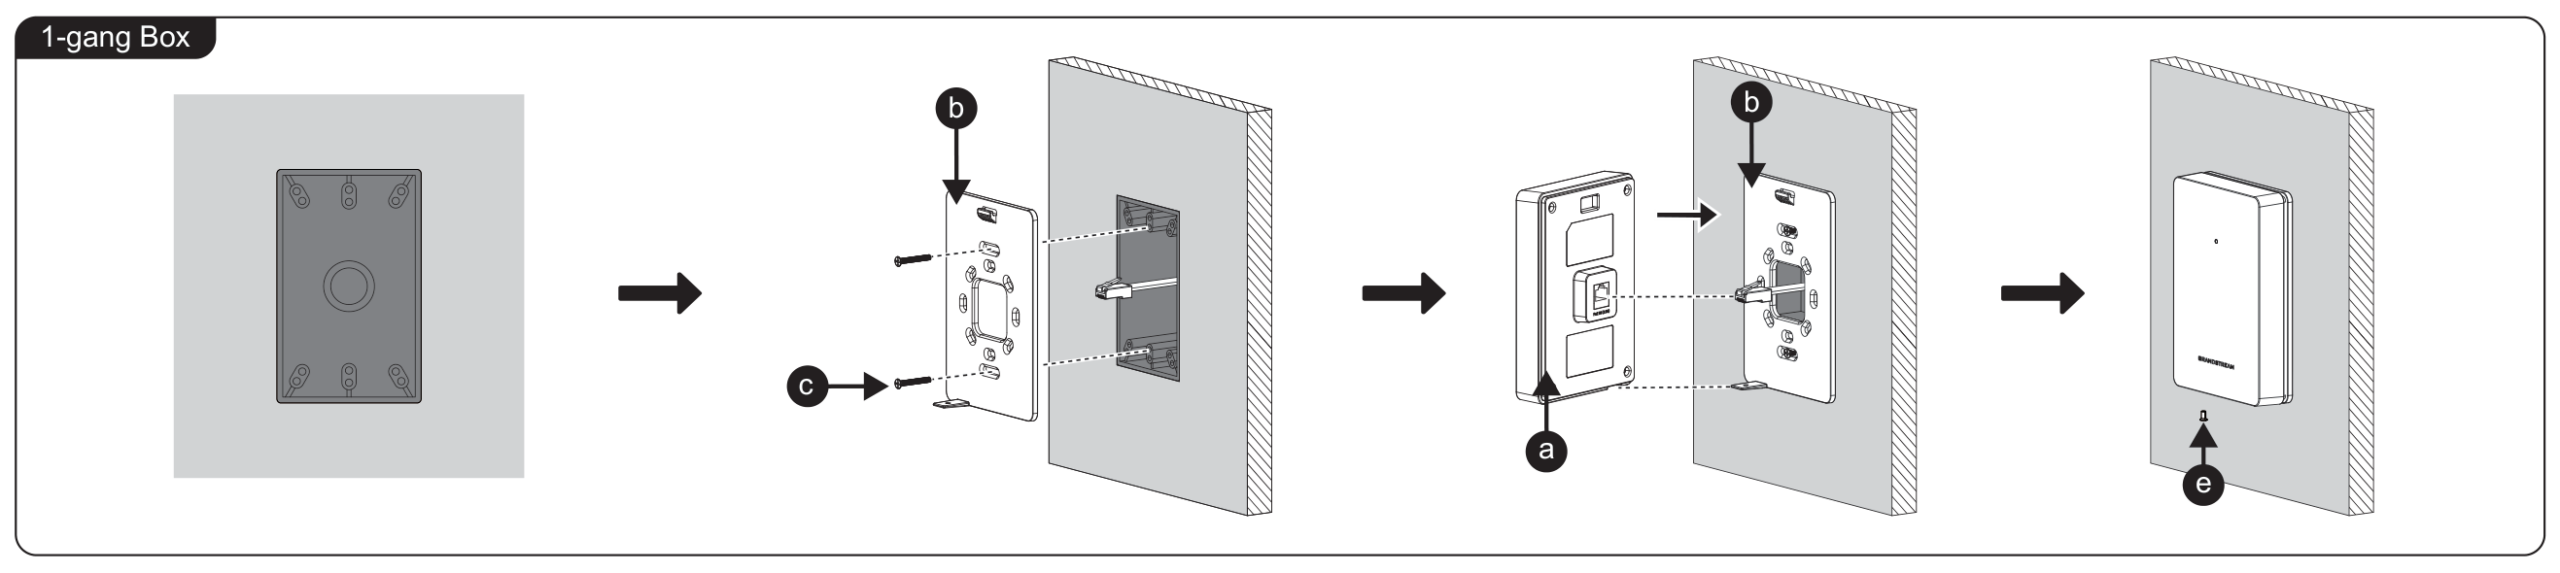
The GWN7671 supports installation in a wall opening, an 86-type electrical box, or a 1-gang electrical box. Use the mounting bracket and securing screw shown in the illustrations.
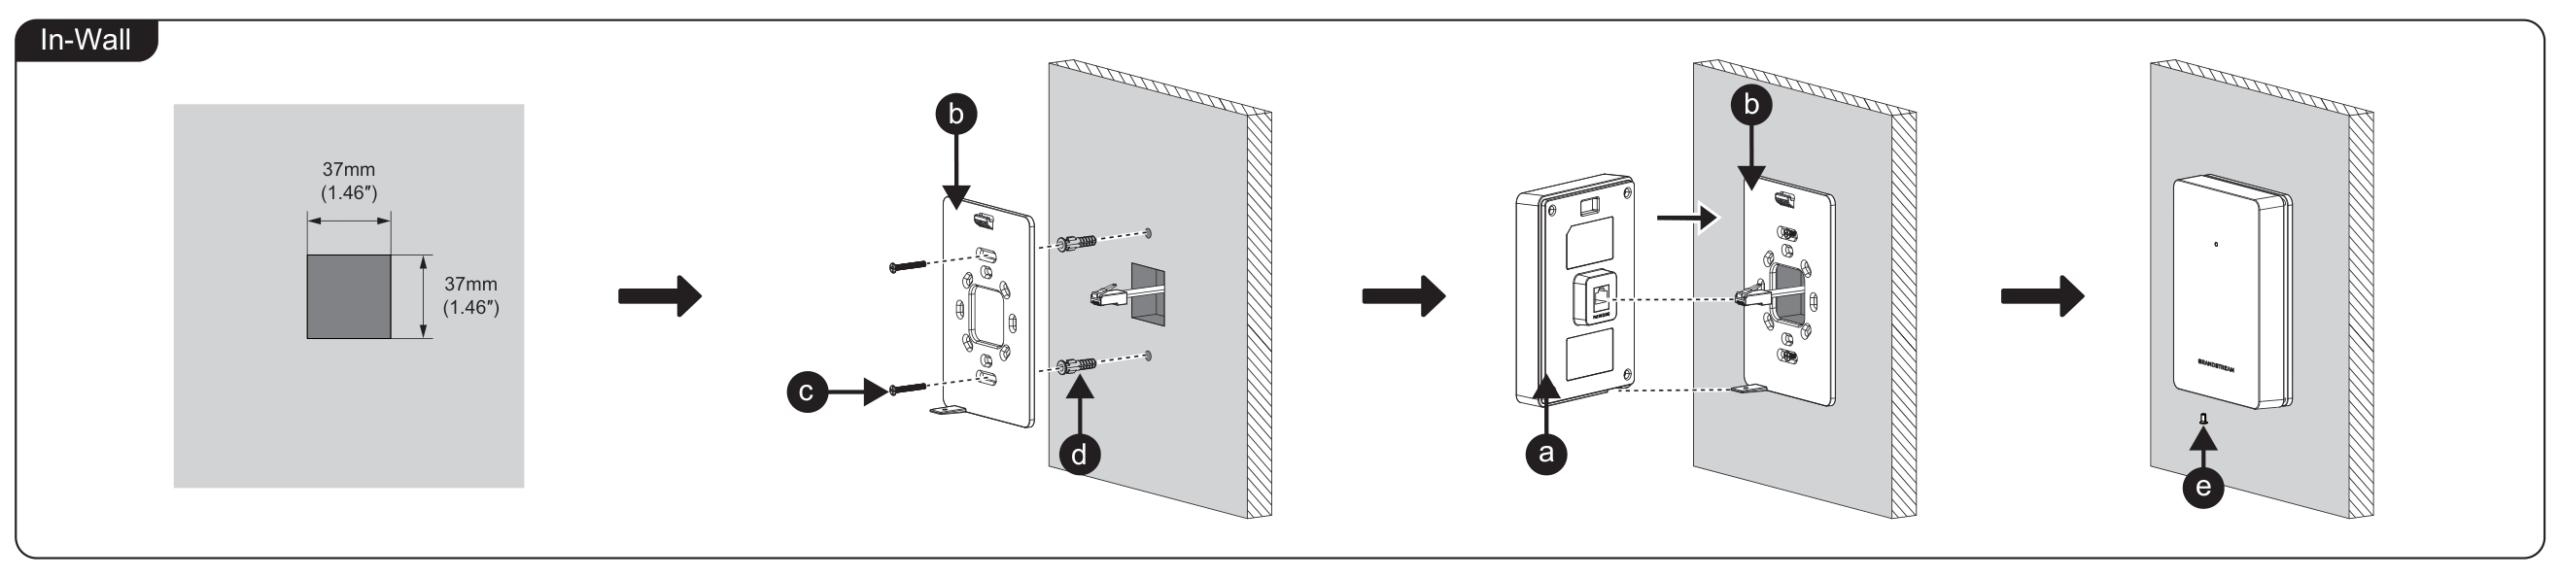
In-Wall Mount
- Prepare a 37 mm × 37 mm (1.46 in × 1.46 in) wall opening for the network cable, as shown below.
- Position the mounting bracket over the opening and mark its mounting holes. Drill the marked holes and insert the plastic expansion bolts. Secure the bracket with the supplied mounting screws.
- Connect the network cable to the rear PoE IN port. Align the GWN7671 with the bracket and slide it into place.
- Install the supplied KM 3 × 6 mm securing screw at the bottom of the unit.
86-Box Mount
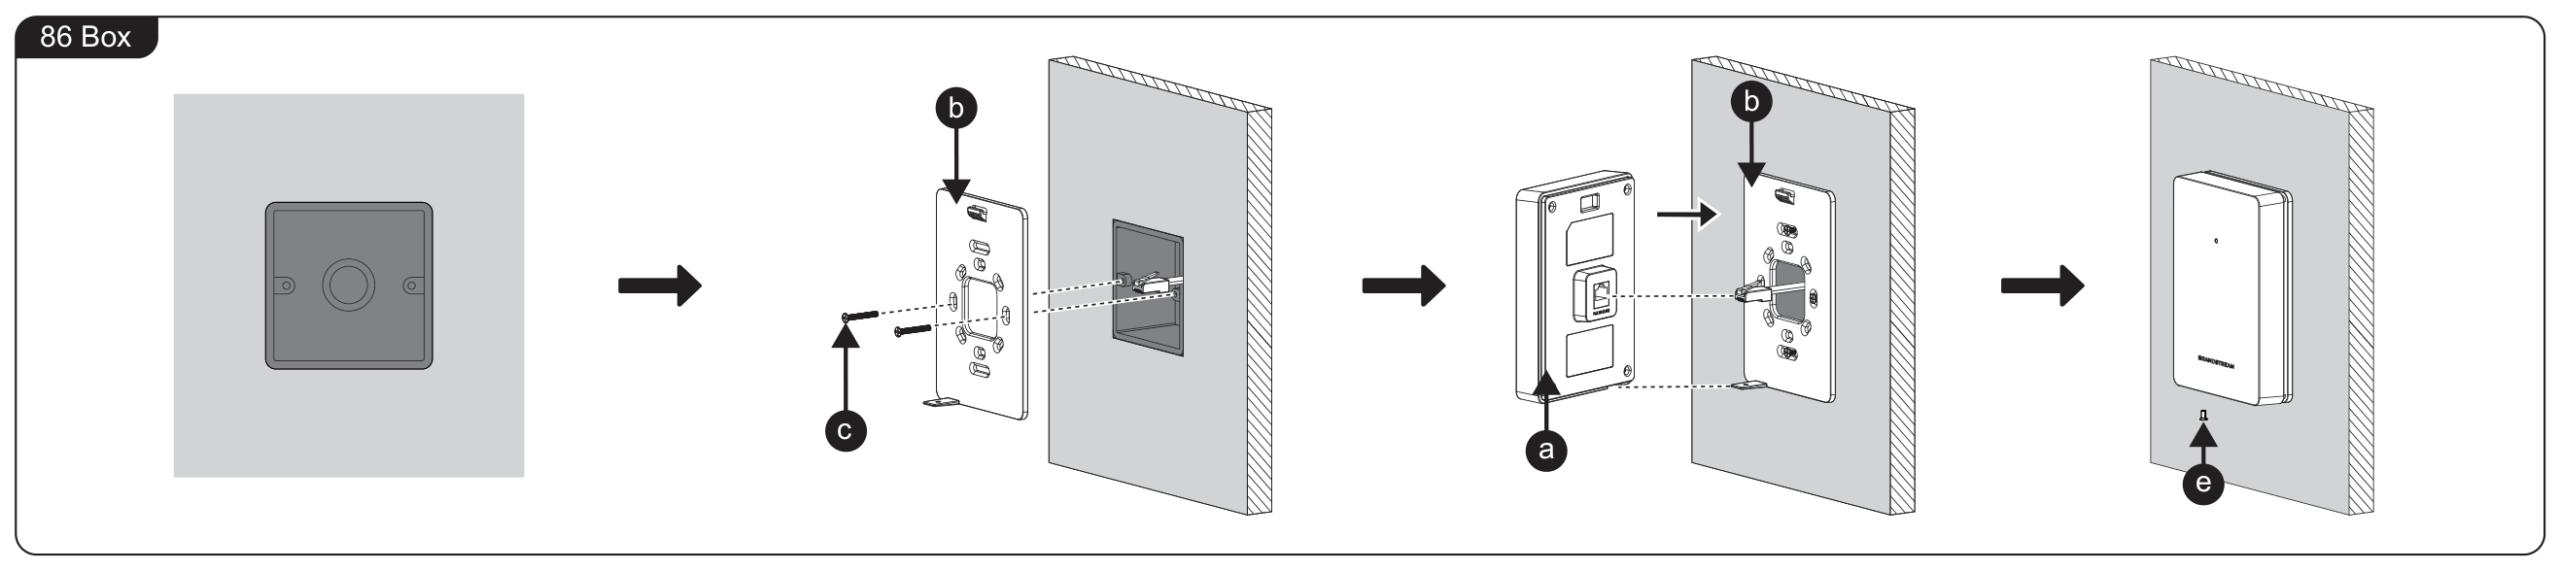
- Route the network cable through the 86-type electrical box and the mounting bracket.
- Align the bracket with the mounting holes on the box and secure it with screws appropriate for the box.
- Connect the network cable to the rear PoE IN port. Align the GWN7671 with the bracket and slide it into place.
- Install the supplied KM 3 × 6 mm securing screw at the bottom of the unit.
1-Gang-Box Mount
- Route the network cable through the 1-gang electrical box and the mounting bracket.
- Align the bracket with the mounting holes on the box and secure it with screws appropriate for the box.
- Connect the network cable to the rear PoE IN port. Align the GWN7671 with the bracket and slide it into place.
- Install the supplied KM 3 × 6 mm securing screw at the bottom of the unit.
Connect to GWN7671 Default Wi-Fi Network
GWN7671 can be used as a standalone access point out of the box, or after a factory reset with Wi-Fi enabled by default.
After powering the GWN7671 and connecting it to the network, GWN7671 will broadcast a default SSID based on its MAC address GWN[MAC’s last 6 digits], and a random password.
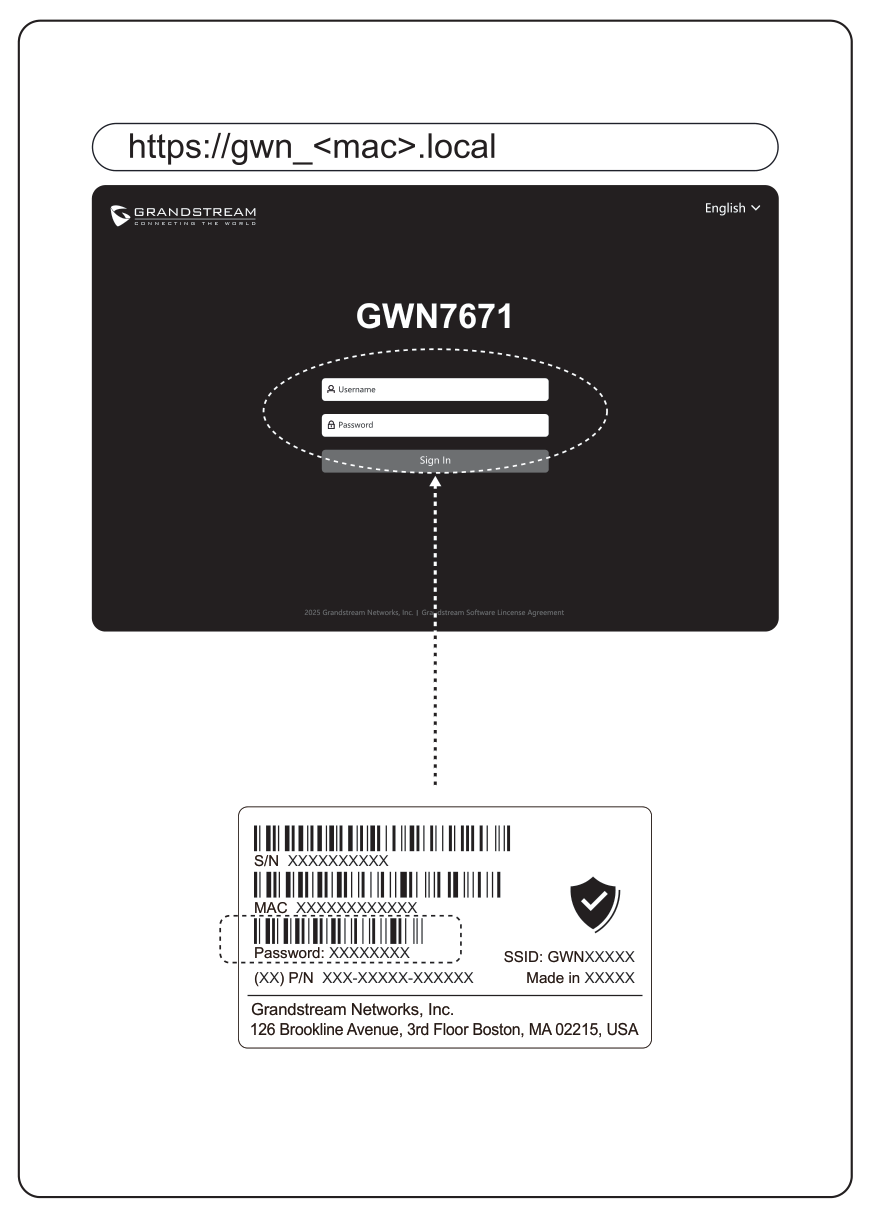
The default SSID and Wi-Fi password are printed on the device label.
Accessing the Configuration Interface
A computer connected to the GWN7671’s SSID, or to the same network as the GWN7671 can discover and access its configuration interface using one of the below methods:
Method 1: Discover GWN7671 Using Its MAC Address
- Locate the MAC address on the MAC tag of the unit, which is on the rear of the device, or on the package.
- From a computer connected to the same network as the GWN7671, type in the following address using GWN7671’s MAC address on your browser: https://gwn_<mac>.local
Example: For MAC address EC:74:D7:8C:4D:F8, enter https://gwn_ec74d78c4df8.local in your browser.
Method 2: Discover GWN7671 Using GWN Discovery Tool
- Download and install GWN Discovery Tool from the following link: https://www.grandstream.com/tools/GWNDiscoveryTool.zip
- Open the GWN Discovery Tool, and click on Scan.
- The tool will discover all GWN76xx access points connected on the network showing their MAC and IP addresses.
- Click on Manage Device to be redirected directly to the GWN7671’s configuration interface, or type in manually the displayed IP address on your browser.
- Enter username and password to log in. (The default administrator username is “admin” and the default random password can be found at the sticker on the GWN7671).
Centralized Management
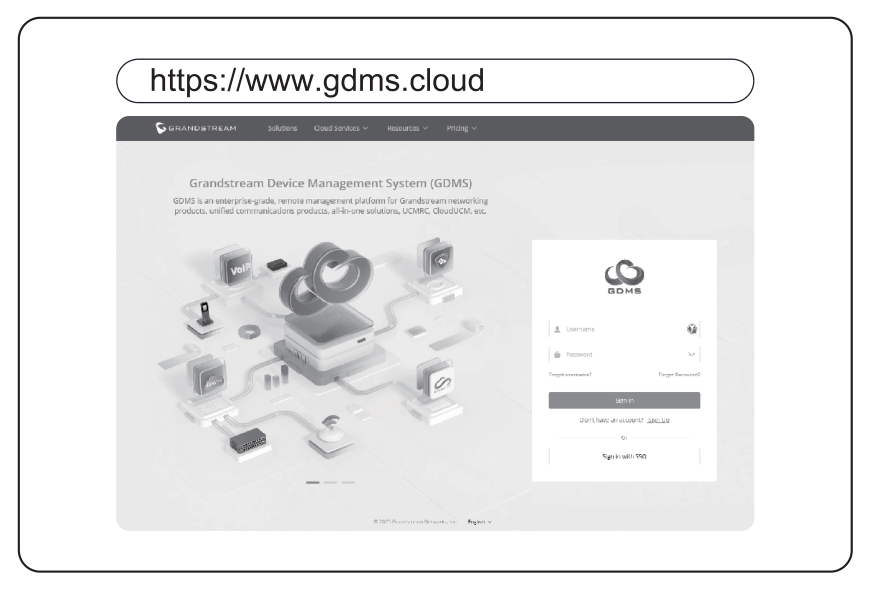
To manage the GWN7671 from the cloud, sign in to GDMS Networking and add the device to your network. GWN Manager provides an on-premises management option. If the AP is already managed by another controller or platform, use that controller or platform to configure it.
The GNU GPL license terms are incorporated into the device firmware and can be accessed through the device Web UI at my_device_ip/gpl_license. They are also available at Grandstream Open Source Software. To obtain a CD with GPL source code information, submit a written request to info@grandstream.com.
For certification, warranty, and RMA information, visit www.grandstream.com.