


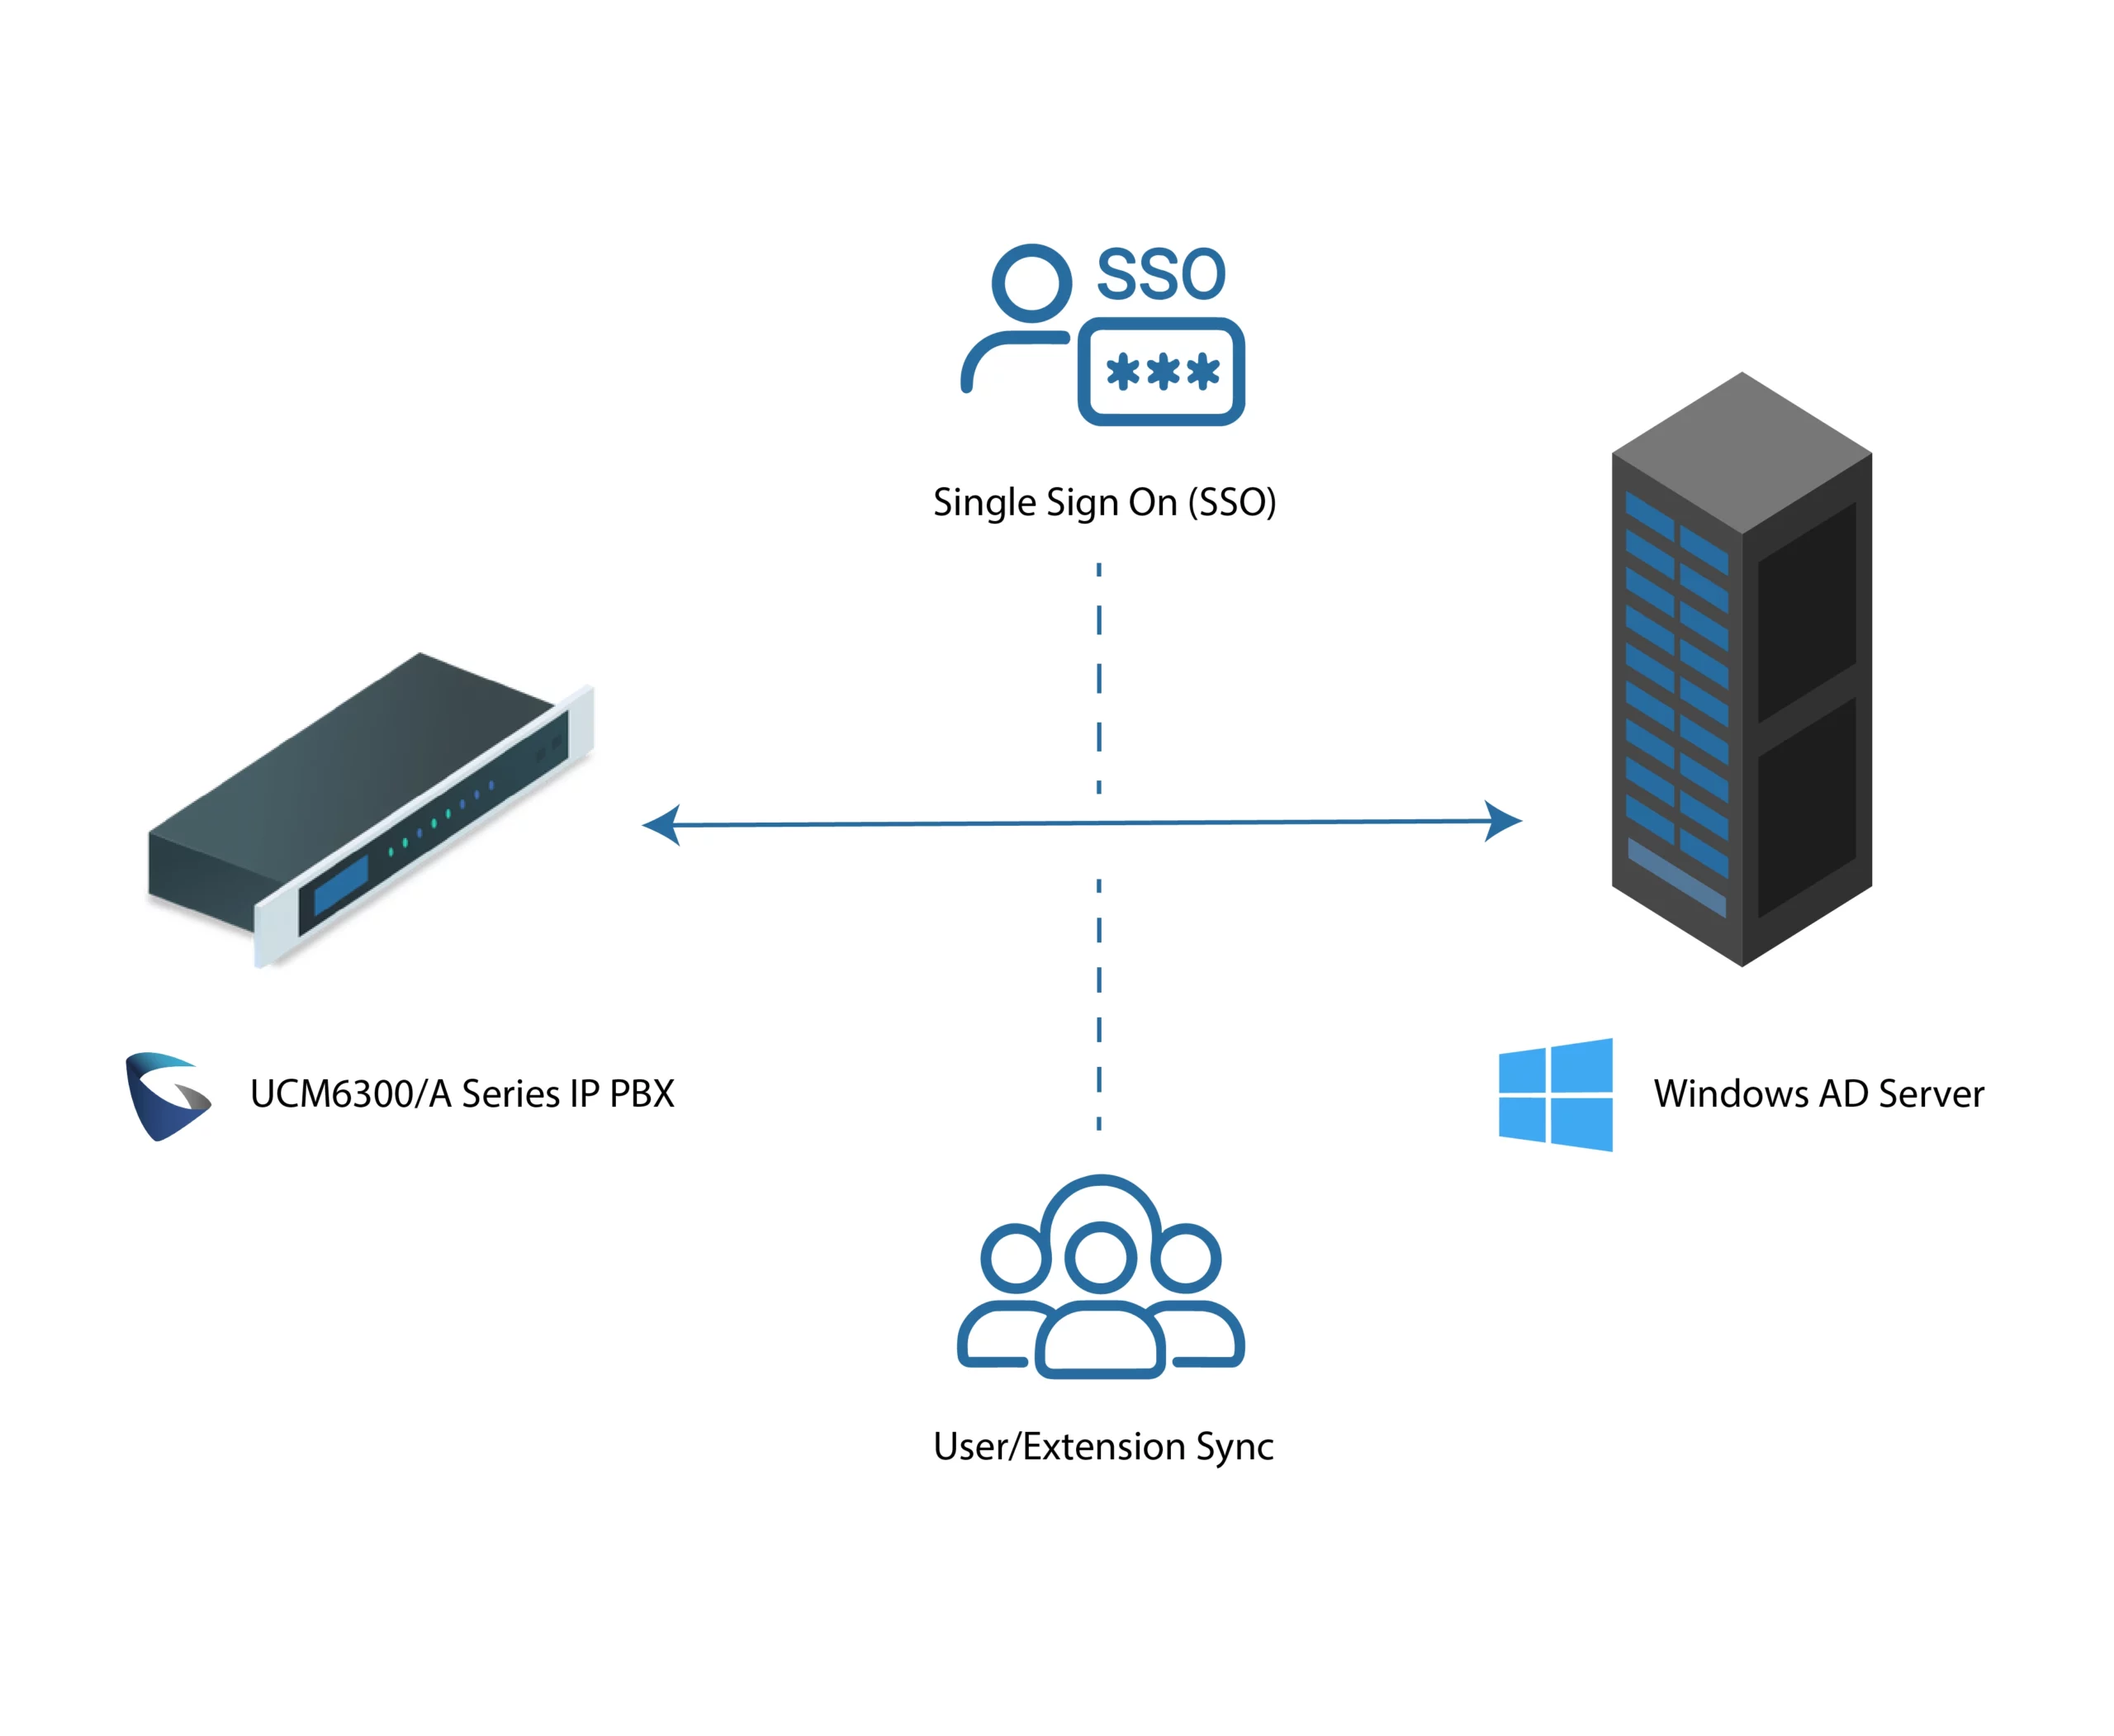
This guide offers a comprehensive walk-through on integrating a Windows Active Directory (AD) server with a Grandstream IP PBX systems.
Integrating Windows AD allows the PBX to fetch and manage user data directly from the AD server, making it easier to maintain consistent user information across platforms. Contacts can be imported into the PBX’s LDAP phonebook, and AD users can be linked to extensions or system accounts for unified user administration. The integration also supports automatic and scheduled synchronization, reducing manual workload and keeping user records up to date.
Additionally, enabling Single Sign-On (SSO) allows AD users to log in to the PBX web interface using their domain credentials, enhancing security and simplifying password management.
PREREQUISITES
Before starting the configuration process, ensure that both your Windows AD environment and PBX system meet the necessary requirements.
- Supported Windows Server Versions
- Windows Server 2008 / 2008 R2
- Windows Server 2012 / 2012 R2
- Windows Server 2016
- Windows Server 2019
- Supported Grandstream PBX Firmware Versions
- Please refer to the [Supported Models] section for details.
CONFIGURING WINDOWS AD ON THE PBX
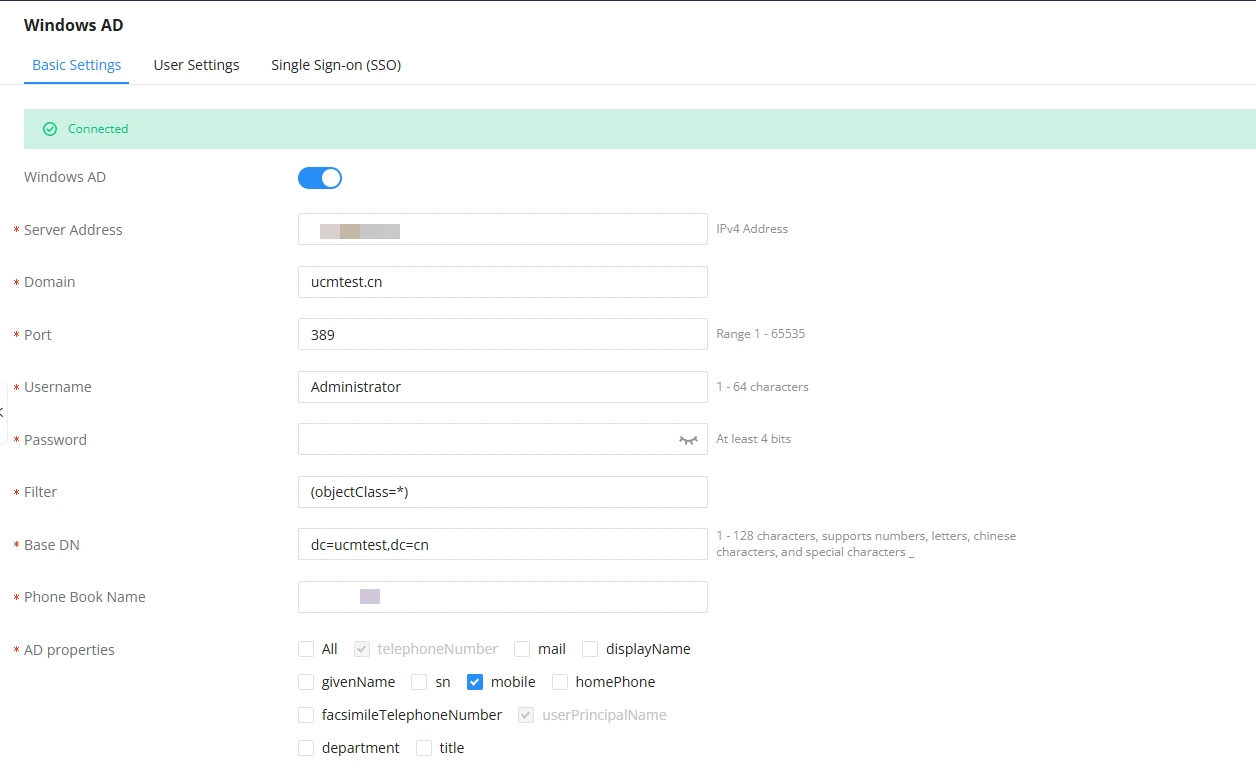
To integrate Windows AD with the PBX, please navigate to Integrations→Windows AD→Basic Settings and fill in the following information:
Parameter | Description |
Windows AD | The IPv4 address of the Windows AD server to which the PBX will connect. This must be reachable from the over the network. |
Server Address | The IPv4 address of the Windows AD server to which the PBX will connect. This must be reachable from the over the network. |
Domain | The domain name of the AD environment, such as “example.local“. It identifies the AD domain for authentication and user retrieval. |
Port | The TCP port used to connect to the AD server, typically 389 for standard LDAP. Valid range is between 1 and 65535. |
Username | The AD domain administrator account, typically “administrator”, must be used to authenticate the PBX with the AD server. Supports 1 to 64 characters. |
Password | The password for the specified administrator account. Required to authenticate the PBX during connection and synchronization operations. |
Filter | An LDAP query string used to control which objects (e.g., users, contacts) are retrieved from AD. For example, (objectClass=*) retrieves all objects. |
Base DN | The Distinguished Name (DN) of the AD node from which searches will begin, such as “dc=example,dc=local”. This defines the LDAP query root path. Supports 1 to 128 characters, including letters, numbers, Chinese characters, and special characters such as underscores (_) and hyphens (-). |
Phone Book Name | The name under which AD contacts will appear in the PBX’s LDAP phonebook. This label helps distinguish AD-sourced entries in the contact list. Only letters, numbers and special characters _ allowed |
AD Properties | Specifies which LDAP attributes to pull for each AD object, such as sn (surname), mail (email), or telephoneNumber. These map to fields on the PBX. |
Synchronizing Windows AD Information
Once the Windows AD connection settings are properly configured, the next step is to synchronize user and contact data from the Windows Active Directory into the PBX system.
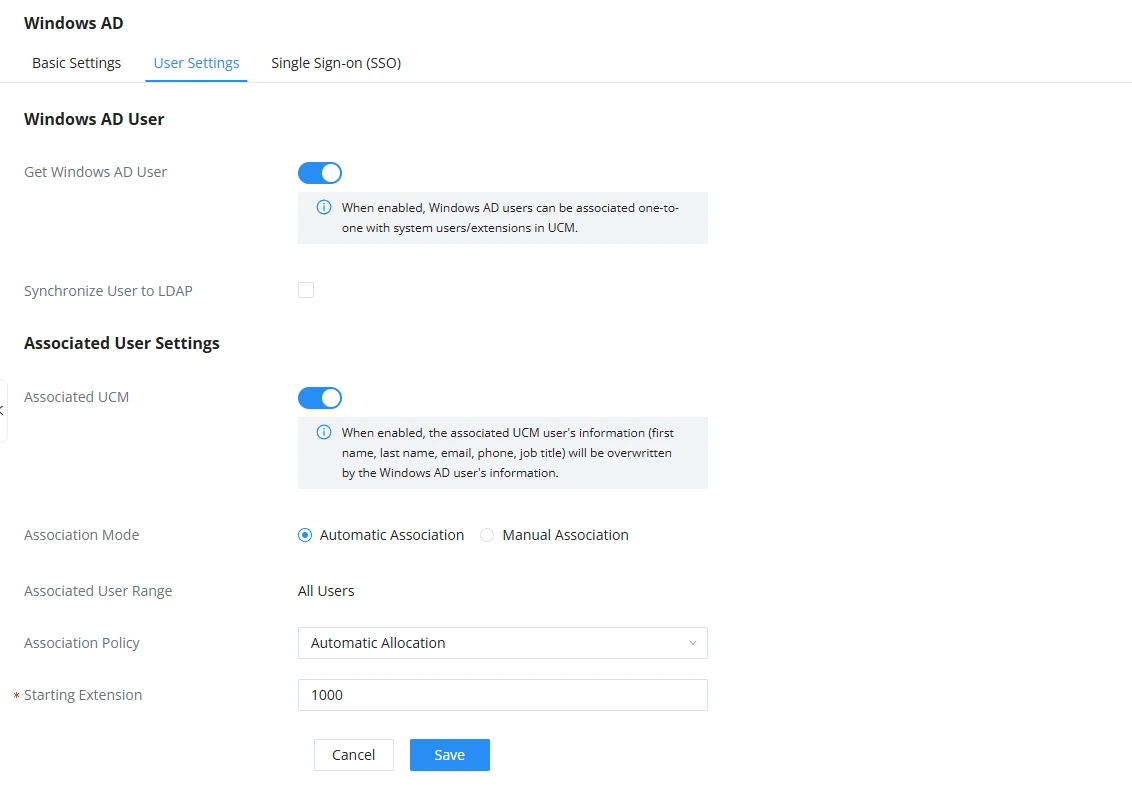
To customize how Windows AD users are retrieved, displayed, and associated within the PBX system, administrators can configure the following synchronization parameters under Integrations→Windows AD→User Settings.
Parameter | Description |
Get Windows AD User | When enabled, the PBX retrieves user accounts from the Windows AD based on the filter and base DN previously configured in the integration basic settings. These users become eligible for association with system users or extensions. |
Synchronize User to LDAP | Enables automatic import of AD user data into the PBX’s LDAP phonebook. IP phones or devices configured with the PBX LDAP server can then perform lookups to access up-to-date contact information. |
Associated UCM* (*Field may vary by PBX model) | Enables/Disables binding of AD users to PBX extensions and system users. |
Association Mode | Defines how Windows AD users are bound to PBX extensions/users. The options are:
|
Associated User Range | Specifies which categories of AD users can be linked to PBX users. |
Association Policy | Defines how PBX assigns extensions to Windows AD users during automatic association:
|
Windows AD User List
Once the synchronization settings are correctly configured, the Windows AD user list (located under Integrations→Windows AD→User Settings) will be populated with user information retrieved from the Windows AD server. The attributes displayed in this list correspond to those selected during the initial integration setup.
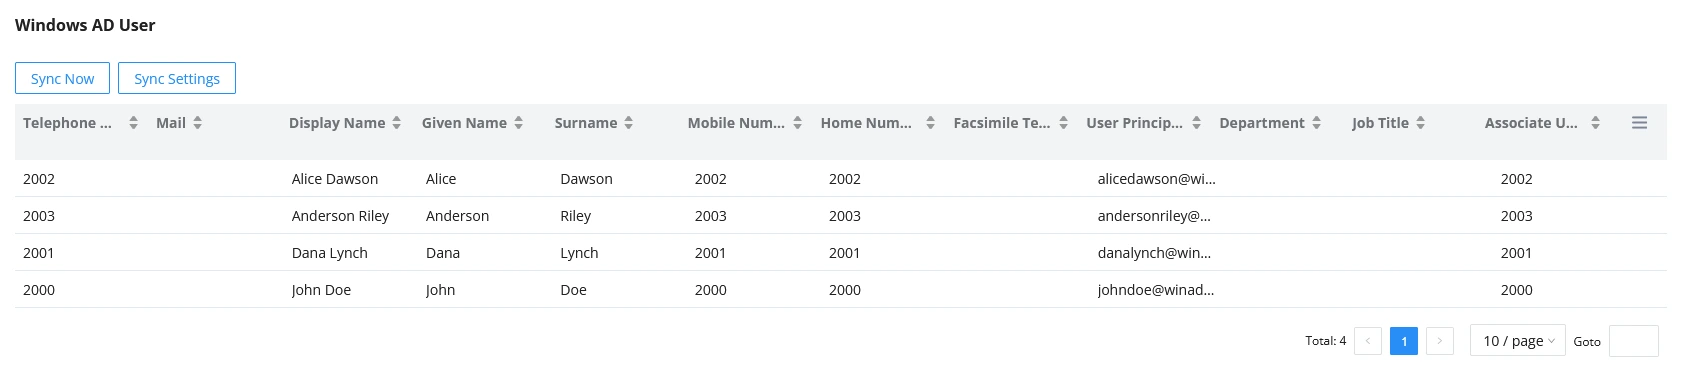
Below the user list, there are two buttons:
Parameter | Description |
 | Manually triggers synchronization to fetch current Windows AD user data and reapply any binding configuration. |
 | Opens configuration options for scheduling automatic synchronization intervals and displays the history or records of past sync operations. |
Automatic Synchronization Configuration
This configuration defines how to schedule automated synchronization of Windows AD users, along with optional extension cleanup based on AD comparison results.
Users can access this feature by clicking the Sync Settings button located in the Windows AD user list under Integrations → Windows AD → User Settings.
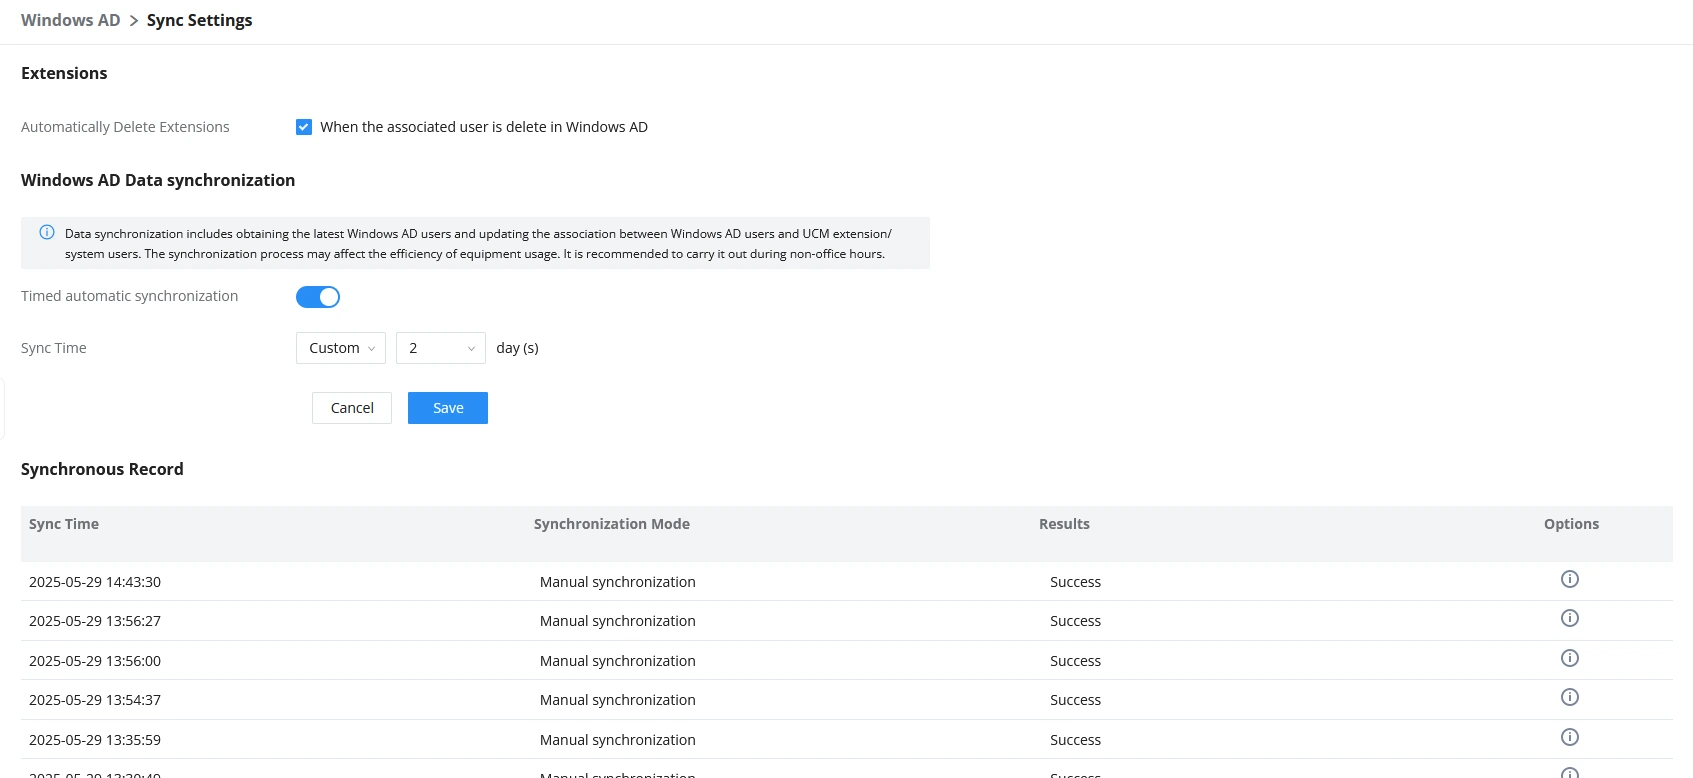
On this page, users can view and configure the following settings:
Parameter | Description |
Automatically Delete Extensions | When enabled, this feature ensures that if a user is deleted or disabled in Windows AD, the PBX will automatically stop synchronizing that user’s information and delete the associated extension. This helps maintain alignment between the AD and PBX systems. |
Timed automatic synchronization | This option allows administrators to enable/disable scheduled synchronization with Windows AD. |
Sync Time | Specifies when automatic synchronization occurs. Administrators can choose from the following scheduling options:
|
Synchronous Record | The Synchronous Record section provides a detailed log of past synchronization activities. The displayed fields are:
|
SSO (Single Sign-On)
This configuration page allows administrators to enable and configure Single Sign-On (SSO) for Windows AD integration. Once enabled, users can authenticate directly using their Windows AD credentials.
To access this page, navigate to Integrations → Windows AD → SSO Settings.
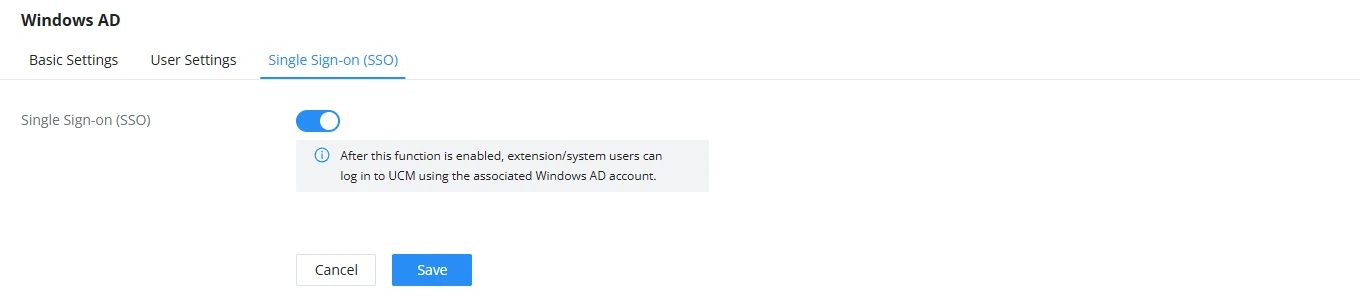
After enabling SSO, extension or system users linked to Windows AD accounts can log in to the PBX using their Windows credentials. This simplifies the login process and centralizes authentication.
Below are the steps to use SSO login:
- Enable the SSO feature from the SSO Settings page (Integrations → Windows AD → SSO Settings).
- After logging out of the PBX’s web UI, the login page will display a “Log in with Windows AD Account” option.
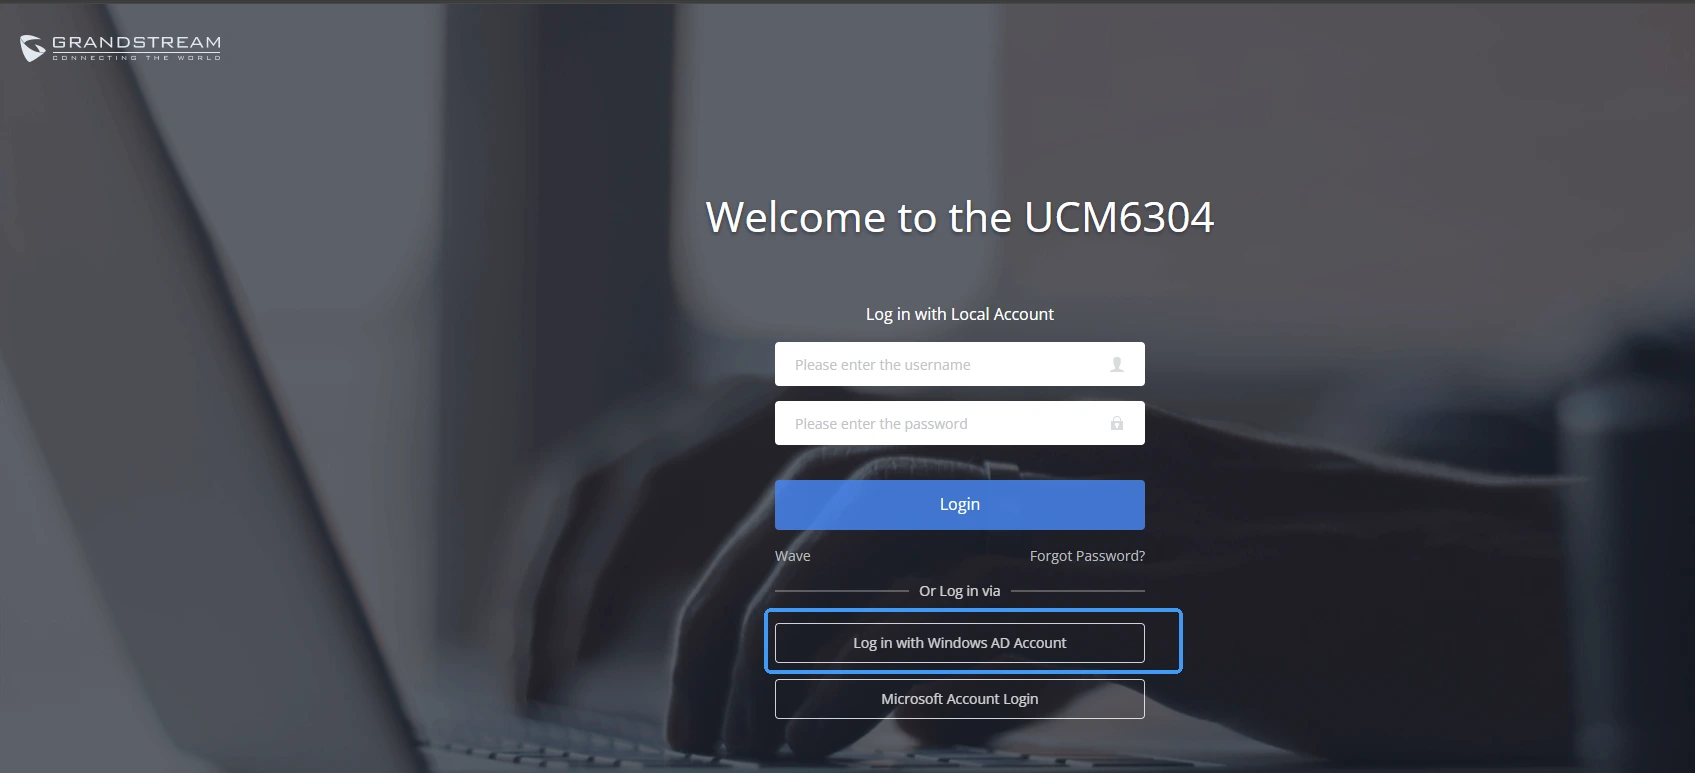
- Log in using the User Principal Name (UPN) (e.g., john.doe@example.local) and the corresponding password from the AD server.
- Depending on the type of binding:
- If the AD user is linked to an extension, the login redirects to the User Portal for that extension.
- If the AD user is bound to a system user account, the login redirects to that user’s PBX account interface.
SUPPORTED MODELS
The table below lists the Grandstream PBXs that support Windows AD integration, along with the minimum firmware version required for this feature.
Supported Devices | Firmware Version |
UCM6300/A Series | 1.0.29.6+ |
CloudUCM | 1.0.29.7+ |
SoftwareUCM | 1.0.33.7+ |