


INTRODUCTION
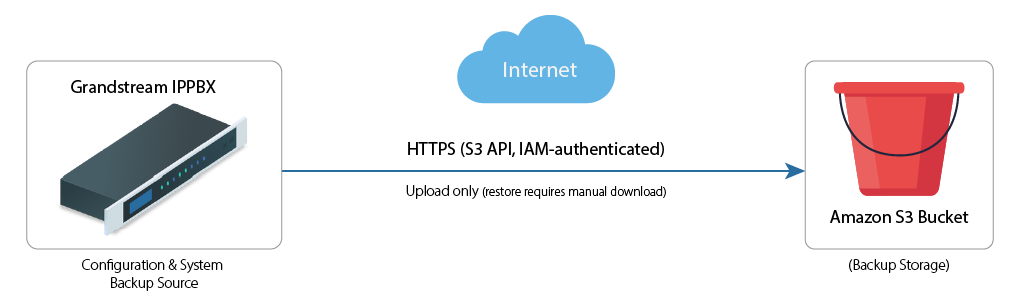
This guide explains how to integrate Grandstream IPPBX systems with Amazon Storage Service (S3) to store system backup files in customer-owned cloud storage. This integration is intended for recovery, compliance, and long-term retention, independent of the primary Grandstream IPPBX storage.
Amazon S3 provides highly durable, off-site storage, allowing administrators to maintain an additional copy of PBX configuration data outside the appliance or cloud instance. When configured, the PBX automatically uploads backup archives to a designated S3 bucket using secure IAM credentials.
The procedures in this guide walk through:
- Preparing an Amazon S3 bucket and IAM user.
- Configuring the PBX to connect securely to that bucket.
- Performing manual and scheduled backups to S3.
PREREQUISITES
To complete this integration, please ensure the following:
- The Grandstream PBX is upgraded to a firmware release that introduces Amazon S3 storage integration (For more information, refer to the Supported Models section).
- Administrator access to the PBX web UI with integration privileges.
- An AWS account with the ability to create and manage S3 buckets, as well as IAM users and access credentials.
- Stable internet access from the PBX to AWS.
- A dedicated IAM user limited to access only the target S3 bucket.
AMAZON S3 CONFIGURATION
This section covers the preparation steps required in Amazon S3 before the PBX can store backups. You will create a dedicated backup bucket and an IAM user with restricted permissions that the PBX will use to upload backup files securely.
Create an S3 Bucket
Follow the steps below to create the bucket that will store IPPBX backup files.
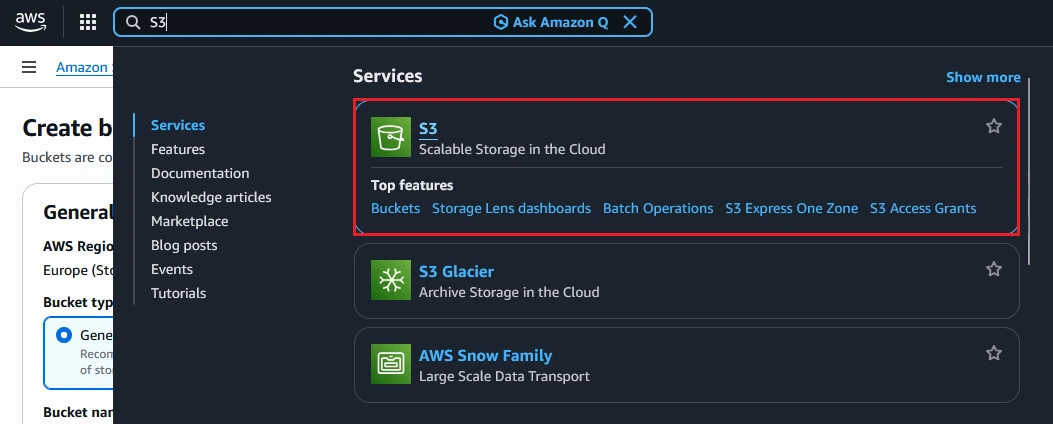
- Sign in to the AWS Console and open Amazon S3.
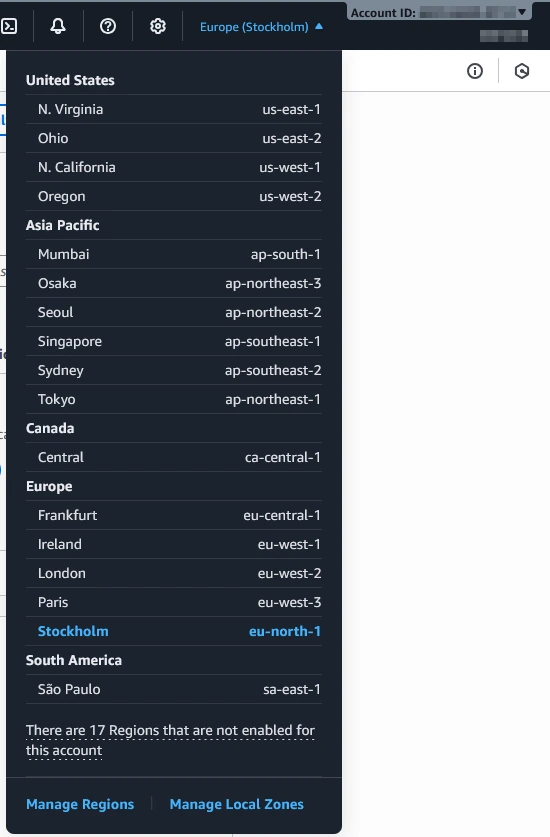
- Before creating the bucket, select the correct AWS Region in the console header (top-right). The bucket will be created in this region.
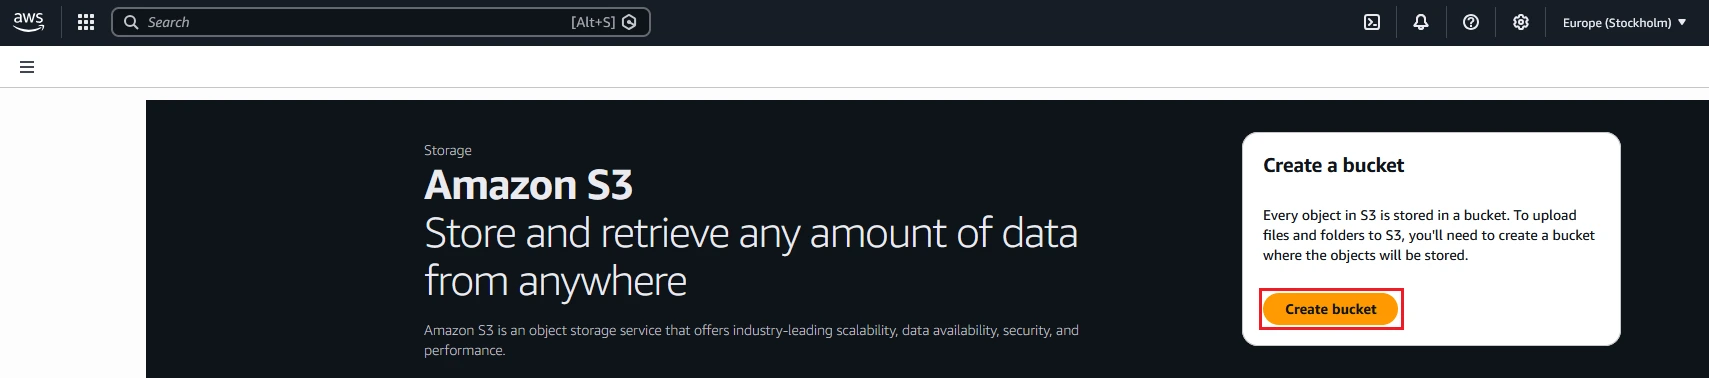
- Click Create bucket.
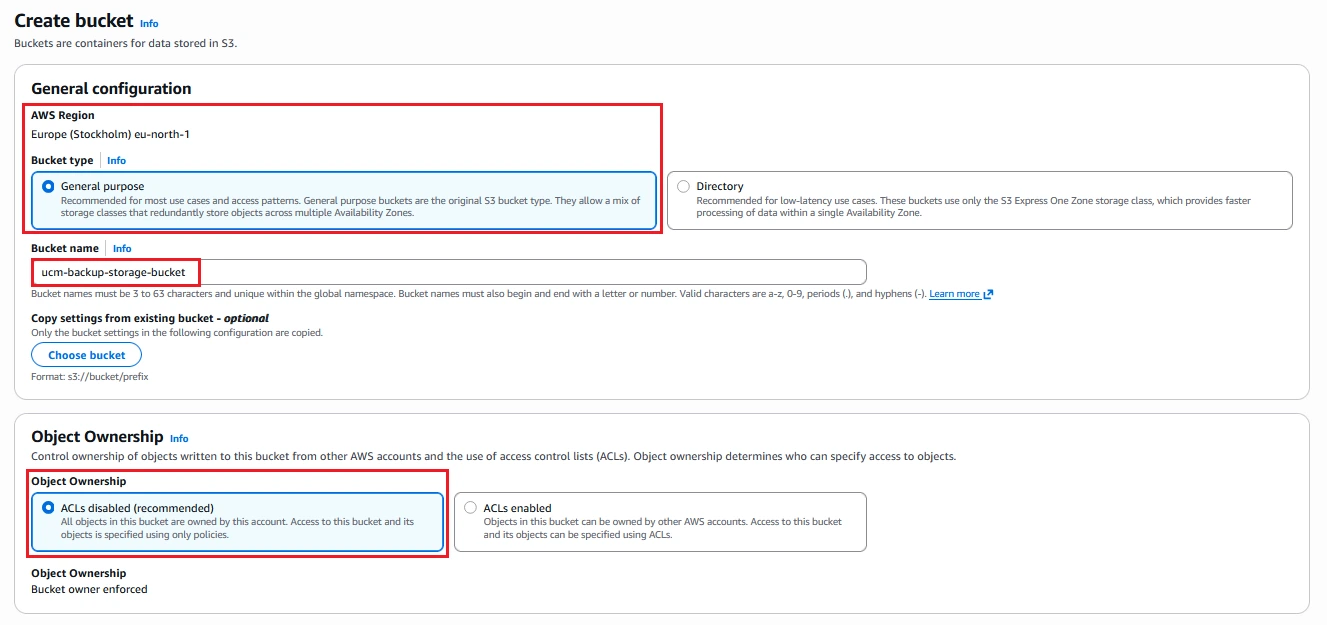
- On the Create bucket page, review the value shown under AWS Region (for example: eu-north-1, us-east-2, etc.)
- Under Bucket type, select “General purpose”.
- Enter a Bucket name.
- Leave Object Ownership set to “ACLs disabled (recommended)”. This ensures the bucket owner always retains control of backup files and access is managed using IAM policies instead of object-level ACLs, reducing complexity and misconfiguration risk.
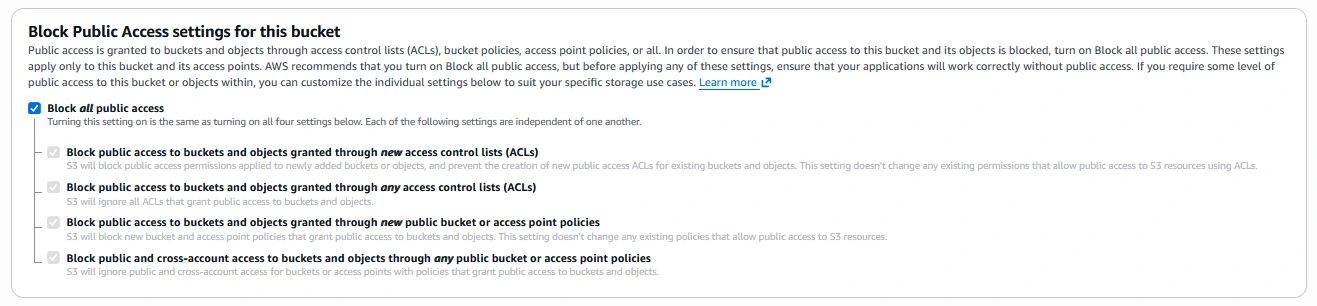
- Ensure that Block all public access remains enabled. This setting enforces private-only access paths since backups must never be exposed publicly.
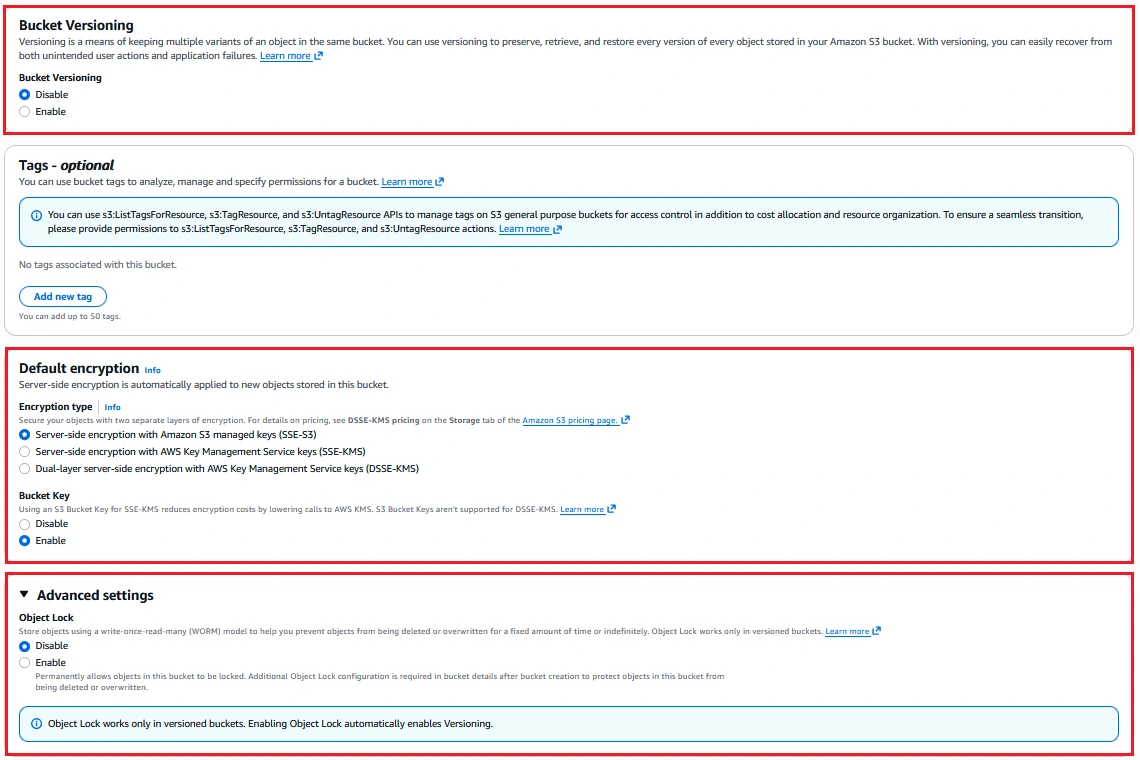
- (Optional but recommended) Enable Versioning and Default Encryption before creating the bucket. Versioning allows rollback to previous backups if one becomes corrupted, and encryption ensures backup data is protected at rest.
- (Optional) Enable Object Lock only if your organization requires immutable backups. Object Lock prevents backup files from being deleted or overwritten for a defined retention period. It is typically used in regulated environments (WORM compliance).
- Click Create bucket. After creation, you will see a confirmation message and be redirected to the bucket details page.
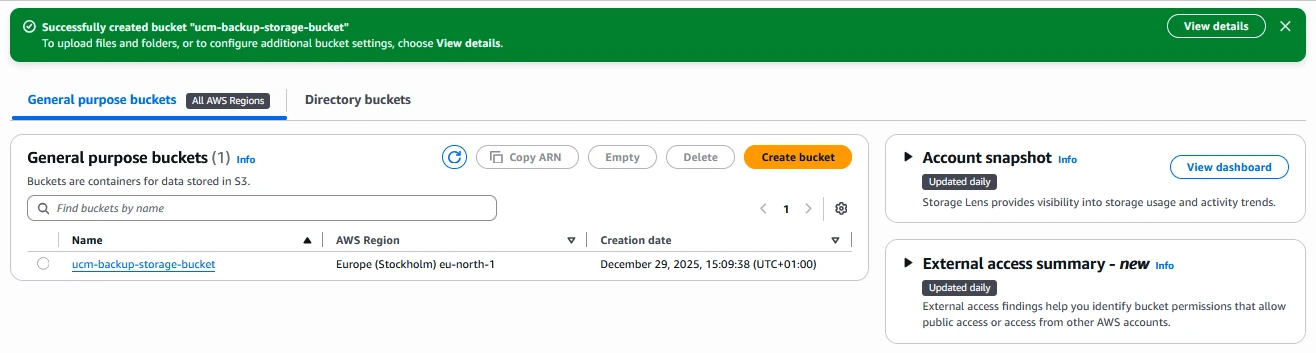
- Record the bucket name and region, both of which are required when configuring Amazon S3 on the PBX.
Create an IAM User and Access Keys
The PBX connects to Amazon S3 using an IAM user. It is strongly recommended to create a dedicated IAM user with restricted permissions instead of using a root or administrative account.
Follow the steps below to create credentials for the PBX.
- Open the AWS Console and go to IAM→Users→Add users.
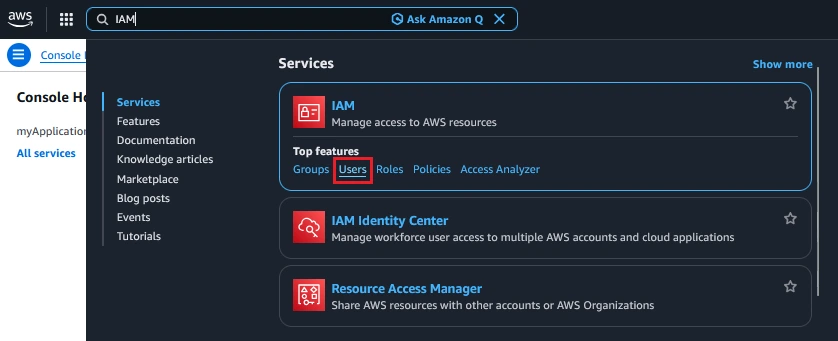
- Click on “Create user”.

- Enter a username (for example: ucm-s3-backup).
- Leave “Provide user access to the AWS Management Console” unchecked.
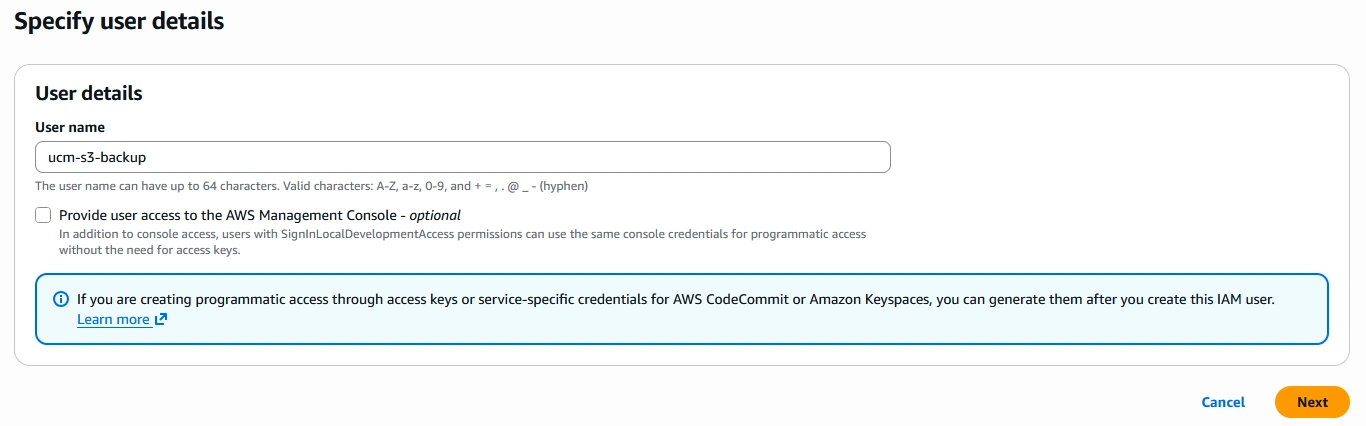
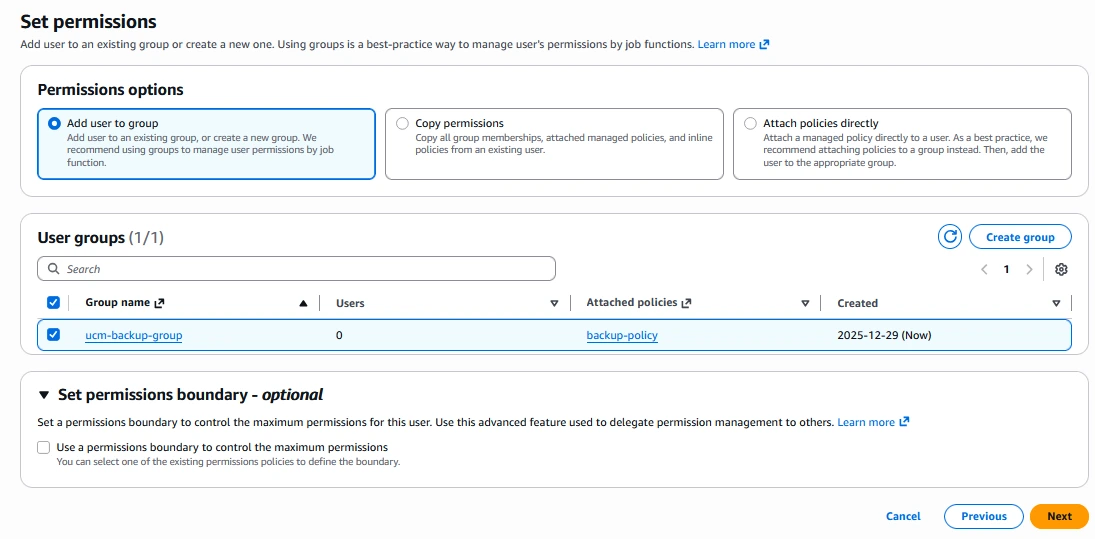
- On the Set permissions page, select Add user to group. Using a group makes it easier to manage backup permissions later if additional systems are added.
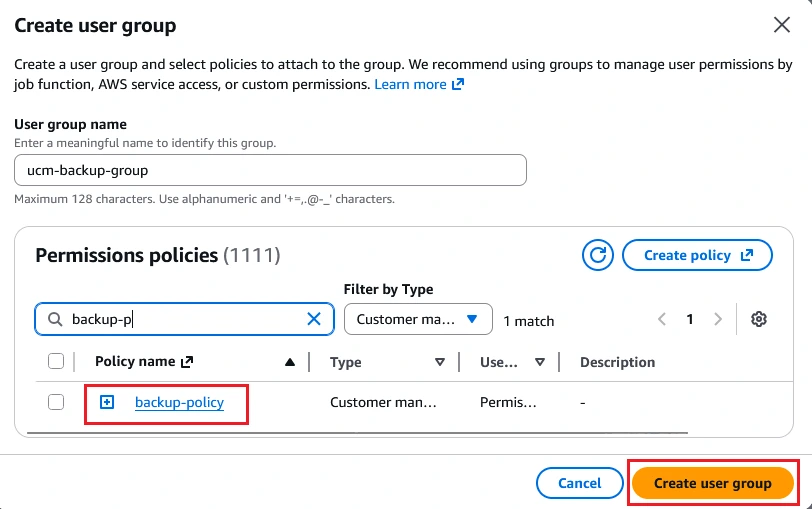
- Click Create group and name the group something descriptive, such as “ucm-backup-group”.
- Select Create policy to configure the permissions for this user group.
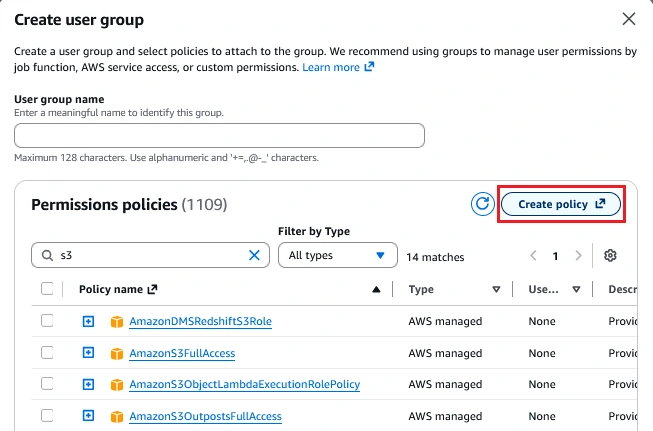
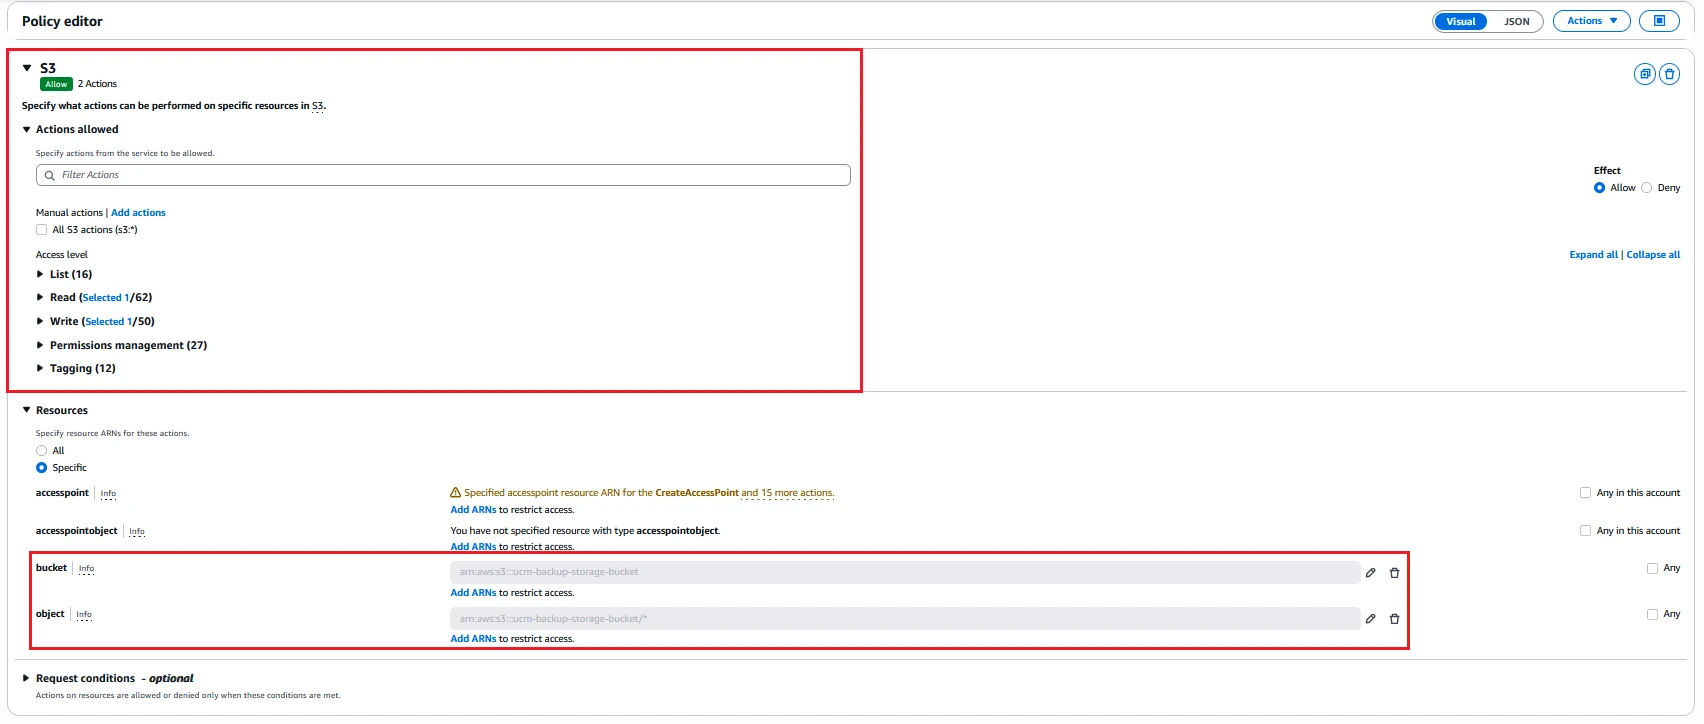
- On this page, name the policy and define permissions using either the Visual editor or the JSON editor (advanced).
- Method 1 (Visual editor):
- Choose Service → S3, then enable:
GetBucketLocation(under Read)PutObject(under Write)
- Specify the resources by clicking “Add ARN” under bucket, entering the previously created bucket name, then repeat under object and enter the same bucket name with
*as “Resource object name” to allow access to objects inside the bucket.
- Choose Service → S3, then enable:
- Method 2 (JSON editor): Paste the policy below and replace
YOUR-BUCKET-NAMEwith your S3 bucket name.
- Method 1 (Visual editor):
{
  "Version": "2012-10-17",
  "Statement": [
    {
      "Effect": "Allow",
      "Action": [
        "s3:GetBucketLocation",
        "s3:PutObject"
      ],
      "Resource": [
        "arn:aws:s3:::YOUR-BUCKET-NAME",
        "arn:aws:s3:::YOUR-BUCKET-NAME/*"
      ]
    }
  ]
}
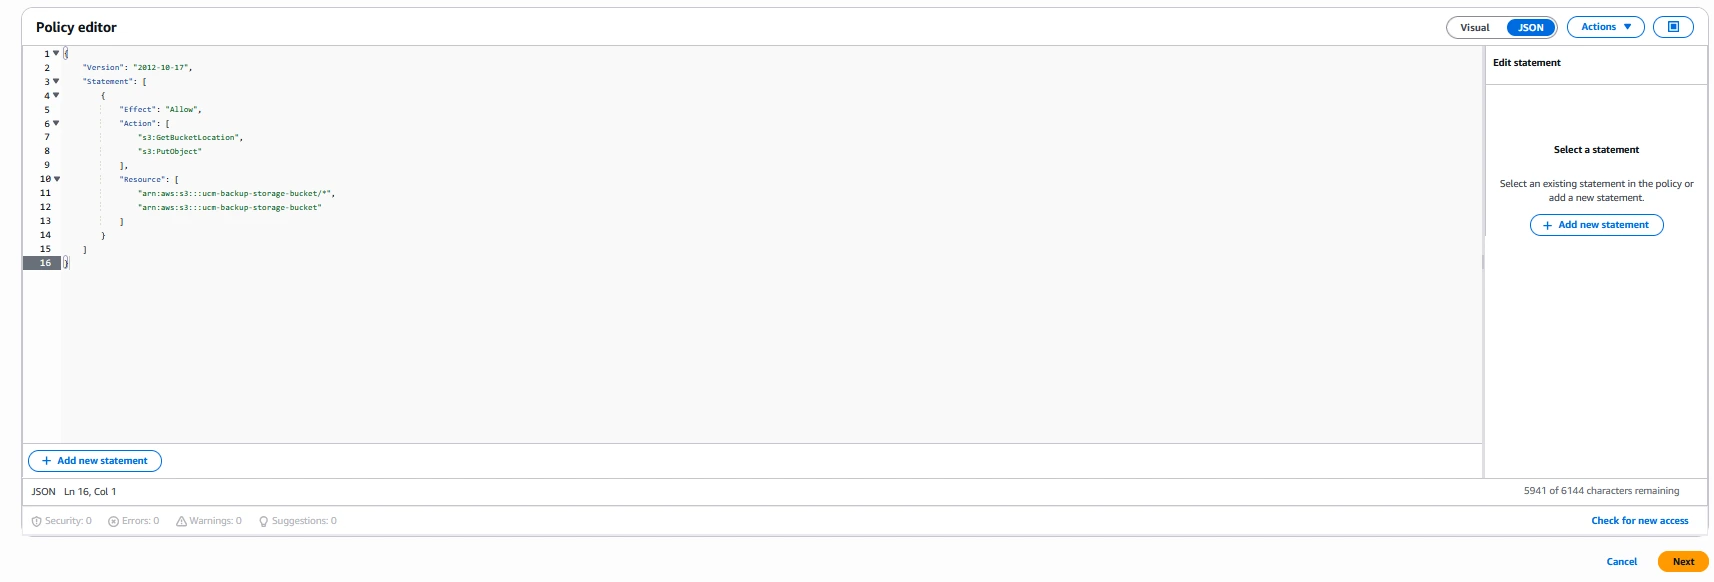
- Save the policy, return to the Create user group window, refresh the list, select your new policy, and click Create user group.
- Complete the user creation wizard by assigning the created group and confirming.
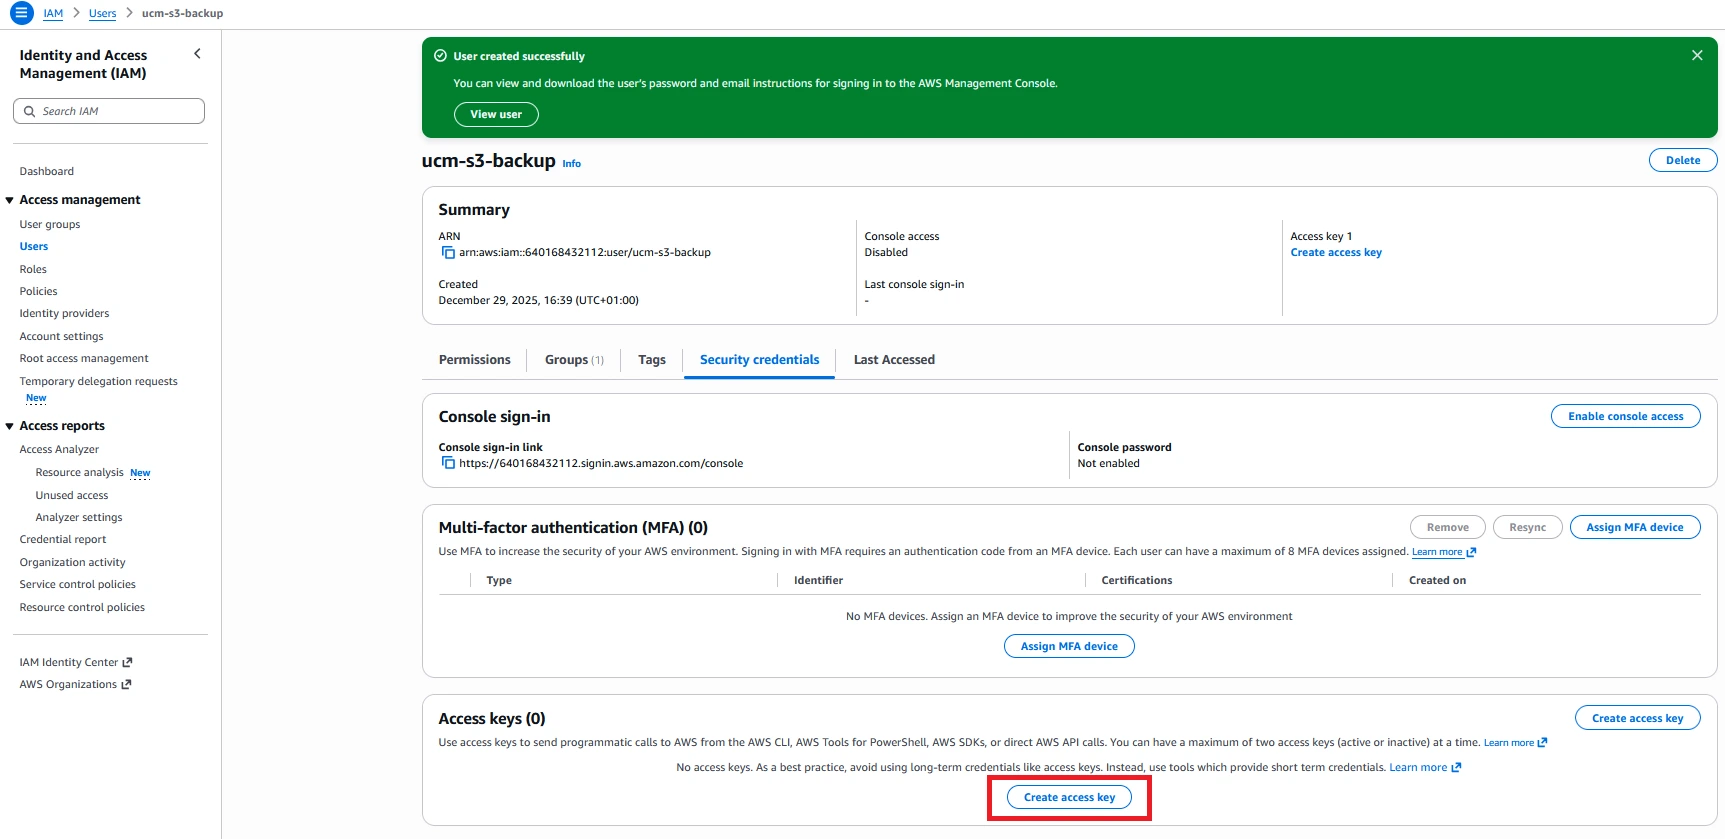
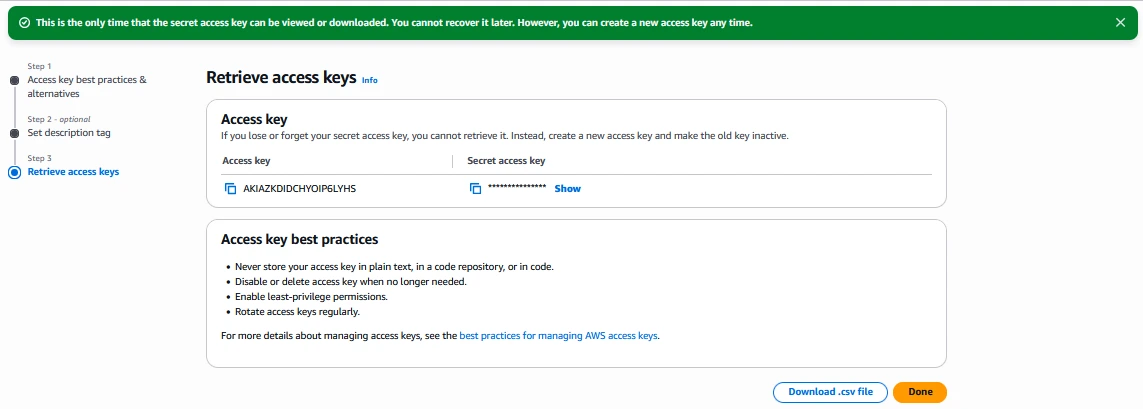
- Open the user, go to Security credentials, and click Create access key.
- Choose Application running outside AWS, then generate and save:
- Access Key ID
- Secret Access Key
- Click Download .csv file and store it in a secure location.
PBX CONFIGURATION
This section describes how to connect the PBX to the Amazon S3 bucket created earlier and how to use S3 as a backup destination. After configuration, the PBX will securely upload backup files to the designated S3 bucket.
Configure Amazon S3 Connection
Once the S3 bucket and IAM credentials are prepared, the next step is to configure the PBX so it can store backup files in Amazon S3.
Follow the steps below.
- Log in to the PBX web UI using an administrator account with integration privileges.
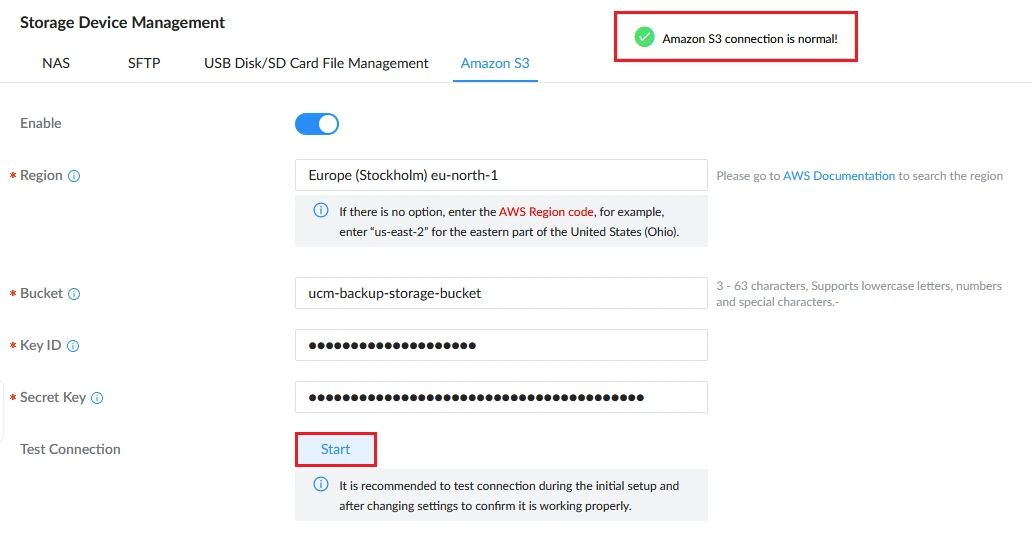
- Go to PBX Settings→Storage Device Management→Amazon S3.
- Toggle Enable to activate the Amazon S3 configuration fields.
- Fill in the fields as follows:
Region | Select the AWS Region where your bucket was created (for example: Europe (Stockholm) eu-north-1). If only a text field is available, enter the AWS Region code (for example: eu-north-1, us-east-2). |
Bucket | Enter the exact name of the S3 bucket you created (for example: ucm-backup-storage-bucket). Bucket names are case-sensitive and must match exactly. |
Key ID | Paste the Access Key ID from the IAM user created earlier. The field is masked immediately after entry for security. |
Secret Key | Paste the Secret Access Key from the downloaded CSV file. The field is masked immediately after entry for security. |
- Click Start under Test Connection. If the test succeeds, a confirmation banner appears, indicating that the PBX can reach the S3 bucket using the provided credentials.
- After a successful test, click Save.
Using Amazon S3 for Backups
Once Amazon S3 is configured and enabled, the PBX can store backup archives directly in the configured S3 bucket.
Create a Manual Backup to Amazon S3
To create a manual backup to Amazon S3, please follow the steps below:
- Log in to the PBX web UI.
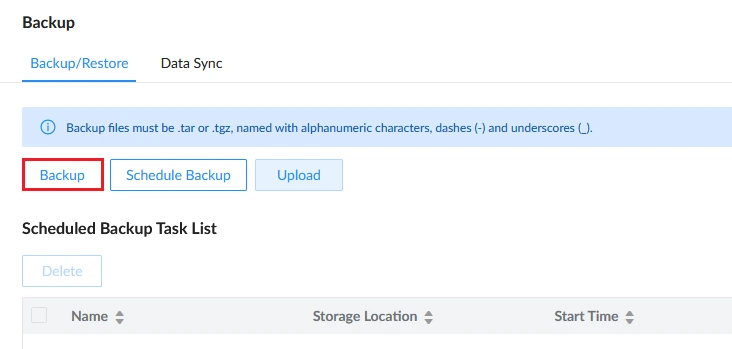
- Navigate to Maintenance→Backup→Backup/Restore.
- Click Backup to create a new backup task.
- Select the configuration components you want included in the backup.
- Under Storage Location, choose Amazon S3.
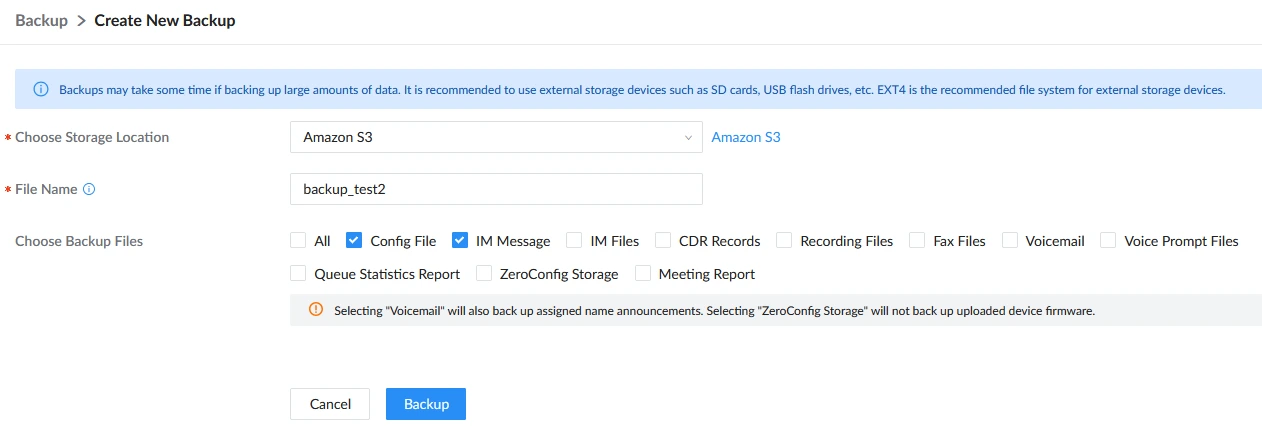
- Click Execute to start the backup.
The PBX creates the backup file locally and uploads it to the configured S3 bucket using the IAM credentials provided. If the upload fails, check S3 connectivity, IAM permissions, and bucket region configuration.
Configure Scheduled Backups to Amazon S3
Scheduled backups allow regular automated upload to Amazon S3.
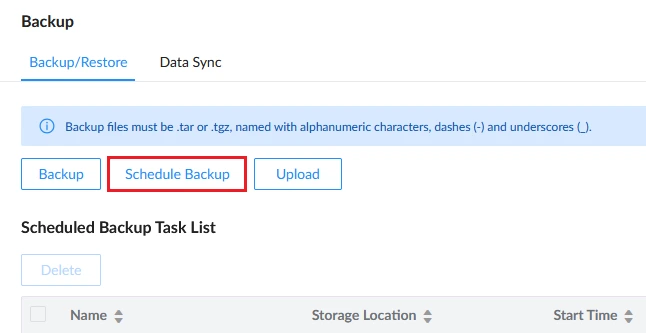
- Go to Maintenance→Backup/Restore.
- Click Schedule Backup to create a new scheduled backup.
- Specify the date, time, and recurrence (e.g., daily, weekly, monthly, or custom).
- Select the components to include in the backup.
- Under Storage Location, choose Amazon S3.
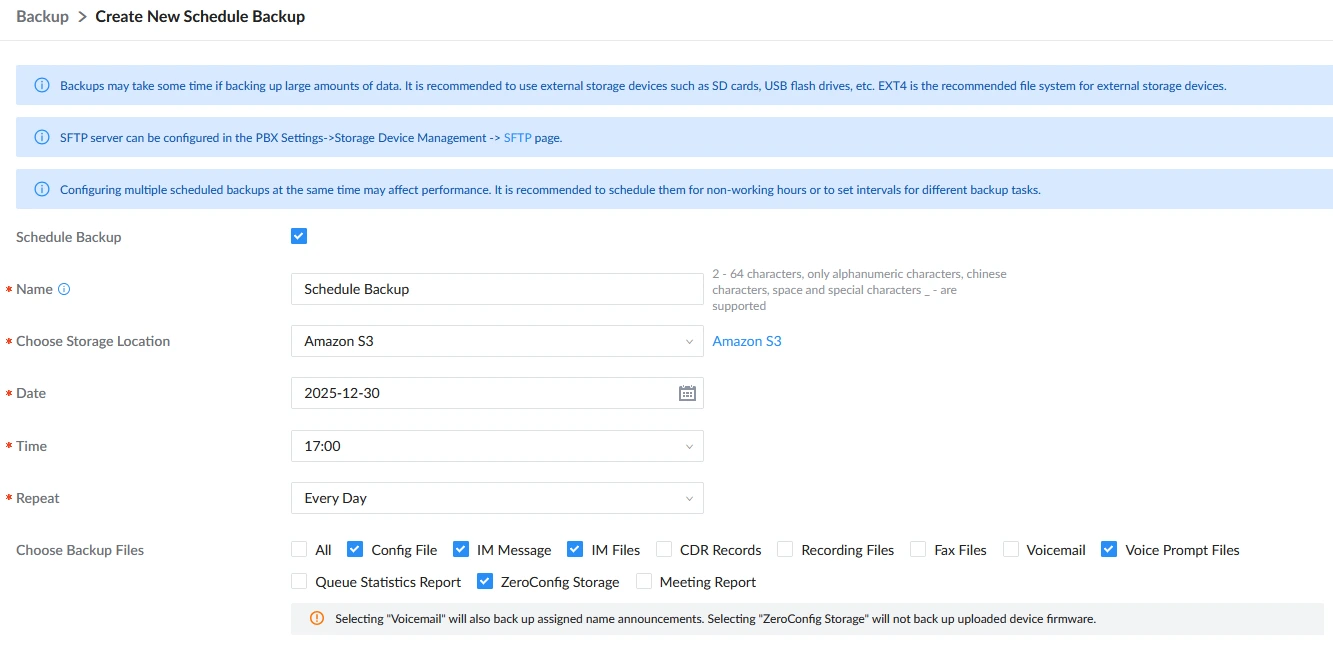
- Save and apply the scheduled backup settings.
The PBX will automatically generate and upload backups to S3 at the configured times.
Verify Backups on Amazon S3
Once a backup task (manual or scheduled) completes, verify the S3 bucket to confirm that the backup file has been uploaded.
- Sign in to the AWS Console.
- Open Amazon S3→Buckets.
- Select the bucket configured for PBX backups.
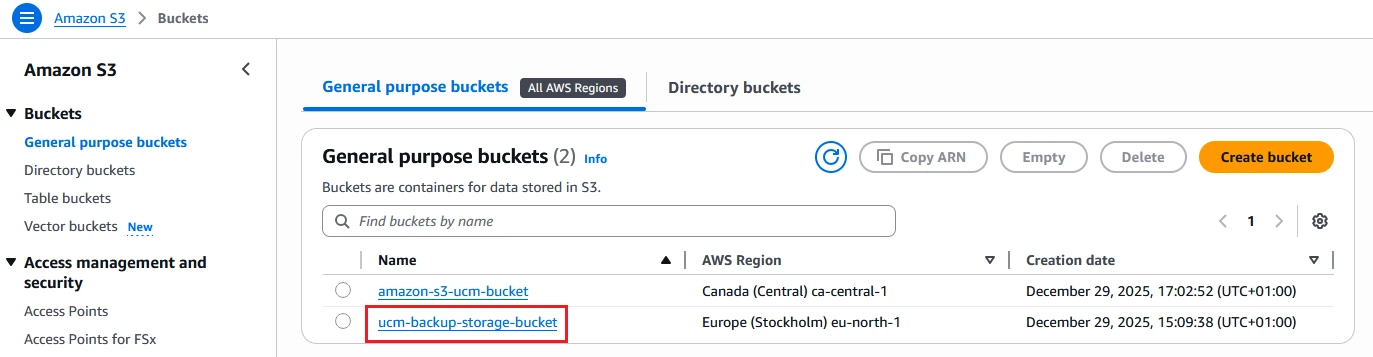
Inside the bucket, the PBX creates a folder named after its MAC address. This allows multiple devices to share the same S3 bucket without overwriting each other’s backups.
- Open the folder whose name matches the PBX MAC address.
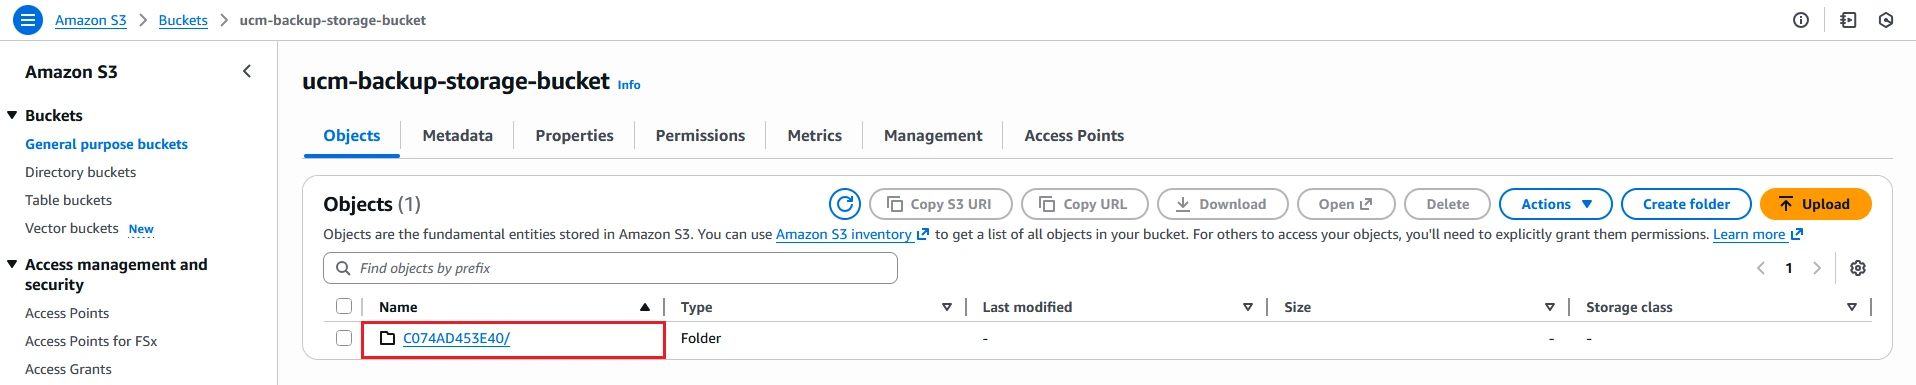
- Inside the folder, confirm that backup files exist.
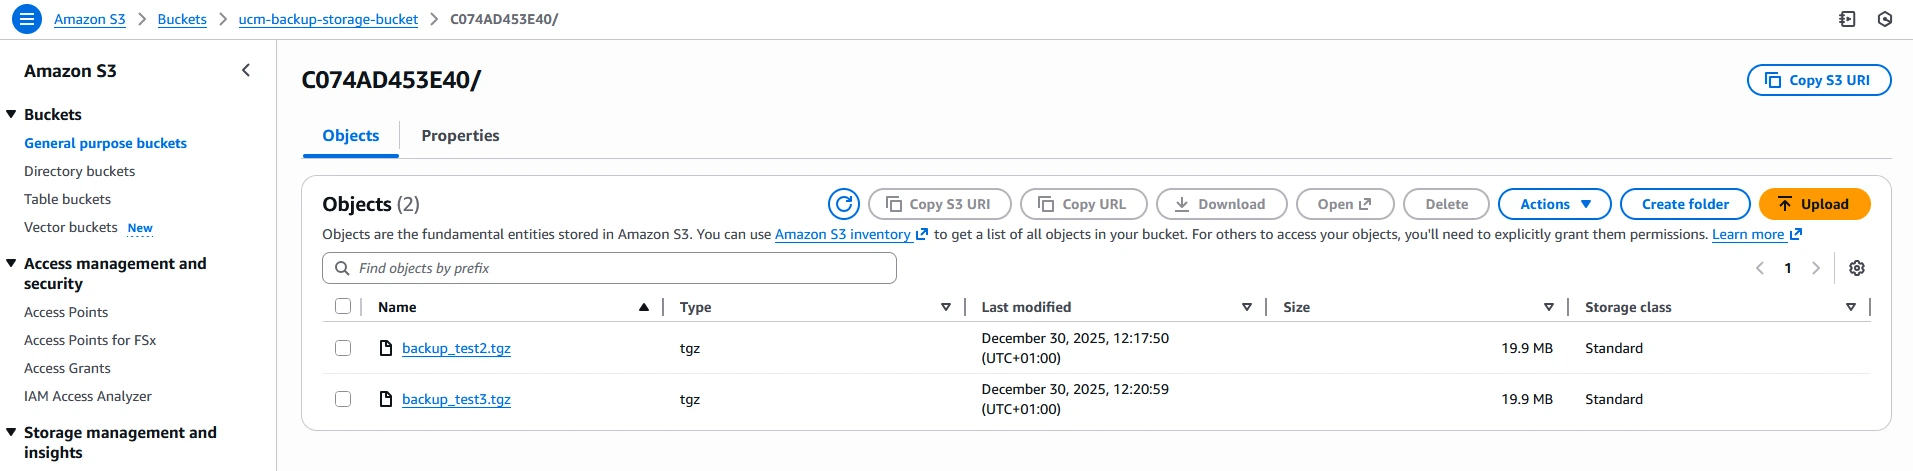
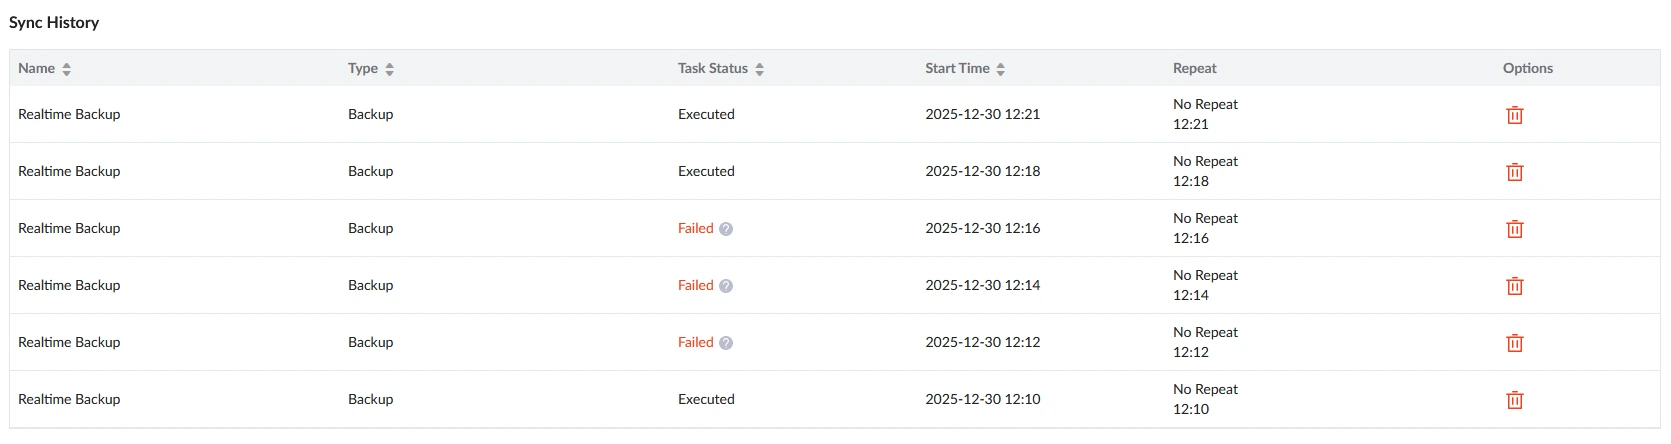
If the folder is empty or missing, check the backup job result in Backup→Backup/Restore→Sync History.
SUPPORTED MODELS
The Amazon S3 integration is available only on specific Grandstream PBX platforms and firmware releases. Use the table below to verify whether your system supports this feature before proceeding with configuration.
Models | Firmware Requirement |
UCM630x | 1.0.31.7+ |
UCM630xA | 1.0.31.7+ |
CloudUCM | 1.0.29.7+ |
SoftwareUCM | 1.0.33.7+ |