
The Wave app allows your team to take advantage of an abundance of features to communicate and collaborate from anywhere, anytime on any device.
- Single chat and Group chat (free IM tool)
- High quality point-to-point audio and video calling (Free softphone)
- Instant video meeting and schedule meeting
- Multi-layer contacts, LDAP contacts and Personal contacts
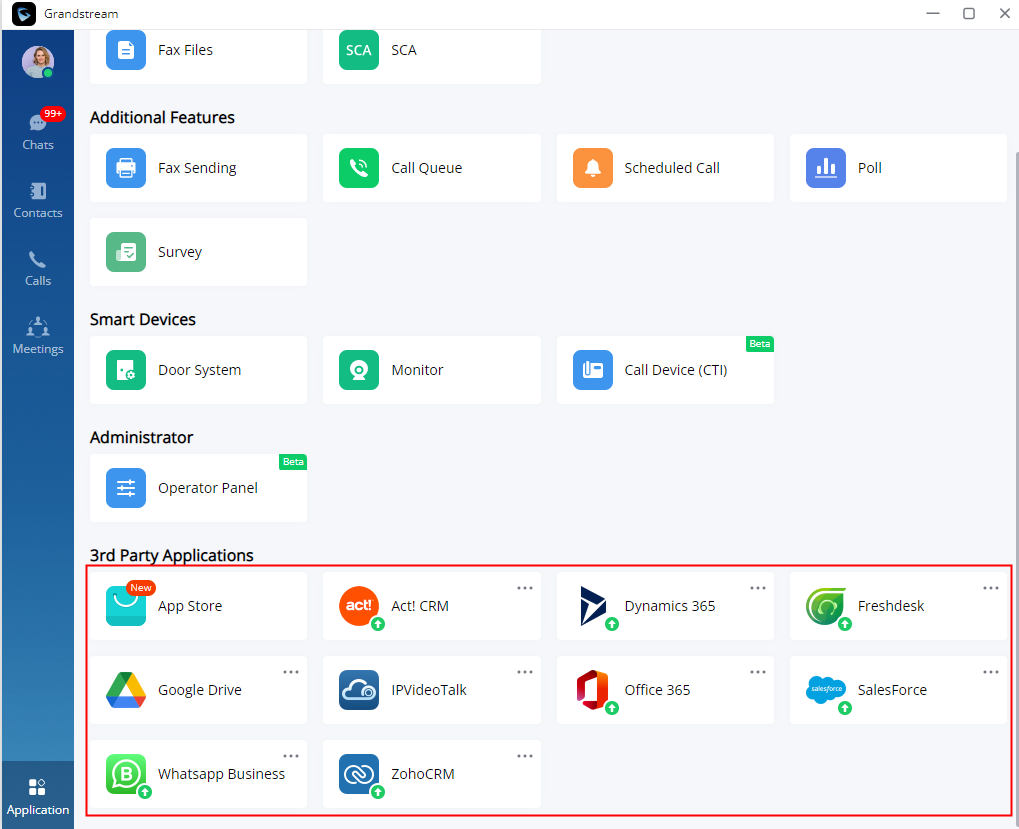
- Integrate CRM, WhatsApp, Google Drive, and many add-ins
- Available for desktop, web, Android, and iOS
Quickly Start Wave
- You can log in to the UCM Web UI and go to the Wave Client tab page on the extension editing page to view the information of the Wave app.
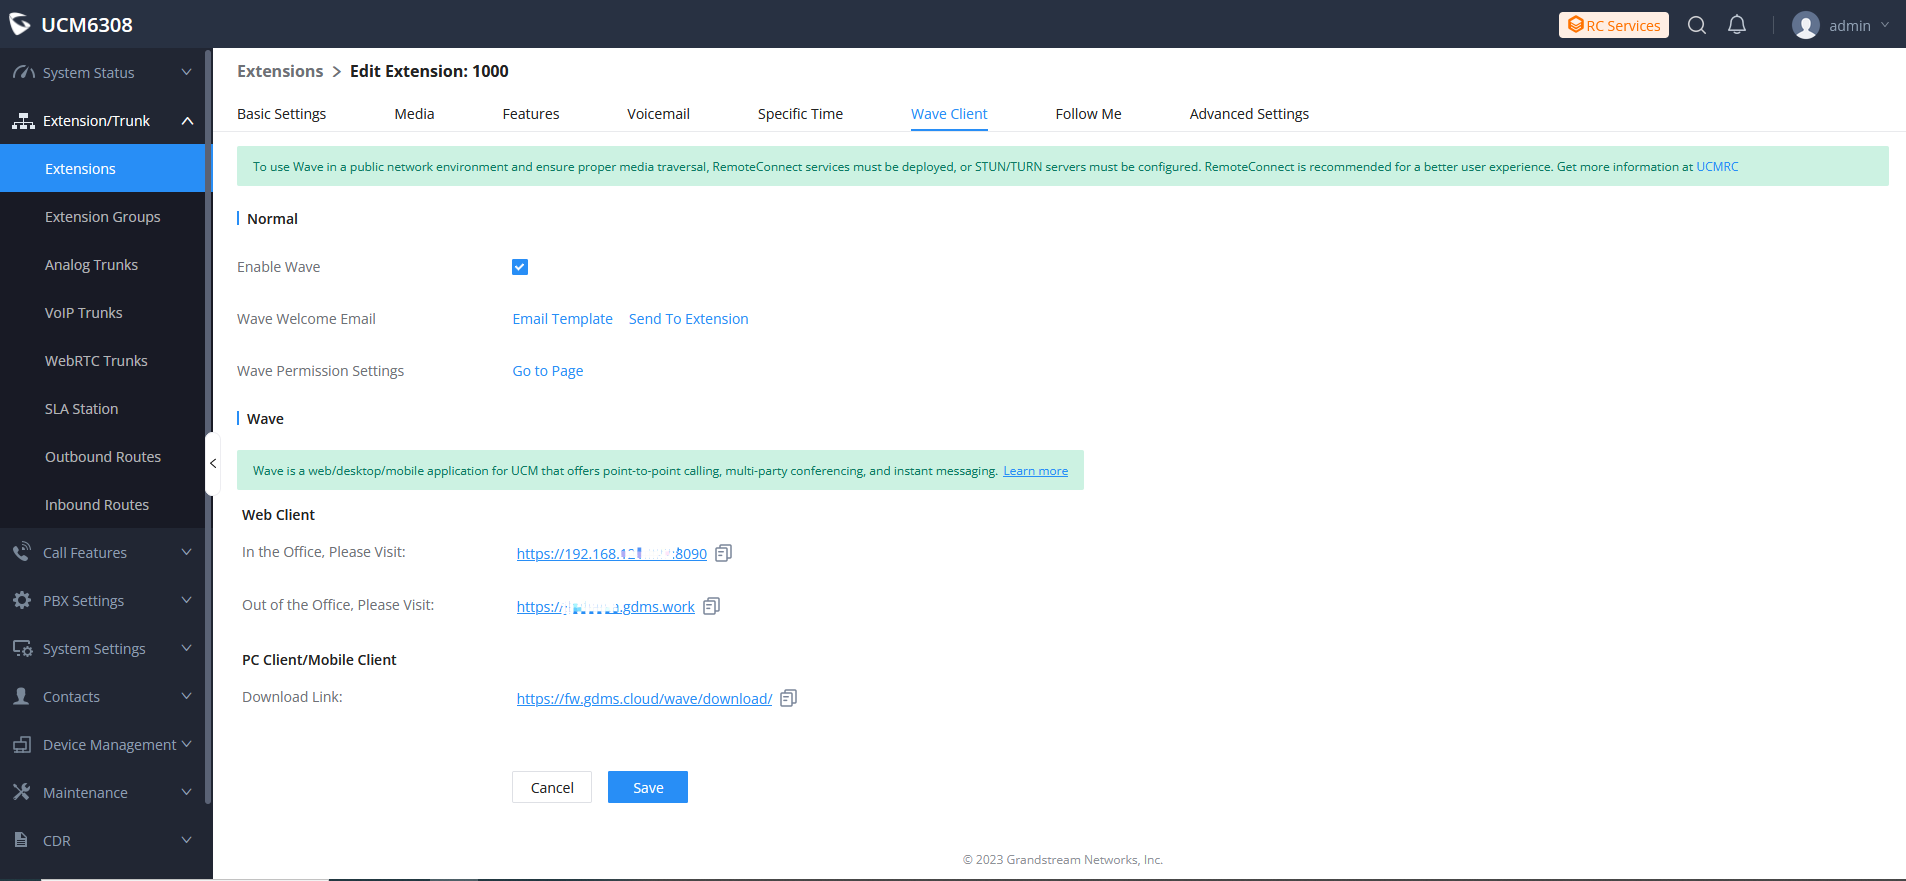
Enable Wave | This field is used to set whether to allow this extension to log in to the Wave application. |
Wave Welcome Email | Users can quickly send a Wave welcome email to this extension’s mailbox so that the extension owner can start to use Wave quickly. |
Wave Permission Settings | This field is used to set the functional permissions in the Wave application for this extension, such as video call, chat, meeting, encrypted chat, add-in installation, etc. |
Web Client | Users can open the Wave Web client directly through a browser without installation.
Users can quickly copy the link to the team members. |
PC Client/Mobile Client | The address of downloading Wave Desktop/Mobile application. Users can quickly copy the link to the team members. |
2. You can log in the Wave Web client directly, or download the Wave clients for login.
Invite Your Team to Use Wave
You can follow the steps below to inform your team members to start using Wave app.
- You can go to the Extension module on the Web UI of your UCM63xx and send Wave welcome emails to your team members to invite them to use Wave app.
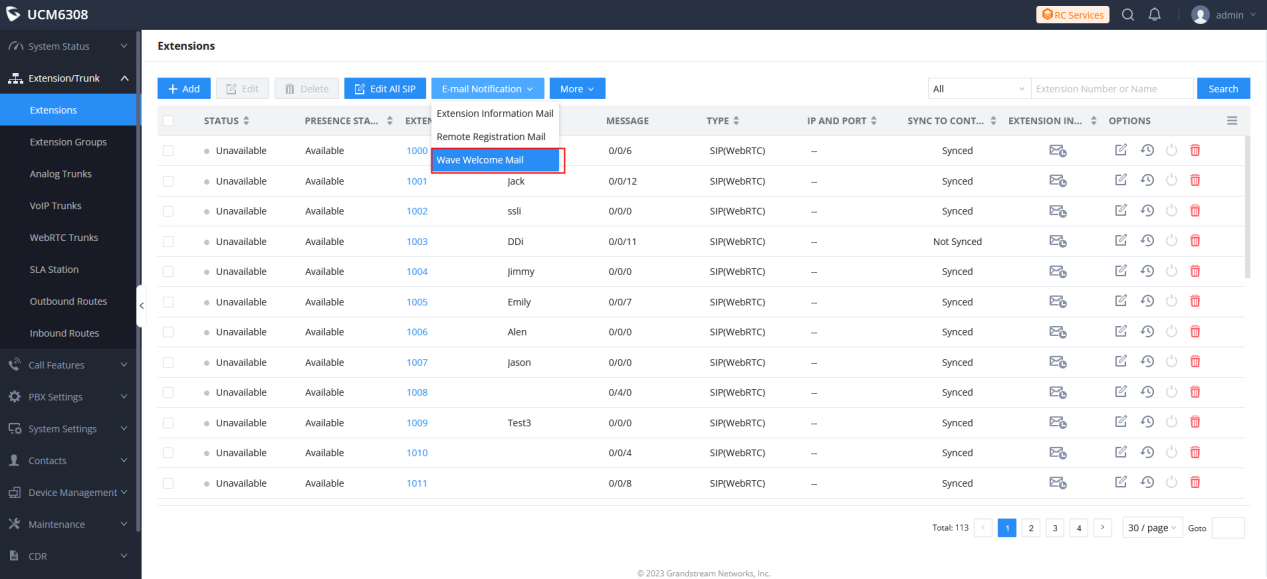
2. Your team members will receive an email as the screenshot shows below: (You can also go to Settings->Email Settings->Email Templates to modify the contents.)

3. Your team members can log in the given credentials through Wave Web client address, or download the Wave app for login.
Reset User/Wave Password
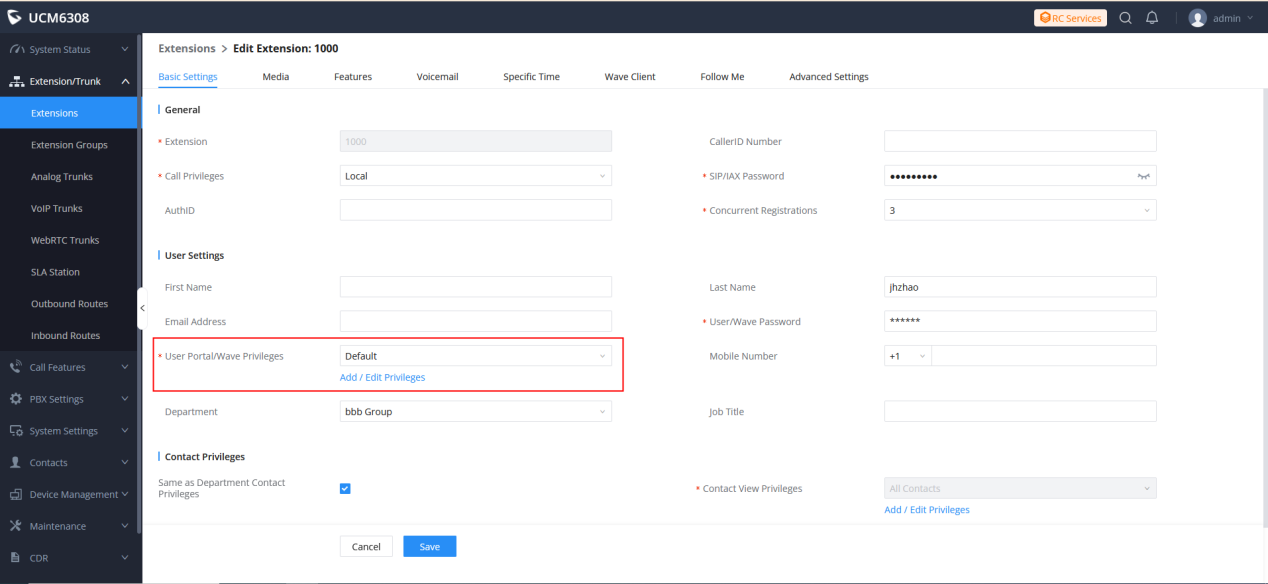
If the extension owner forgets the Wave login password, the user can log in to the Web UI of the UCM63xx and reset the User/Wave Password.

Manage Privileges for Wave Users
Enable/Disable Wave
You can log in to the Web UI of the UCM63xx, access the Wave Client tab on the extension editing page to enable/disable the privilege whether if it allows users to use Wave app for login. The default setting is “Enabled”.

Set Wave Functional Privileges
You can set the Wave functional privileges for this extension. If the extension is used in a hotel system, and do not want the meeting function, you can follow the steps below to remove the meeting privilege:
- You can create multiple “User Portal/Wave Privileges”, and assign one of them to an extension. All privileges will be granted for the Wave user by default.
2. You can go to User Management -> User Portal/Wave Privileges to add or modify privileges.

Set Privilege to View Contacts
The user can configure custom privileges other than the default ones (All contacts, Departments, and sub-departments contacts). These custom privileges allow more flexible ways of allowing contacts to view all or specific contacts from other departments.
- Users can set contacts privilege on the extension editing page:

Same as Department Contact Privileges: This field is used to check whether the privileges of the contact are the same as those privileges of the department. If the privileges are the same, “Contact View Privilege” cannot be set.
Contact View Privilege: This field is used to set the view privileges for the contact.
Sync Contact: This field is used to set whether to display this extension in the Contacts module of the Wave app. If this option is unchecked, this extension will not be displayed in the Contacts module of the Wave app.
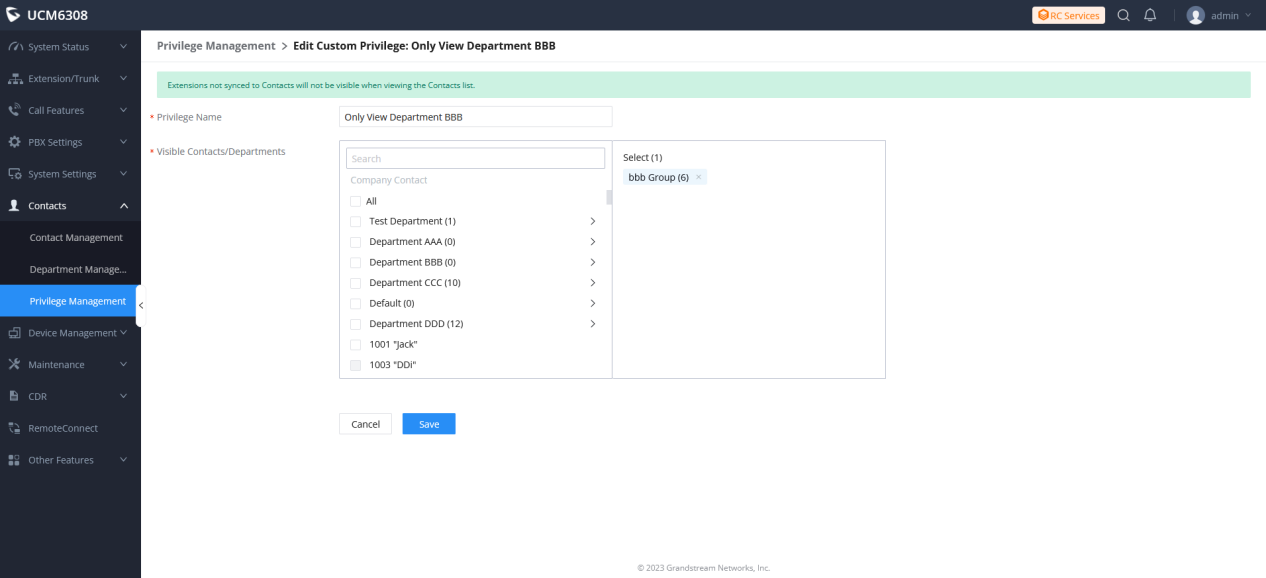
2. UCM admin can add or edit Privilege Management on Contacts -> Privilege Management under UCM web UI, there are 2 default privileges:
- Visible to all contacts.
- Only the contact person’s department and sub-department contacts are visible.

3. UCM admin can select one or more departments and assign the privilege to an extension owner to view the contacts in these departments. This extension owner can only view the contacts in the selected departments, and this user cannot see the contacts in rest of departments.
Assign Extension to Use Operator Panel
UCM supports the addition and configuration of the call console, which can realize one or more extensions as administrators to manage PBX activities, such as extension status, call queue status, call transfer, call monitoring, call hangup, etc.
- The call console can be set through Call Features.
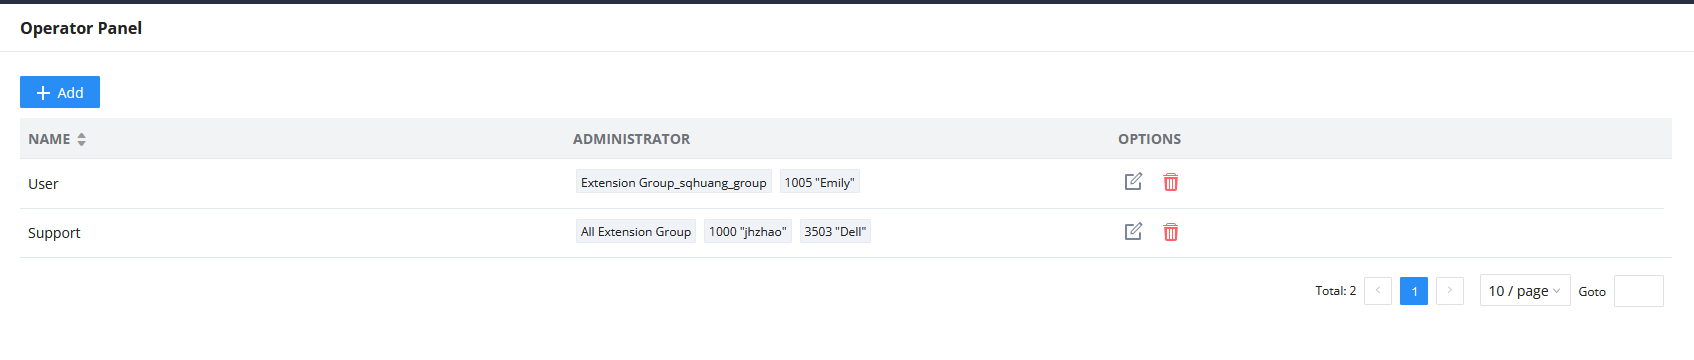
Click the “Add” button to add the call console. Please refer to the following for the description of the specific configuration items of the Operator Panel:
Name | The Operator panel name. |
Administrator | The operator of the call console can select extensions, extension groups, and departments. For the selected extension groups and departments, subsequent extensions will automatically become administrators. |
Management Module | |
Extension | The selected extensions will be supervised by the administrator, and you can choose extensions, extension groups, and departments. For the selected extension groups and departments, subsequent extensions will be automatically supervised by the administrator. |
Ring Groups | The checked Ring Groups will be supervised by the administrator. Select “All”, all Ring Groups and subsequent updates will be automatically supervised by the administrator. |
Voicemail Groups | The checked Call Queue will be supervised by the administrator. Select “All”, all Call Queue and subsequent updates will be automatically supervised by the administrator. |
Call Queue | The checked Call Queue will be supervised by the administrator. Select “All”, all Call Queue and subsequent updates will be automatically supervised by the administrator. |
Parking Lot | The checked Parking Lot will be supervised by the administrator. Select “All”, all Parking Lot and subsequent updates will be automatically supervised by the administrator. |
2. After an extension user with permission logs in to the Wave app, the Wave app displays the status information of the extension, ring group, voice mailbox, call queue and parking space managed by the current extension.

Configure Monitor
This feature allows the user to retrieve the video feed of the monitoring devices that he/she has permission to user. These devices and permissions are handled by the UCM. To know how to configure these devices on the UCM side, please refer to this guide below:
UCM63XX Device Management Guide
Accessing the camera feed using the Wave app:
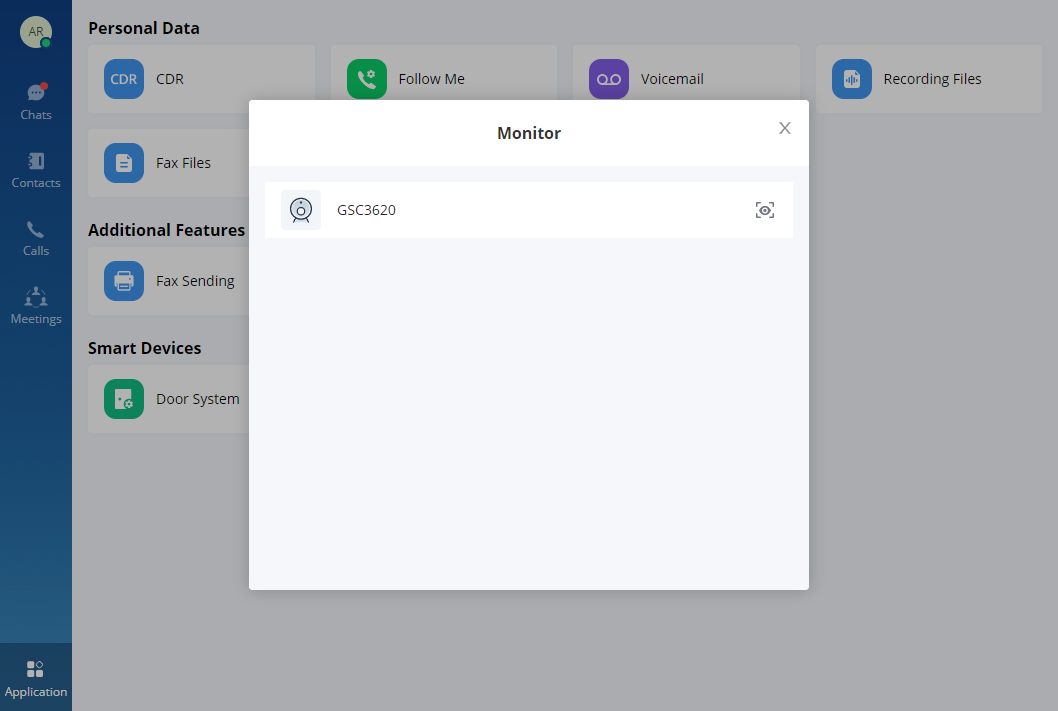
If the extension has been added to the “Allowed Members” list, then the user will be able to see the camera on the list.
Click on
![]() to view the video feed. Please refer to the screenshot below:
to view the video feed. Please refer to the screenshot below:

Unified Deployment for Extensions
Deploy Wave Clients in Batches for Teams
Admin can deploy Wave Desktop clients in batches for enterprise employees’ computers and configure parameters to help employees to quickly use the Wave Desktop clients throughout the enterprise.
Use the Microsoft Intune tool as an example to describe how to deploy Wave Desktop clients in batches on Windows and MAC OS.
How to Deploy Wave Desktop Clients in Batches – User Guide
Pre-install Wave Add-ins for extension users
Users can pre-install the Wave add-ins on the UCM Web UI for all extension users or some specific extension users. For example, users can pre-install the Google Drive add-in for all extension users’ clients.
Before using this feature, the current UCMRC plan of the UCM device needs to obtain the third-party add-in permissions. All paid plans contain the third-party add-in permissions.
Pre-install Wave Add-ins on the UCM63xx -User Guide
- Log in to the Web UI of the UCM63xx device as an administrator.
- Go to Maintenance → User Management → User Portal/Wave Privileges page, when the user tries to add permissions or edit permissions, the user can select the pre-install add-ins. Please refer to the screenshot below:

3. When the extension user logs in to the Wave Desktop application, it will automatically install the configured add-ins and log in with the preset parameters.
Create Basic Service
Create Multi-level Contacts
You can view multi-level enterprise contacts in the Wave client. You can create multi-level contacts on the Web UI of UCM63xx.
- On the Web UI of your UCM63xx, you can go to Contacts -> Department Management to create multi-level department structure.

-
Click on
 to create sub department.
-
Click on
 to add member to the department.
-
Click on
 to edit the department.
You can also edit the contact details and department in Contacts -> Contact Management.
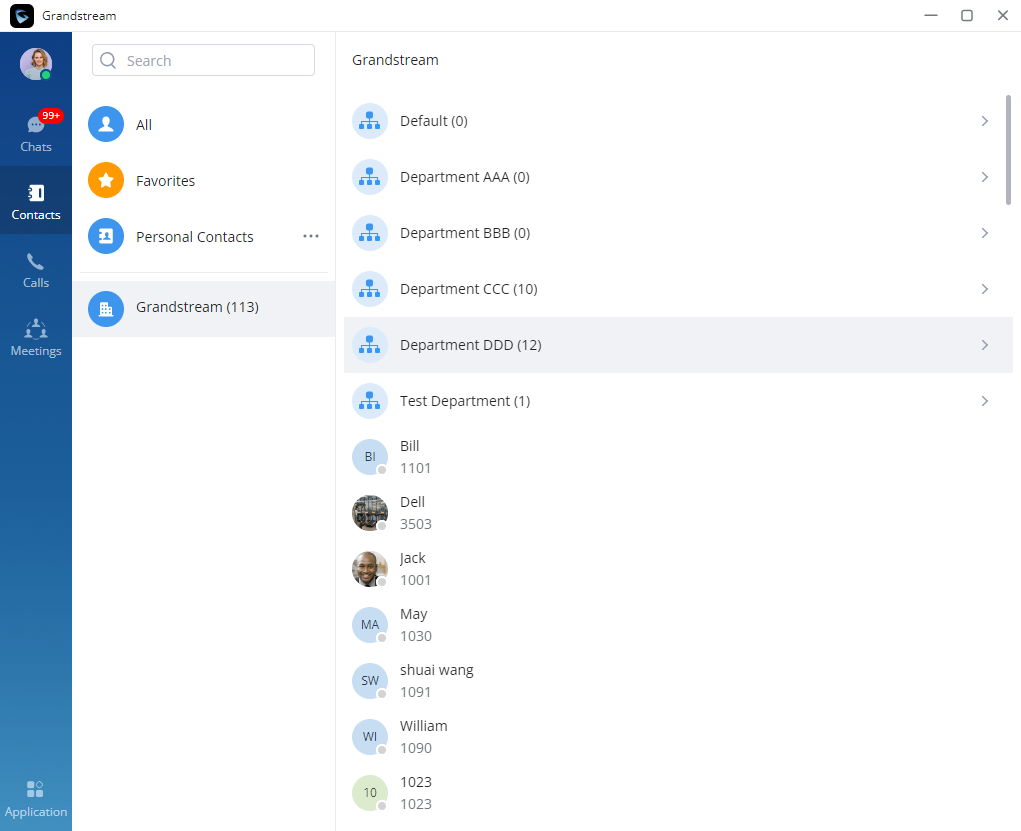
2. You can view the contacts through the Wave app:
Creating Public Meeting Room
You can create a Public Meeting Room so that the extension user can quickly use the meeting room after logging in to the Wave app.
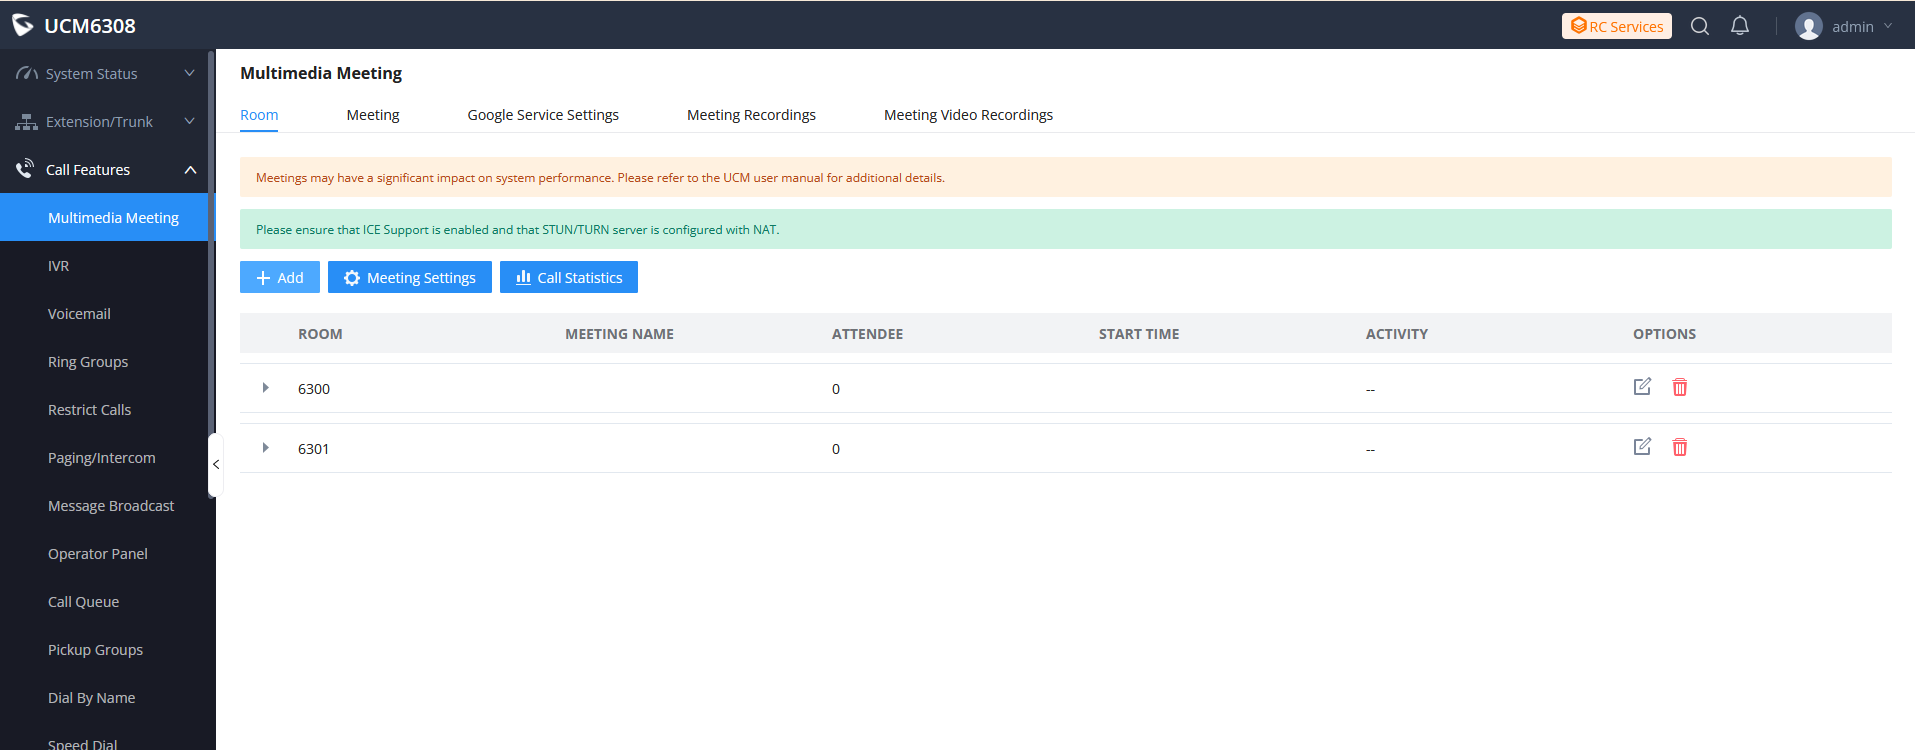
- The multimedia meeting room configurations can be accessed under Web GUI->Call Features-> Multimedia Meeting. In this page, users could create, edit, view, invite, manage the participants, and delete multimedia meeting rooms. The multimedia meeting room status and meeting call recordings (if recording is enabled) will be displayed in this web page as well.
2. Click on “+ Add” to create a new conference room. Users will be prompted to configure the following options for the audio conference room:
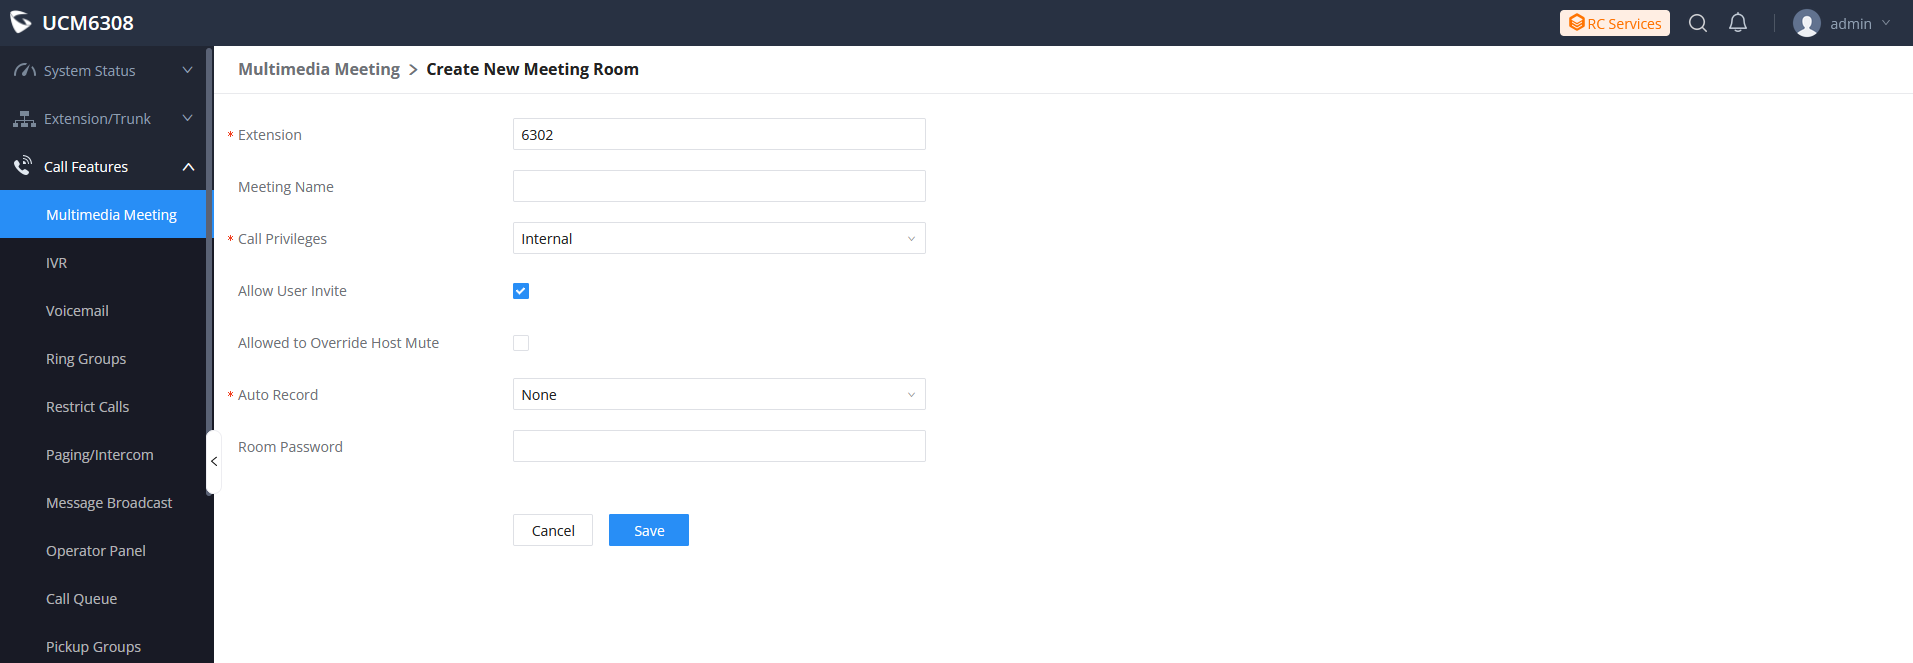
Extension | The number to dial to reach the meeting room. |
Meeting Name | Meeting Name |
Privilege | Please select the permission for outgoing calls. |
Allow User Invite | If enabled, participants will be able to invite other to the meeting by pressing 1 on their keypad or by clicking the Participants -> Invite option on the Wave bottom bar. |
Allowed to Override Most Mute | Allowed to Override Host Mute |
Auto Record | Meeting audio and video can be automatically recorded. These recordings can be found under the Meeting Recording or Meeting Video Recordings Page.
|
3. On the Wave app, the user can click to enter the Public Meeting Room directly, or schedule a meeting:

Creating Onsite Meeting
After creating several onsite meeting rooms under your enterprise account, extension users can view the status of onsite meeting rooms through the Wave app and schedule meetings.
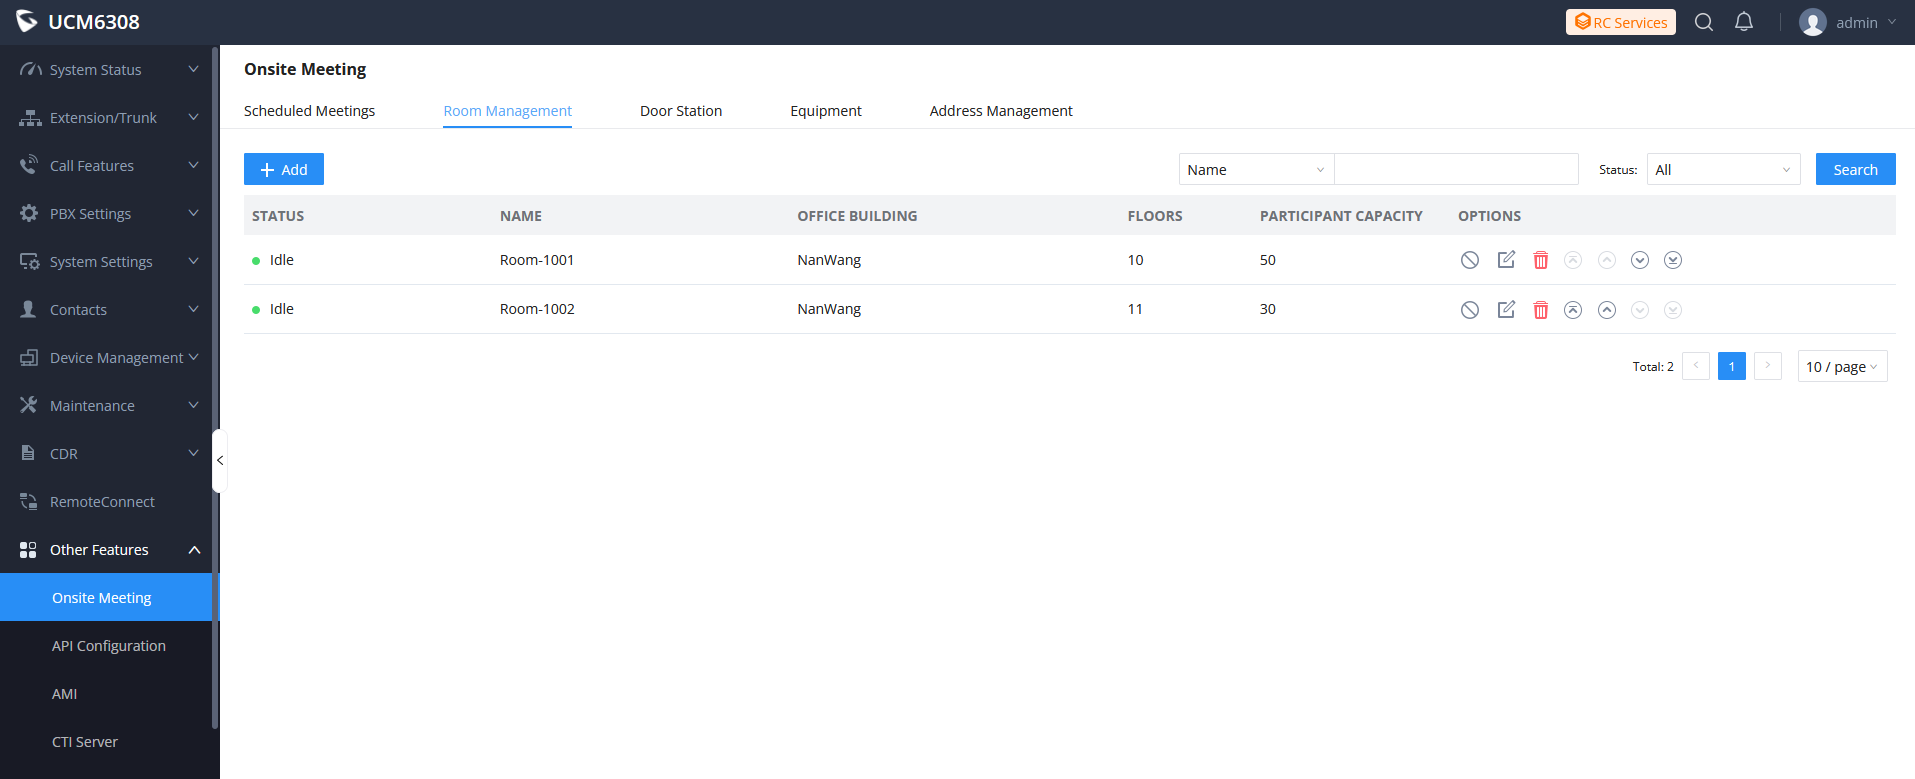
- In order to use this feature, please navigate to the Web GUI → Other Features → Onsite Meeting.
2. Add the addresses of the office buildings to the Address Management by clicking on Add button.
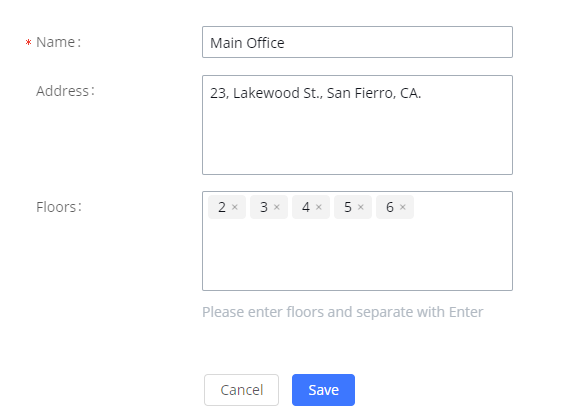
3. You can add the equipment which are used in the meetings to the Equipment.
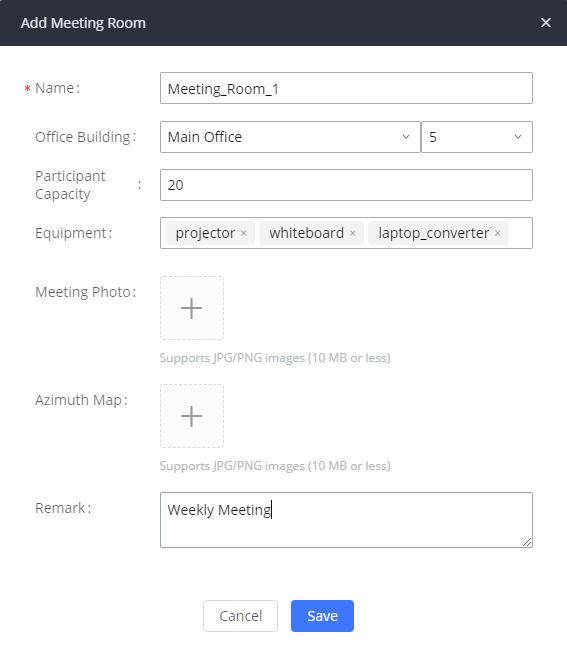
4. You can add the meeting rooms to the Room Management.
5. Users can view the onsite meeting room status through the Wave app, and quickly schedule a onsite meeting.

Enterprise UI Customization
UCM needs to connect to GDMS, so a Basic plan package for RemoteConnect will be assigned to it to start with.
On the UCM Web UI , users can edit the company name and select a local image file as the new logo. The company name acts on the text part with the company’s logo, and the pictures are in different formats and sizes according to the logo position, which are LOGO1 80*80px, LOGO2 256*256px, LOGO3 64*64px (only “ico” format is supported), these logos will be displayed on the “UCM management platform/login”, “Reset Password”, “Email Template”, “Wave_PC”, “Wave Login”, “Browser Label”, “Guide Page” interface preview.
Once done, the administrator can log in to the UCM management platform and customize the Wave LOGO, please refer to the UCM RemoteConnect user guide for details:
After customizing the logo, all Logos on the Wave page are displayed as customized Logos.

IM Settings
Under System Settings IM Settings, users will see the following options:
Read Receipts: If this option is checked, the Wave app will show that whether the other party has read the message. (Only for P2P chat)
New Message Email Notification: If the extension user has not logged in to Wave app for more than 7 days, an email notification will be sent after receiving a new message.
Maximum Chat File Size (MB): Users can fill in the single file size limit that can be sent in Wave chat.

IM Data Cleaning
Administrators are able to clean the Instance message data generated during chat discussions using Wave web and in order to do that, please navigate the UCM630x web interface and go under Maintenance System Cleanup/Reset Cleaner.
It can either be done manually under Manual Cleaning as show below:

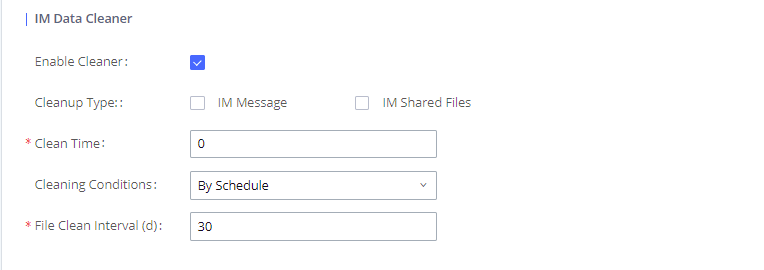
Alternatively, it can be done automatically by configuring IM Data Cleaner as shown below:
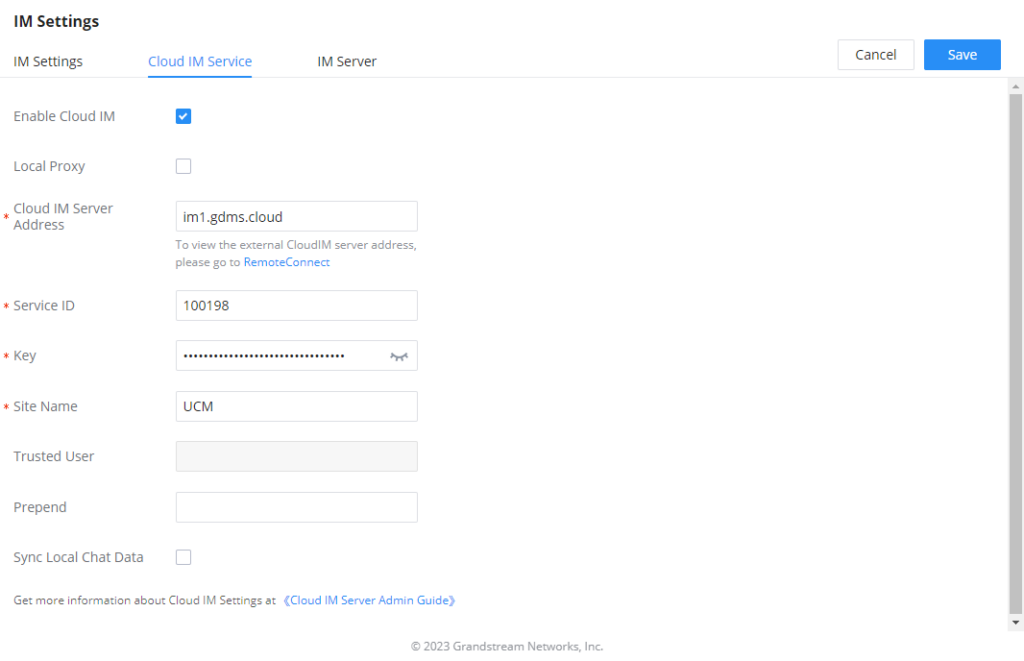
Cloud IM
Cloud IM allows you to sync-together UCM6300 series devices in any location, enabling businesses to build one network that can be utilized across all locations and accessed remotely.
With Cloud IM, your teams can communicate across UCMs with unified calls, meetings, contacts, scheduling, group chat and more.
You can go to System Settings -> IM Settings -> Cloud IM Service to enable the Cloud IM.
A Cloud IM Server – Admin Guide
Learn More: